Vibrobots
Summary
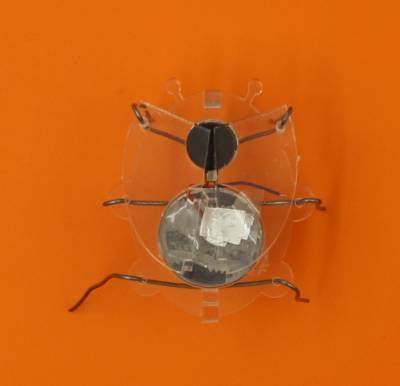
This is a final version of a MakeIt devised by Mick Byrne. Laser cut acrylic parts, a small vibration motor and a coin cell battery snap together to make a jiggling insect. The workshop takes 30 - 45 min to complete, without extensive decoration or racing.
Skills Introduced
- build simple circuits, without soldering
- understand how a vibration motor works
- design thinking to increase speed of forward motion
Materials
Each participant will require
- a set of laser cut parts (body, backbone, two wings)
- 3 x 50-60mm lengths of tie wire (0.5 - 1mm diameter, easily bent by hand)
- 1 x small vibration motor (10mm x 2.7mm with adhesive backing eg: https://www.aliexpress.com/item/32637479788.html?spm=2114.12010612.8148356.8.33551f1dWyGvfx)
- 1 x CR 2032 coin cell battery
- sticky tape
- 2 x 1cm squares of alfoil
Optional: Items for decoration such as googly eyes, coloured markers, pipe cleaner antennae etc.
Spare backbones are a good idea, since this piece sometimes breaks during assembly.
Tools
No tools are required, though it might be helpful to have some small needle nose pliers on hand if bending wire legs is a challenge for participants.
Workshop Walk through
Before starting, emphasize to participants that coin cell batteries can cause death or injury if swallowed, and this device is not suitable for small children Removing the battery if small children are around is a good idea.
Step 1: Prepare the parts
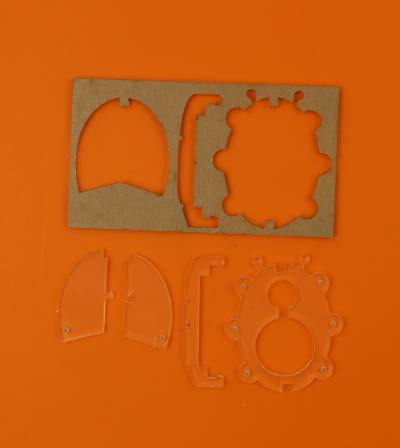
Snap out the parts if necessary, and remove protective paper.
Step 2: Give it some backbone
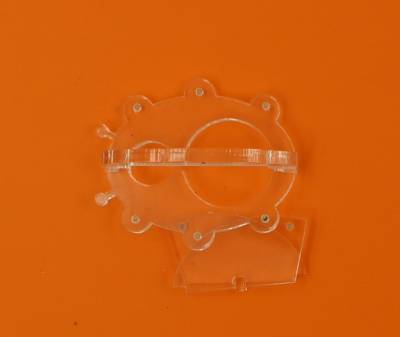
Carefully snap the backbone into the notches at the top and bottom of the body- some force is required, but be aware that this material can snap easily.
Step 3: Insert the vibromotor
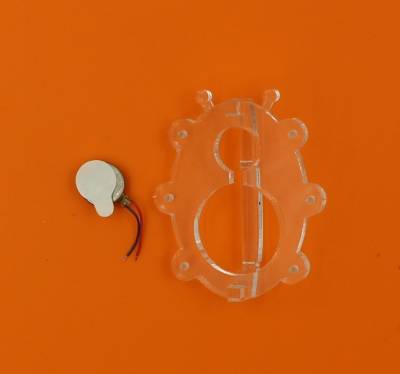
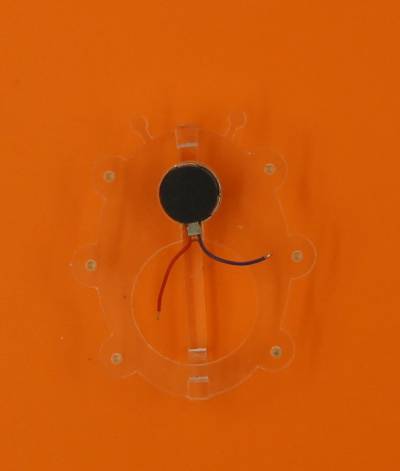
Remove the protective paper (white) from the vobromotor, and insert it into the small hole in the body. It should adhere to the backbone
Step 4: Attach the front legs
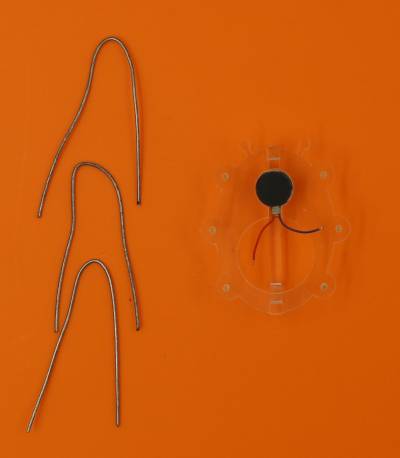
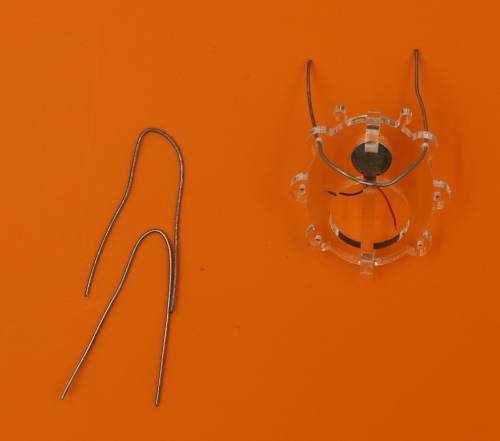
Bend the three pieces of wire in the middle. Insert through the holes in the body FROM THE BOTTOM as shown.
Step 5: Attach the wings
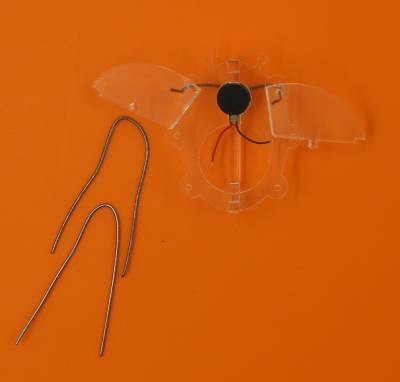
Turn the Vibrobot over and the ends of wire should now be pointing up. Slip a wing over each leg, using the small hole provided.
Gently bend the legs down over the wing, and under the body.
Step 6: Insert the coin cell battery
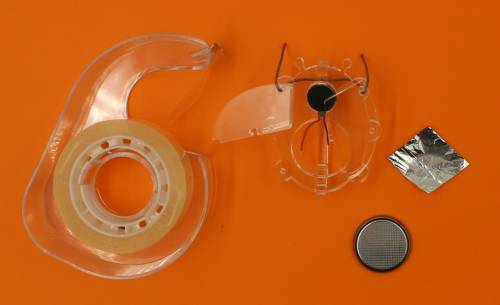
Ready the battery, sticky tape and alfoil.
The alfoil is to assist a good electrical connection between the vibromotor wires and the battery. For this to work, each of the exposed ends of the motor wires must connect with a piece alfoil. Begin by ensuring the ends of the motor wires are exposed, and then wrapping each end in a piece of alfoil by folding, bending and squeezing.
Now attach the wrapped black motor wire to the negative side of the battery, fixing in place with a bit of sticky tape. It may not matter which face is used since this only affects the direction in which the motor will spin, but either way produces a vibration.
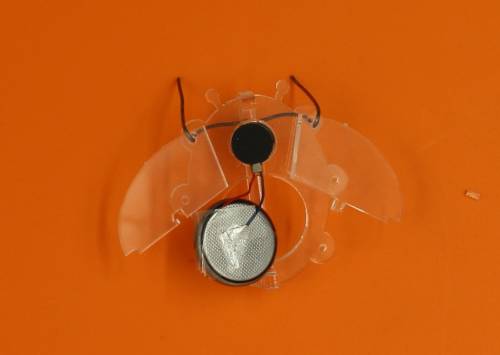
Place the battery in the larger hole in the body with the fixed wire underneath, and touch the red wire to the top face. The motor should begin to vibrate, showing the circuit is complete. Move the top wire away from the battery for now so you can complete the assembly.
Step 7: Attach the rest of the remaining legs
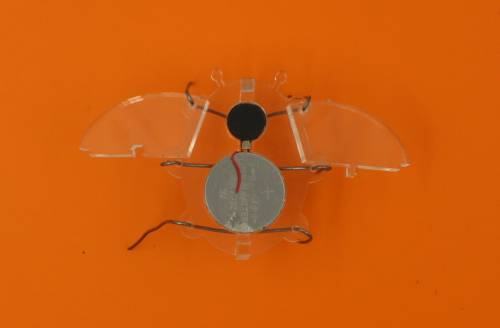
The remaining legs can now be attached, by inserting from the bottom as before. Try to get the length of the leg on each side the same.
Push each end of the wire up through one of the pairs of holes in the body, and set firmly against the backbone. Bend the wire over the body, and down so the leg is below the body.
Step 8: Complete the connection to the battery
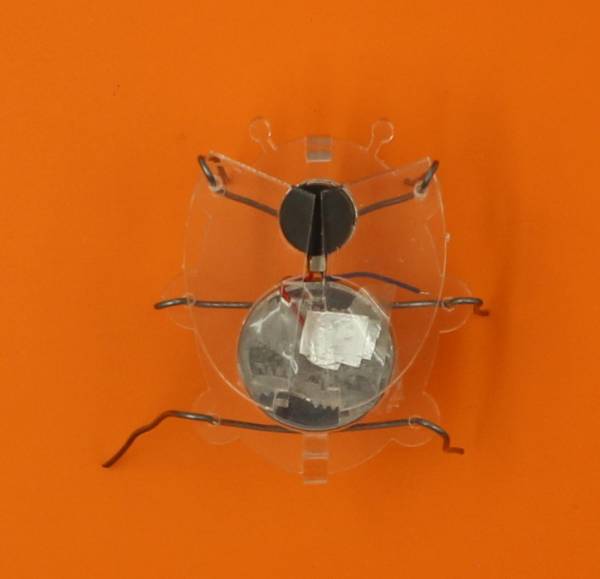
Wrap a piece of alfoil around the exposed end of the red wire, and use the sticky tape to attach it to the positive side of the battery (which should be on top). You vibrobot will now jiggle across a hard surface (until the battery goes flat).
Extension Activities
Devise a switch
It gets annoying having to detach the sticky tape to stop the motor vibrating, and continuous operation also drains available power quickly.
A switch in one wire , between the motor and the battery could make this a better toy. Essentially, a switch only needs a gap in the wire, and an easily reversible way of bridging the gap with an electrical conductor. You could use a swiveling paper clip, or a recycled button from some ewaste, but make sure the ends of the wire are well connected to the ends of the switch, so they do not come loose during vibration. Think about where the switch needs to be placed for ease of use, and how heavy it is (which might slow things down, or even stop it moving altogether).
Have a race
Changing the speed and direction of movement can be achieved by bending the legs. The shape of the feet (bent or sharp) might also have an influence. Trial and error is the best way to investigate this, but a competition is the only way to find out who has the best solution.
Make it pretty - Or scary
Adding stick-on googly eyes, painting or drawing on the body and wings, adding springy antennae and so on can all add to the fun.
Given the battery, it might even be possible to steal some power in another circuit to light an LED or two.
Downloads
Design files for laser cutting the parts from 3mm acrylic are in the following file:
These files include A4 and A3 sized multiples, and tabbed or untabbed versions. The tabbed versions will require participants to snap out the pieces, but make handling large numbers easier.

