Lock Workshop Woodford
This version is revised for the workshop delivery at The Woodford Folk Festival 2016/2017 at has the code name Crowd Control.
Summary
During this workshop participants will learn how to make a lock and learn how to pick the lock with some supplied lock-picking tools.
Materials
These materials are per participant if not specified otherwise.
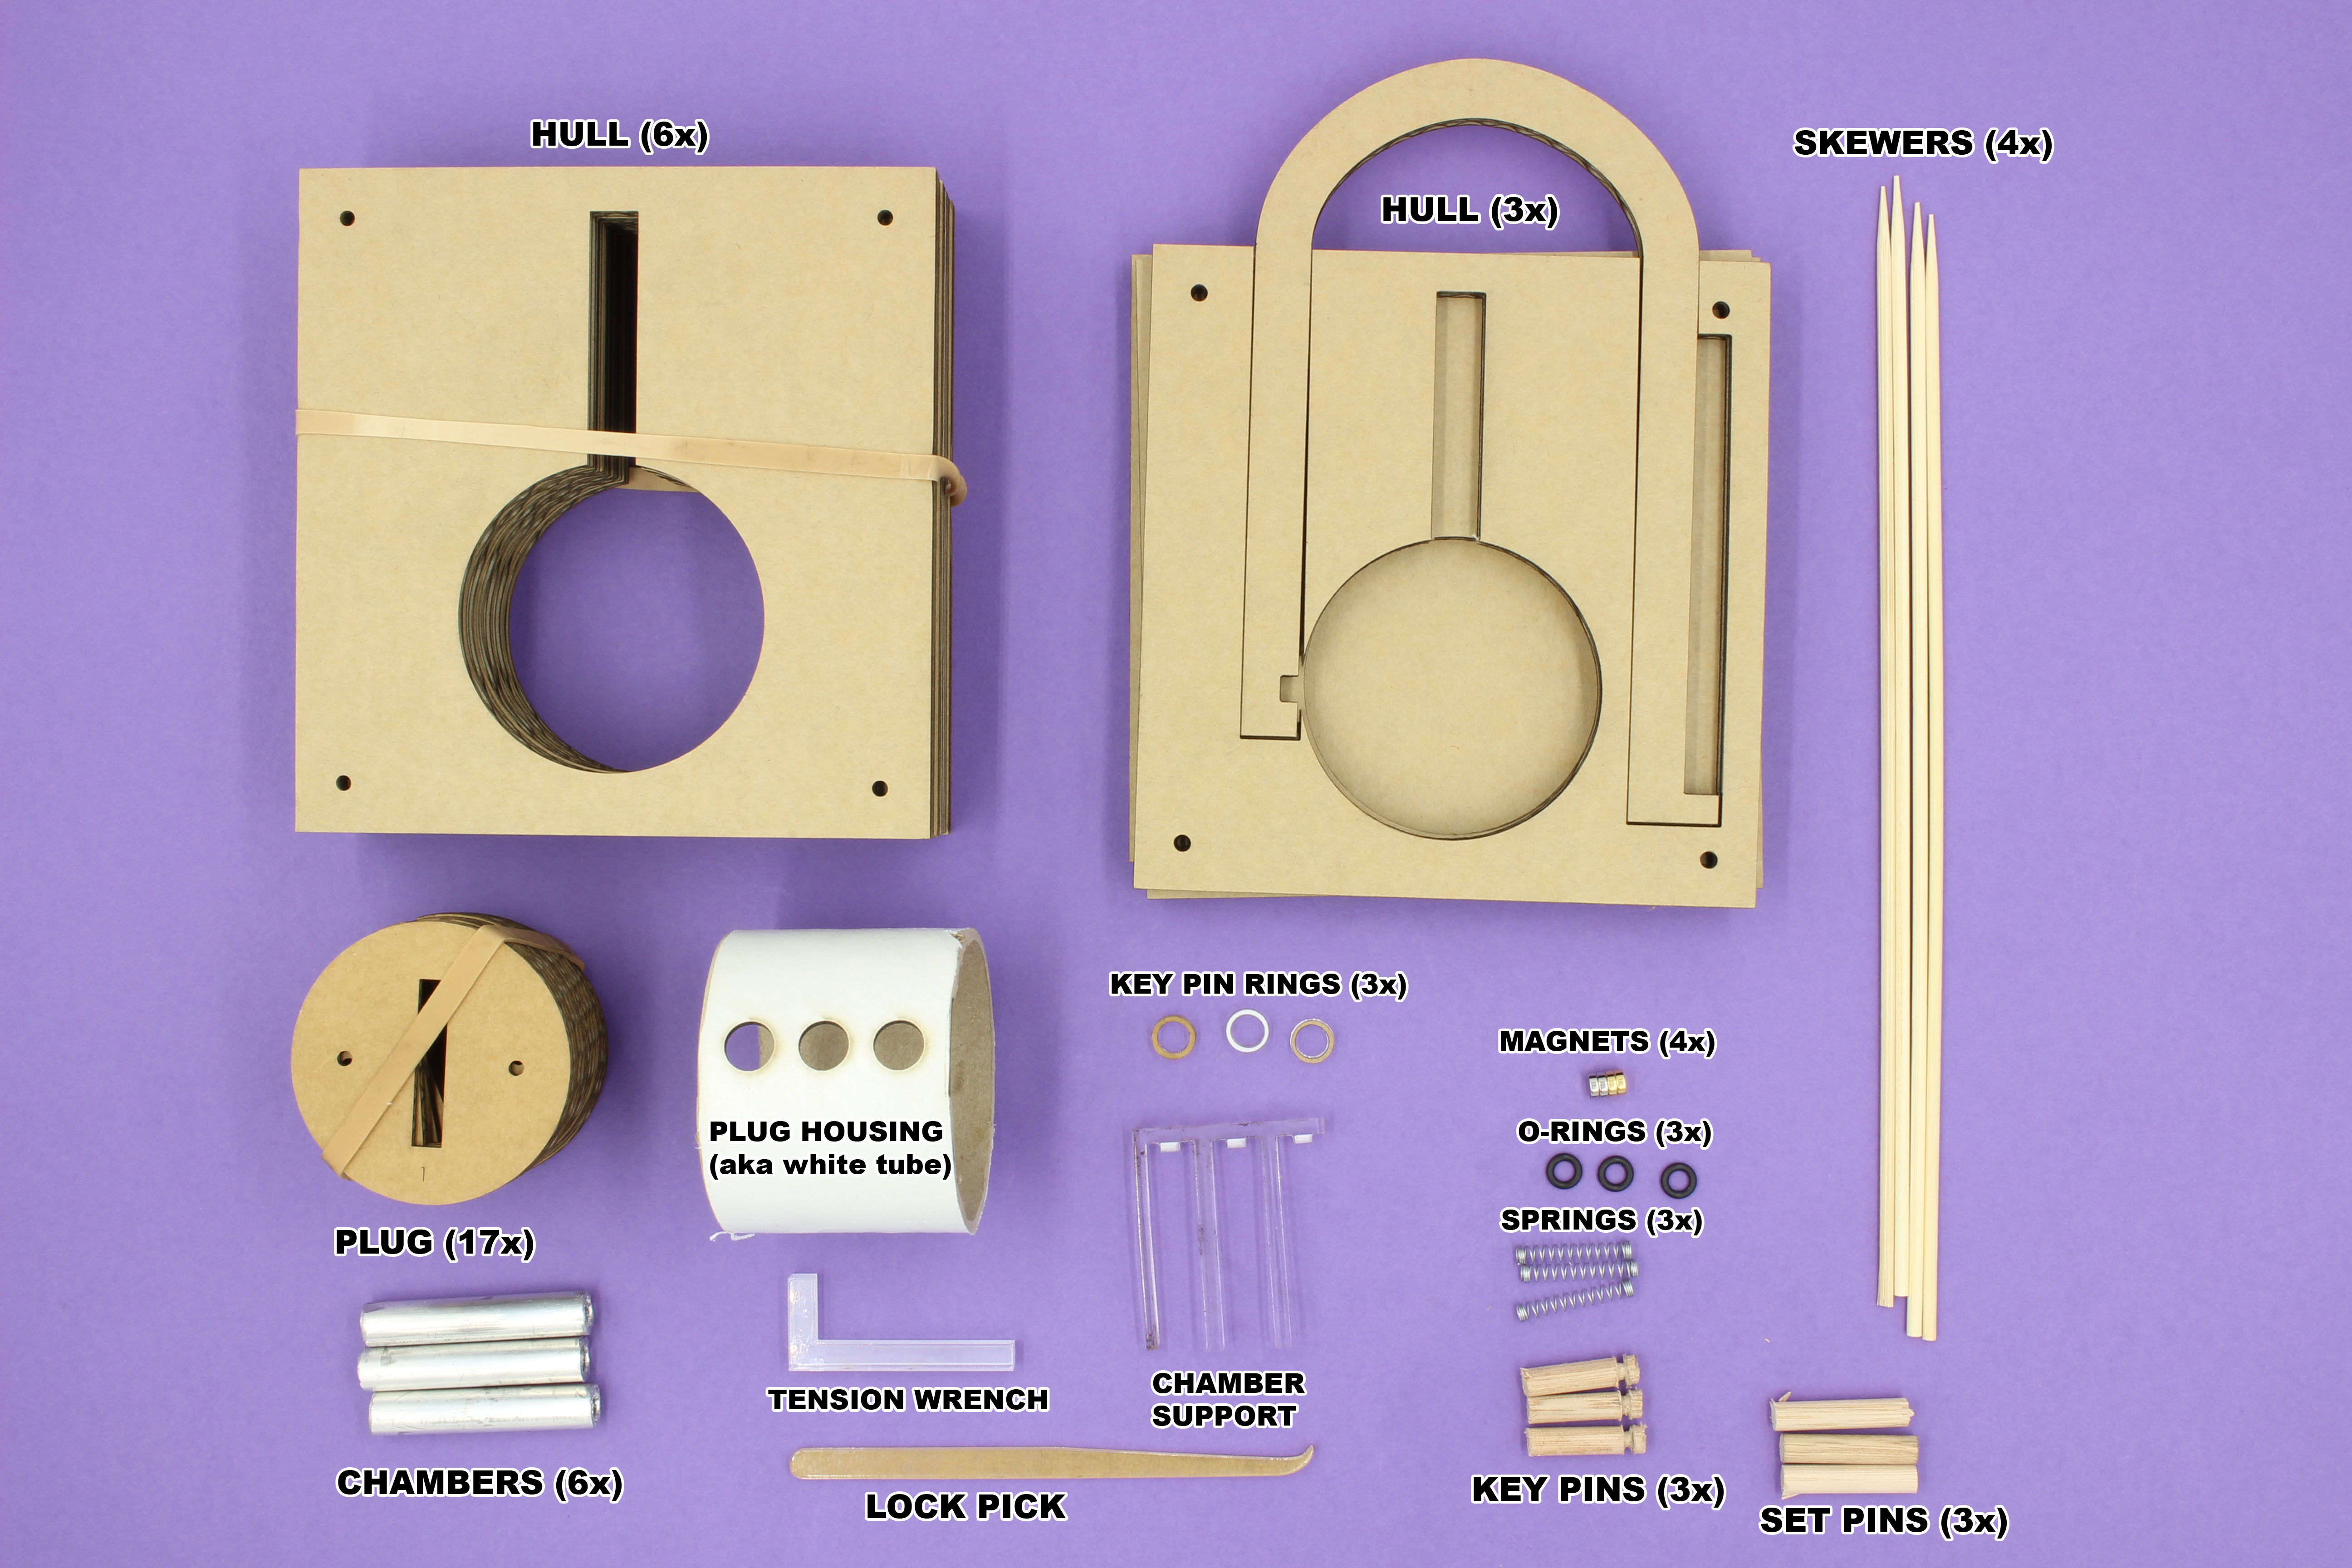
- 1 x A3 corrugated cardboard sheet, 3mm
- 2 x A3 corrugated cardboard sheets, 6mm
- 1 x A3 coated acrylic 3mm (for picks, rings)
- 1 x A3 Coated acrylic, 6mm (for tension wrenches, chamber support)
- 1 x Postage tube, 51mm (O/D:60mm)
- 3x 50mm metal pipe (I/D: 7-9mm O/D: 10mm)
- 3 x Retractable Ballpoint pen (for spring)
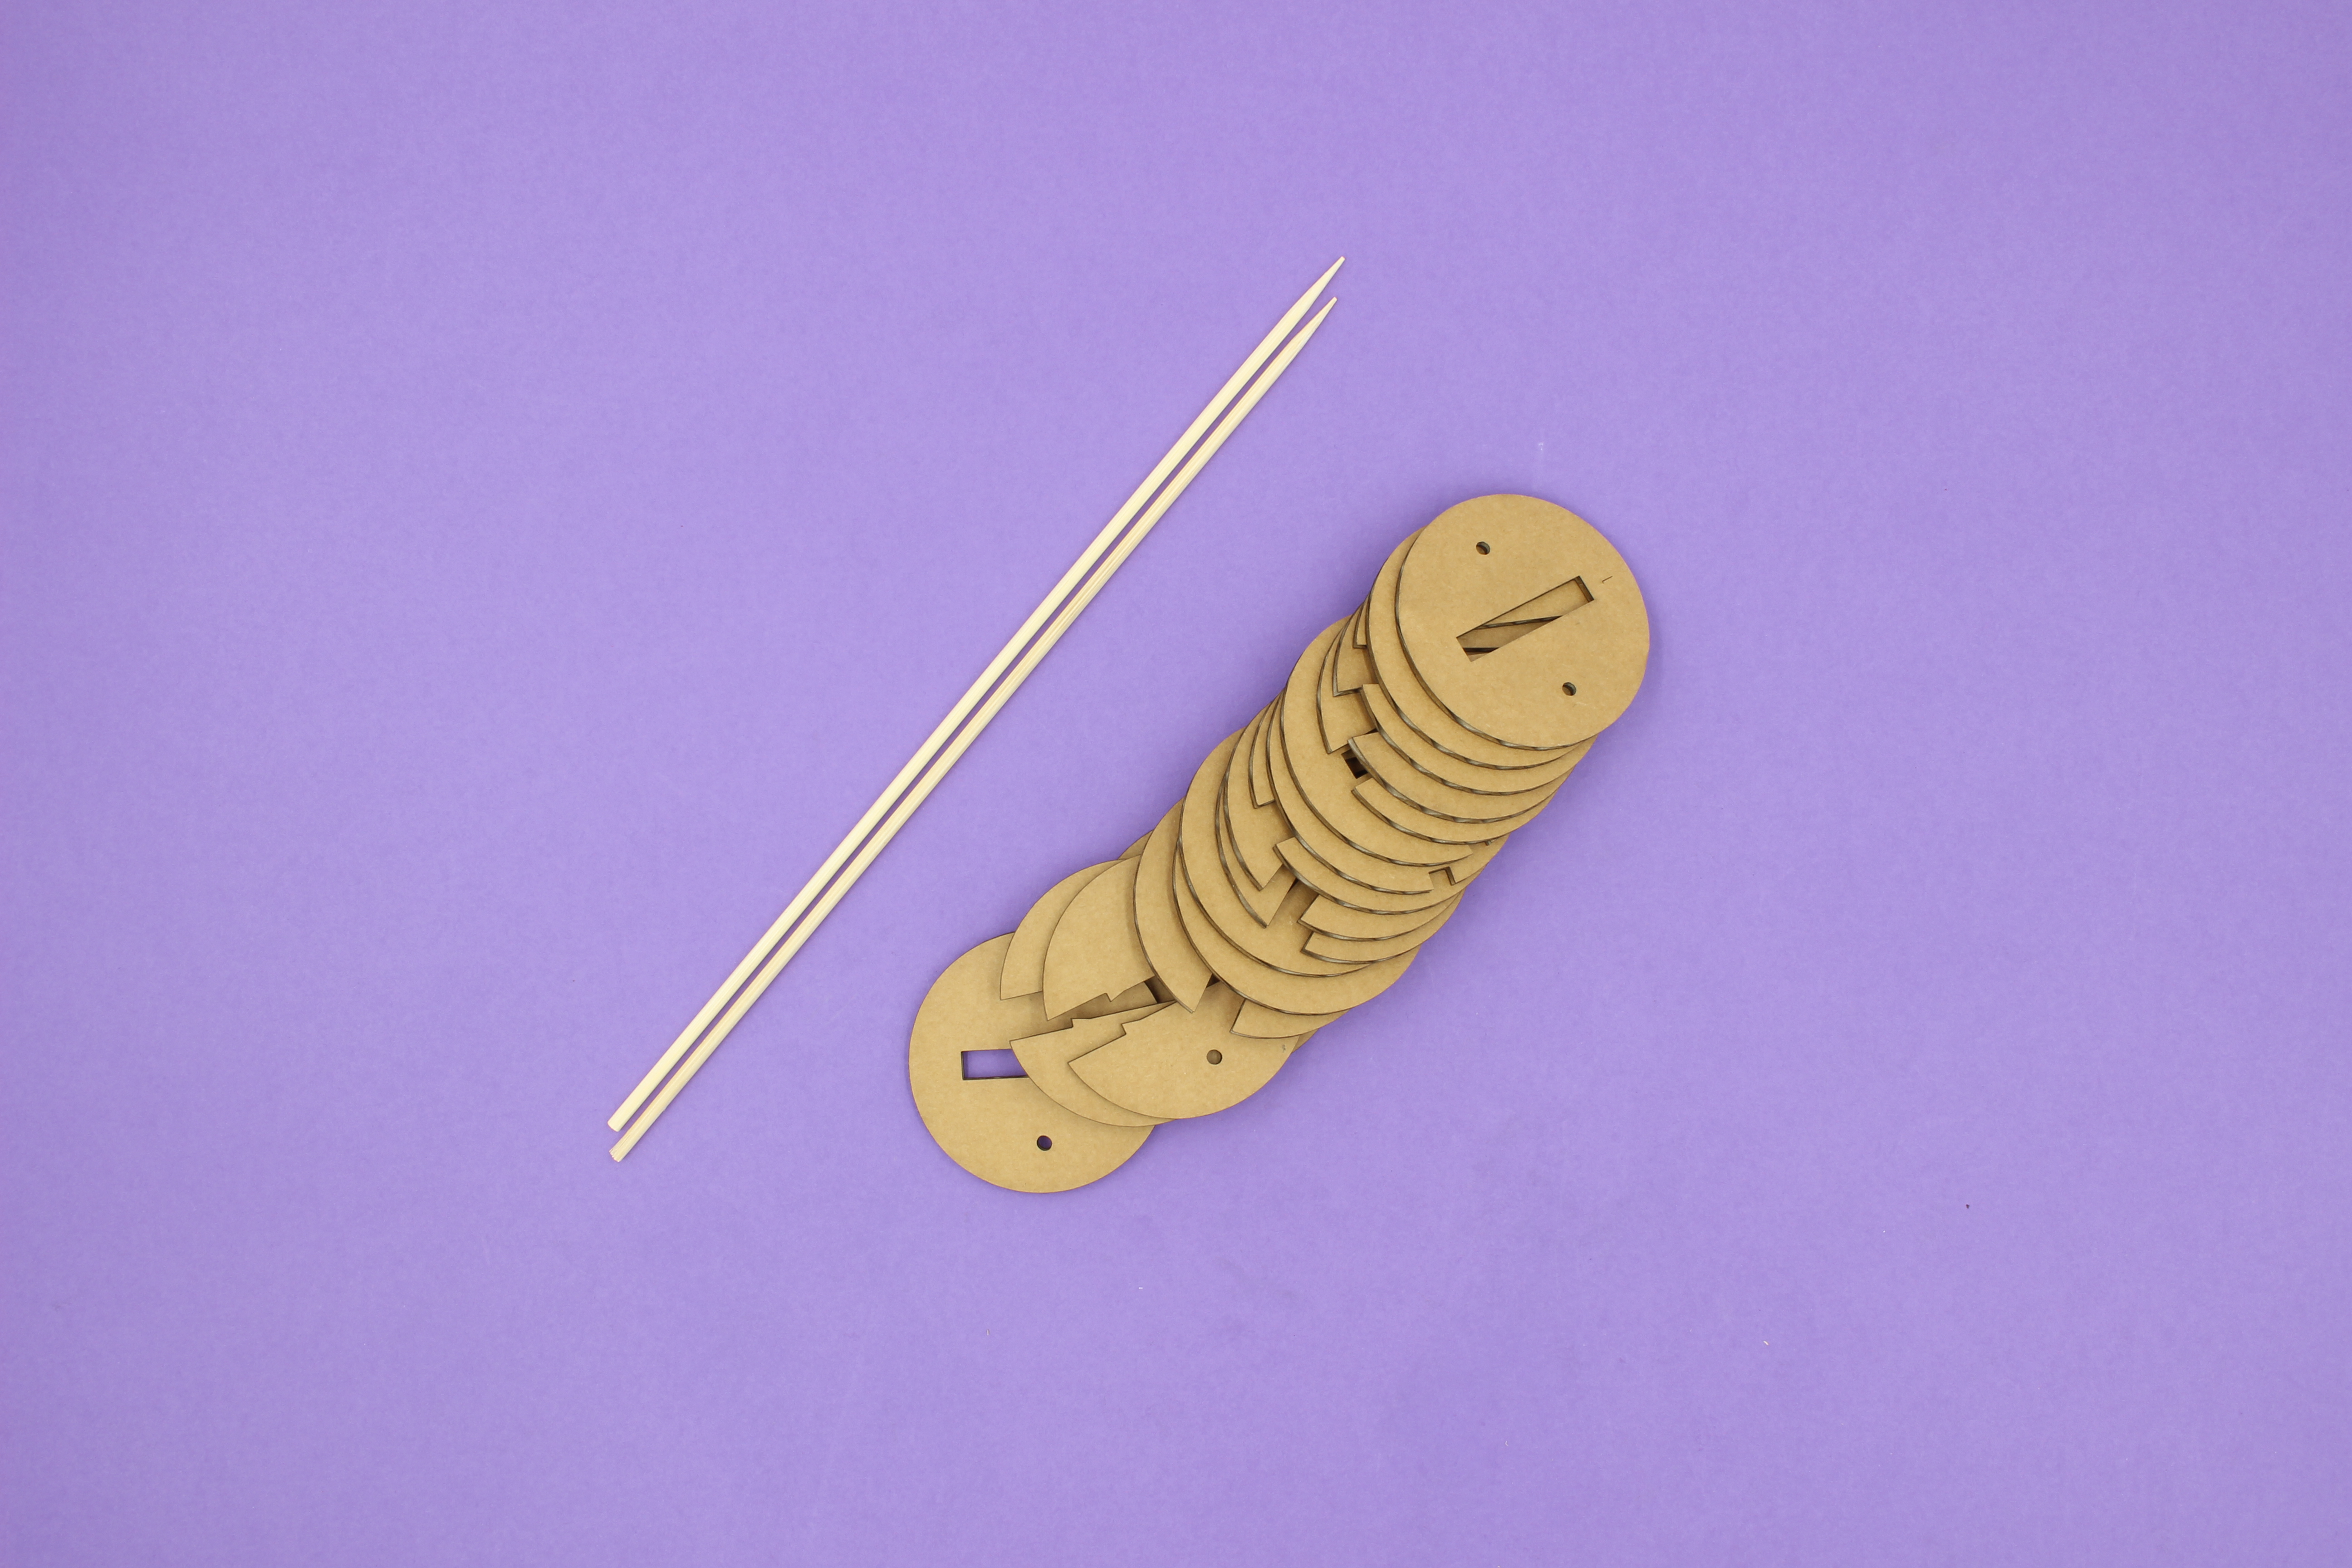
- 4 x Skewers (3mm diameter)
- 3 x 30mm Dowel (Diameter: 6mm)
- 3 x 25mm Dowel (Diameter: 6mm)
- 3 x O-ring (I/D: 4.1mm O/D: 7.3mm), Nitrile rubber
- 4 x strong mini magnets
- Electrical tape
- 2 x Rubber bands (fit around the hull)
Tools
Tools required during the workshop. It is not required that one of each is supplied for participants but one tool per two participants is preferred.
- Sandpaper (not too rough)
- Side cutters (for biting off skewers)
- Scissors (for cutting tape)
- Covered footwear
- Tinfoil hat
Instructions
Rename the steps as you like, use italics or bold for emphasis
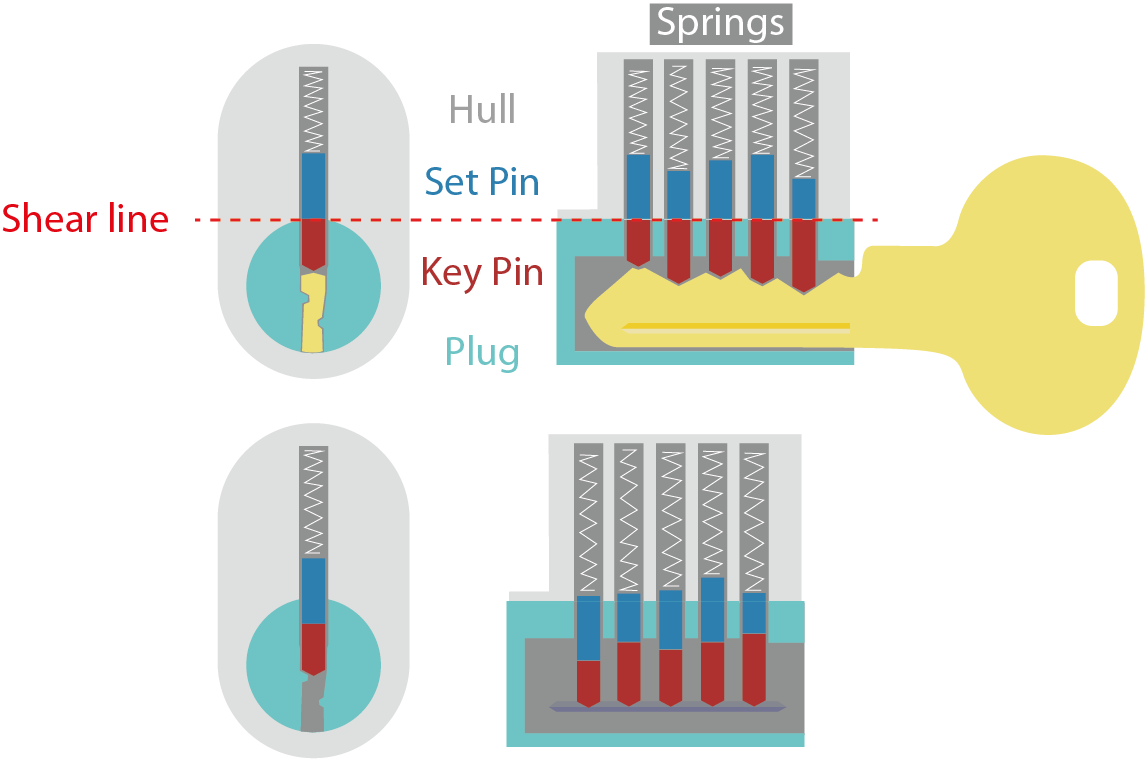
Step Zero: The Tumbler Lock and Your Kit
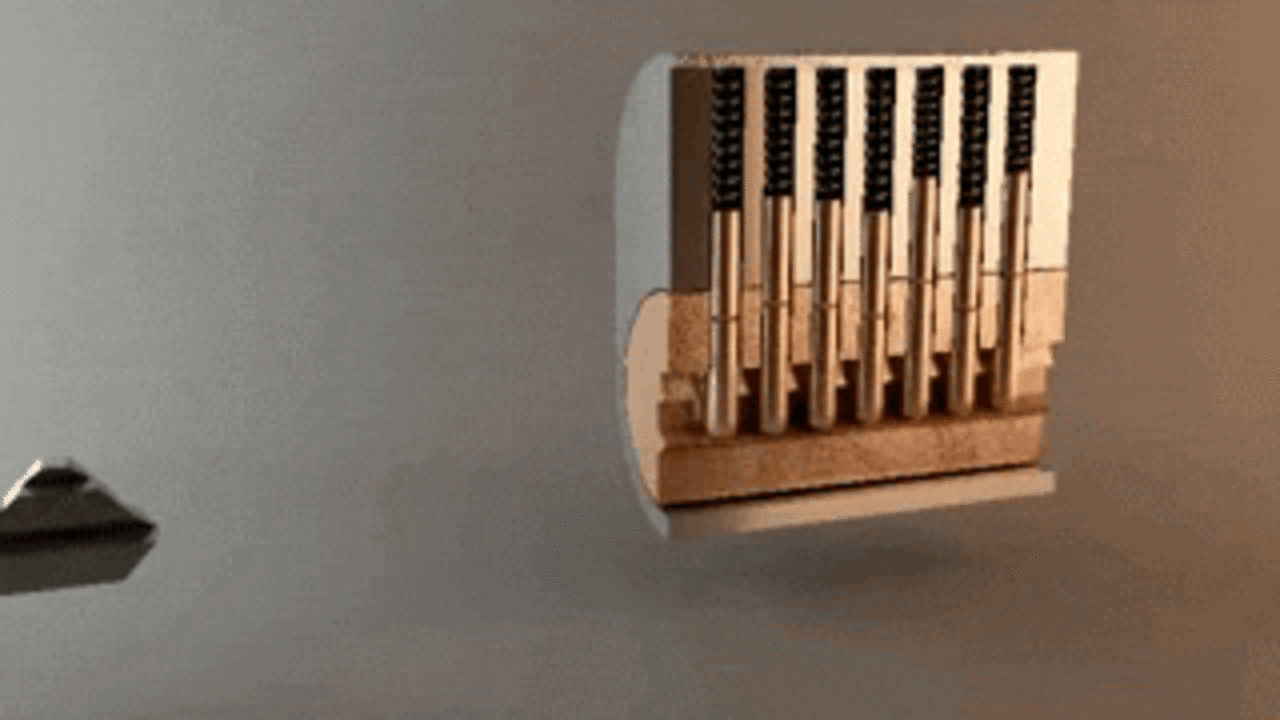
Step One: The Plug
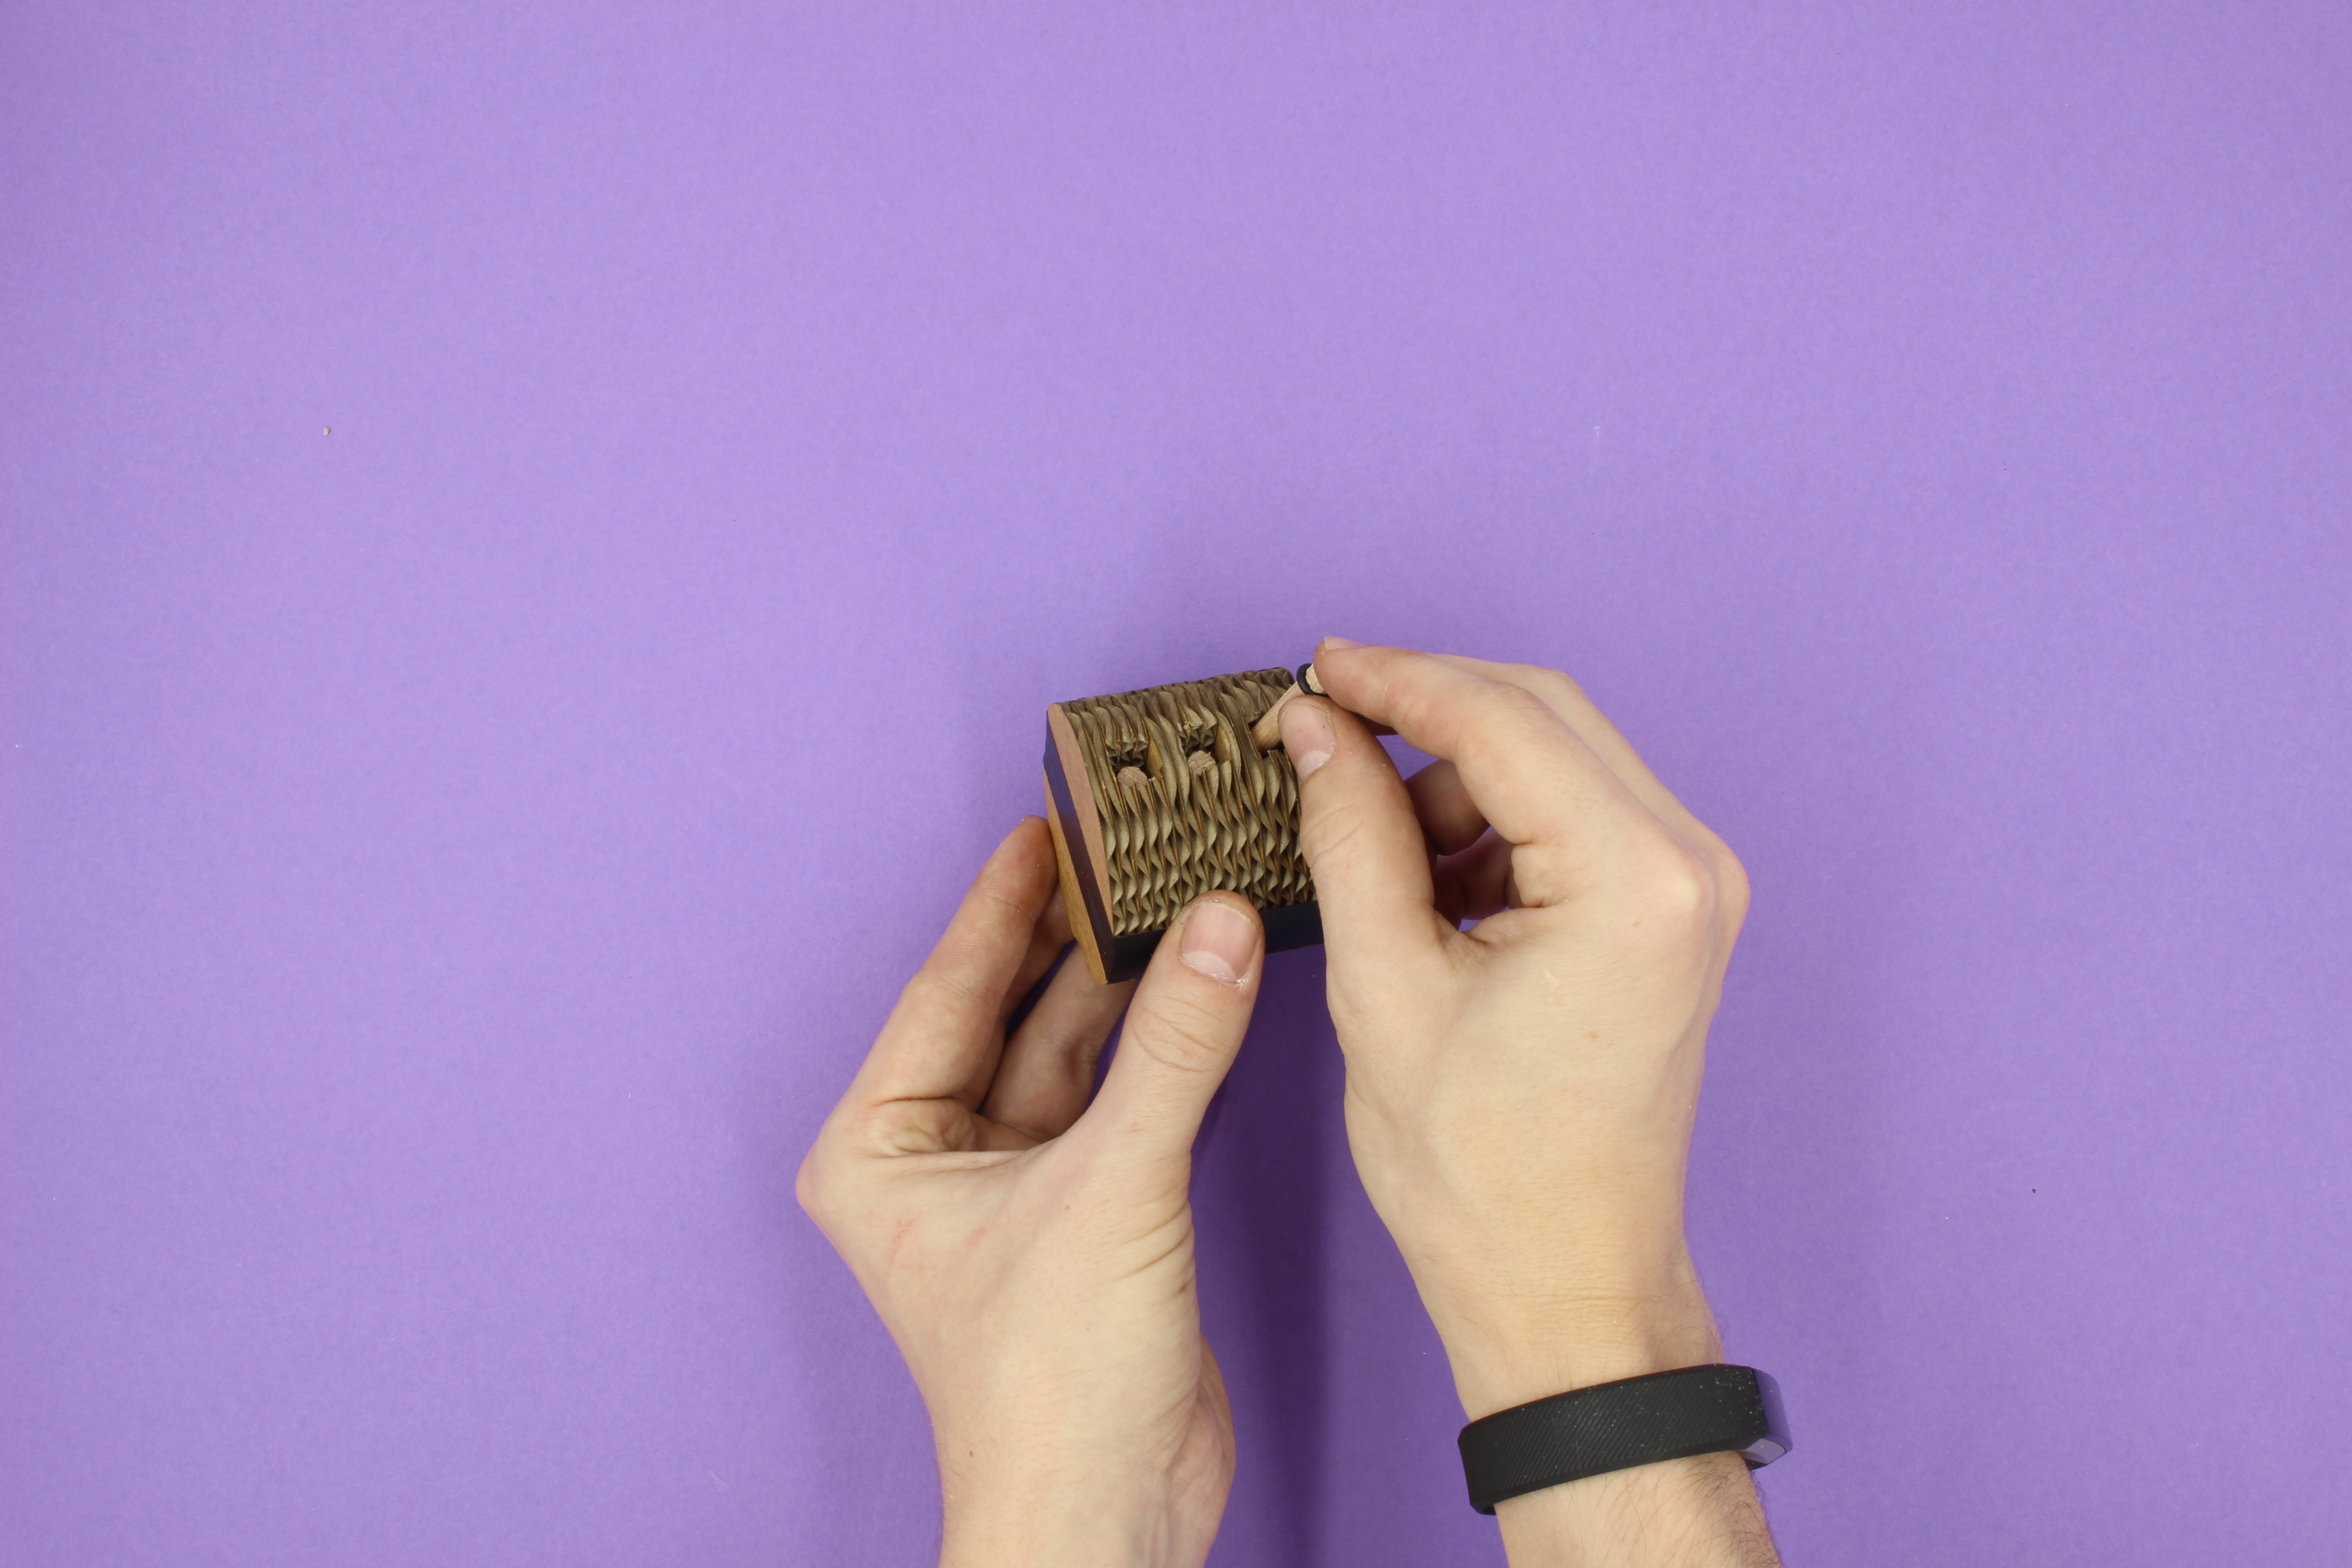
We'll start with putting our plug together. Each segment has a number on the bottom front side. Put the plug together with the help of a couple of skewers adding each layer one-by-one (There are 17 layers in total). Make sure that the skewer holes in your cardboard segments are punched out. insert the skewers from back to front starting with the last layer, layer 17.
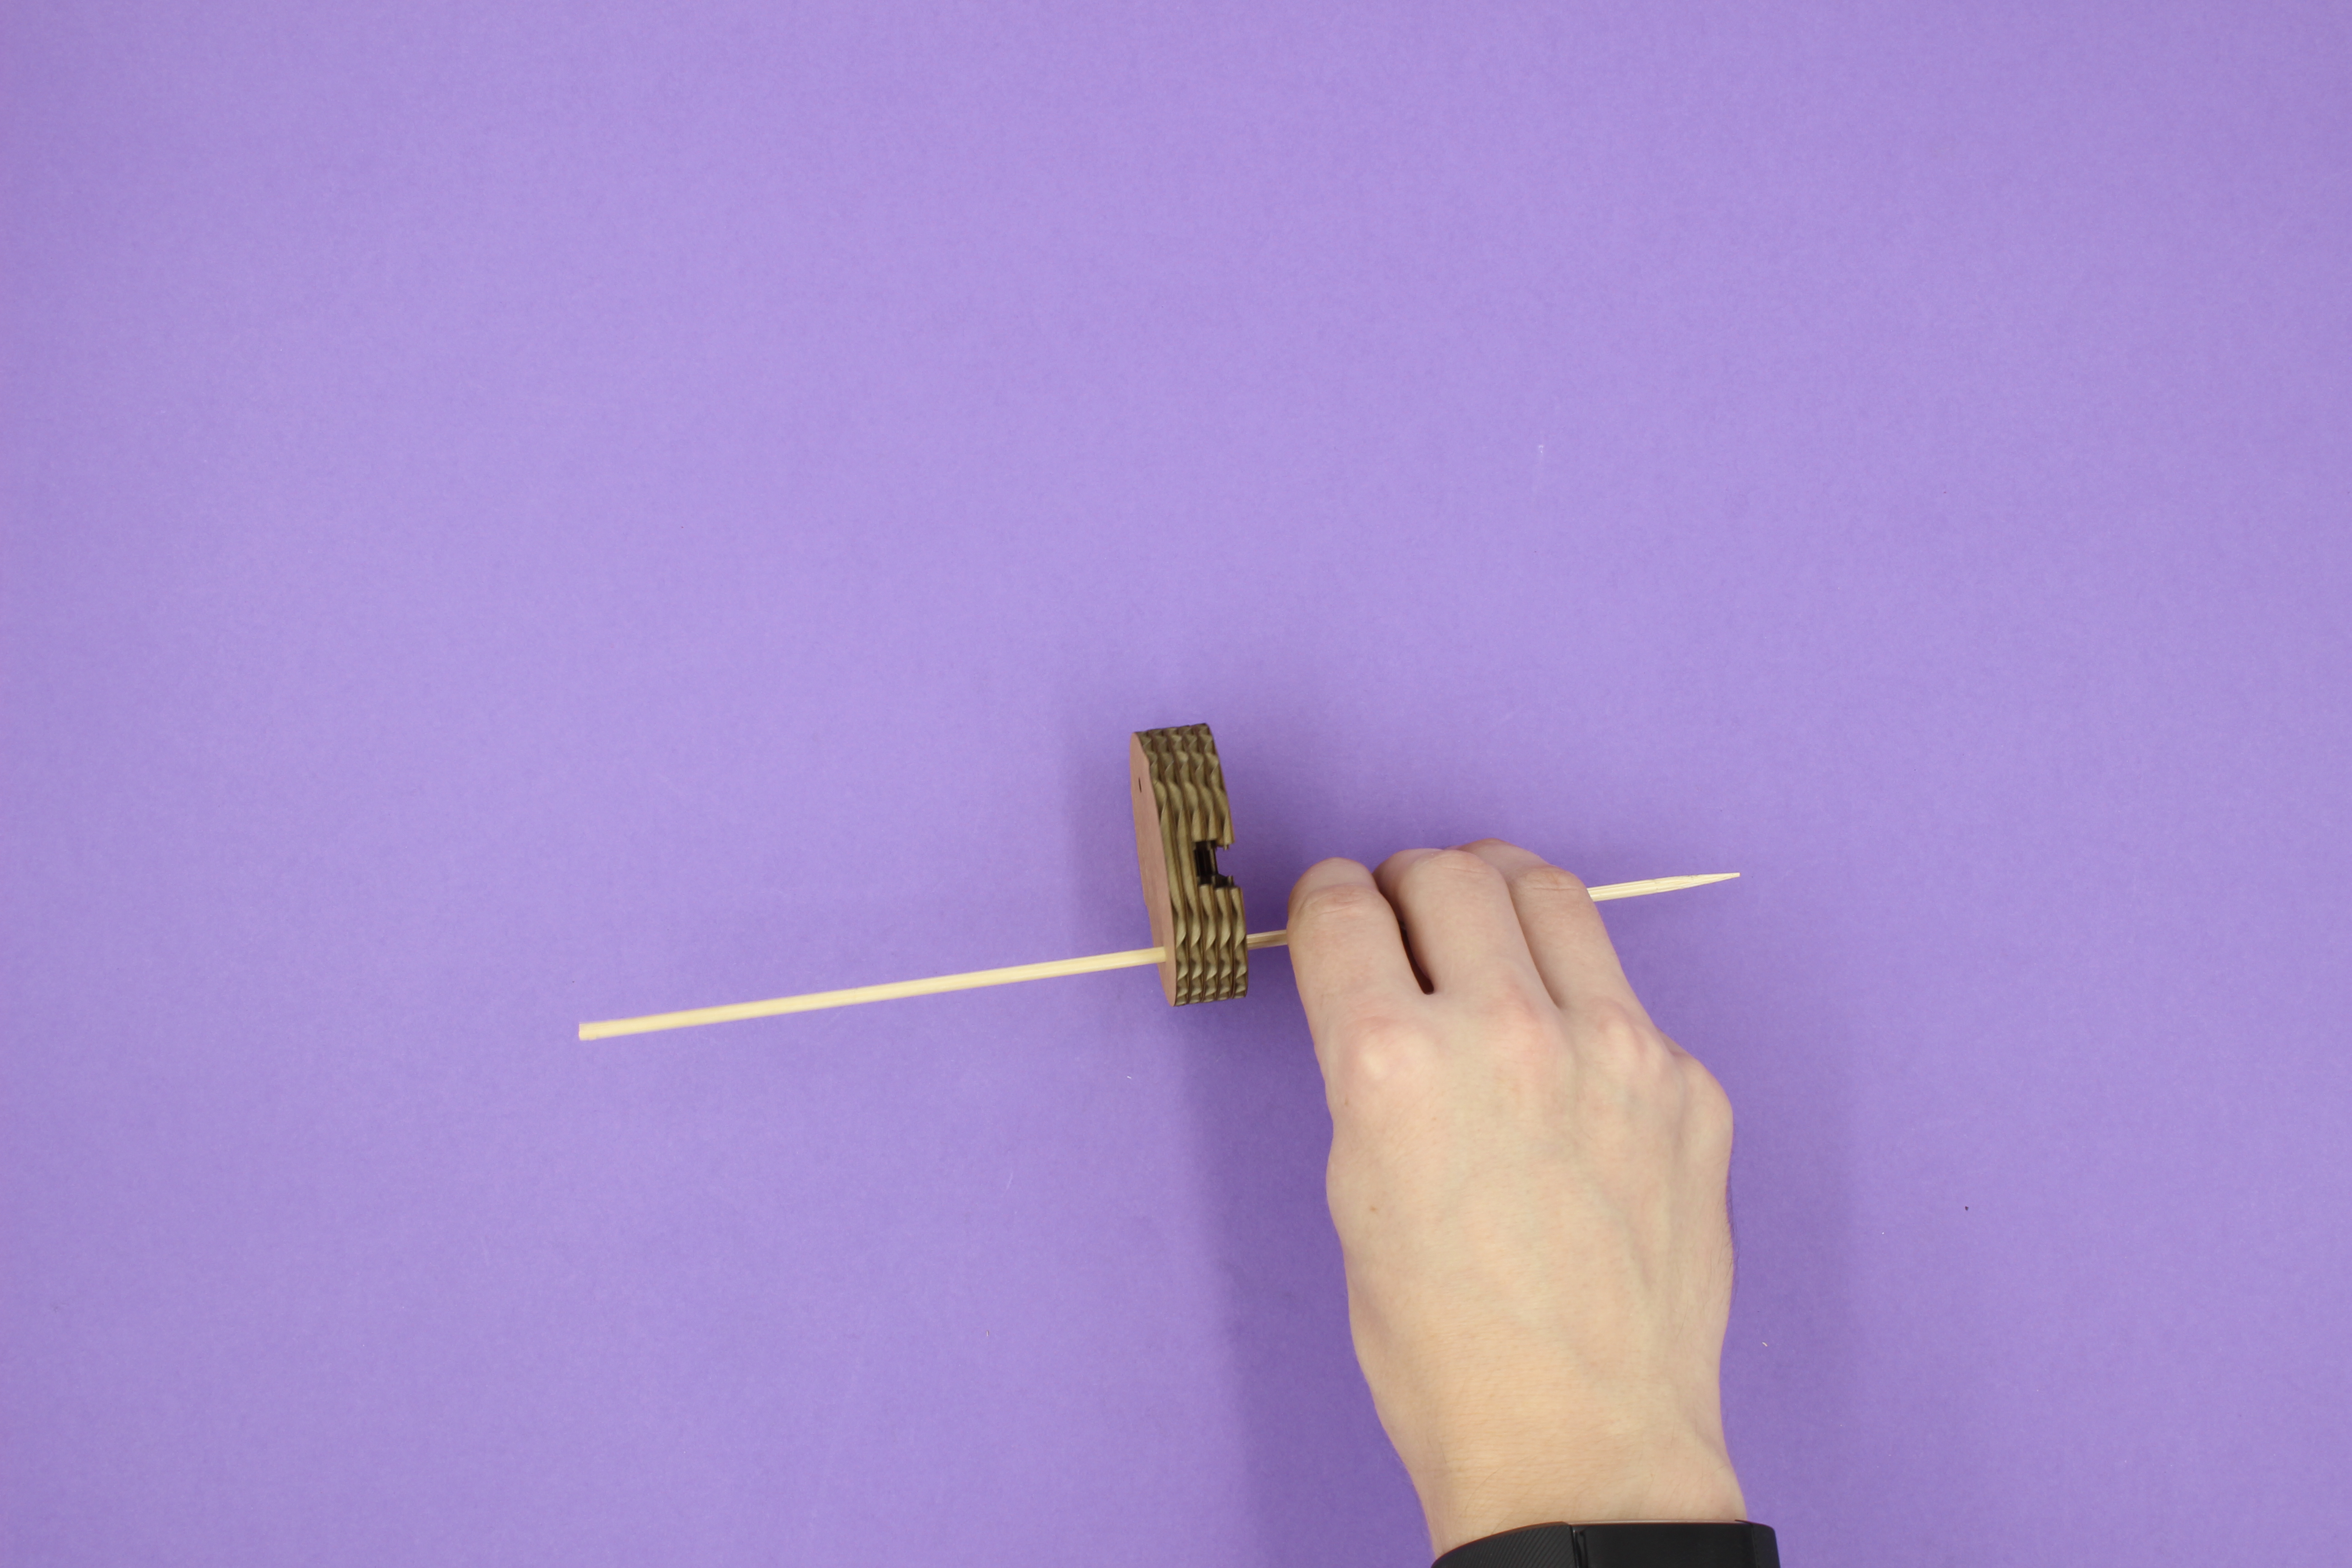

Snip off the ends of the skewers (make sure you hold on to the bit you're cutting so it doesn't fly off!)

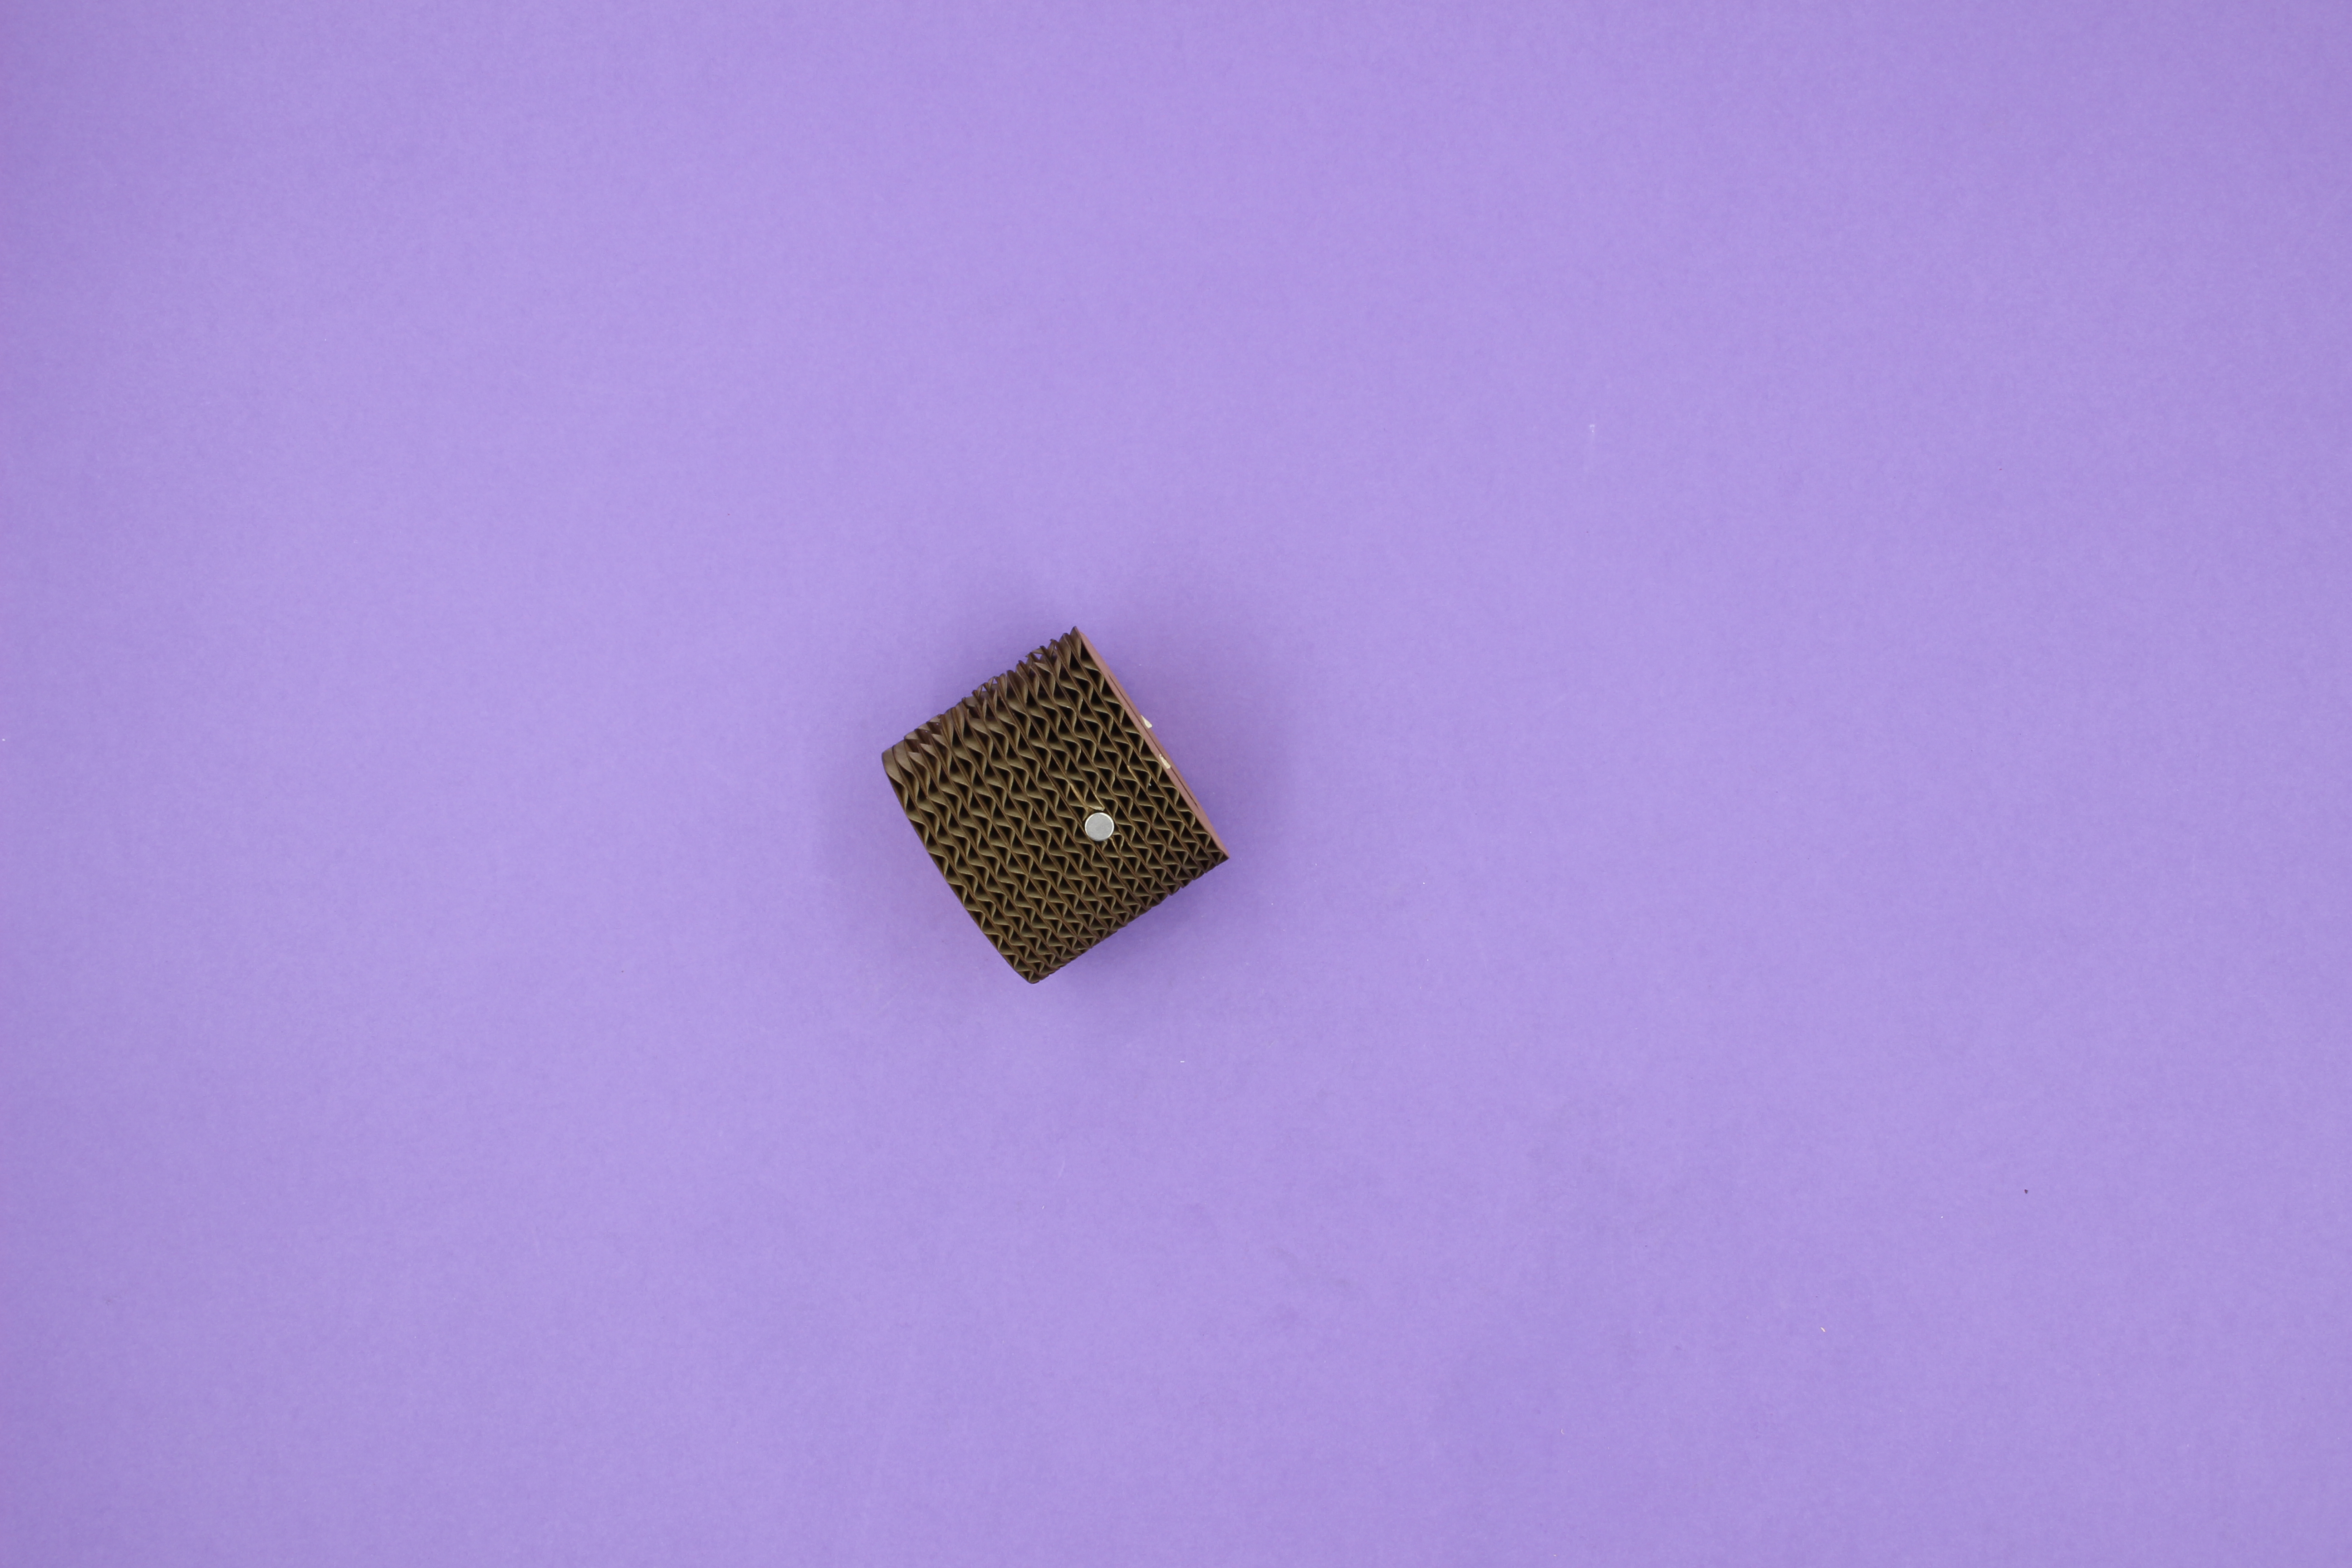
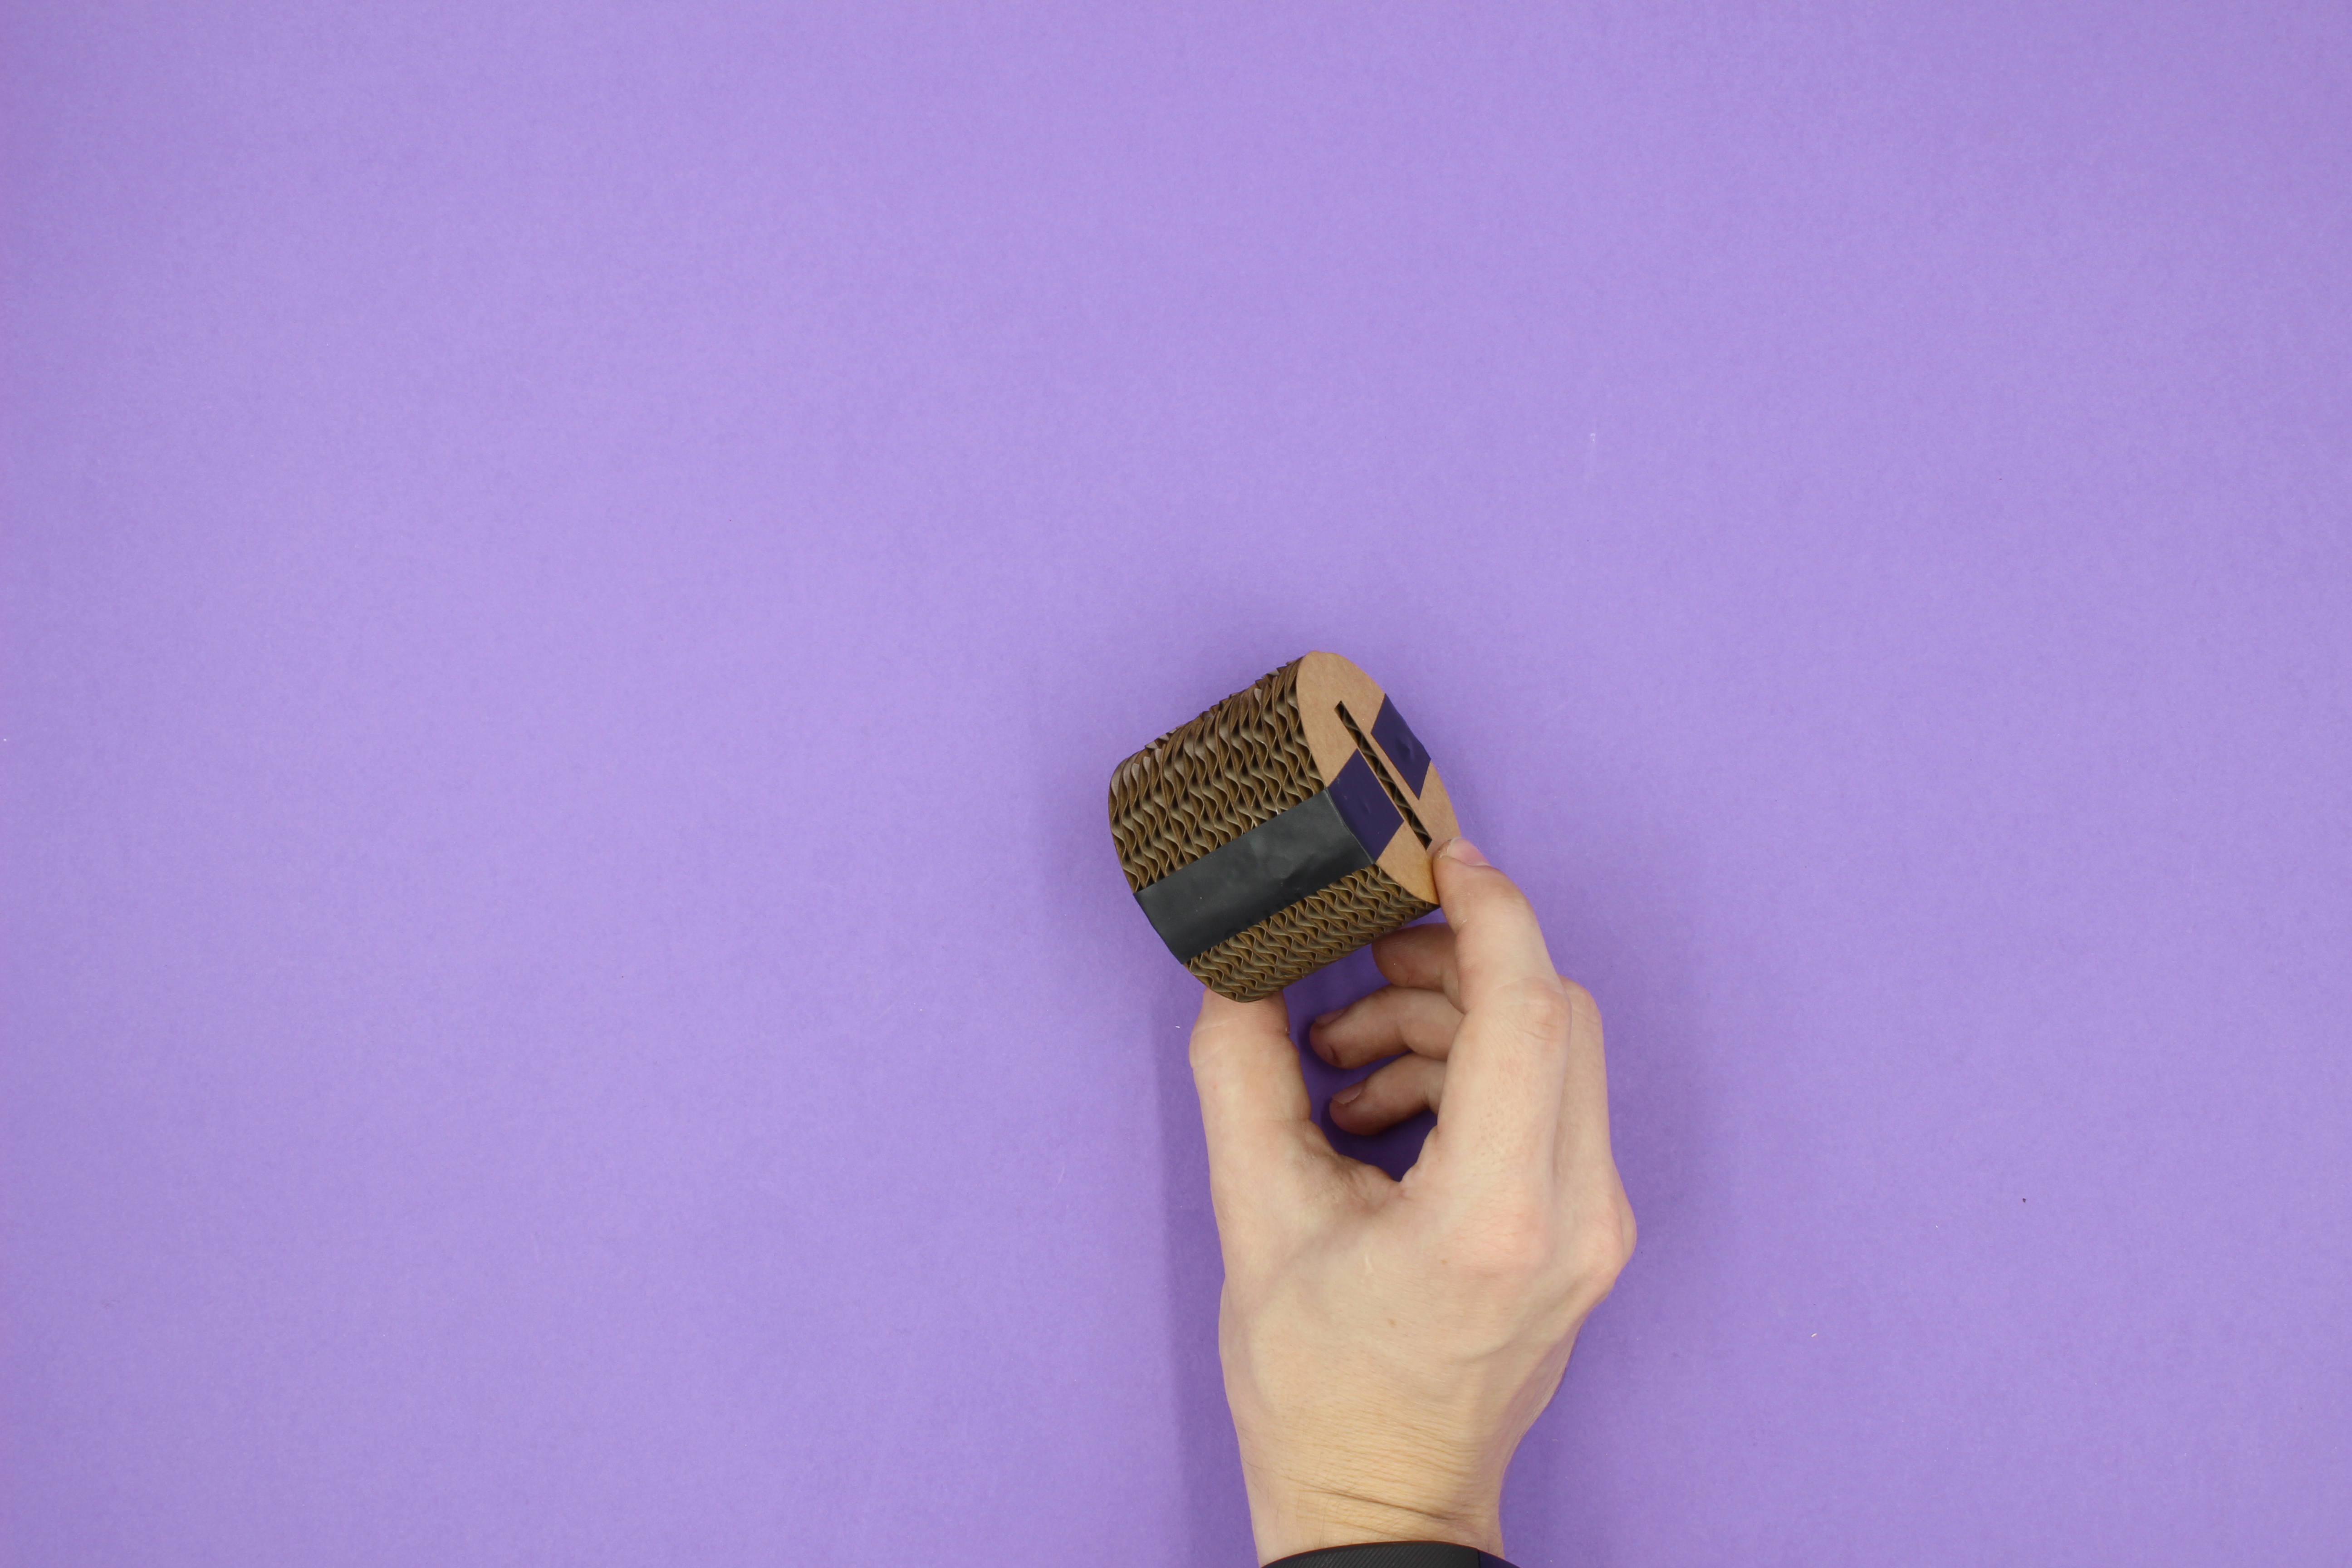
Grab two of your magnets and insert them into the small hole on one of the sides of your plug. Face the magnet front/back outwards. Make sure it is lower or flat with the surface otherwise it may cause unwanted friction when turning the plug. It doesn't matter what direction the polarity is going for the time being. We will match the other magnets with it later.
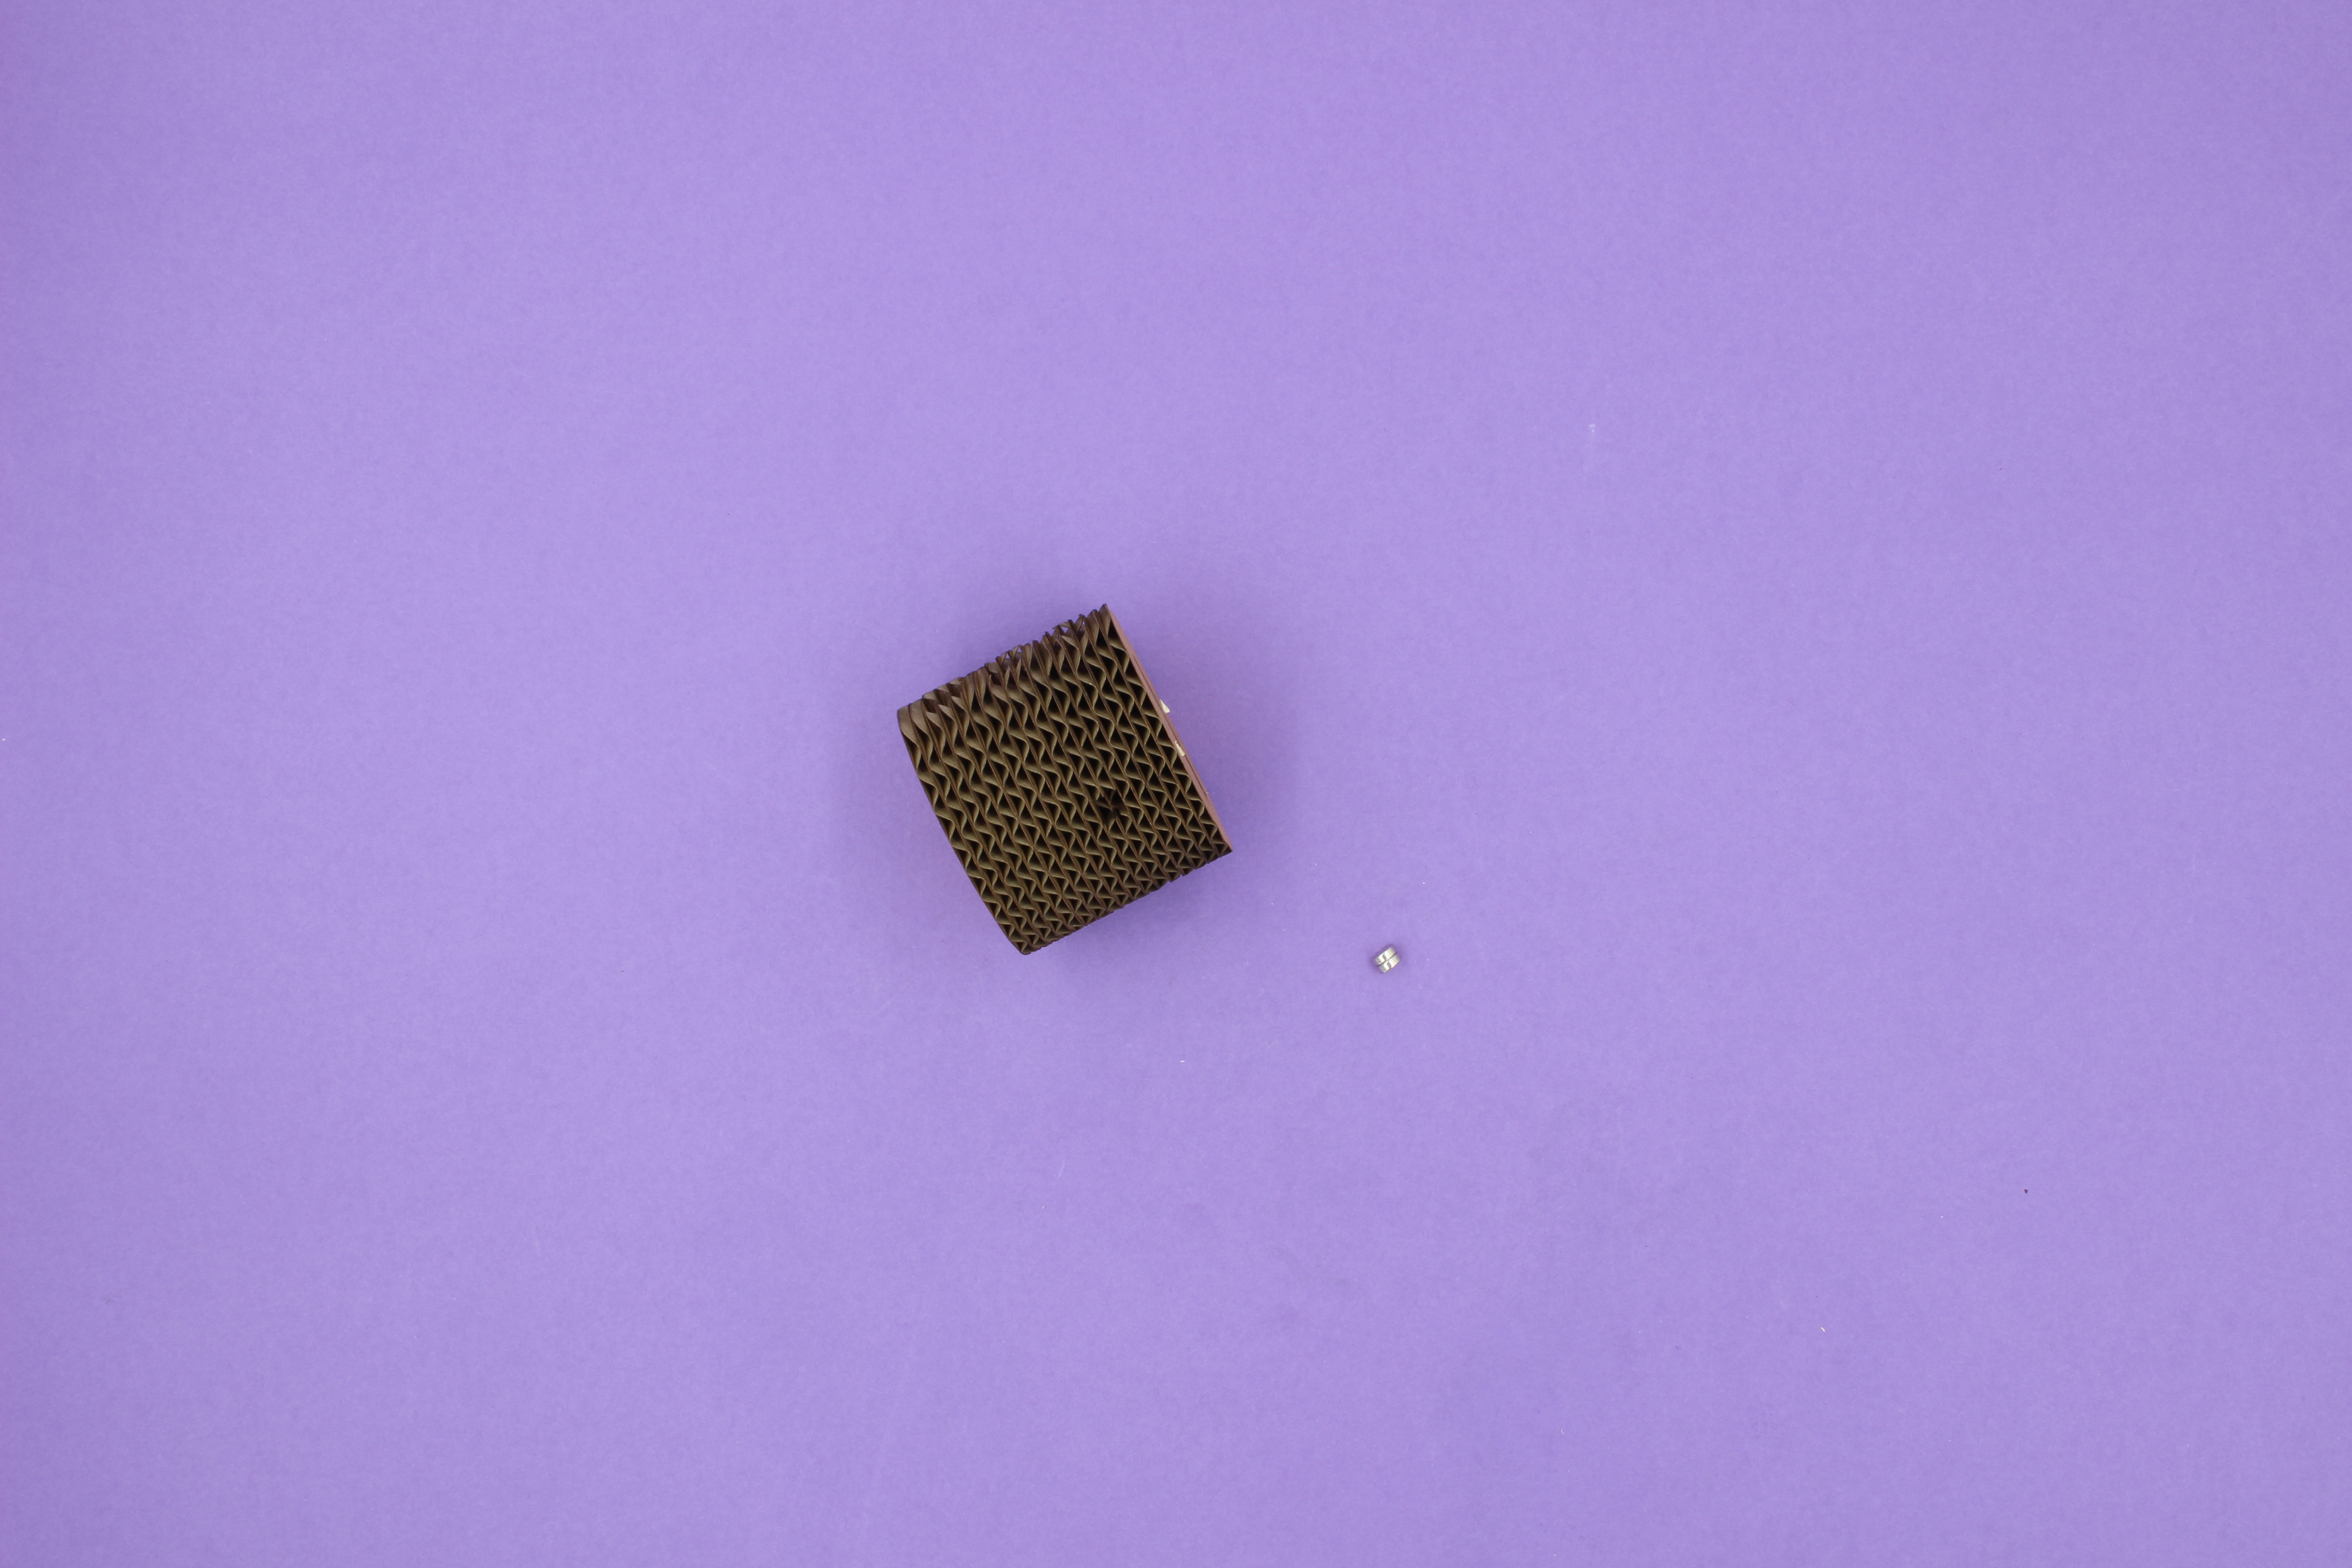
Note that the magnets need to be on the left side when seen from the front (keyhole is facing the front for reference)! This is so they align with the magnets in the hasp.
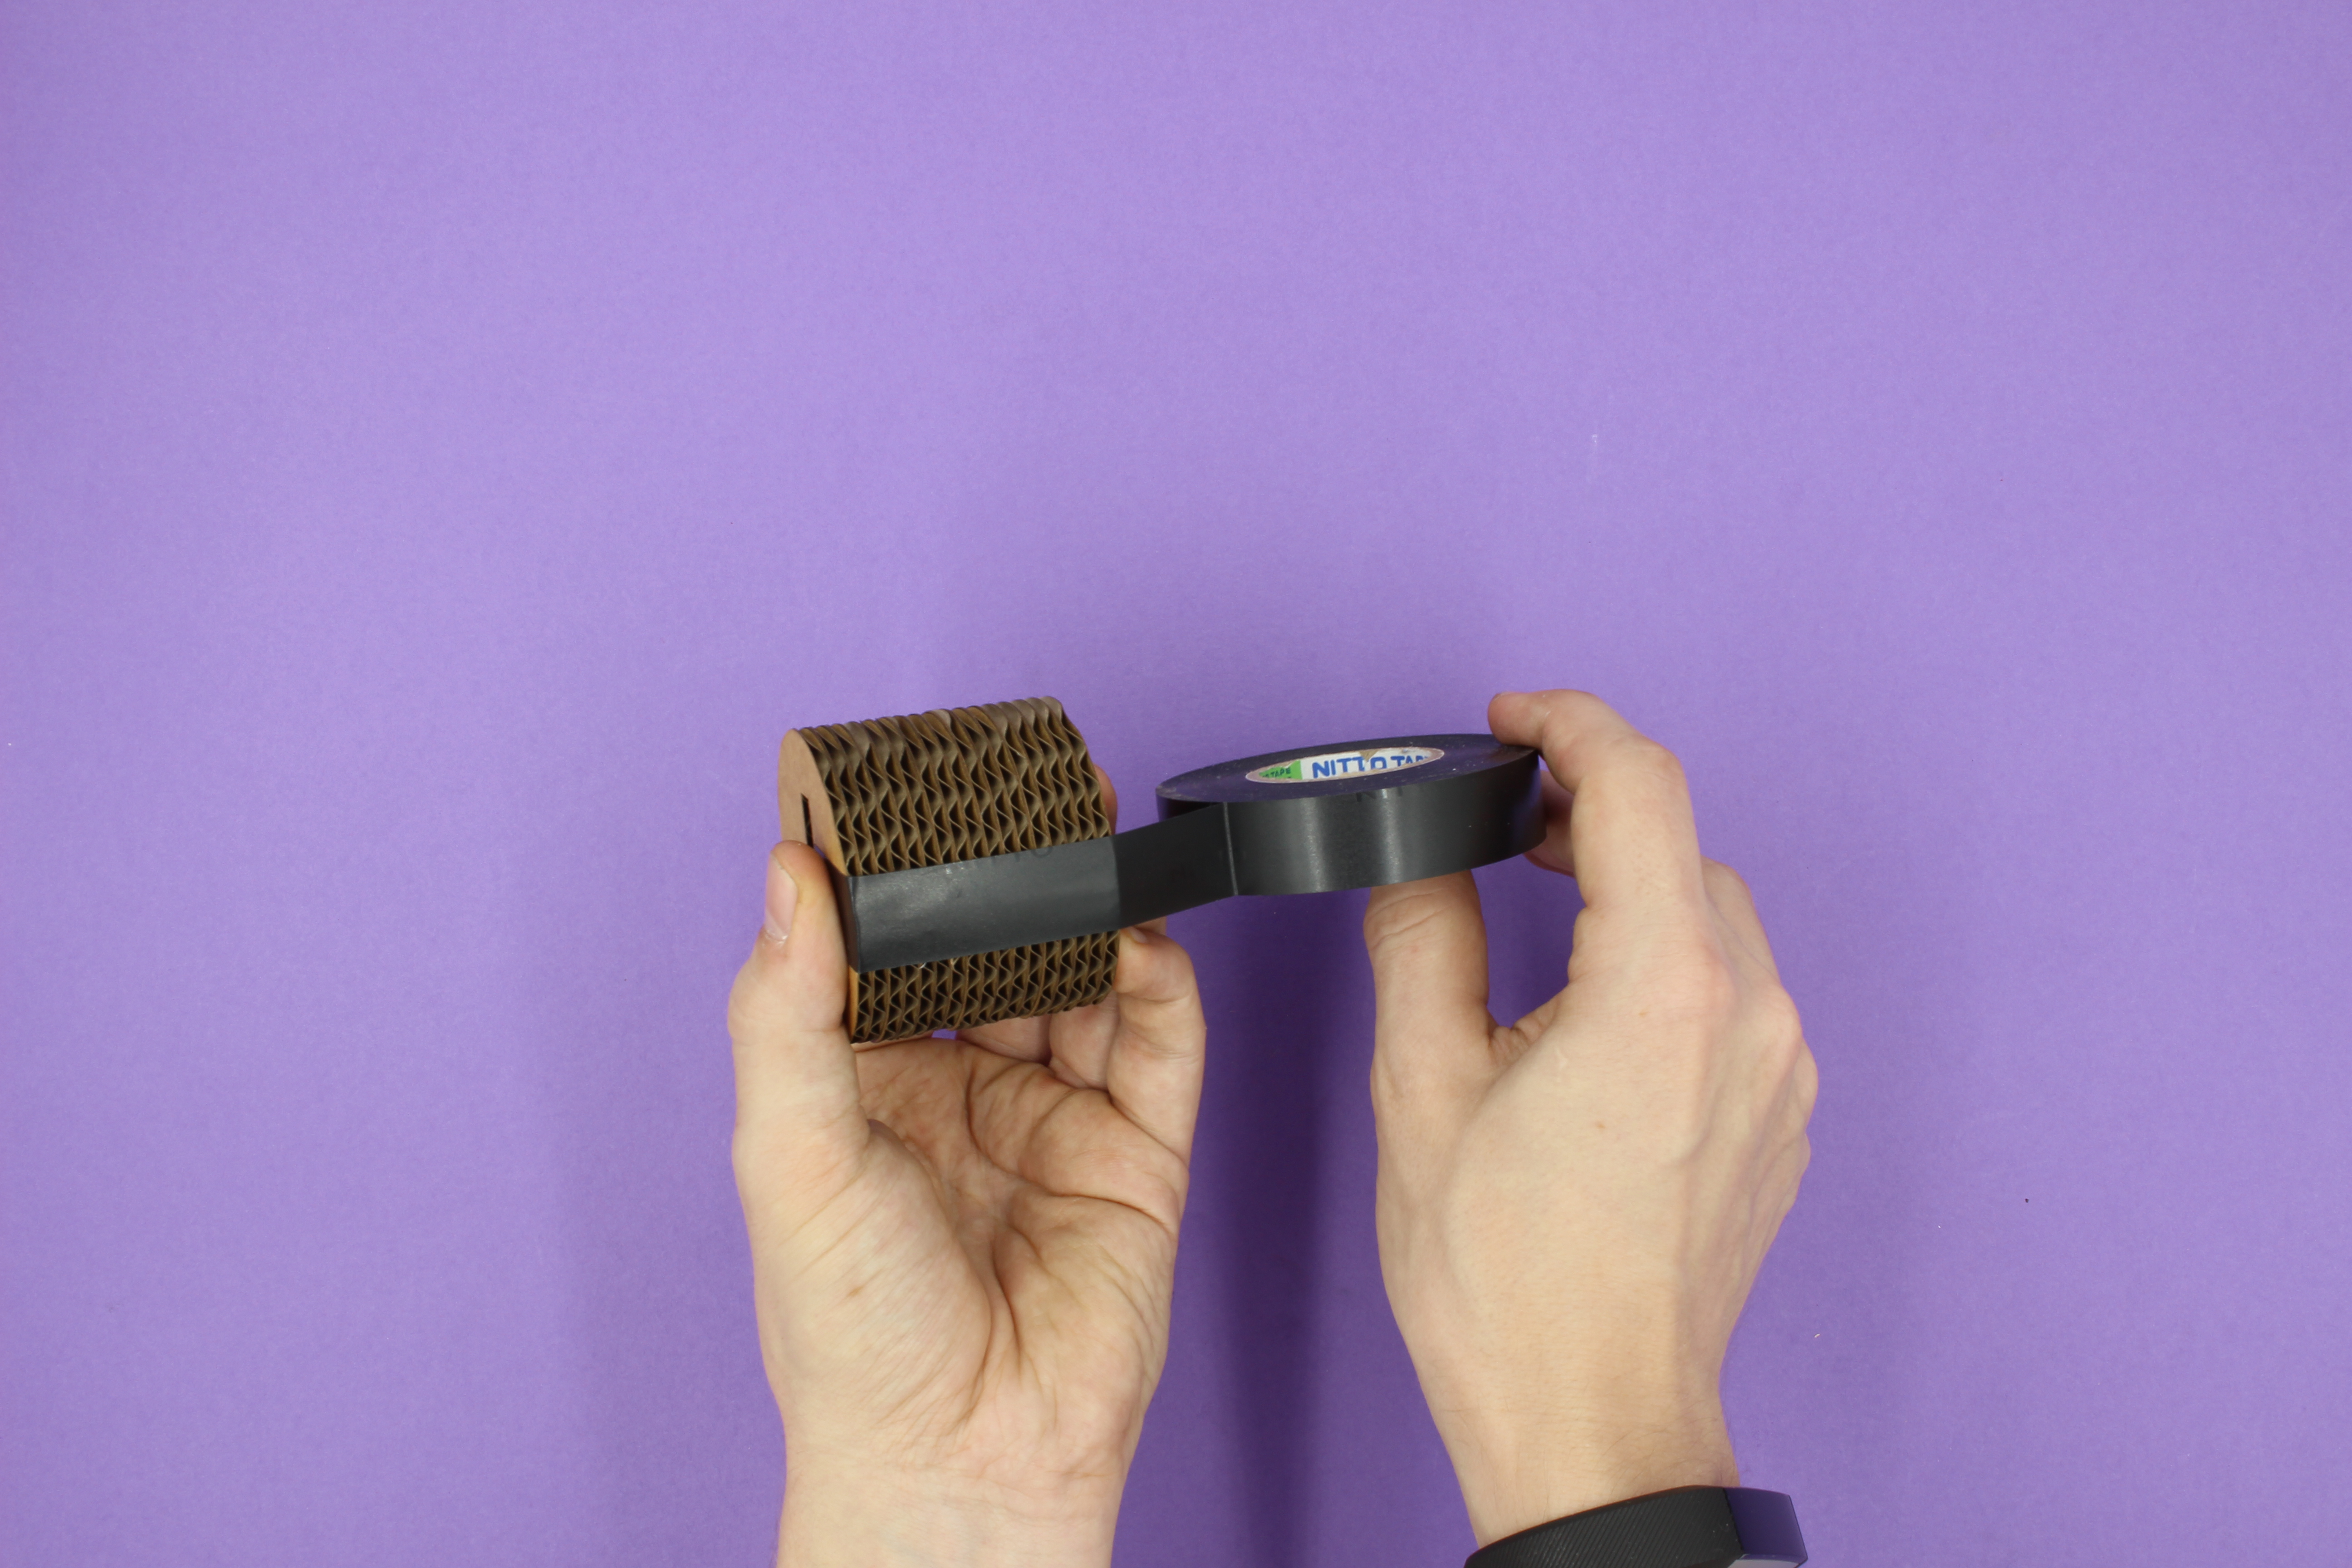
Put a strip of electrical tape horizontally around the plug to keep everything in place (including the magnets). Make sure you are not compressing the cardboard too much but also that there isn't any space between the layers.
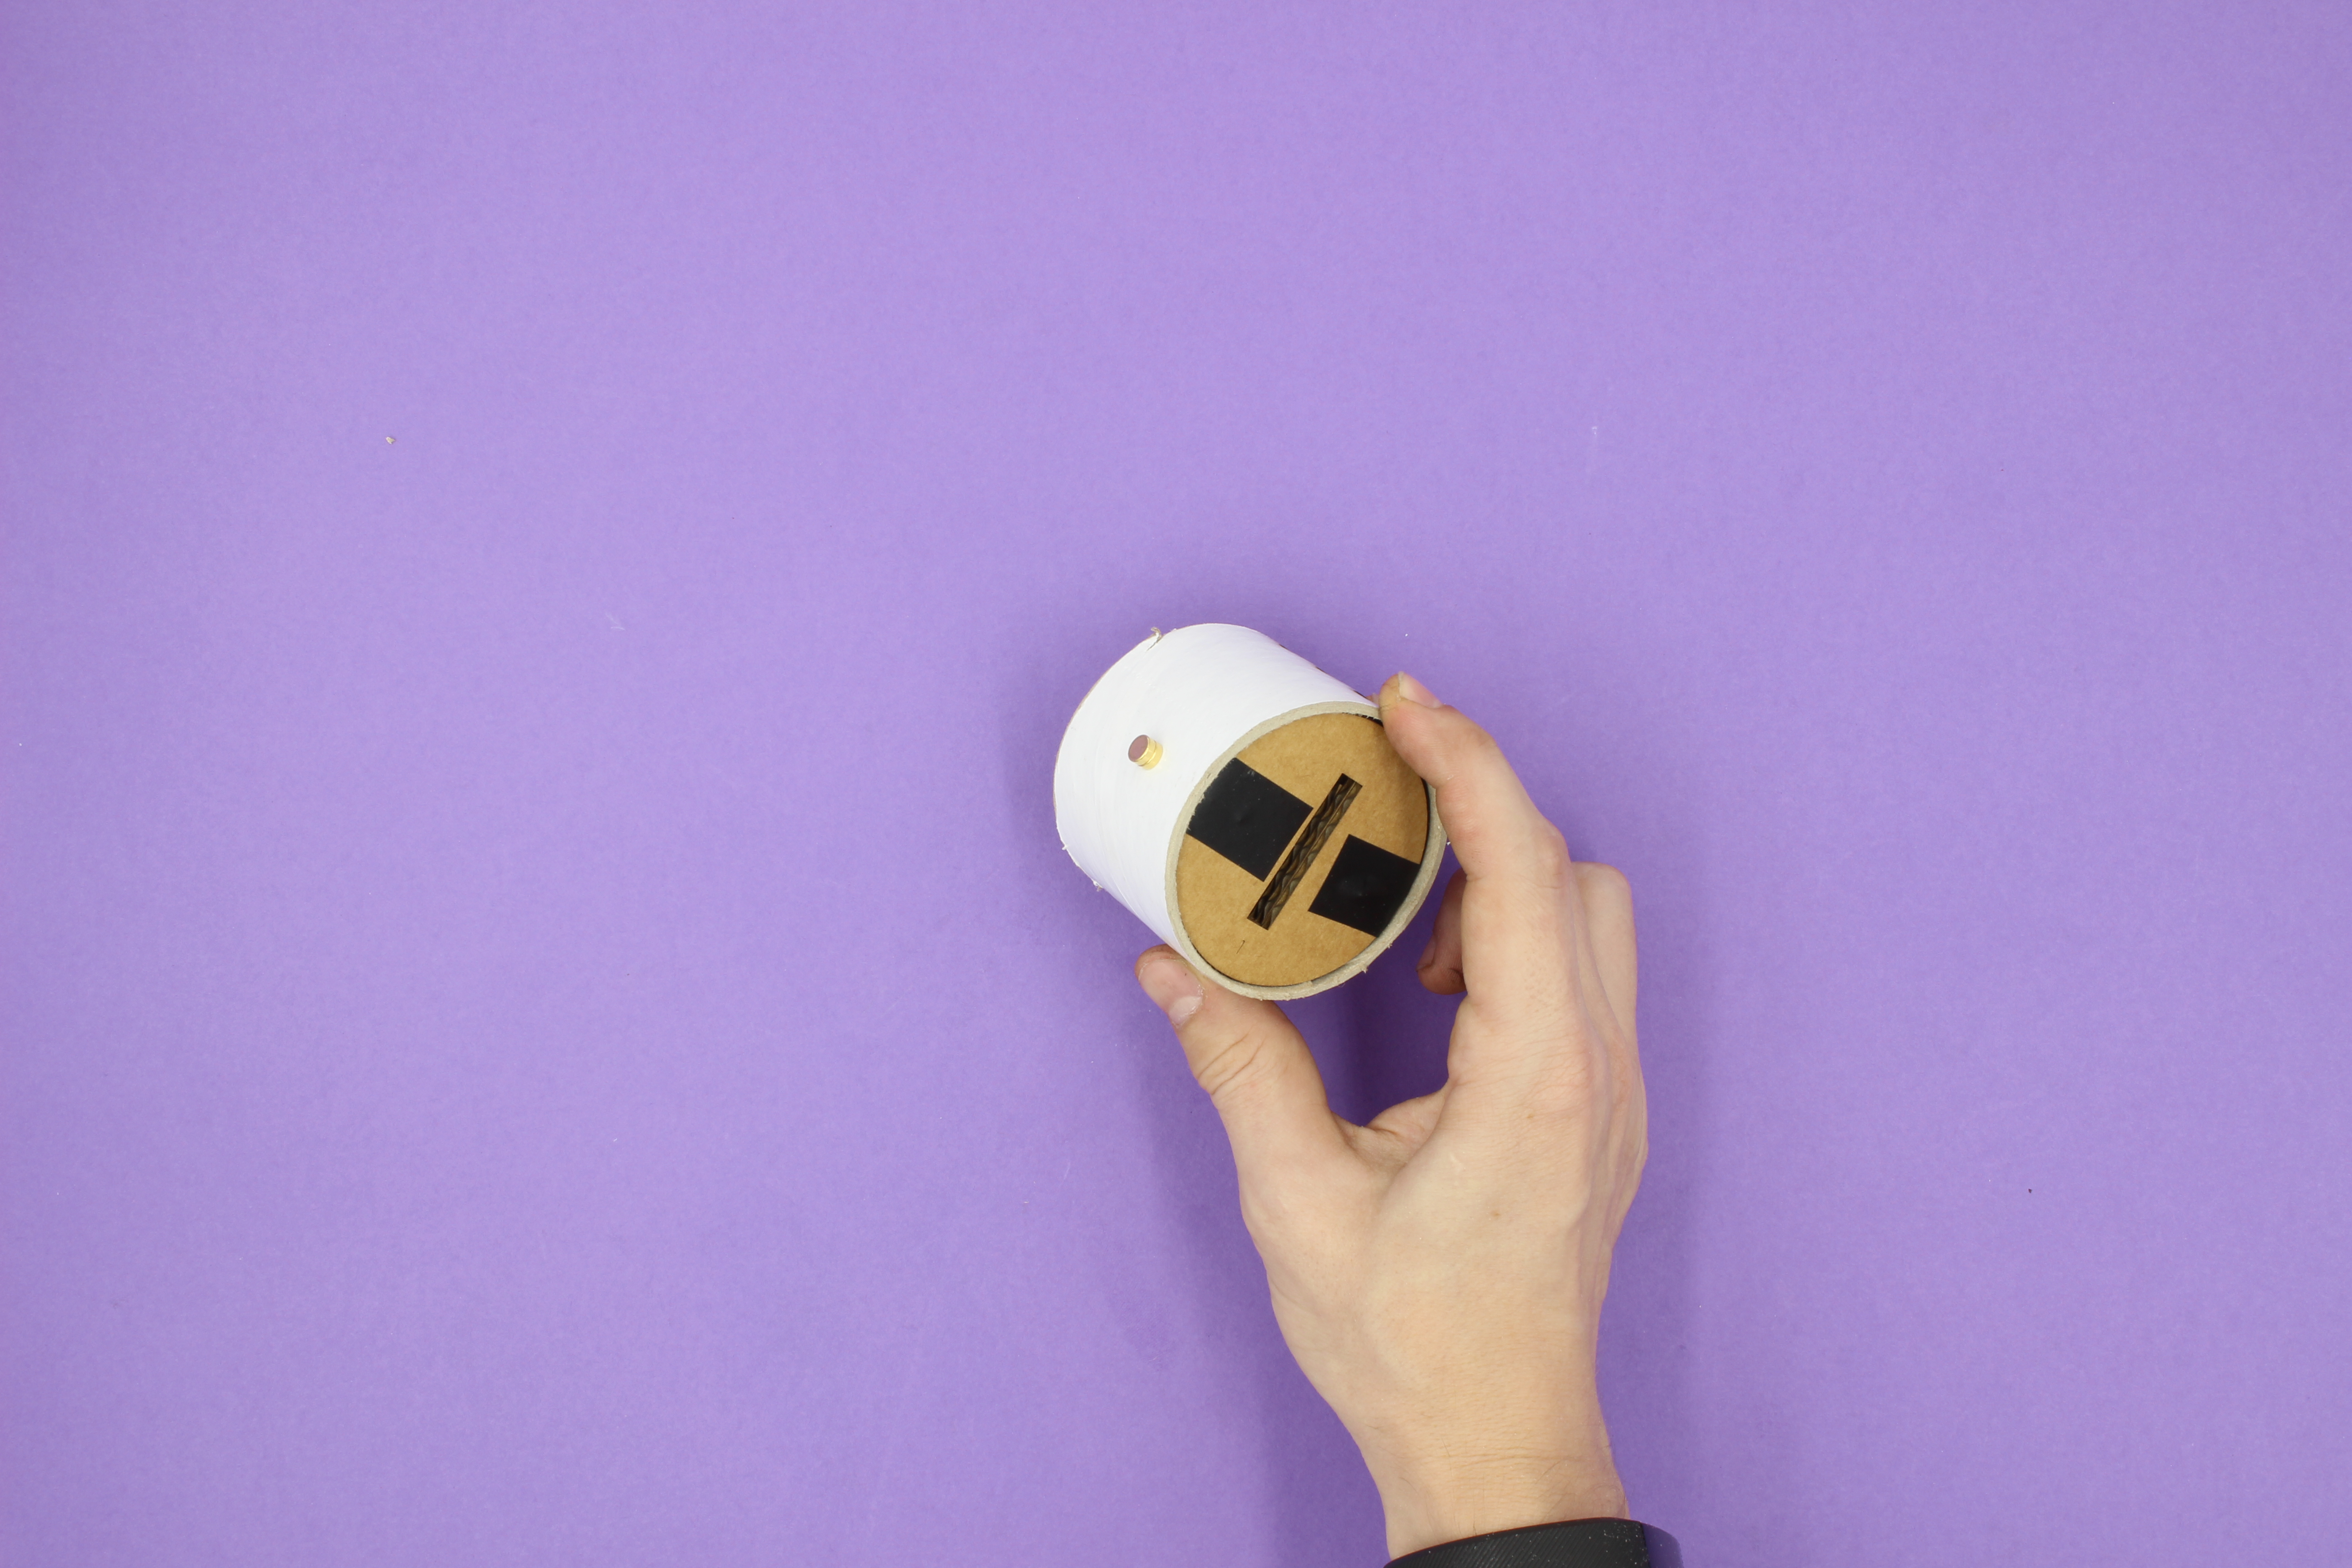
Before we move on, insert your plug into the white tube and make sure the plug spins properly without any or little friction. Feel free to use sandpaper to remove some of the rough parts on the tube. Align the holes of the plug and the tube, you might need to flip the plug 180 degrees for the best result.
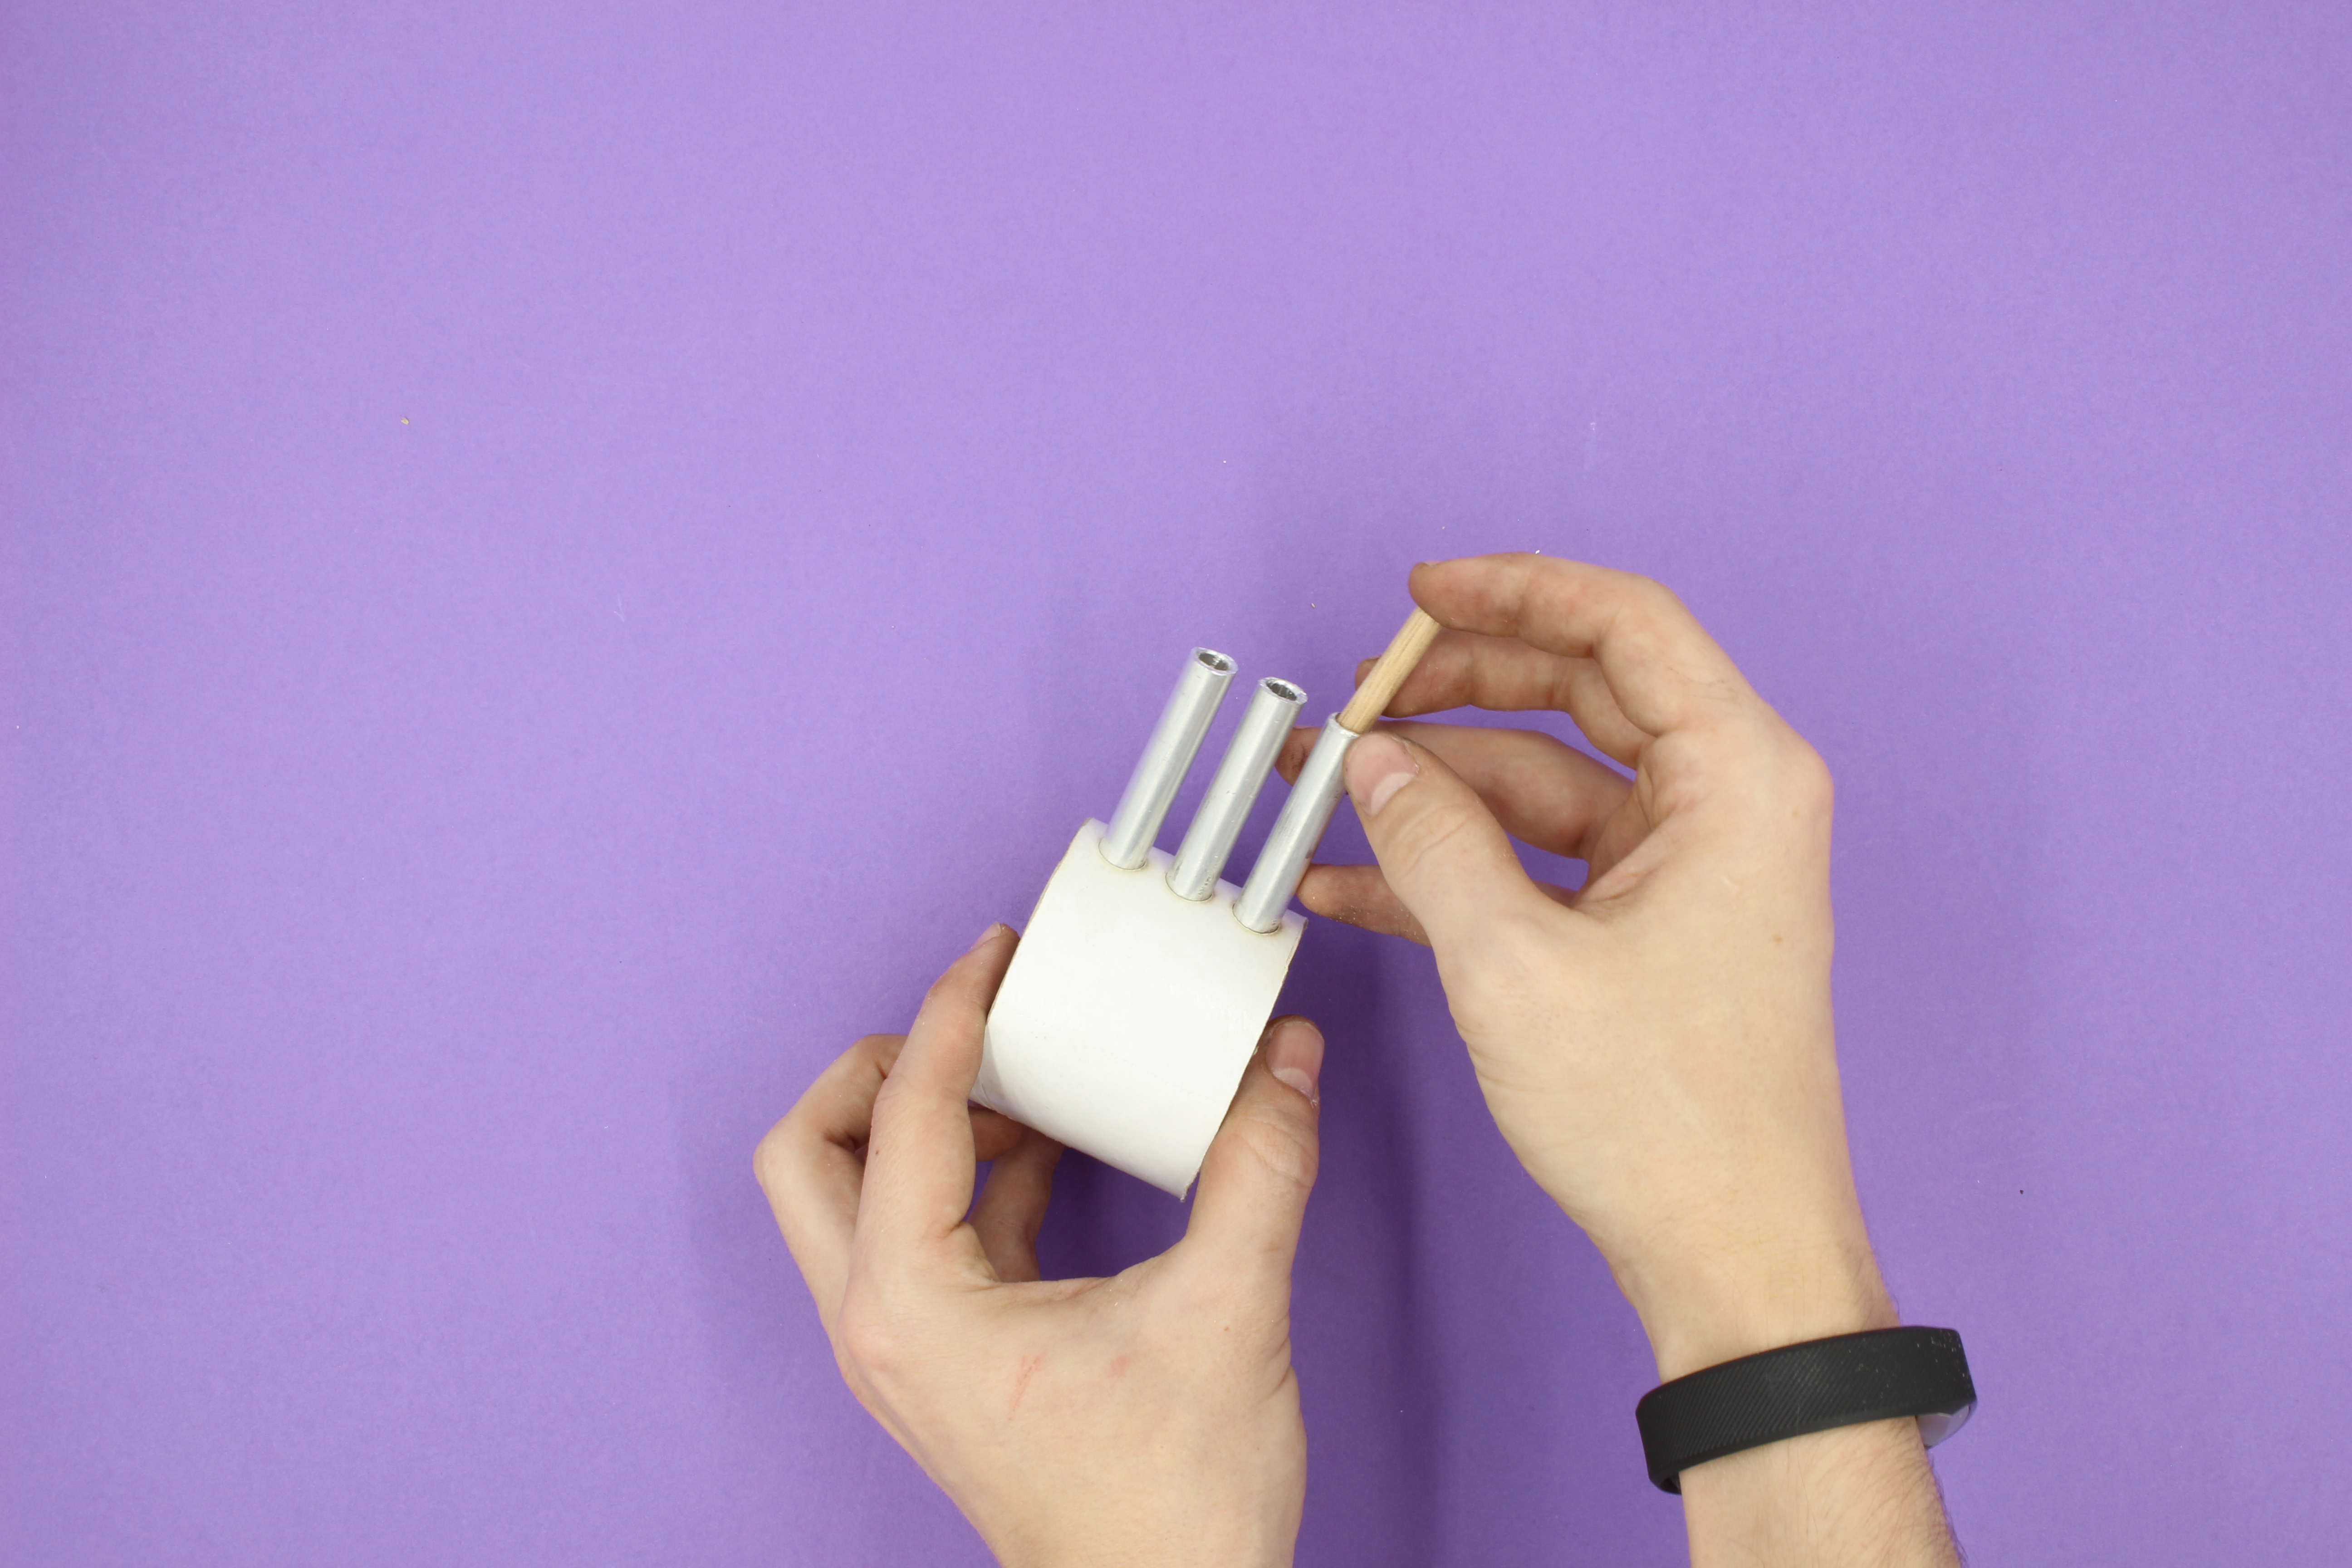
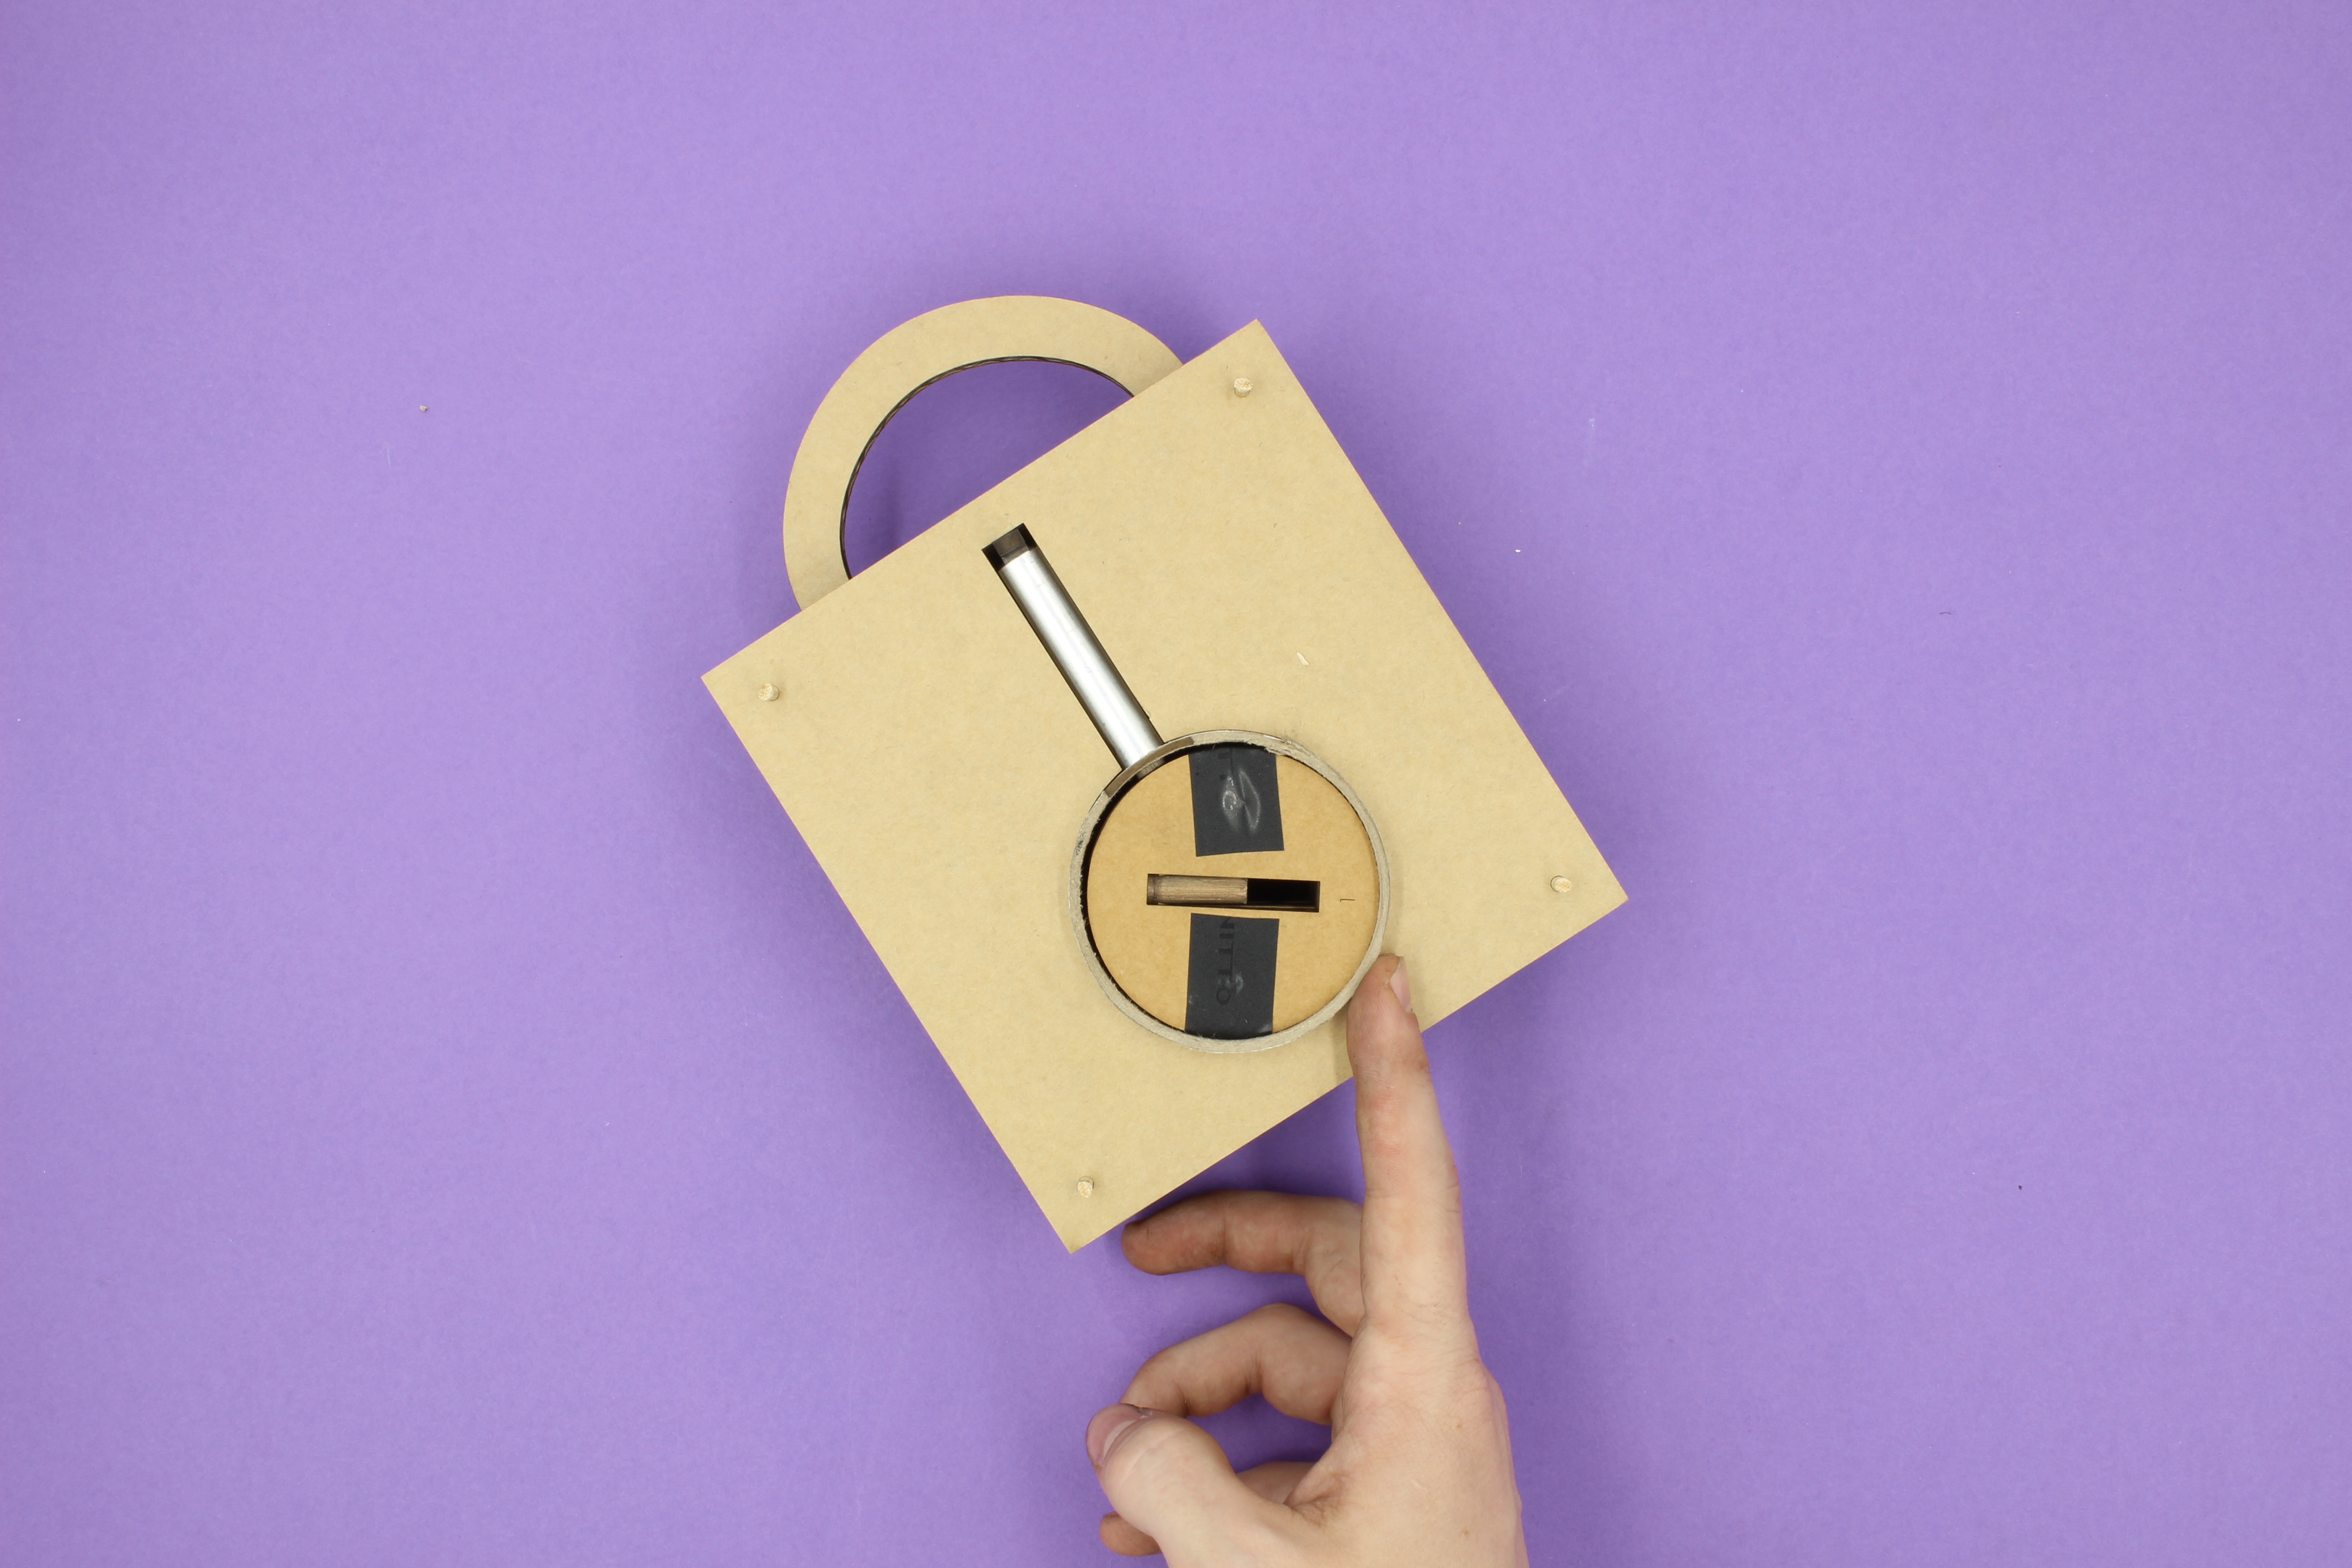
Step Two: Key Pin and Fitting
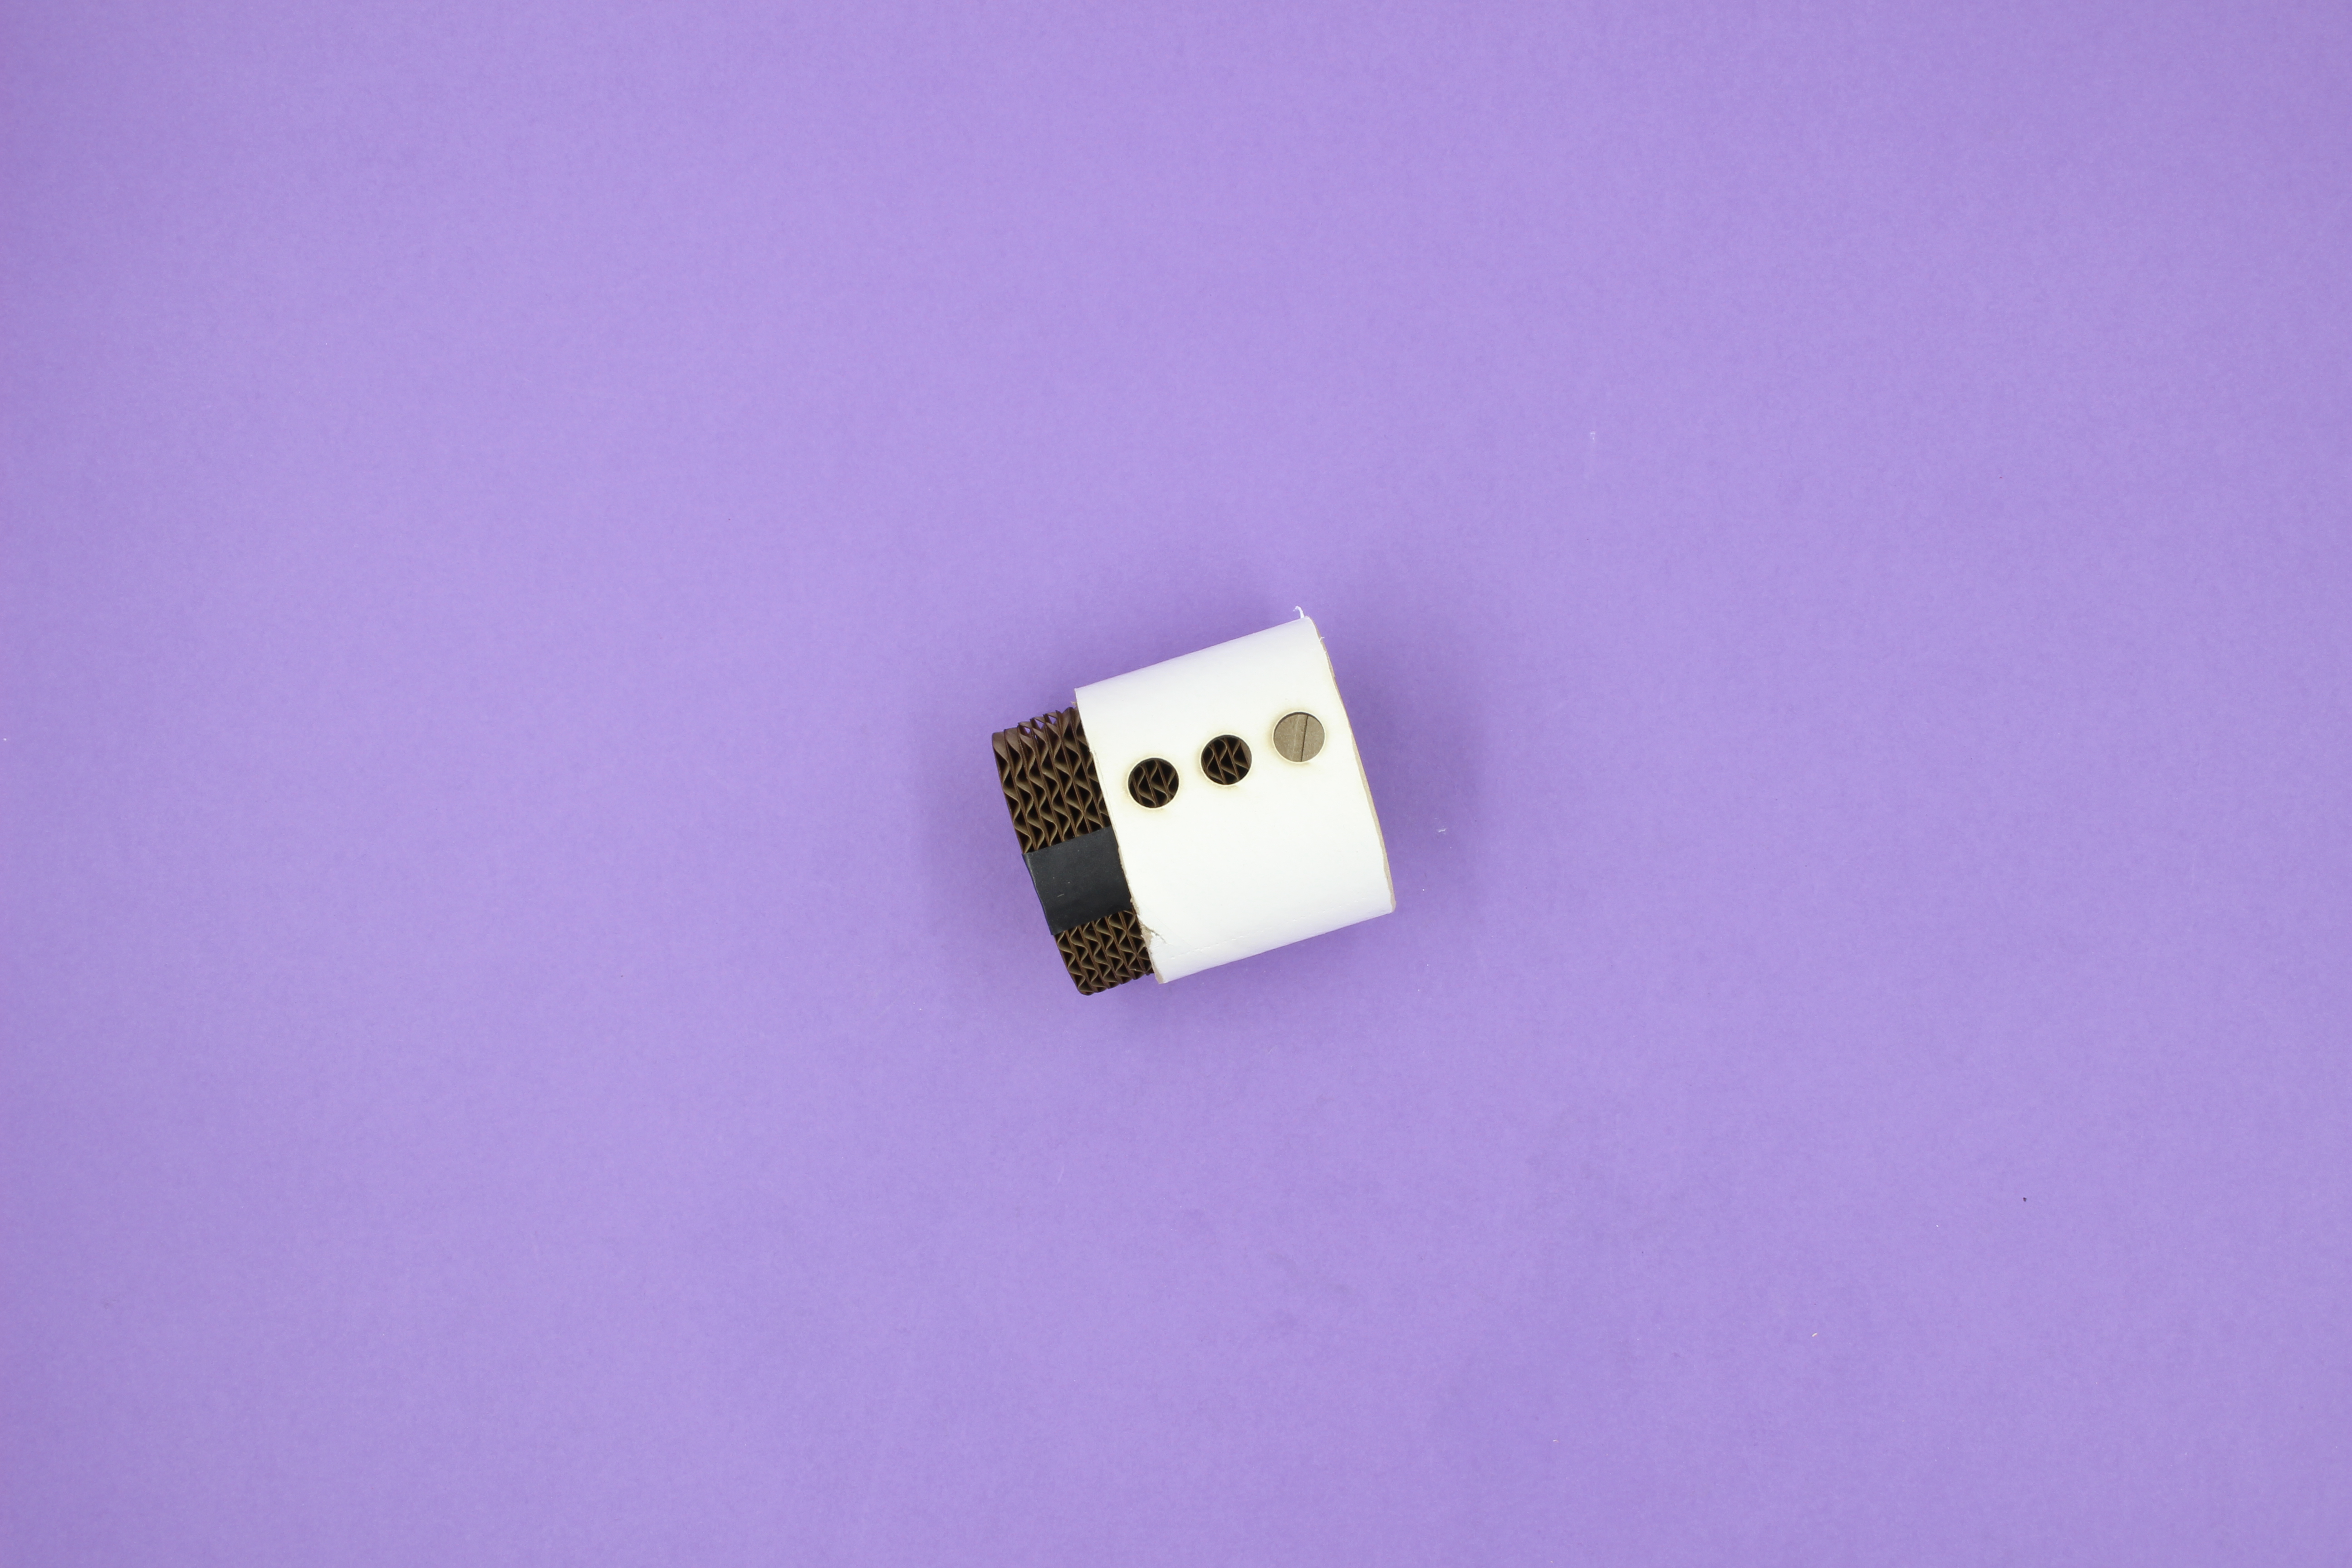
Collect your three acrylic rings, they are small so don't lose them, also make sure you remove the plug from the white tube.
We are going to insert the rings into each of our plug's holes. This is going to keep our key pins from dropping or getting pushed out into the key hole. Make sure you push them all the way in (5mm or so), some force might be needed but make sure you don't damage the cardboard holding the ring. The rings should lay flat in the holes.
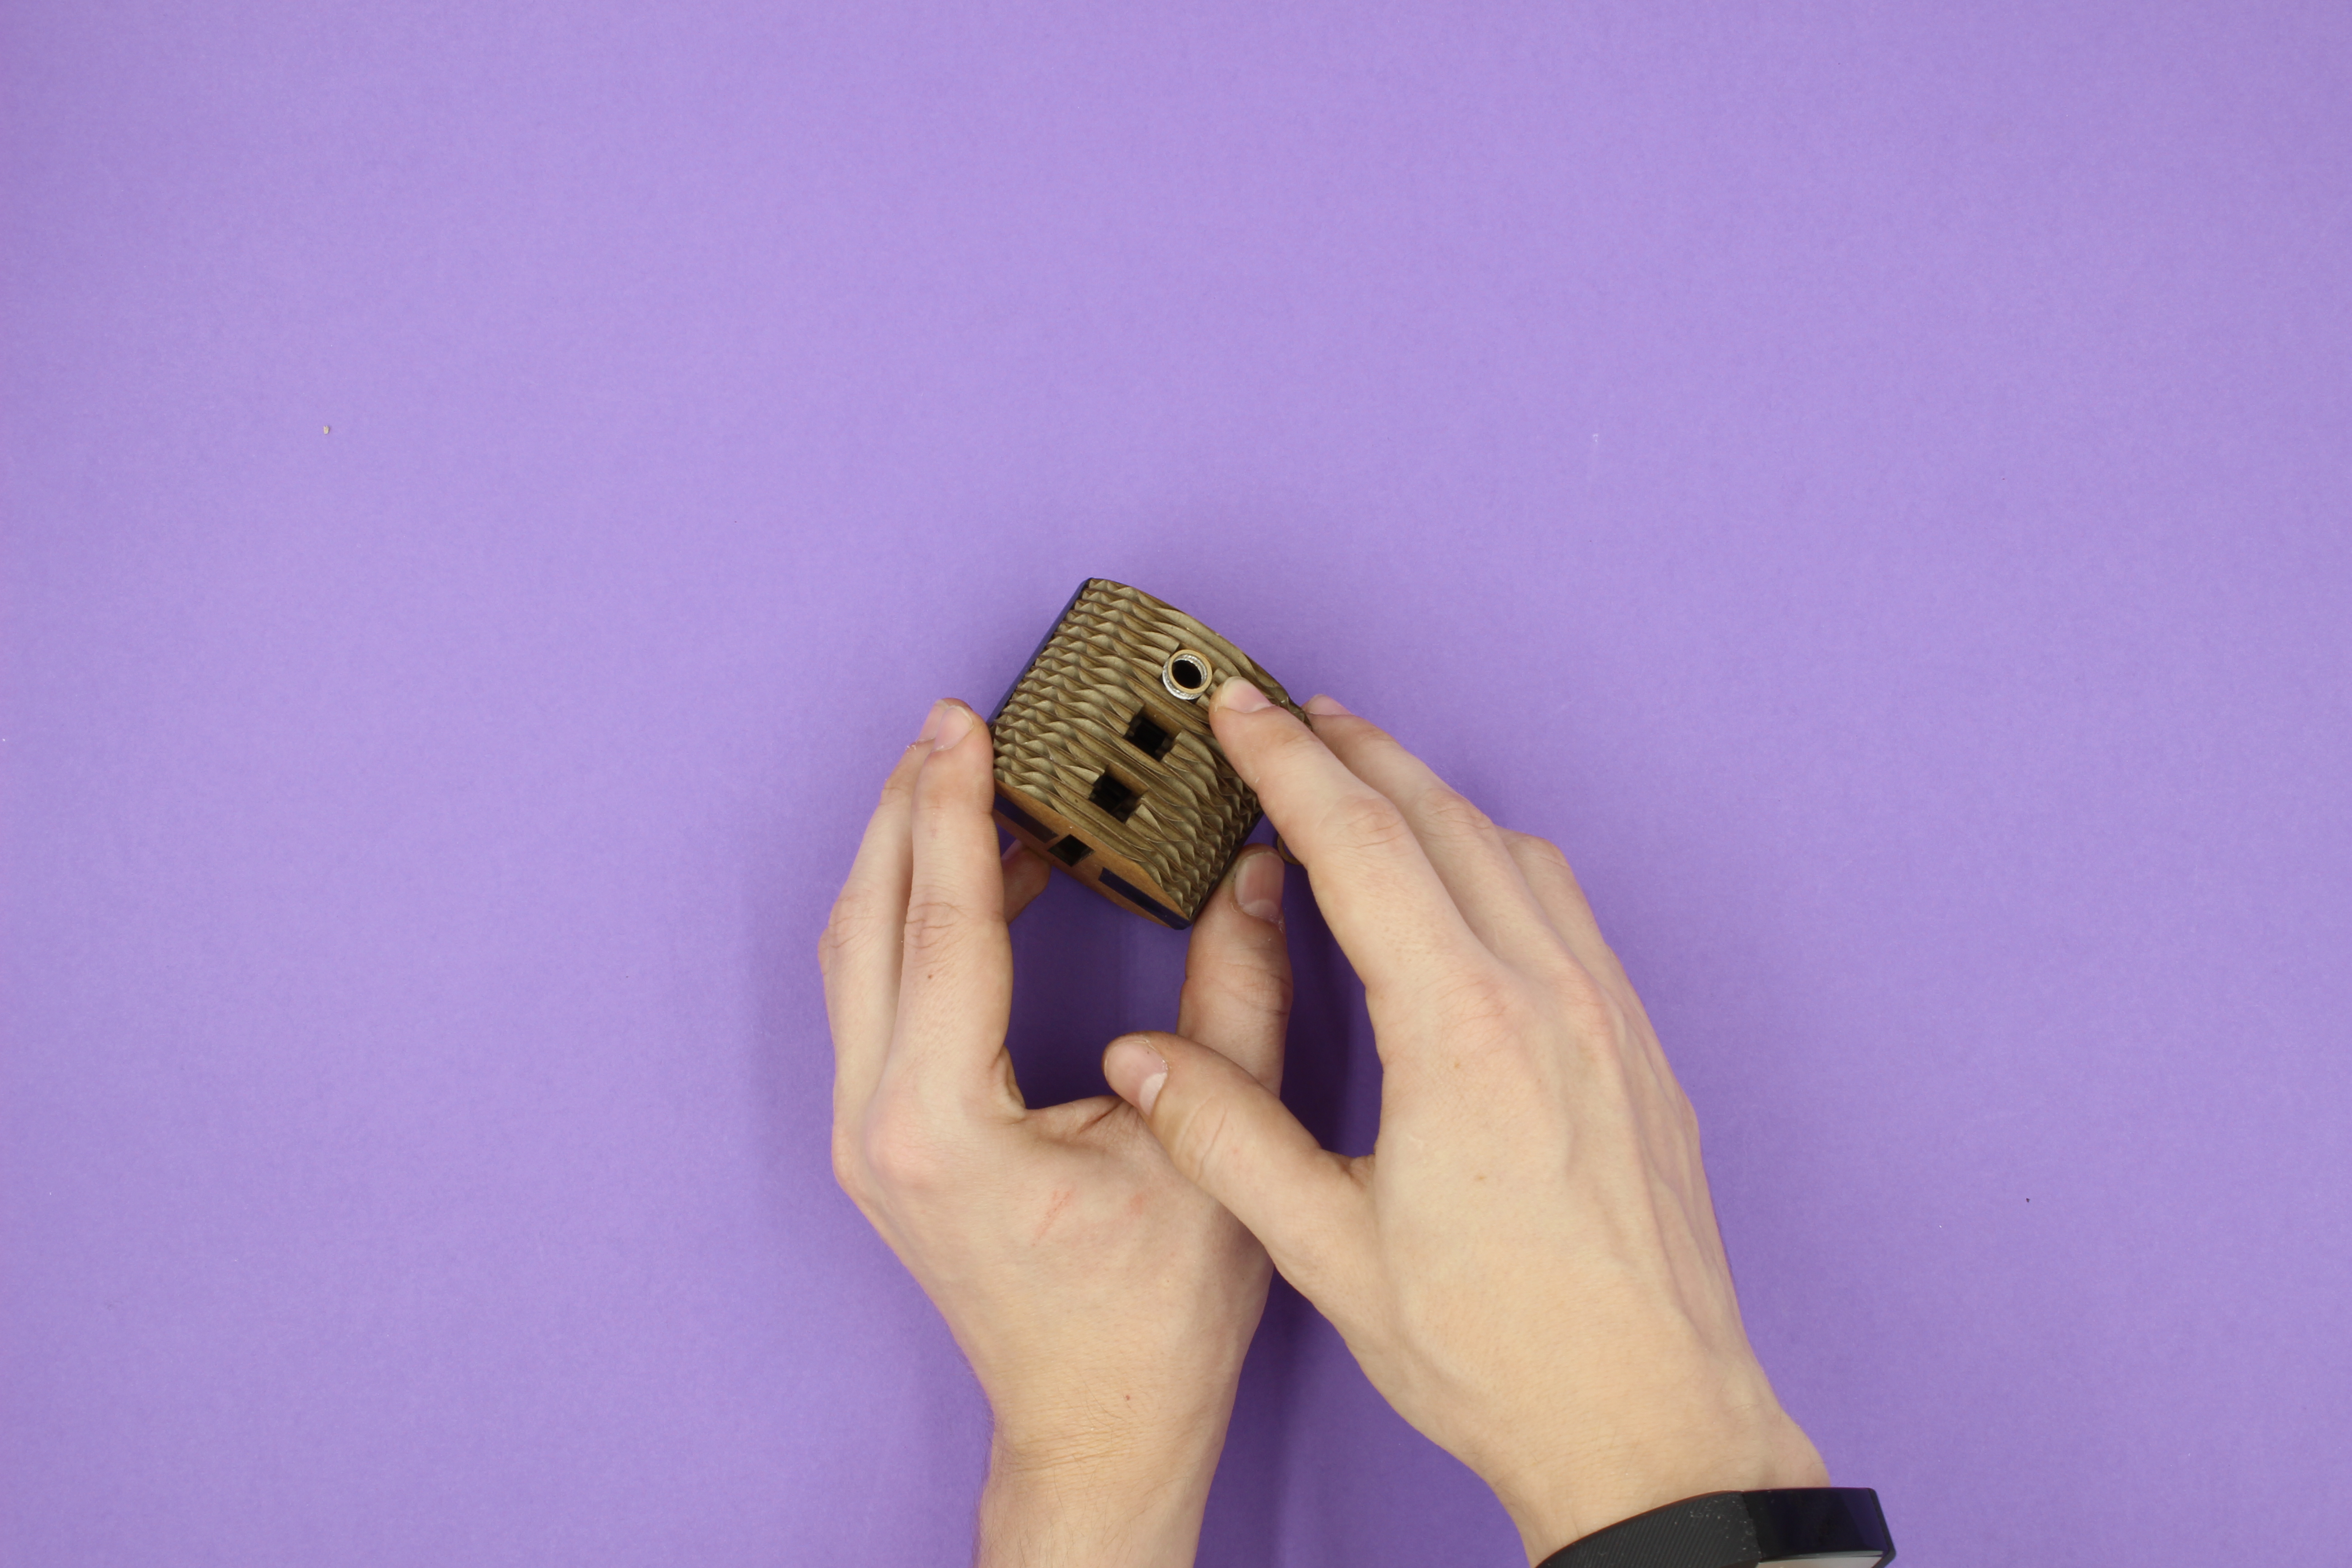

You should be able to look into the key hole and see each of the rings sticking down into the keyhole slightly.
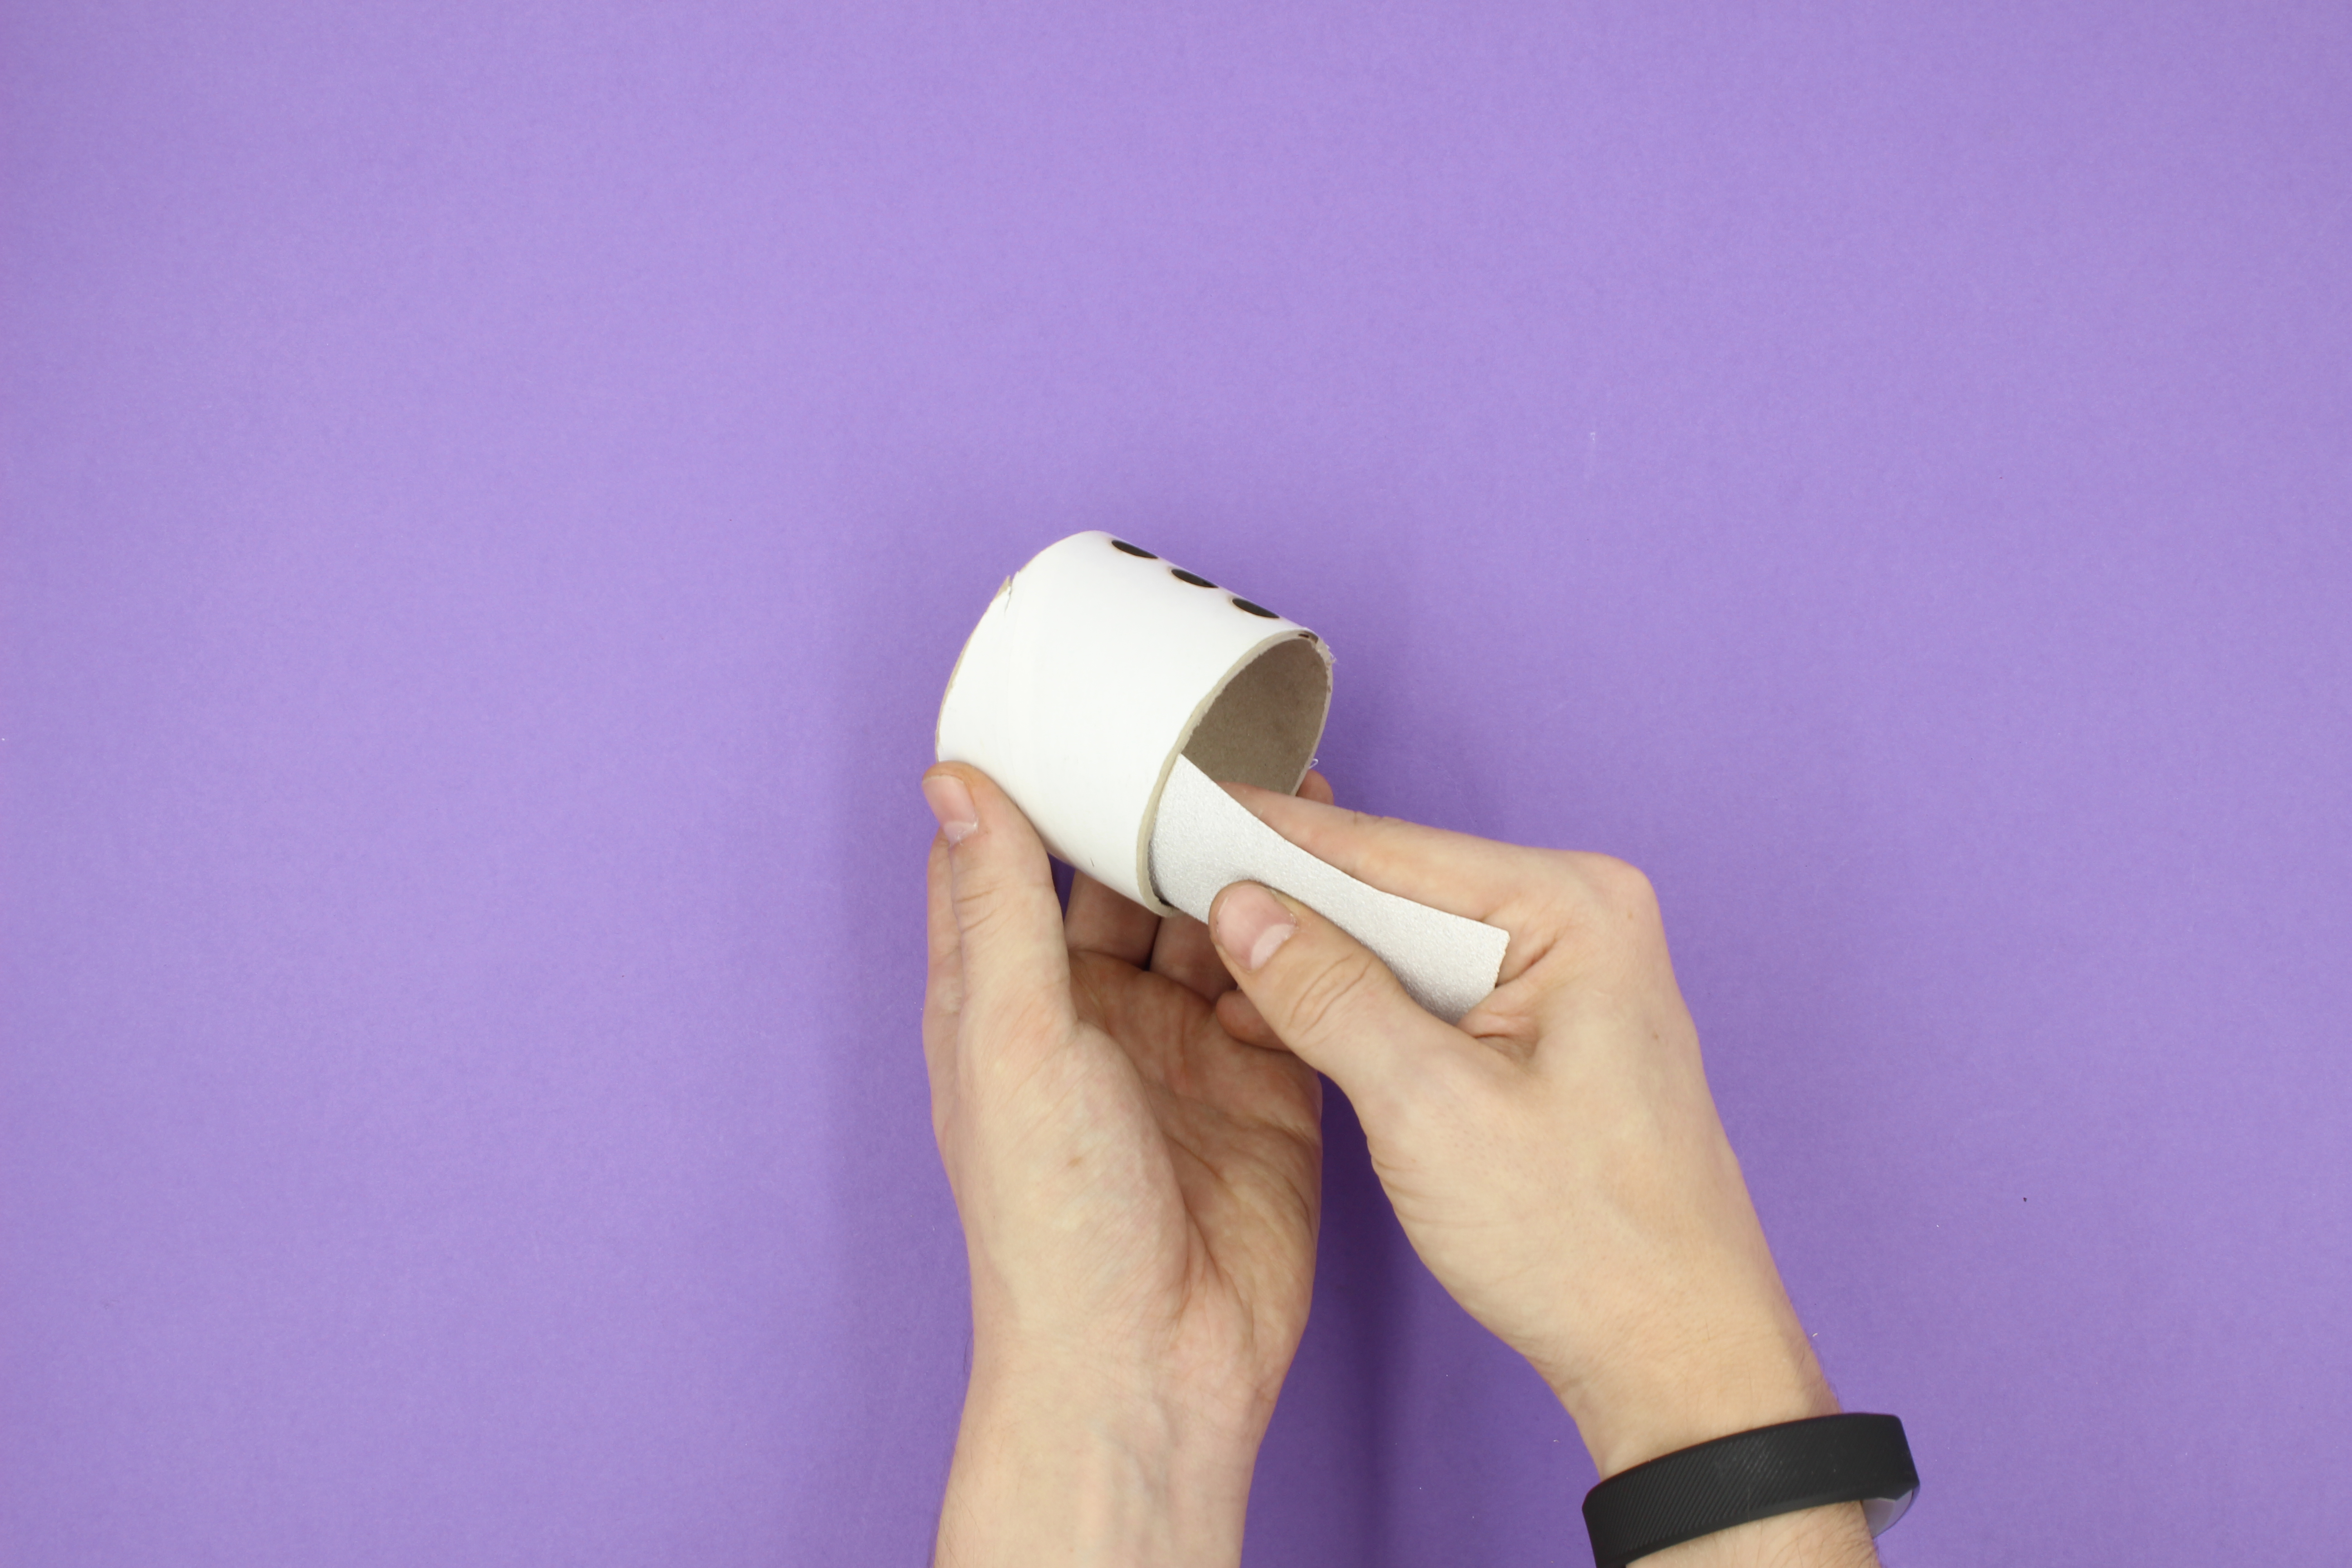
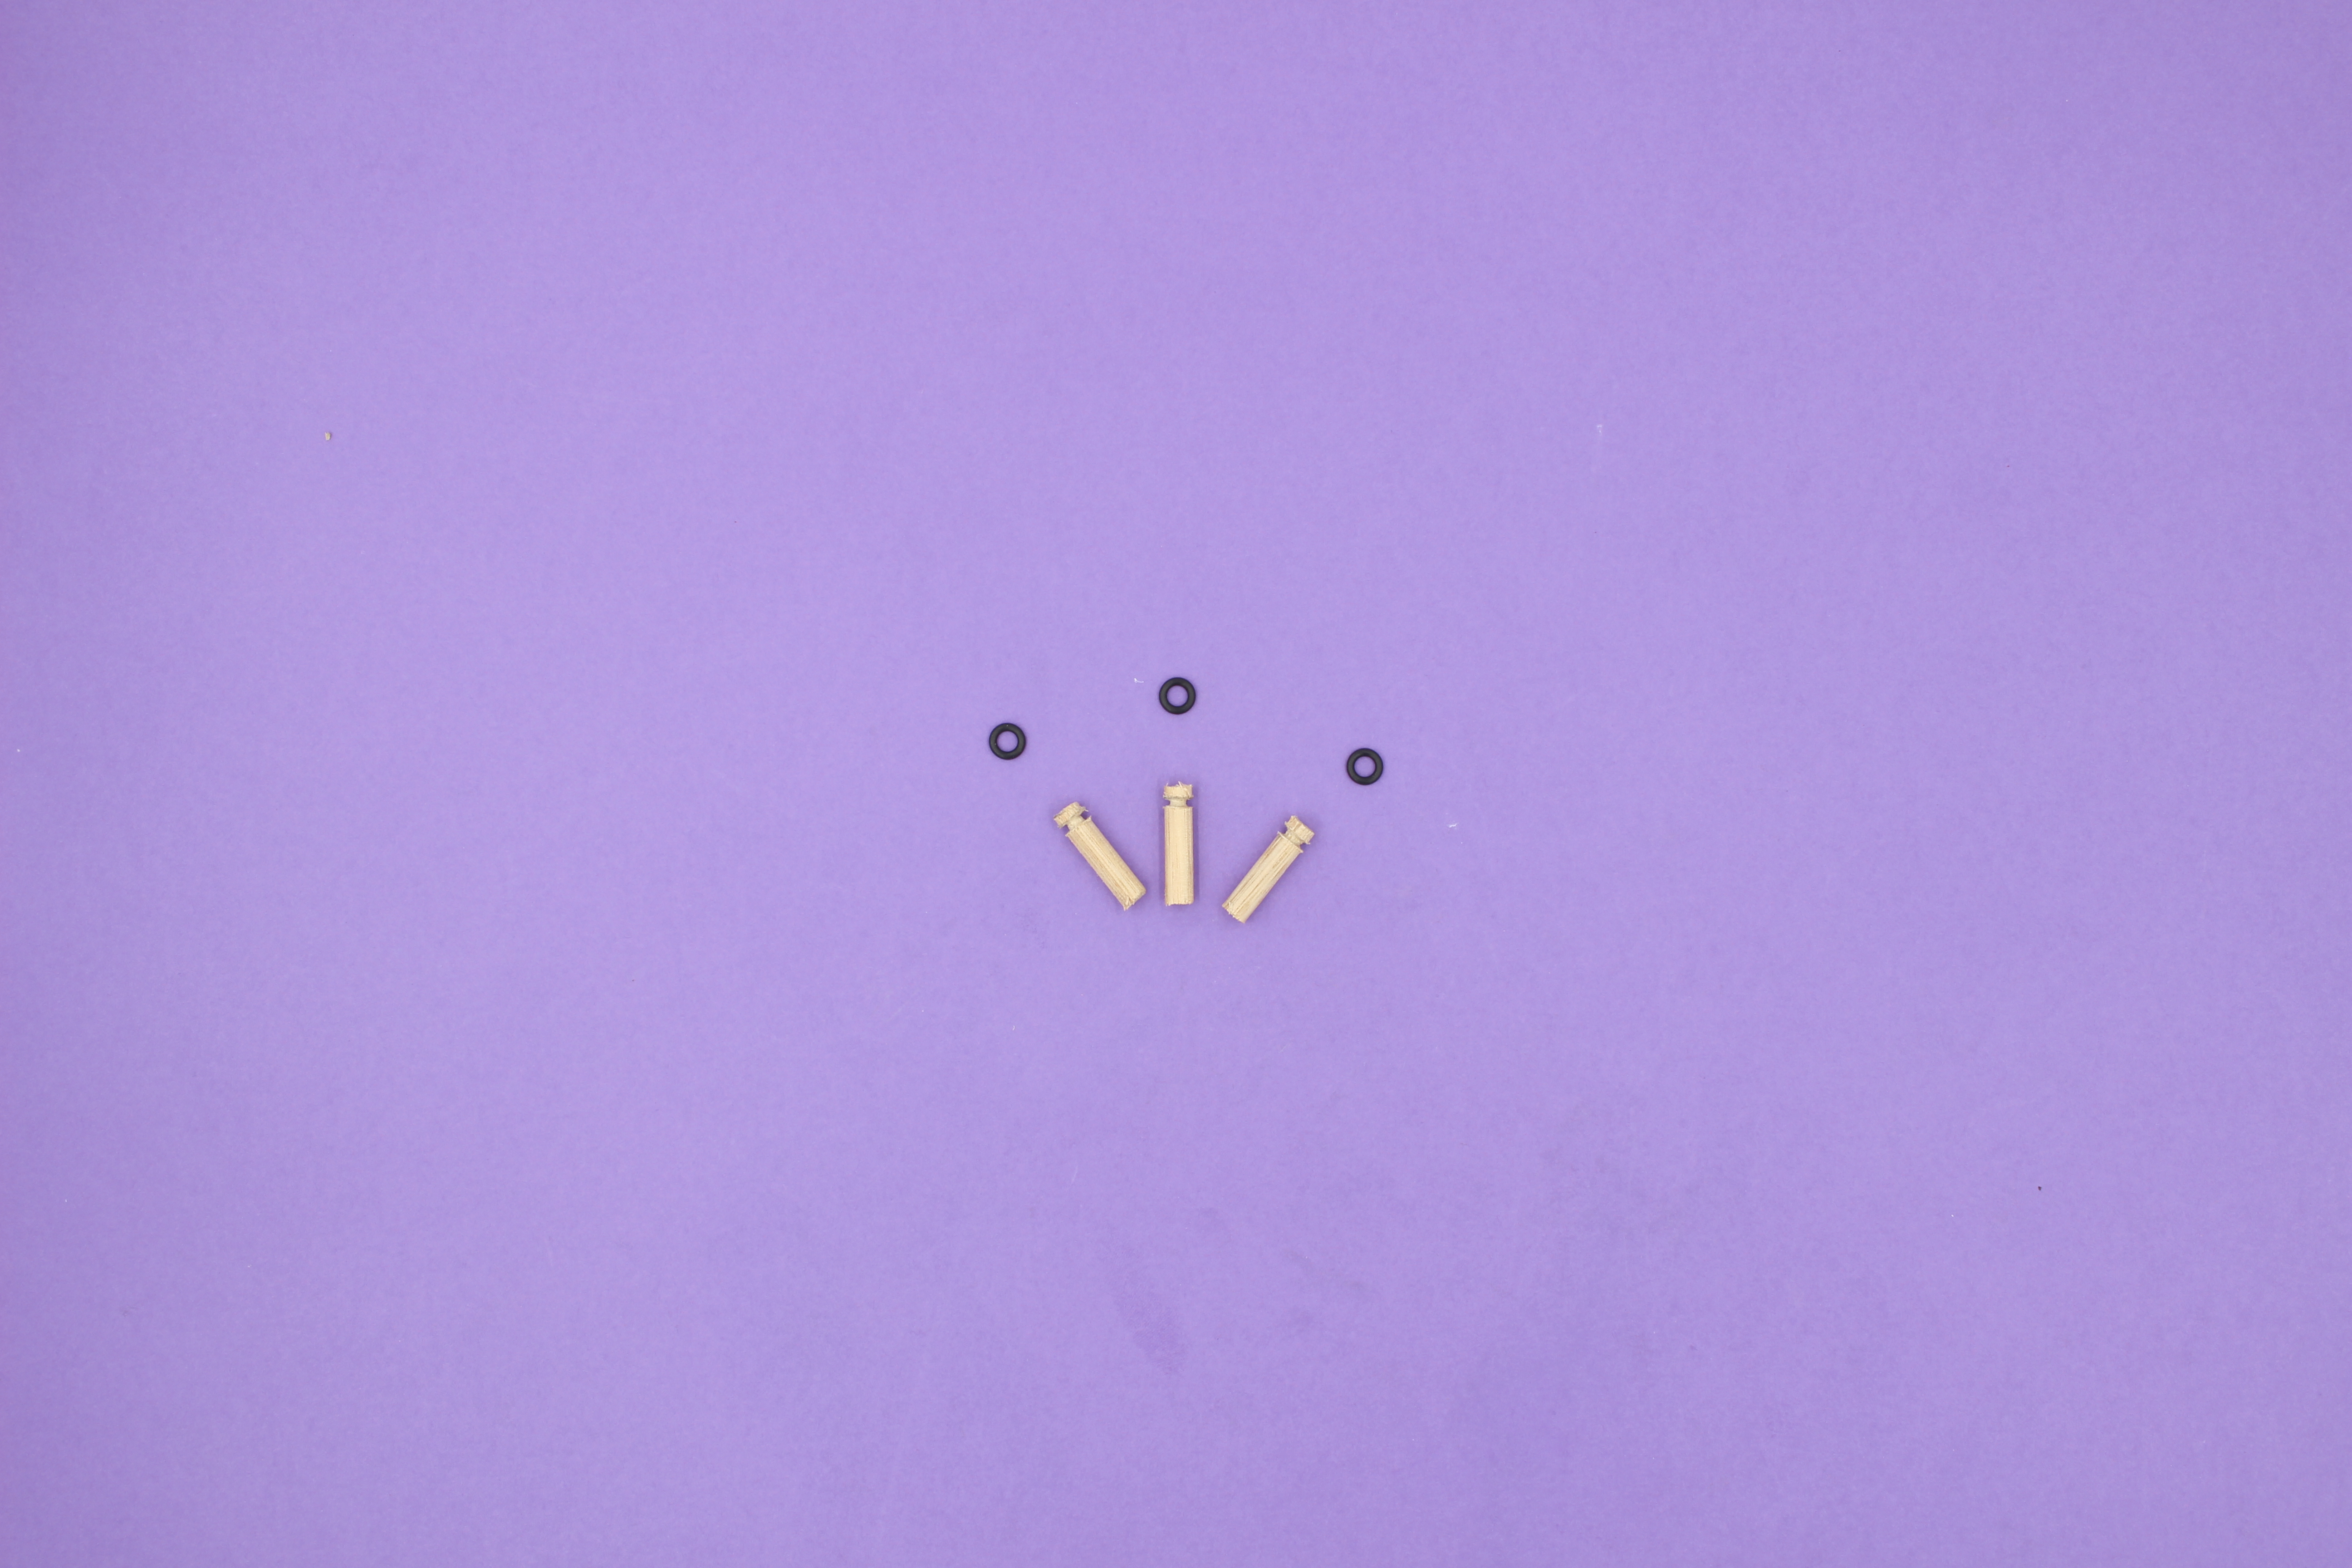
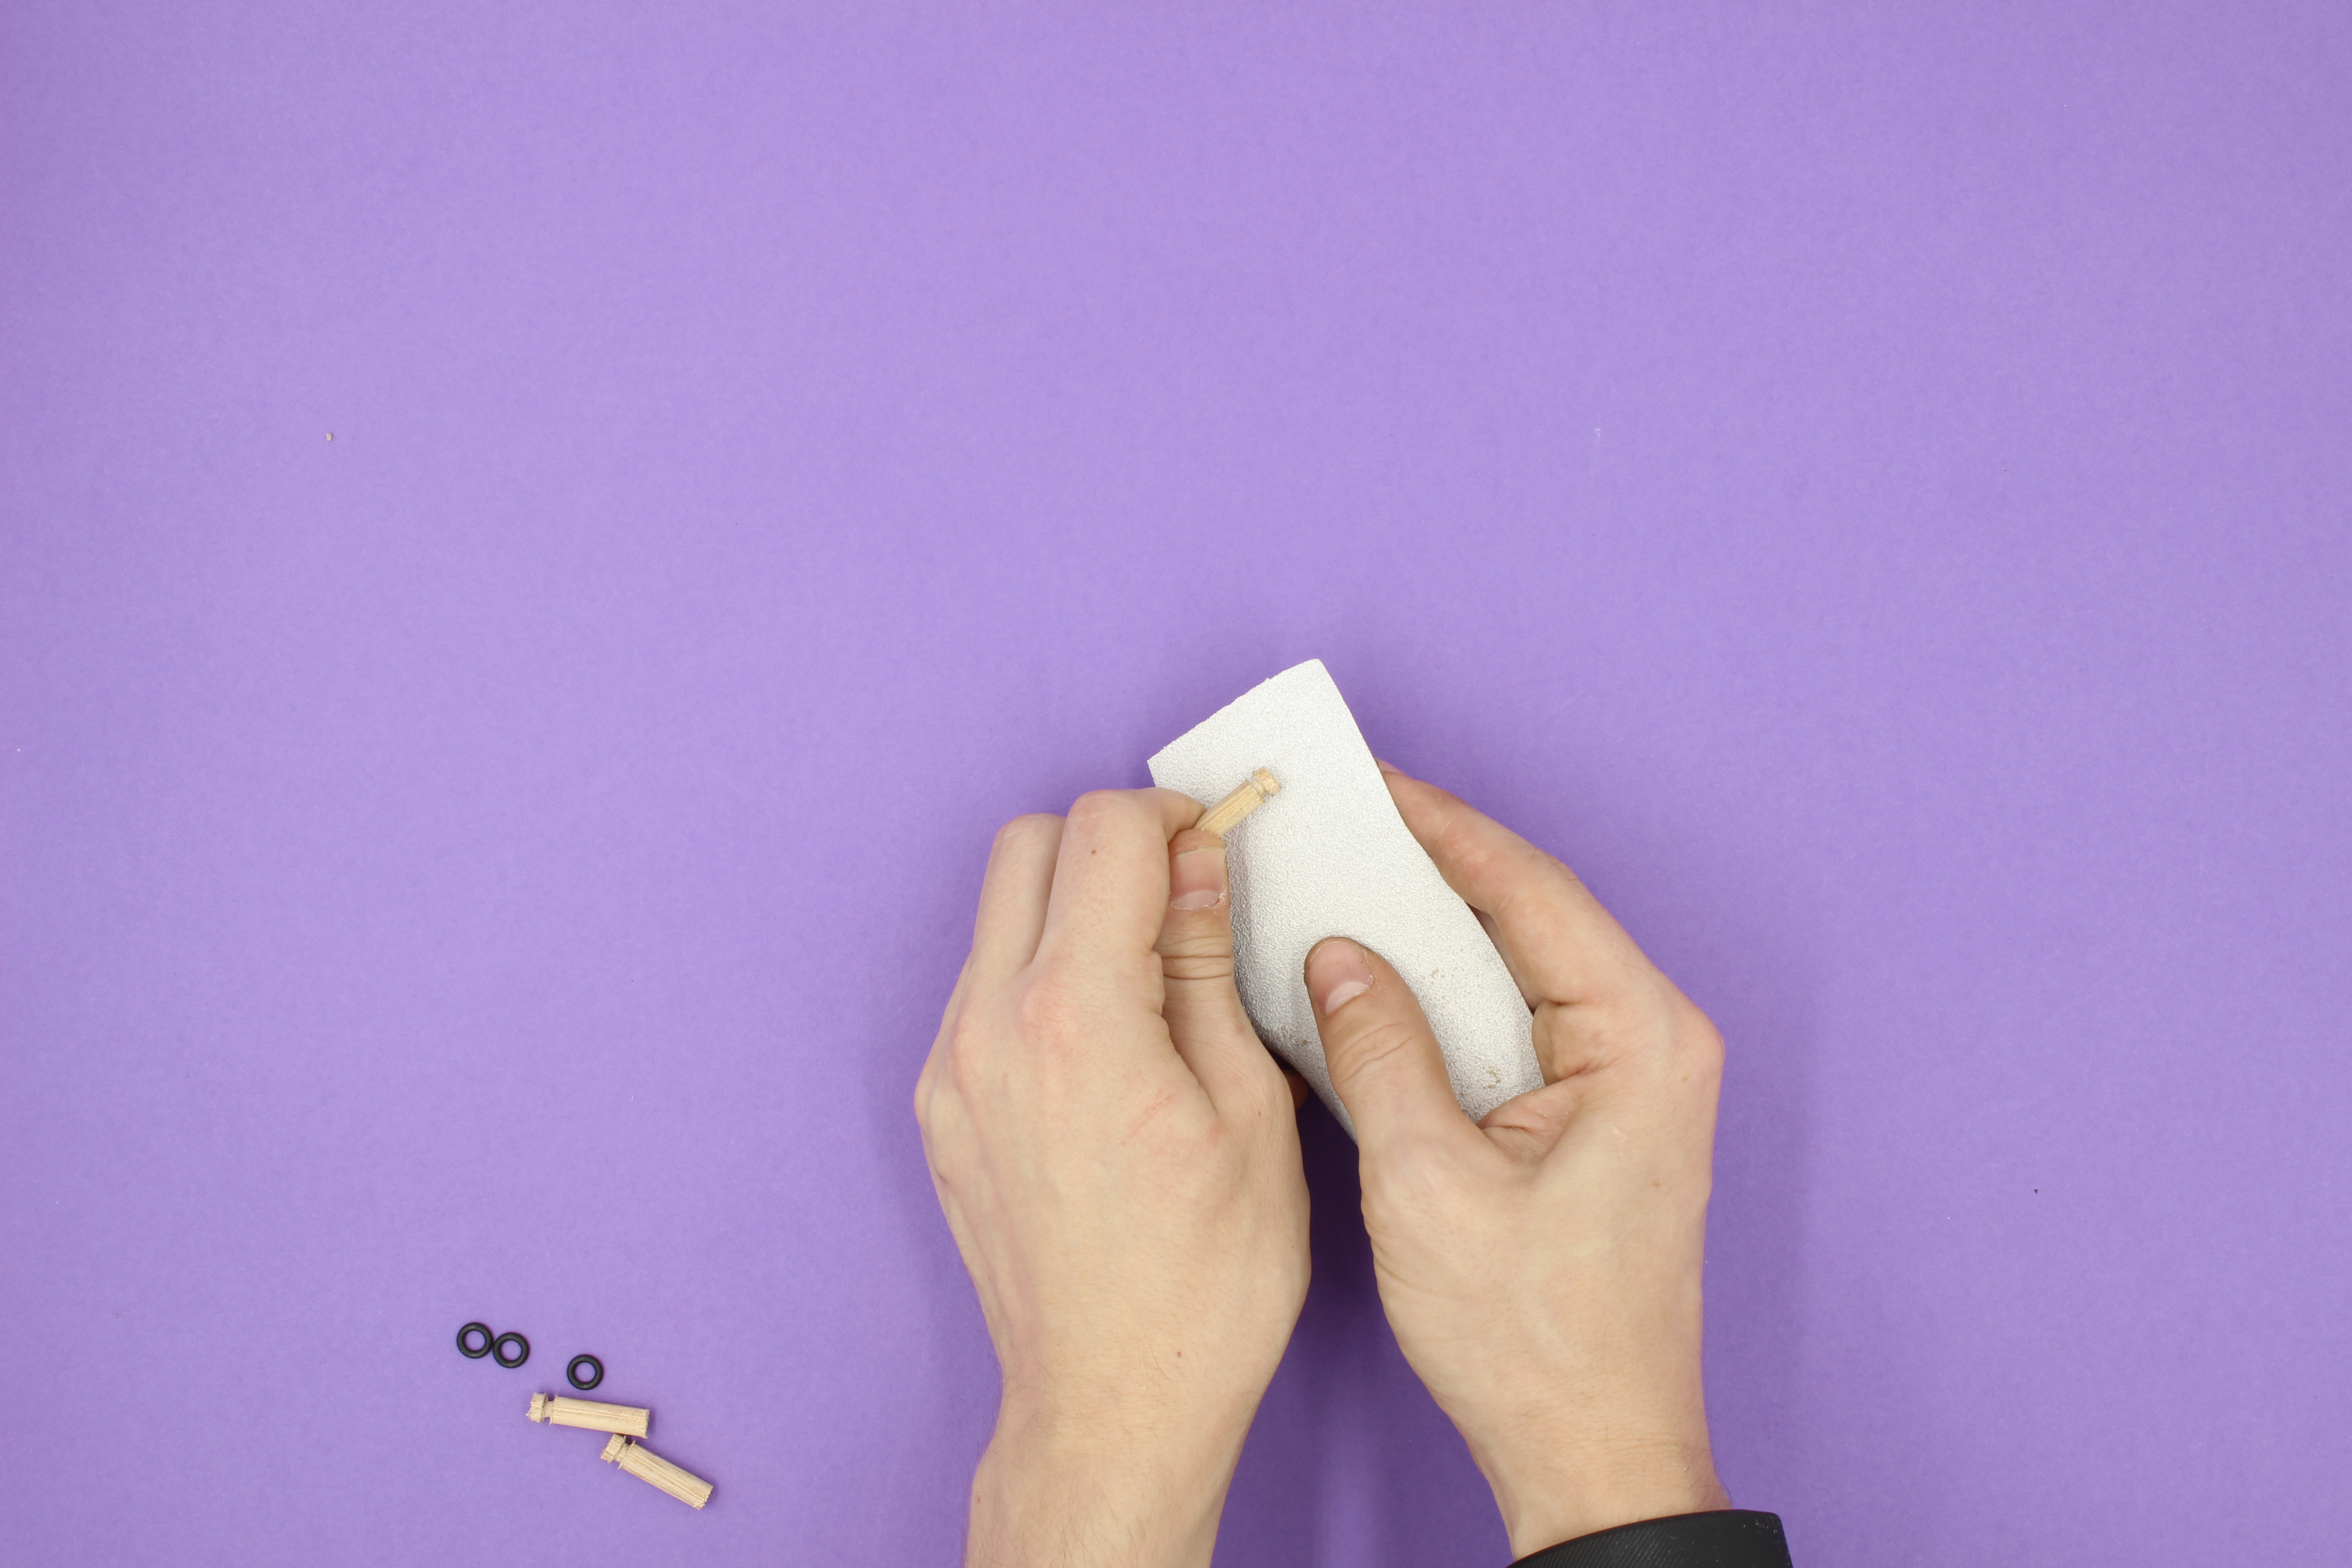
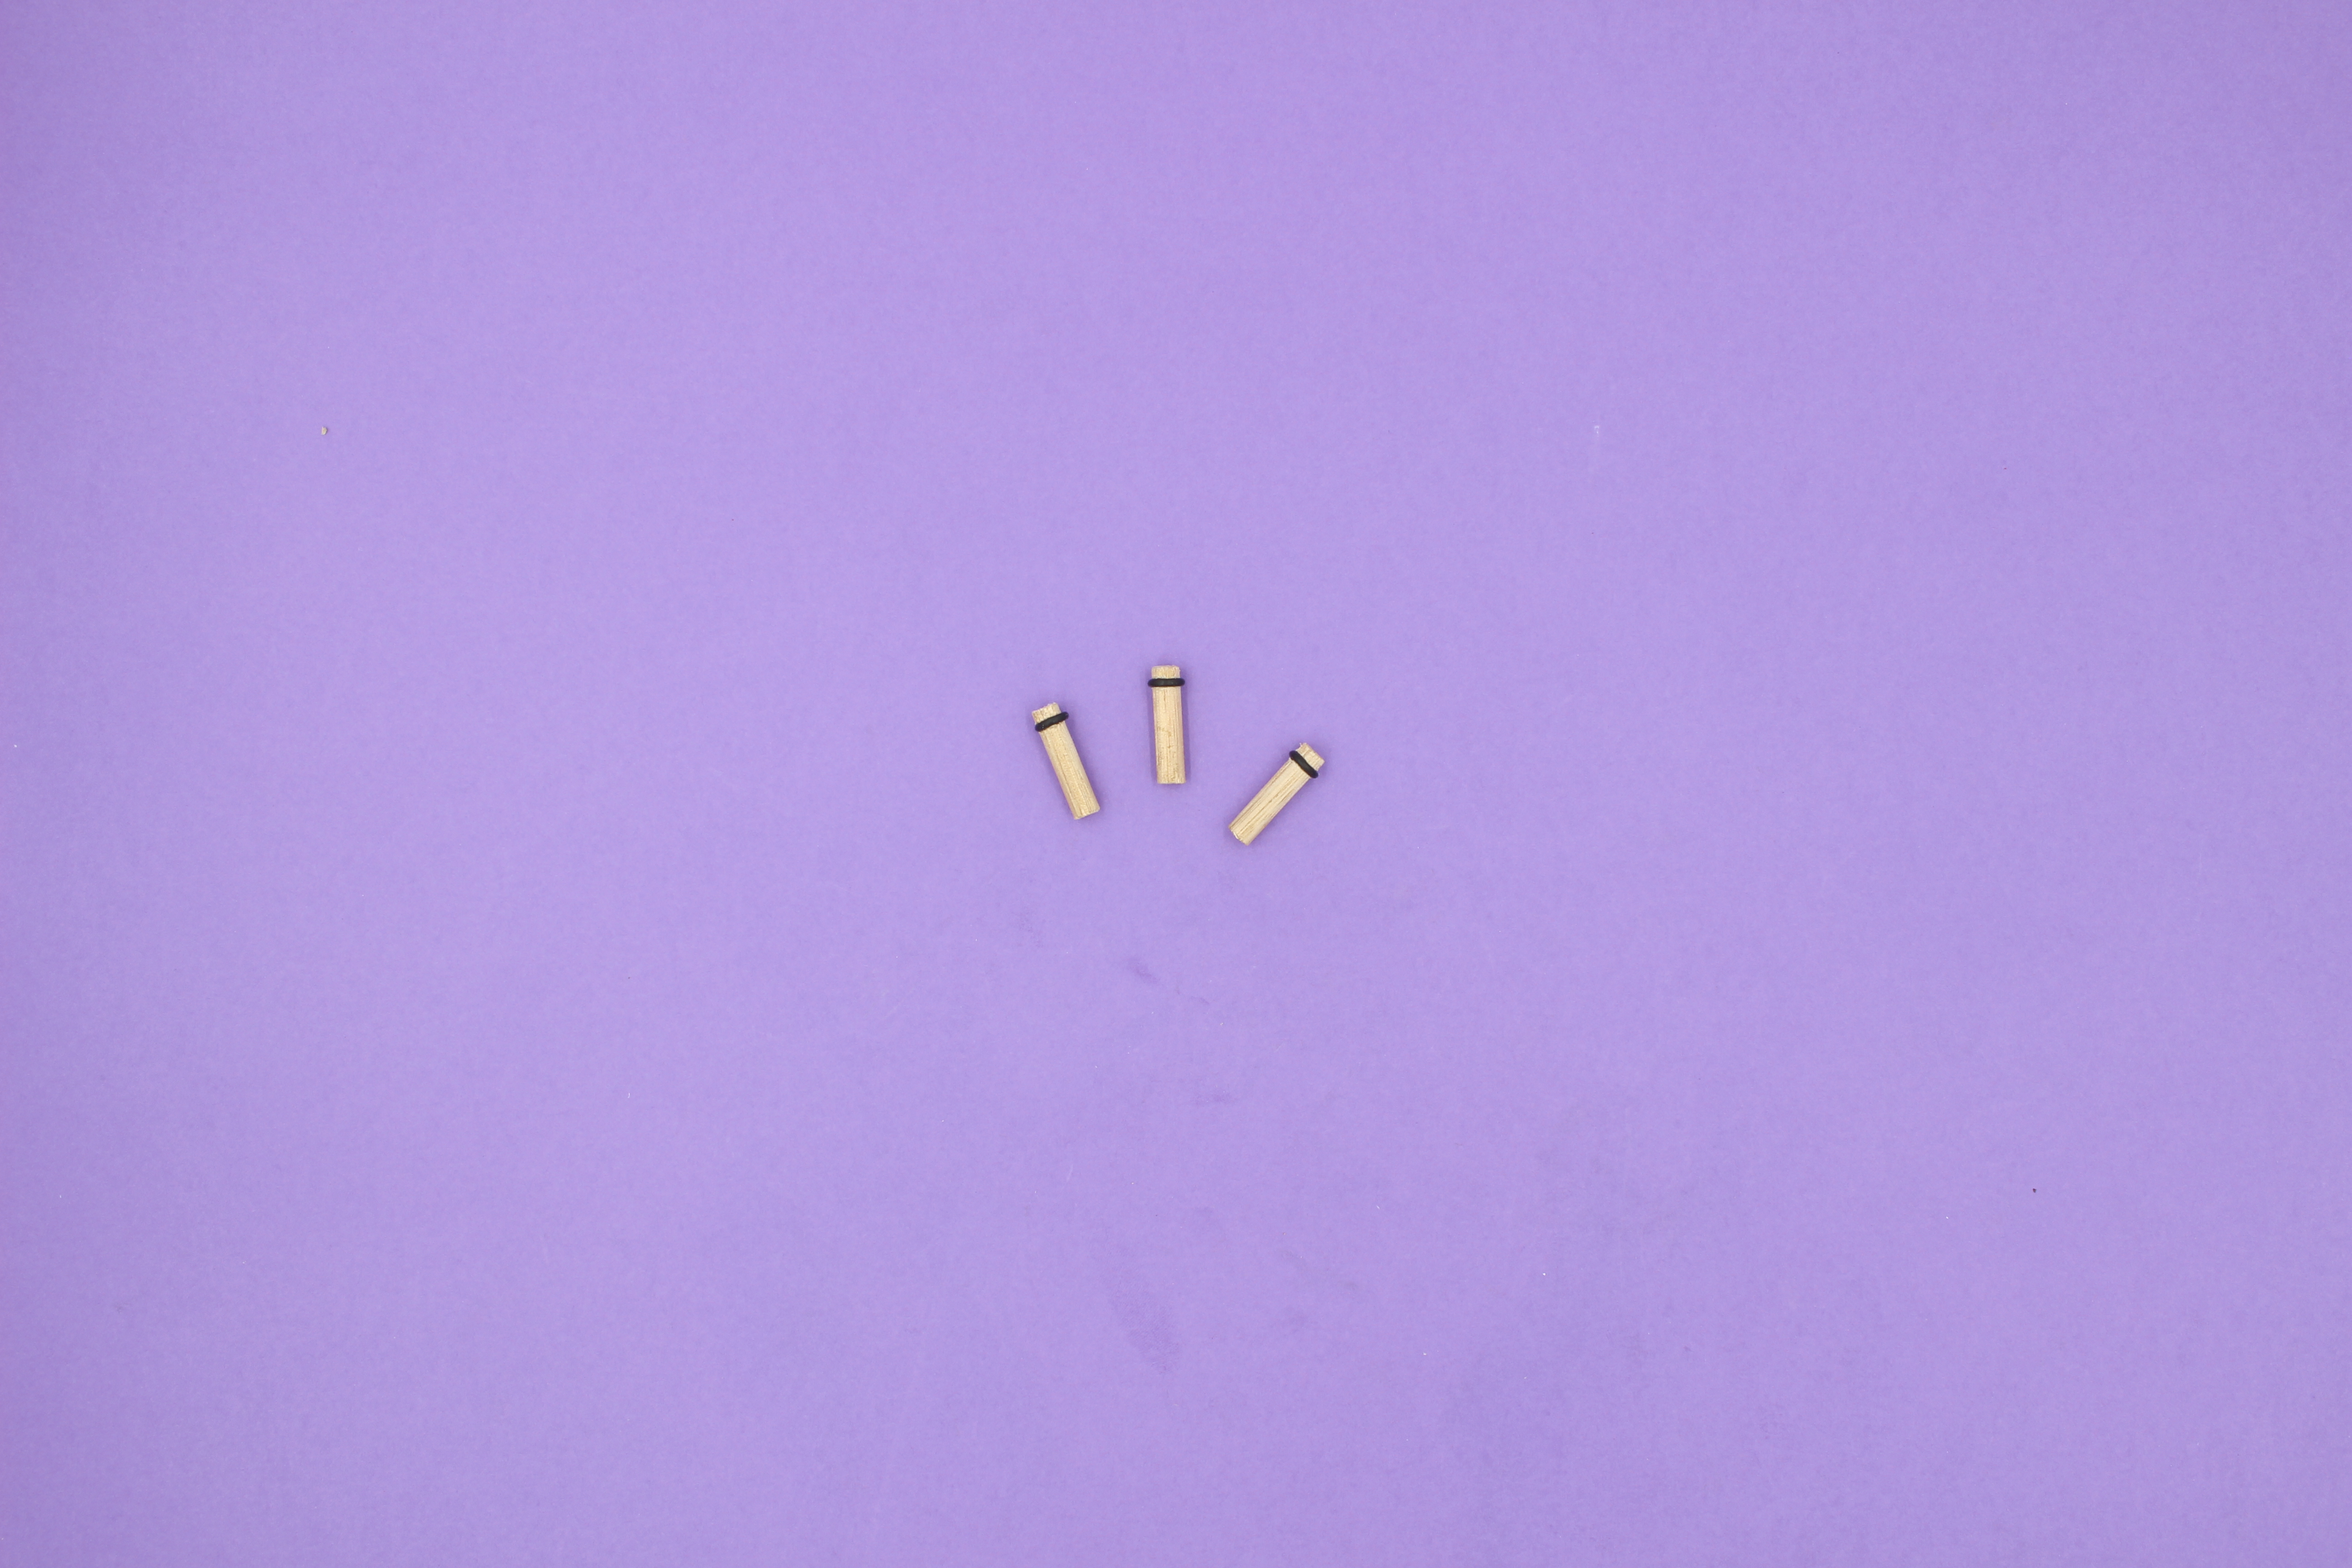
Grab your key pins (which are the three slightly shorter pins with a small groove) and carefully sand them so they are as smooth as possible, we don't want anything sticking out. Once you're happy with the result, thread your o-rings over the key pins and seat it in the groove.
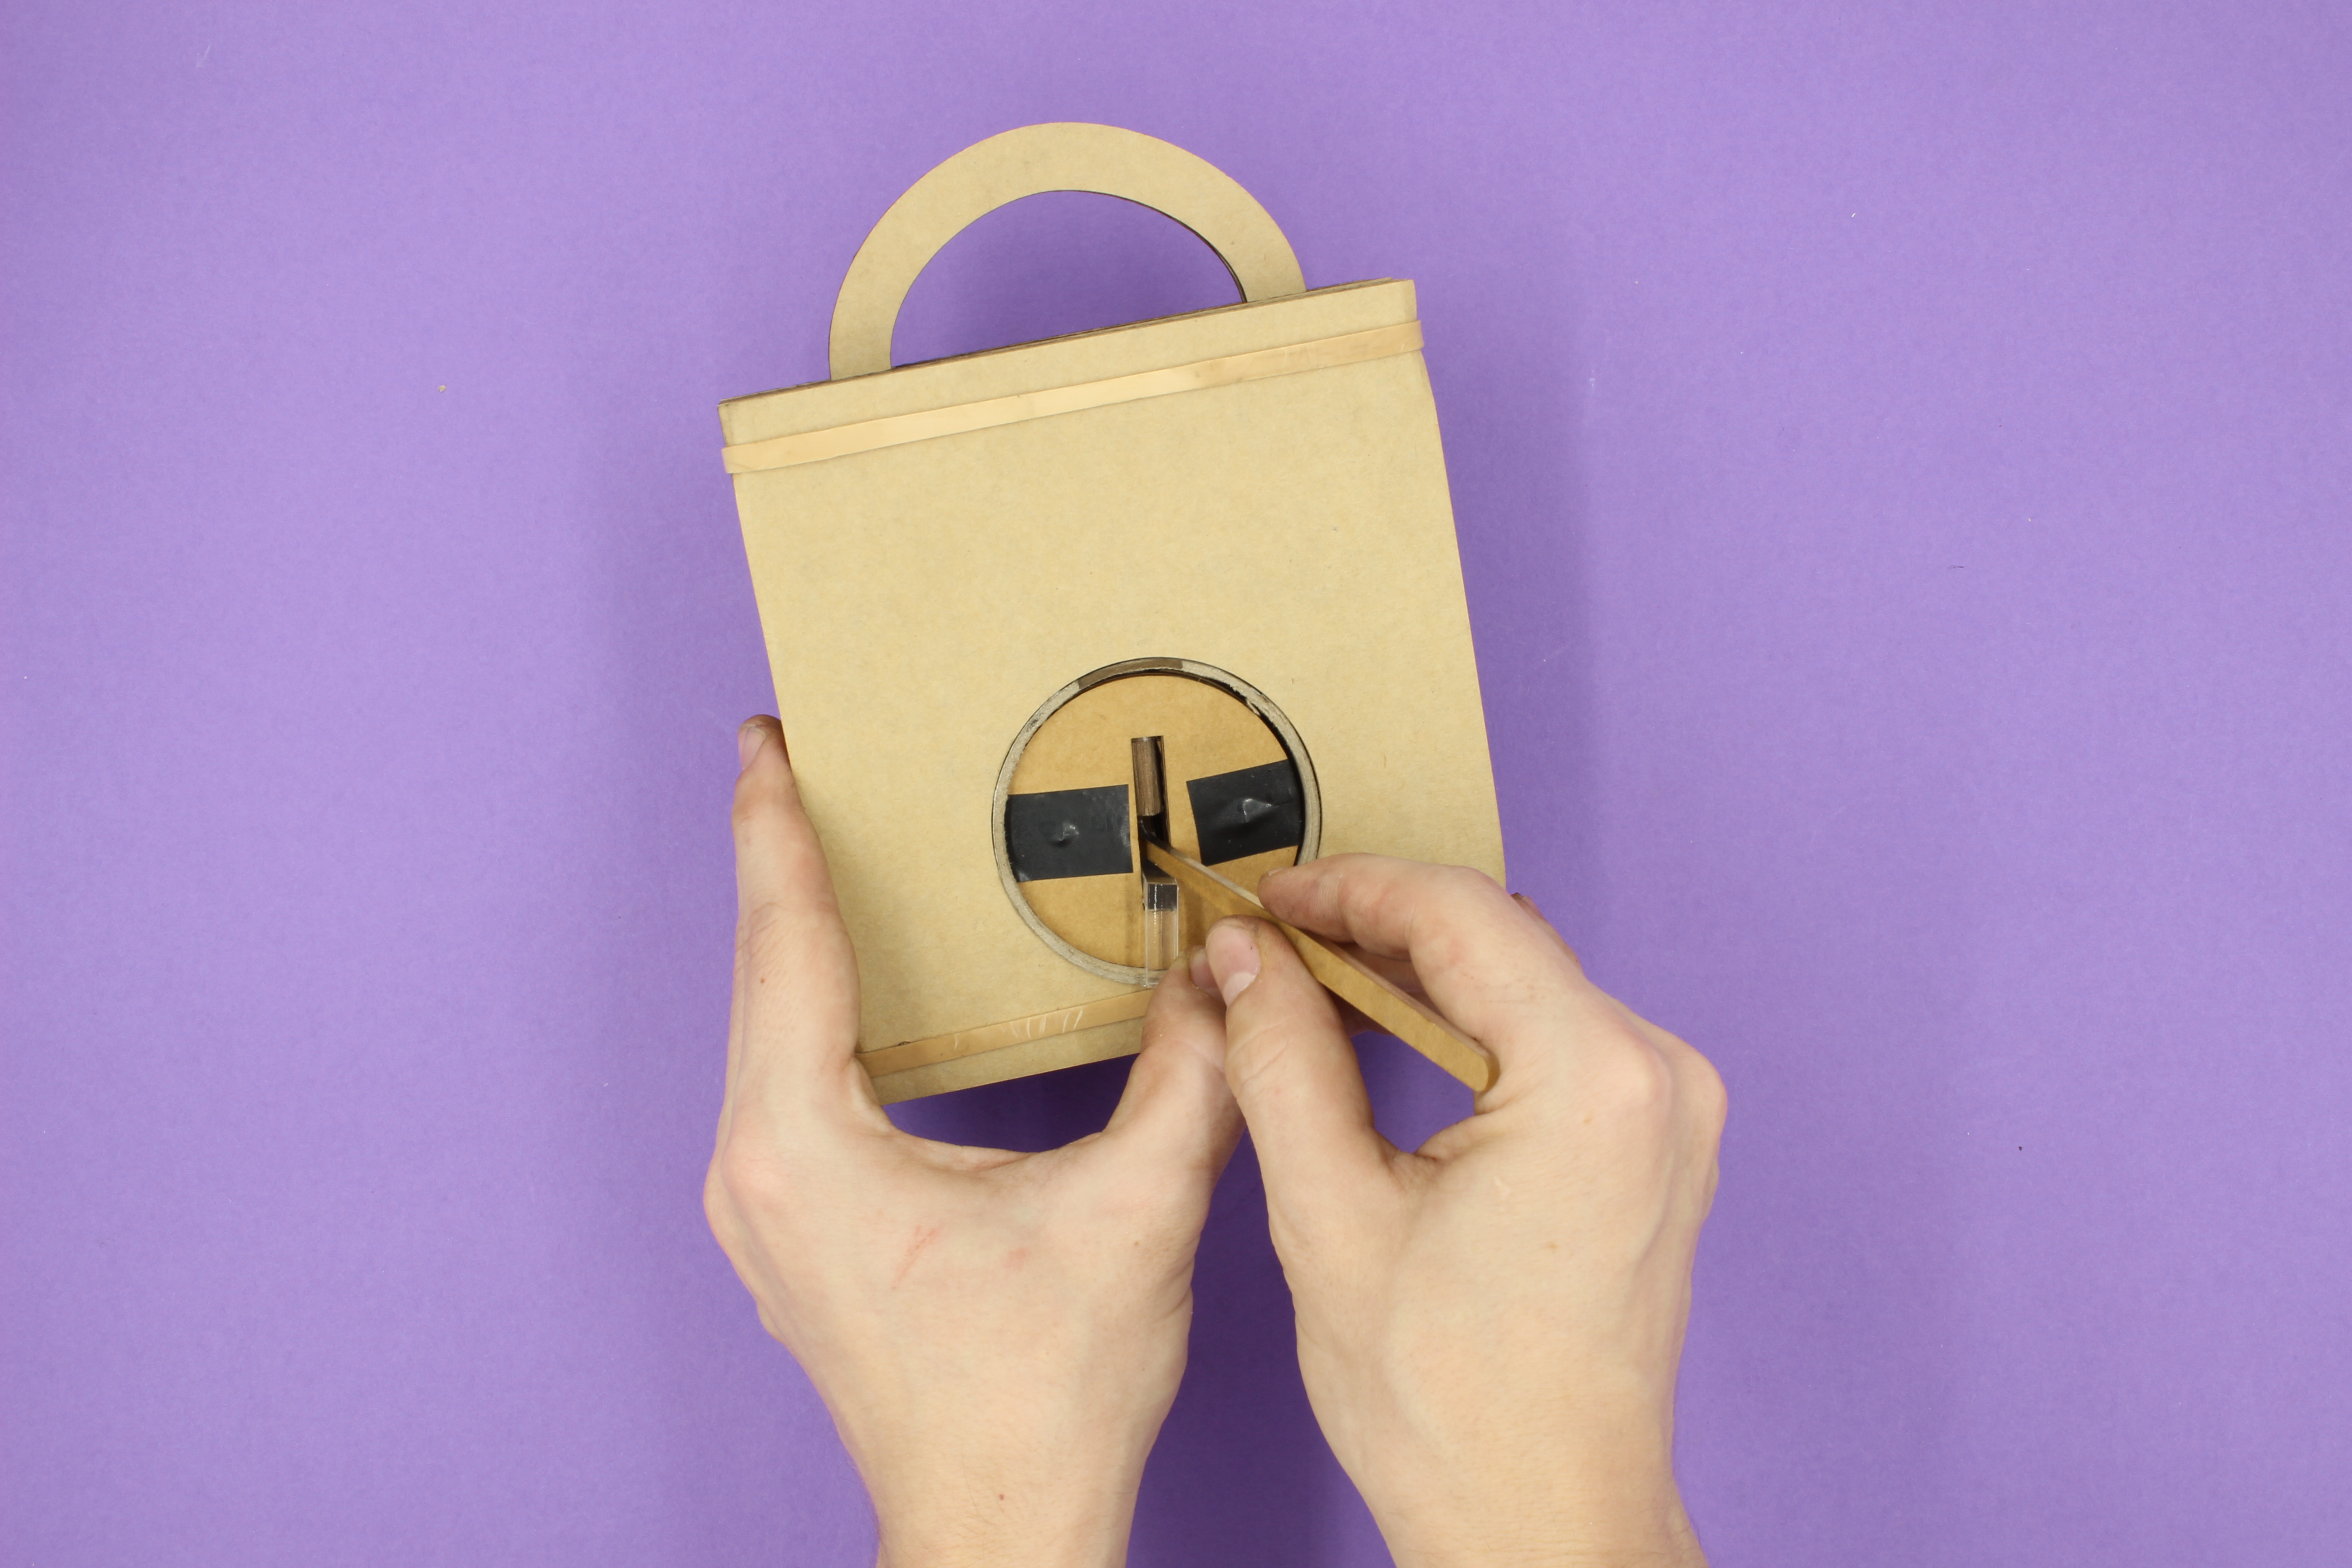
Finally, insert the key pins into the holes in the plug keeping the end with the o-ring pointed up, our acrylic rings should keep it from falling too far down. It should be easy to push the pins up and fall back down when released. You can use your lock pick or tension wrench to test it out. If you are having problems you might need to adjust your rings.
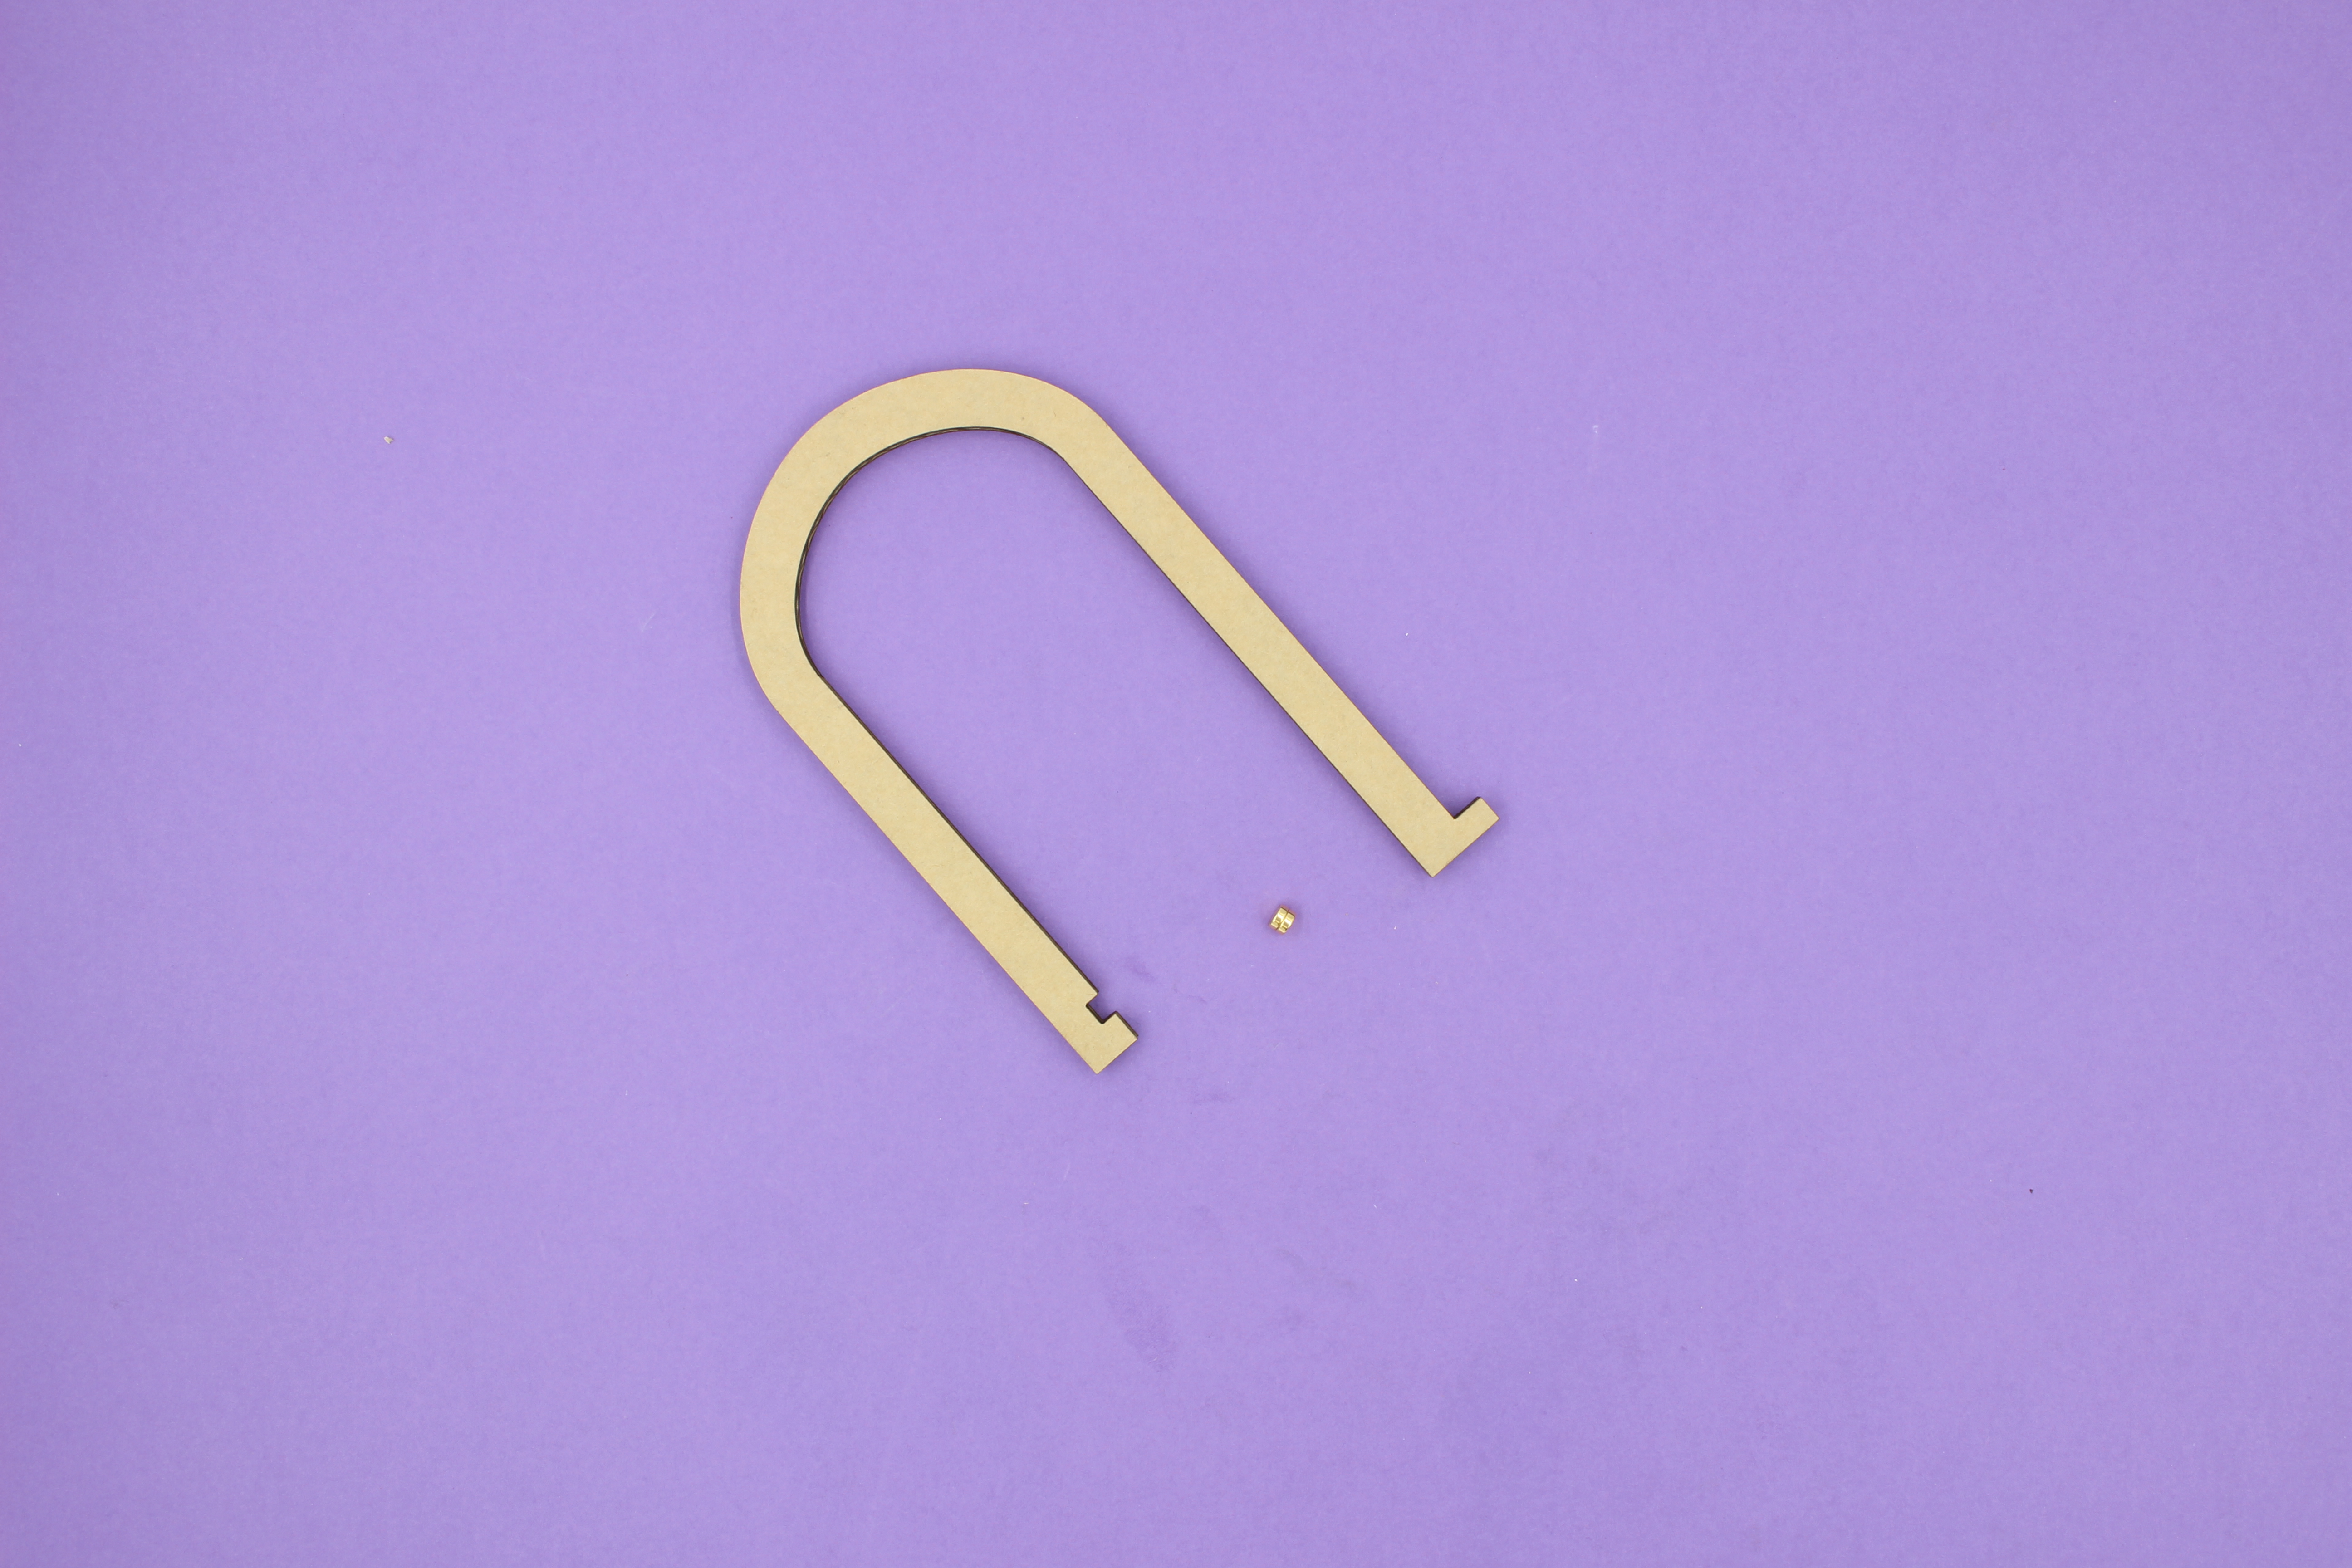
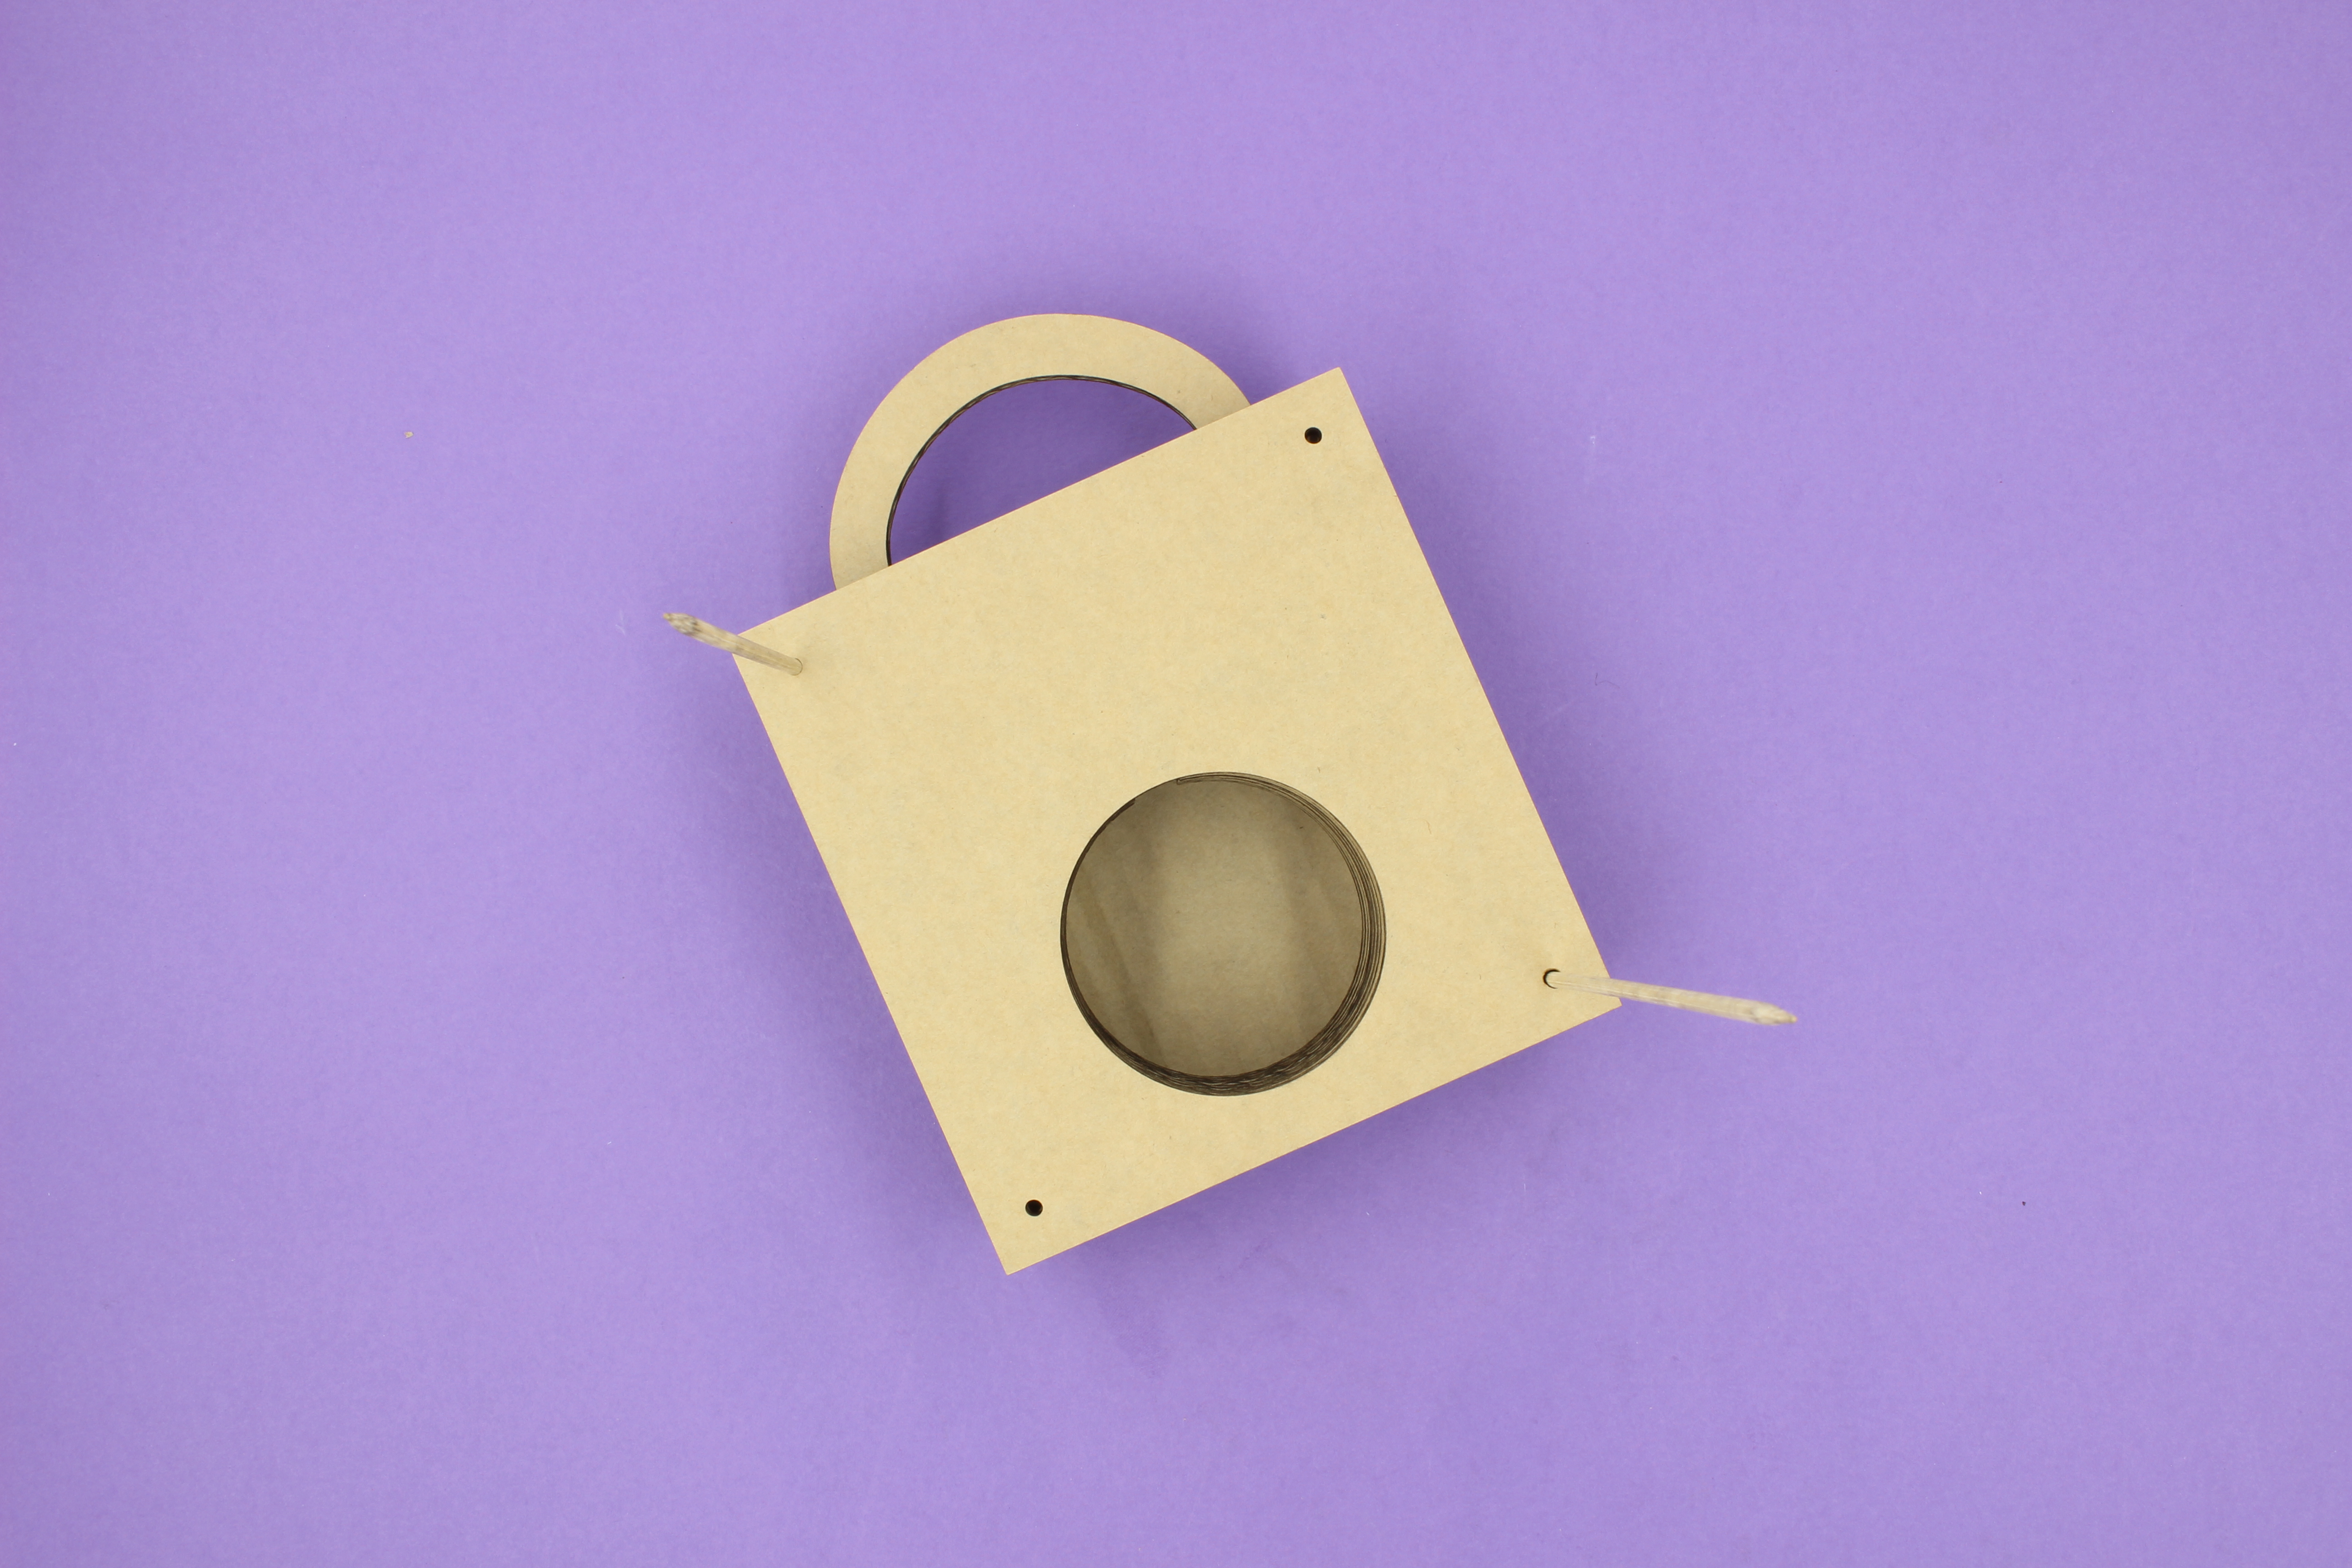
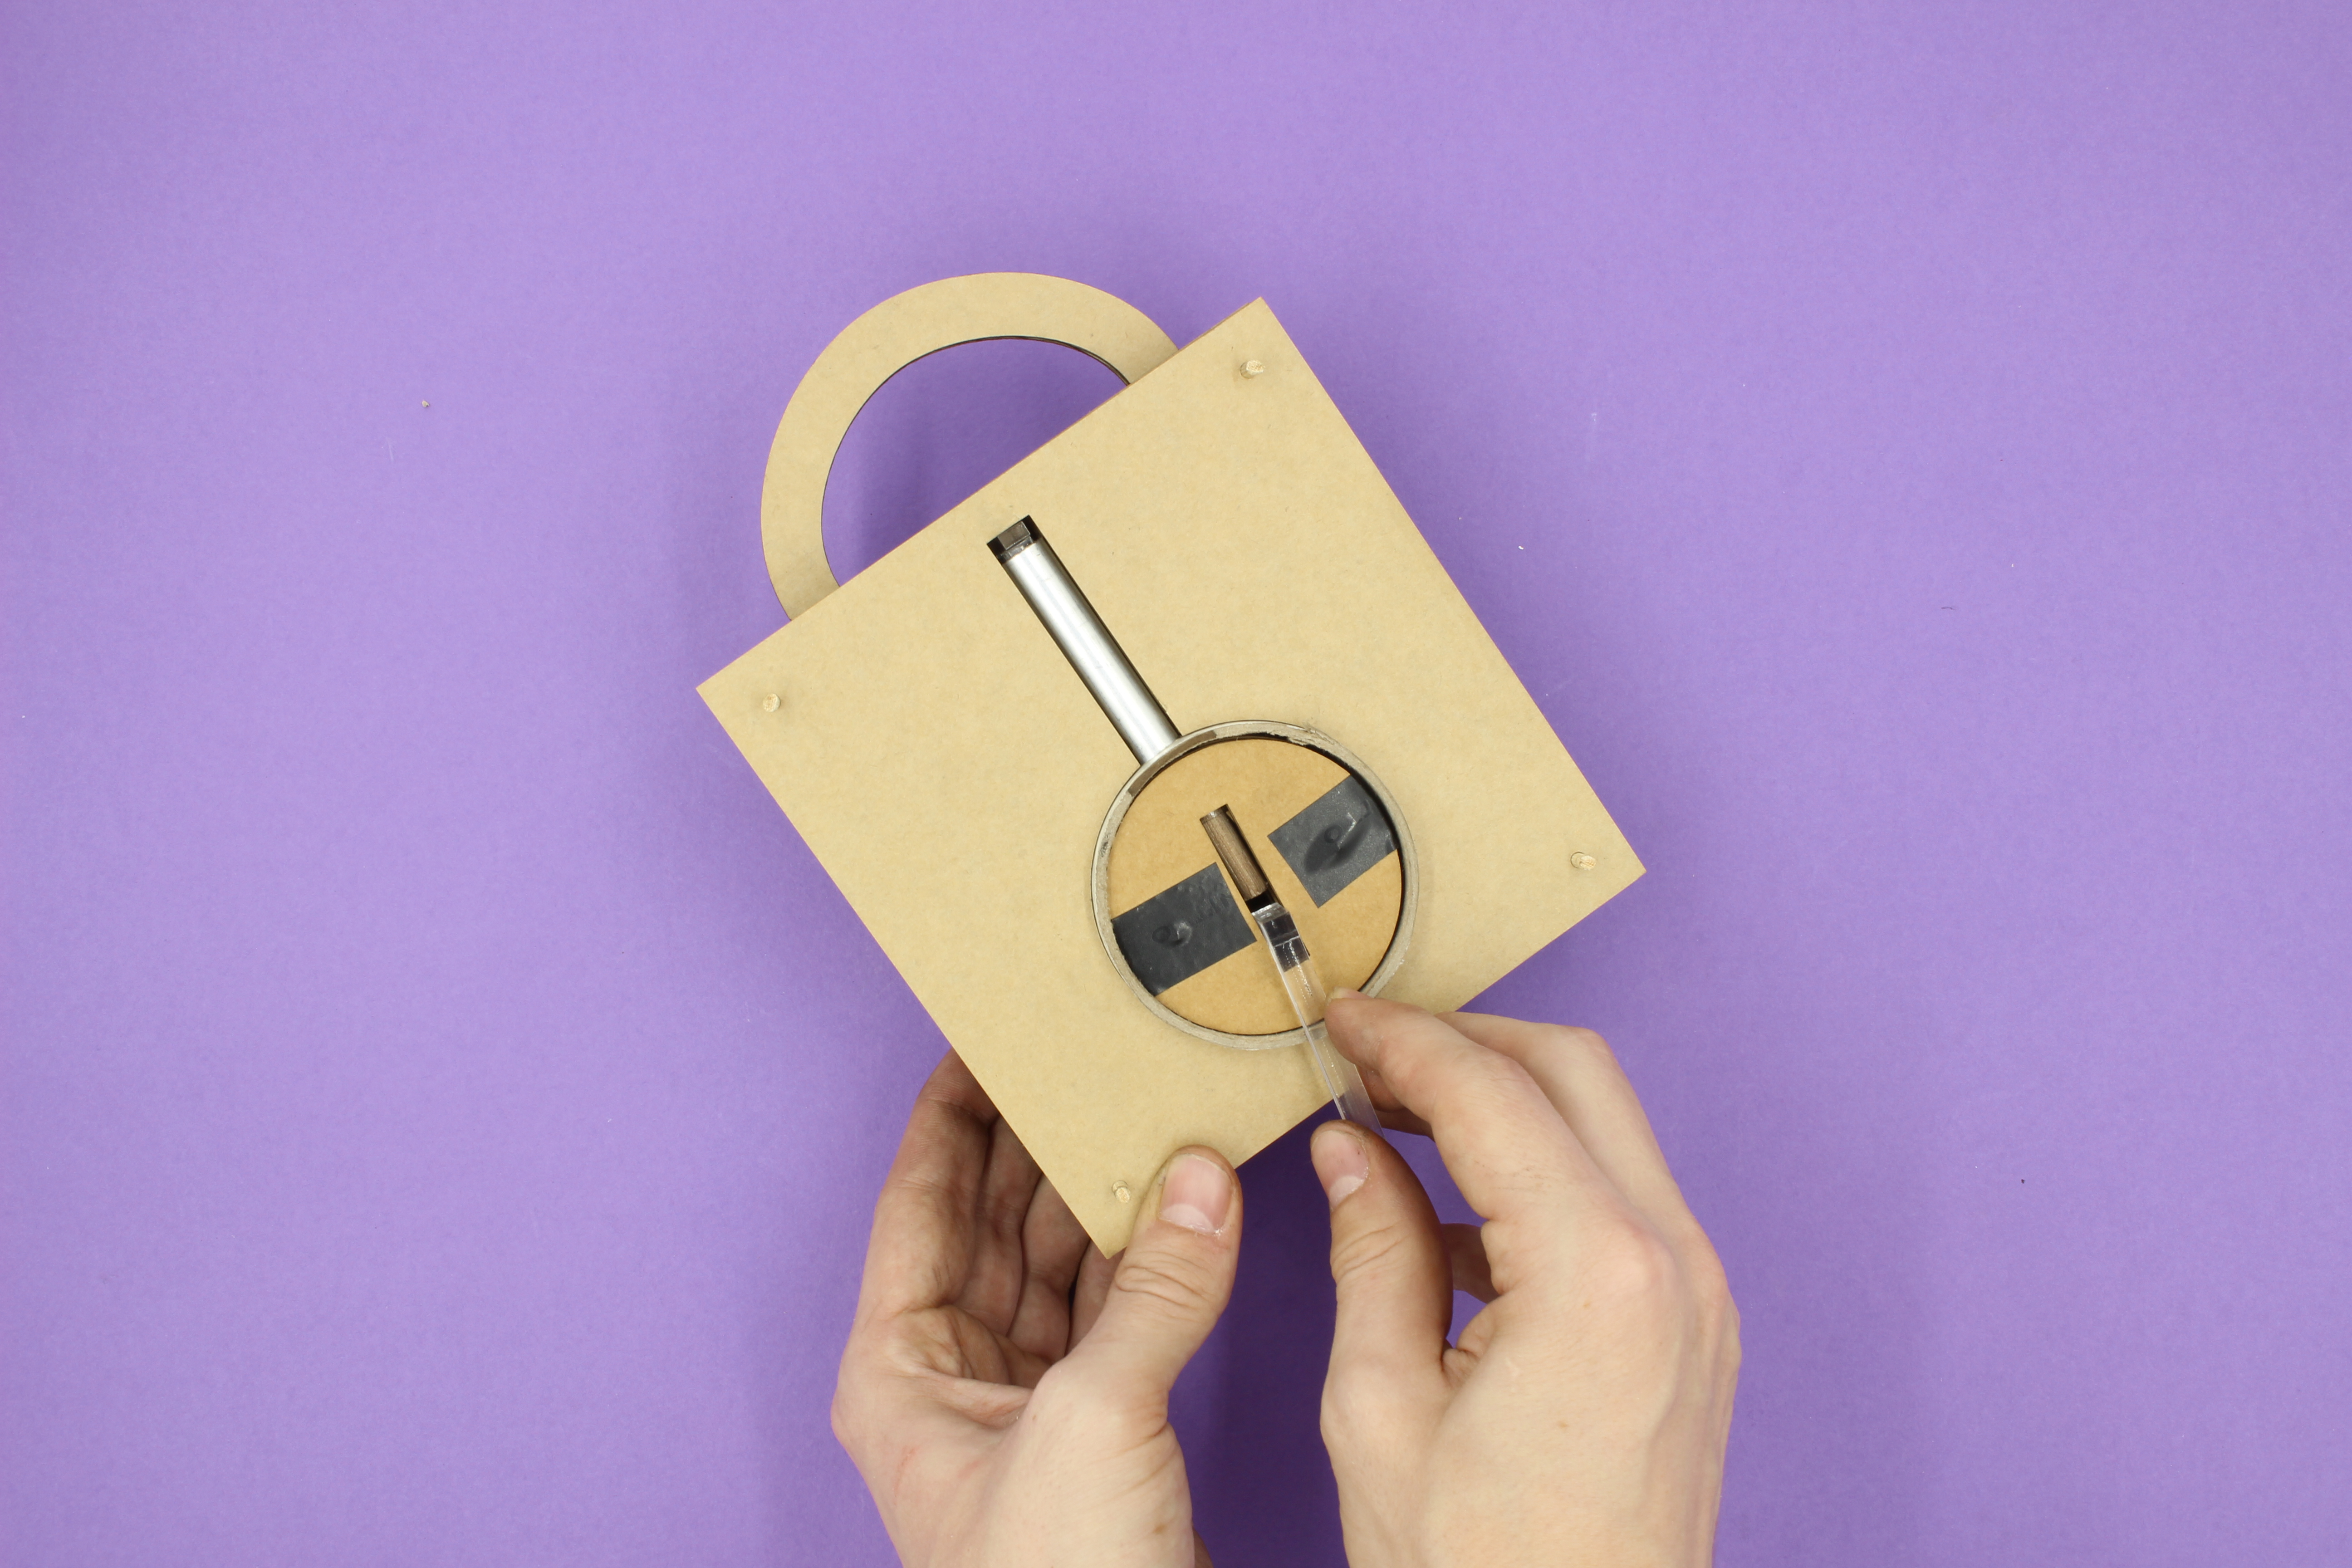
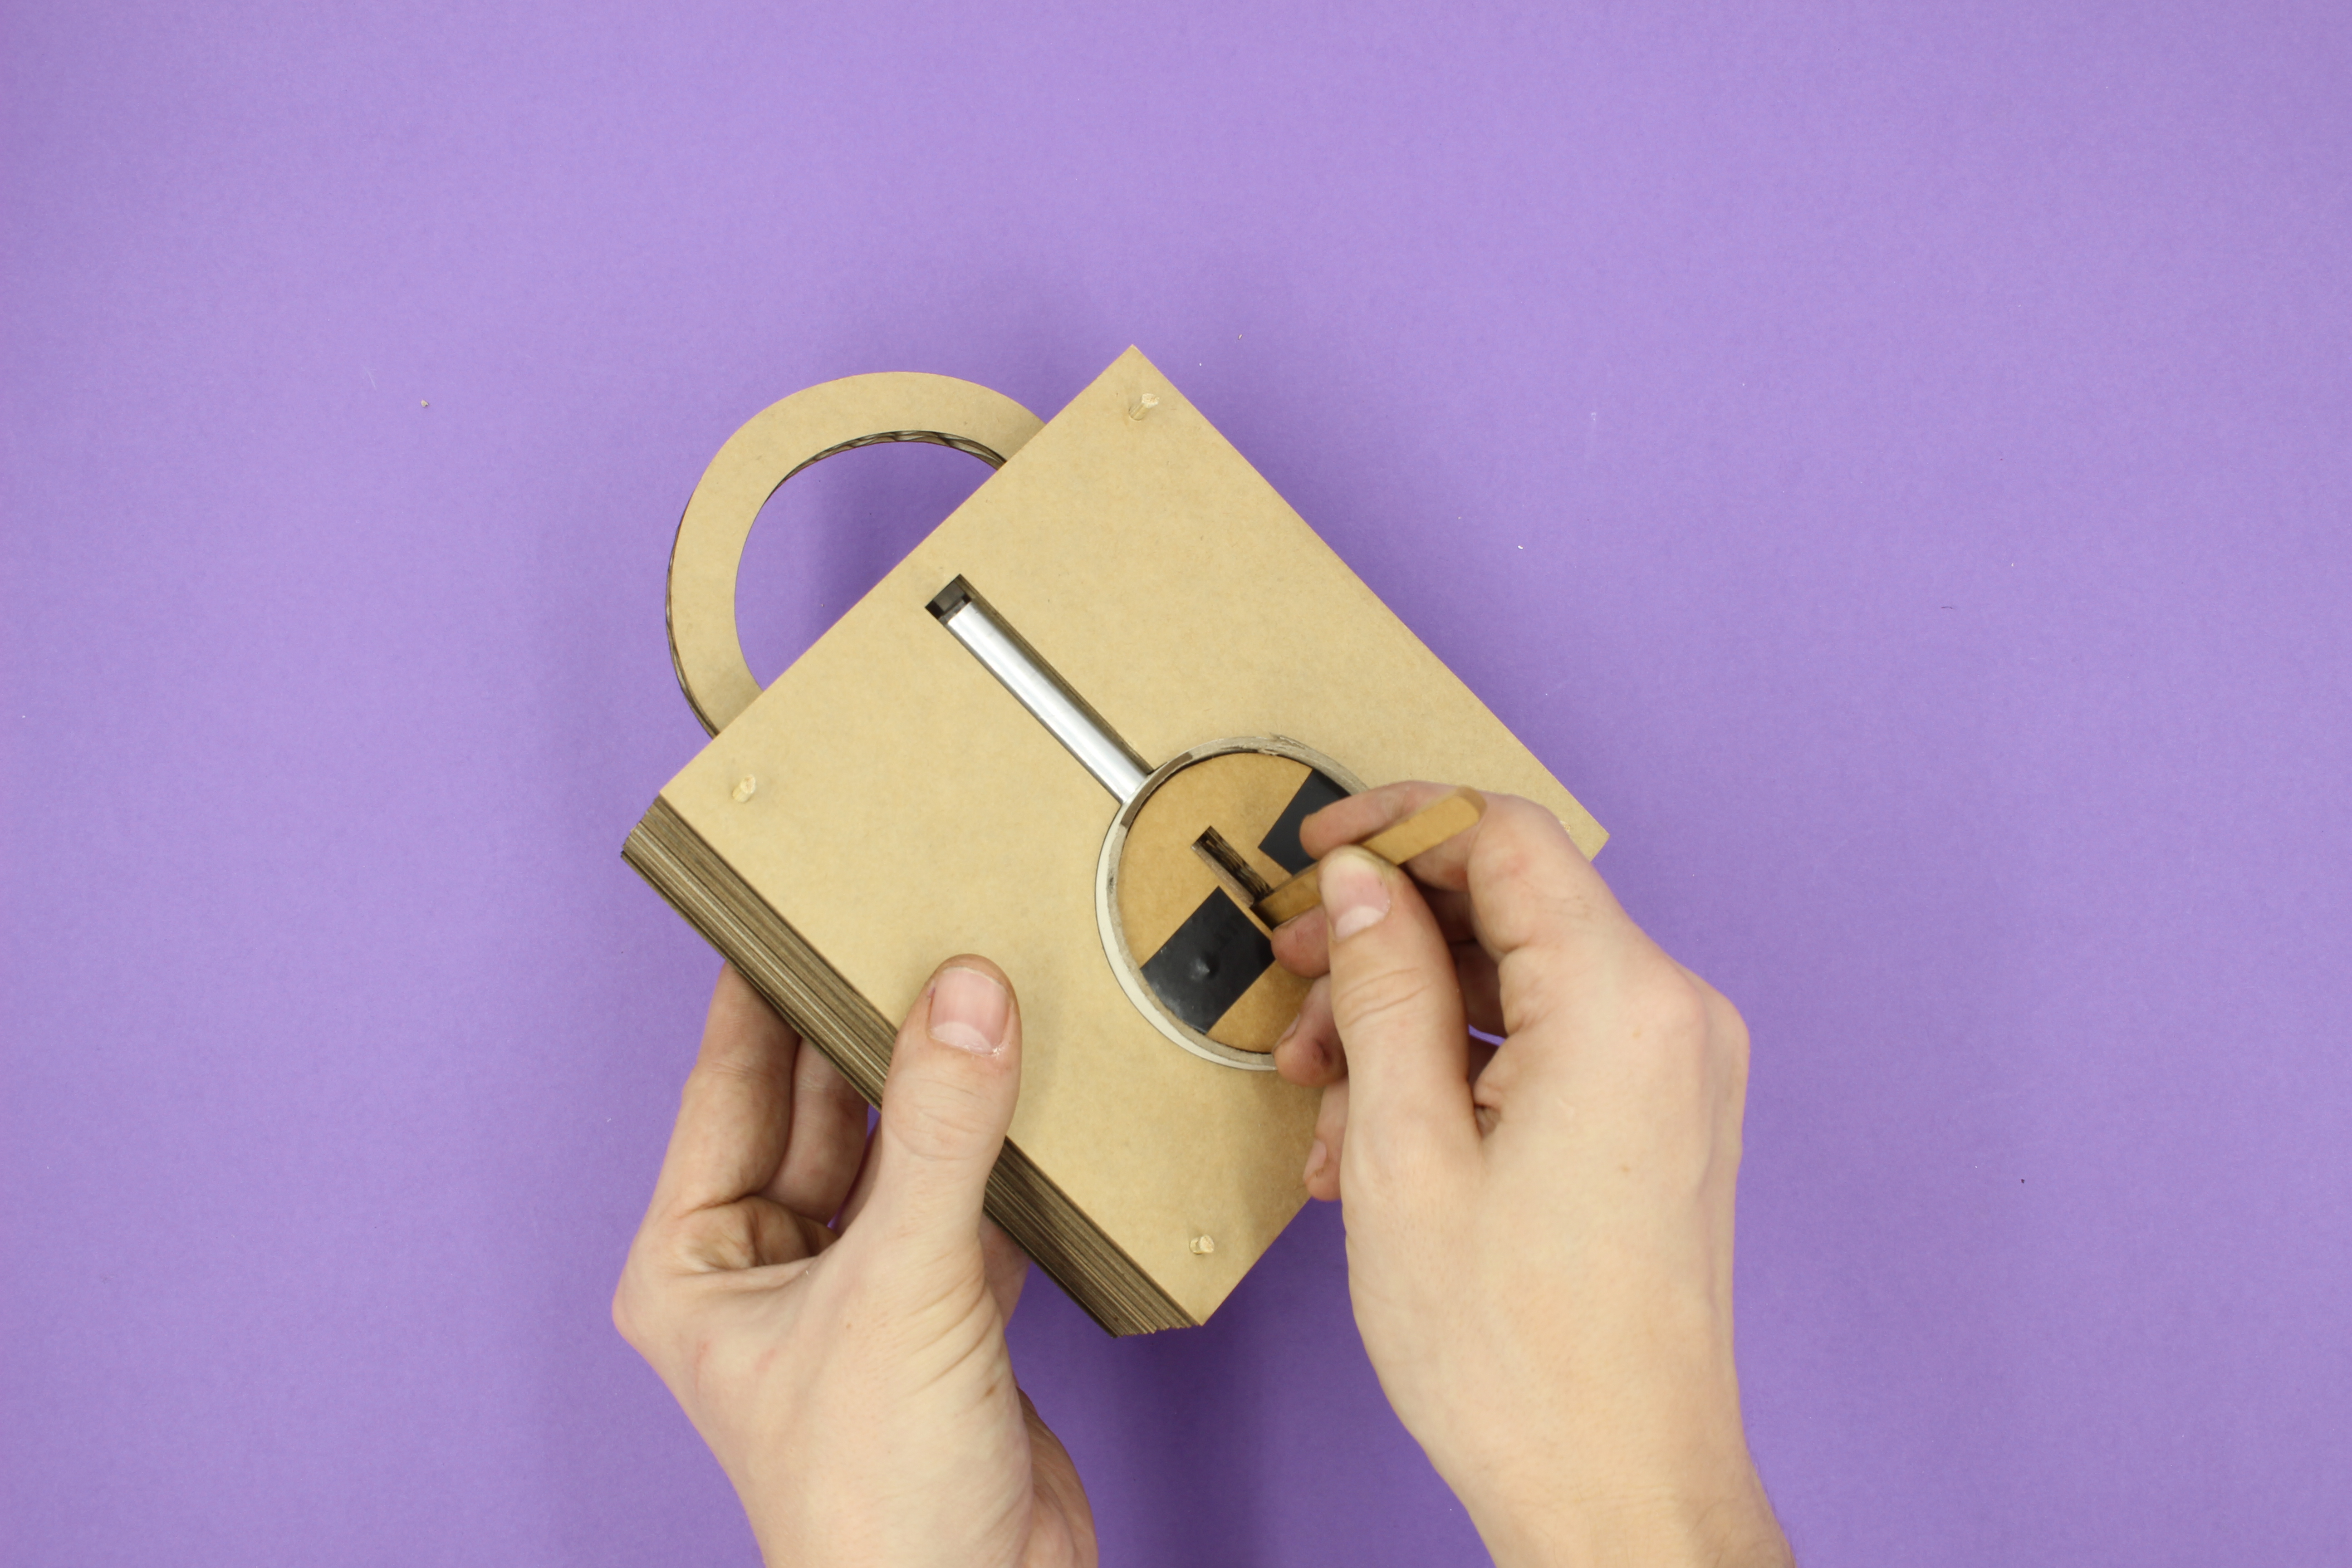
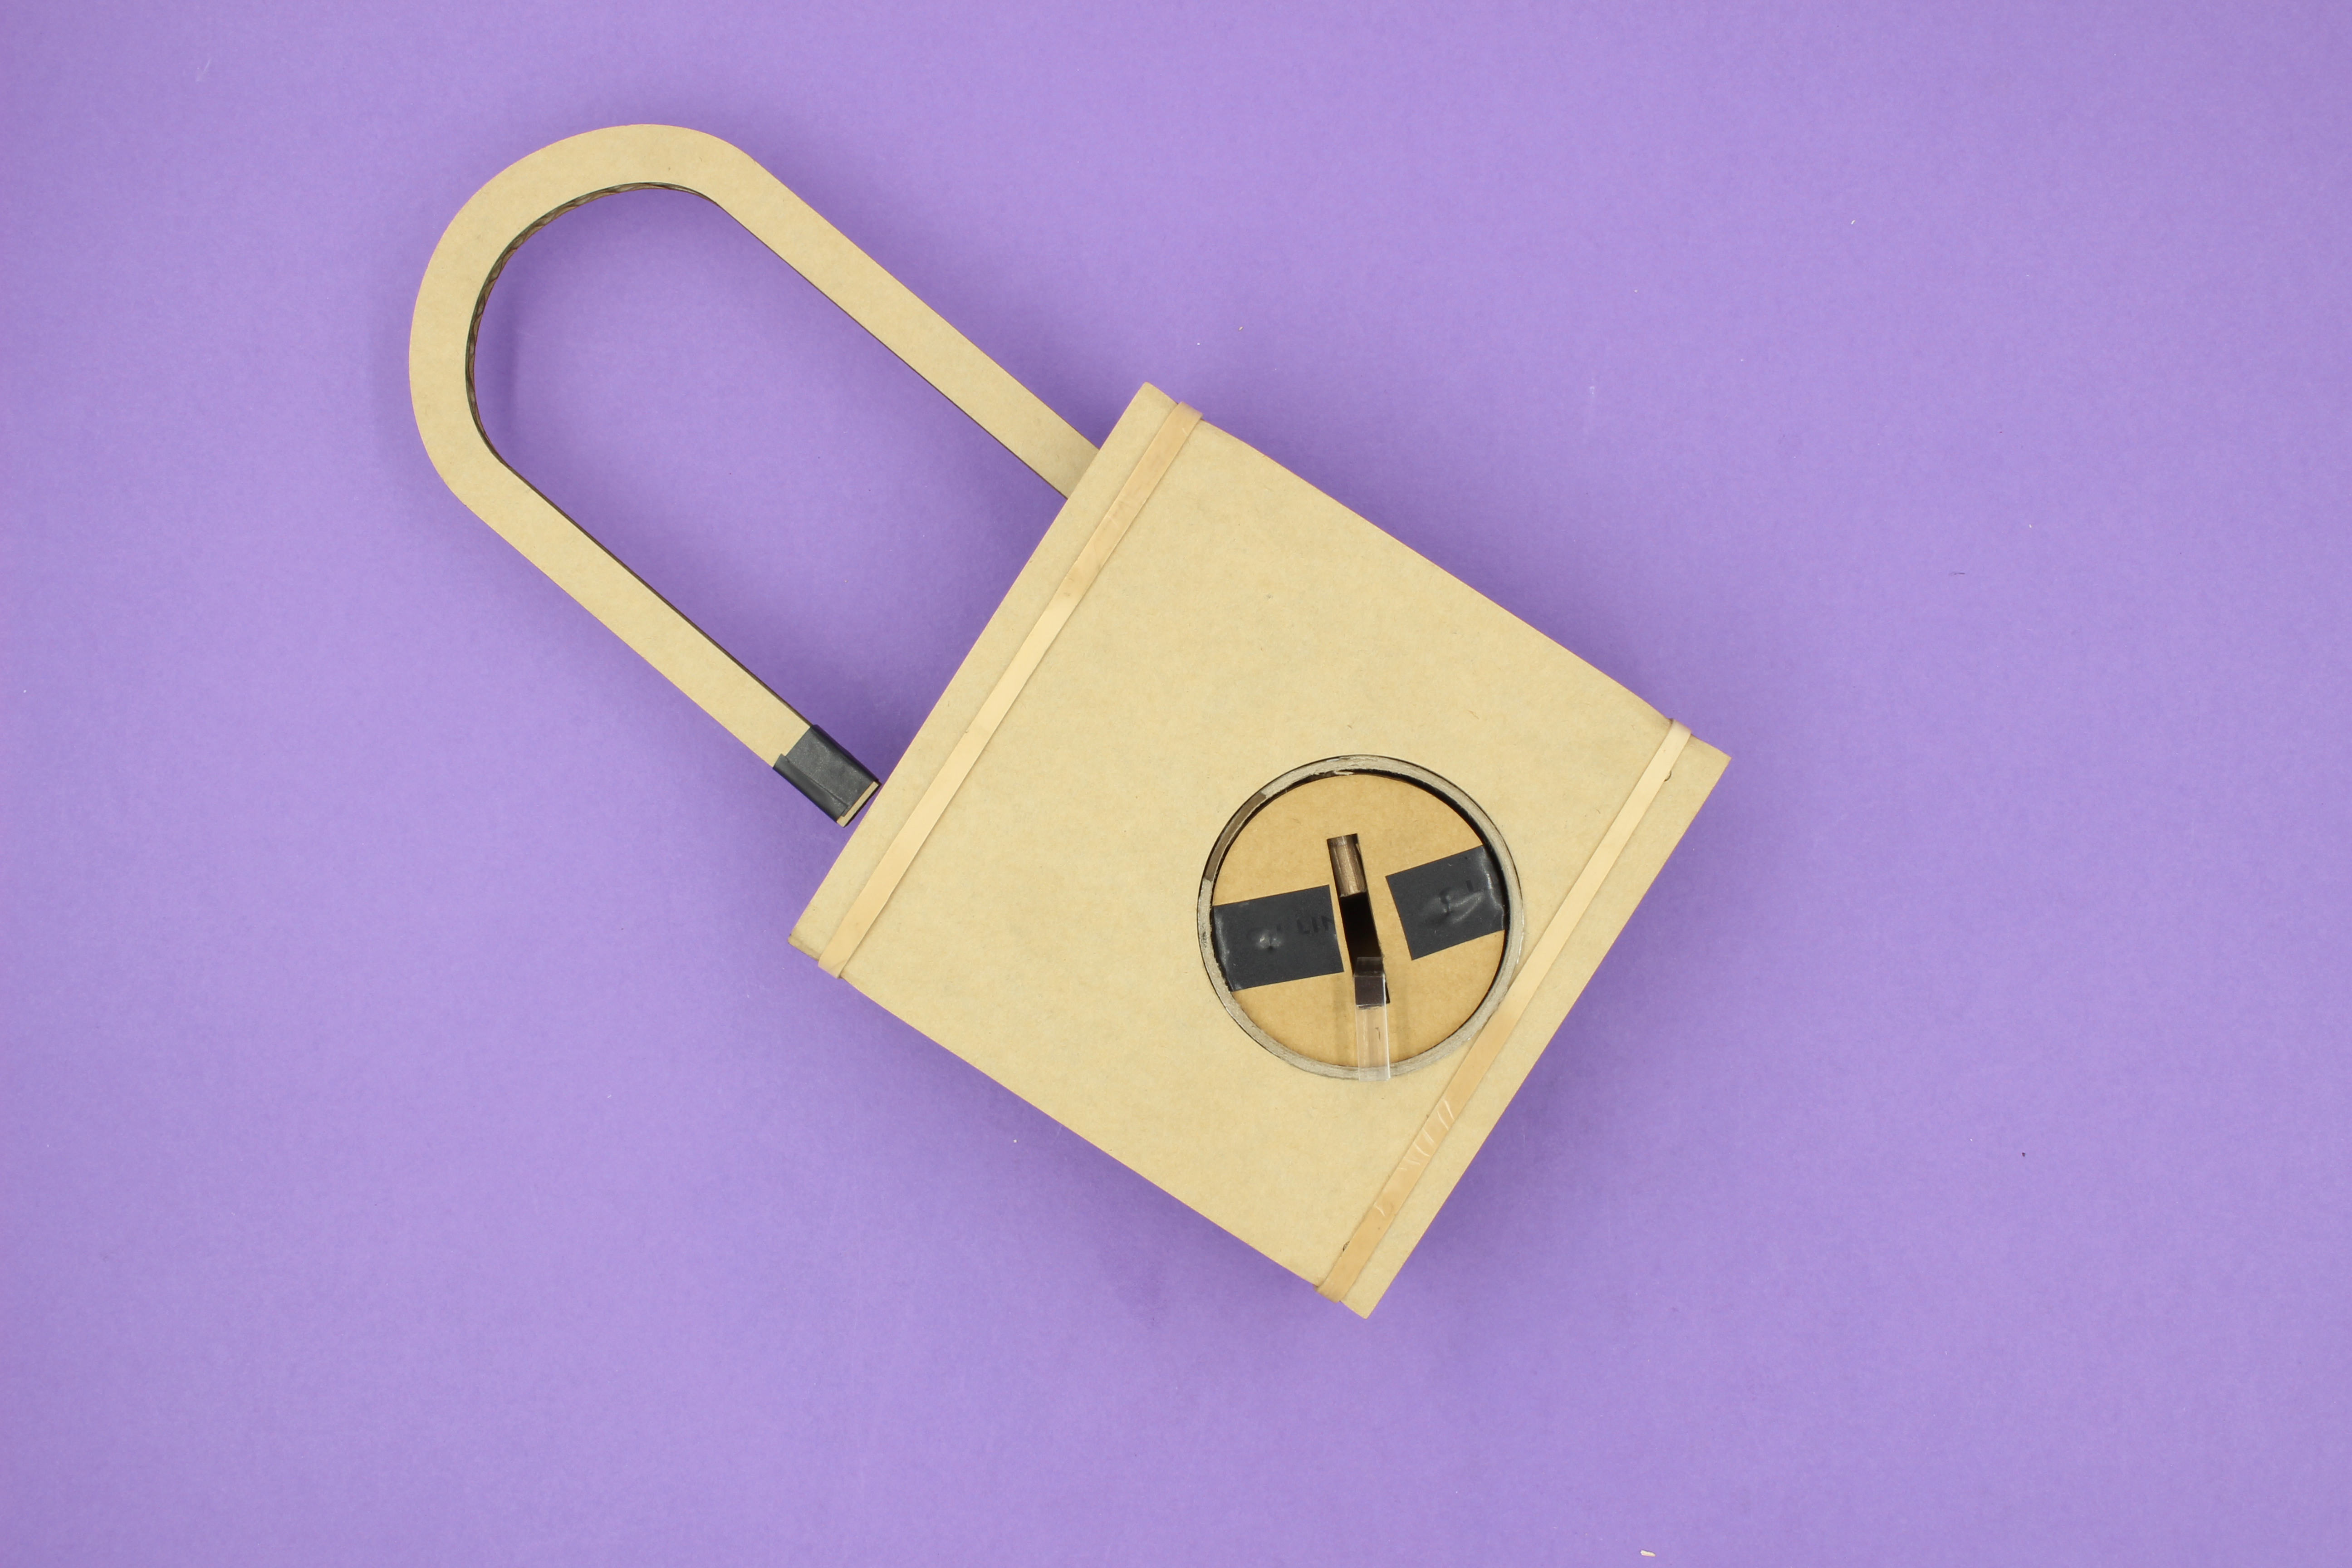
Step Three: The Hull
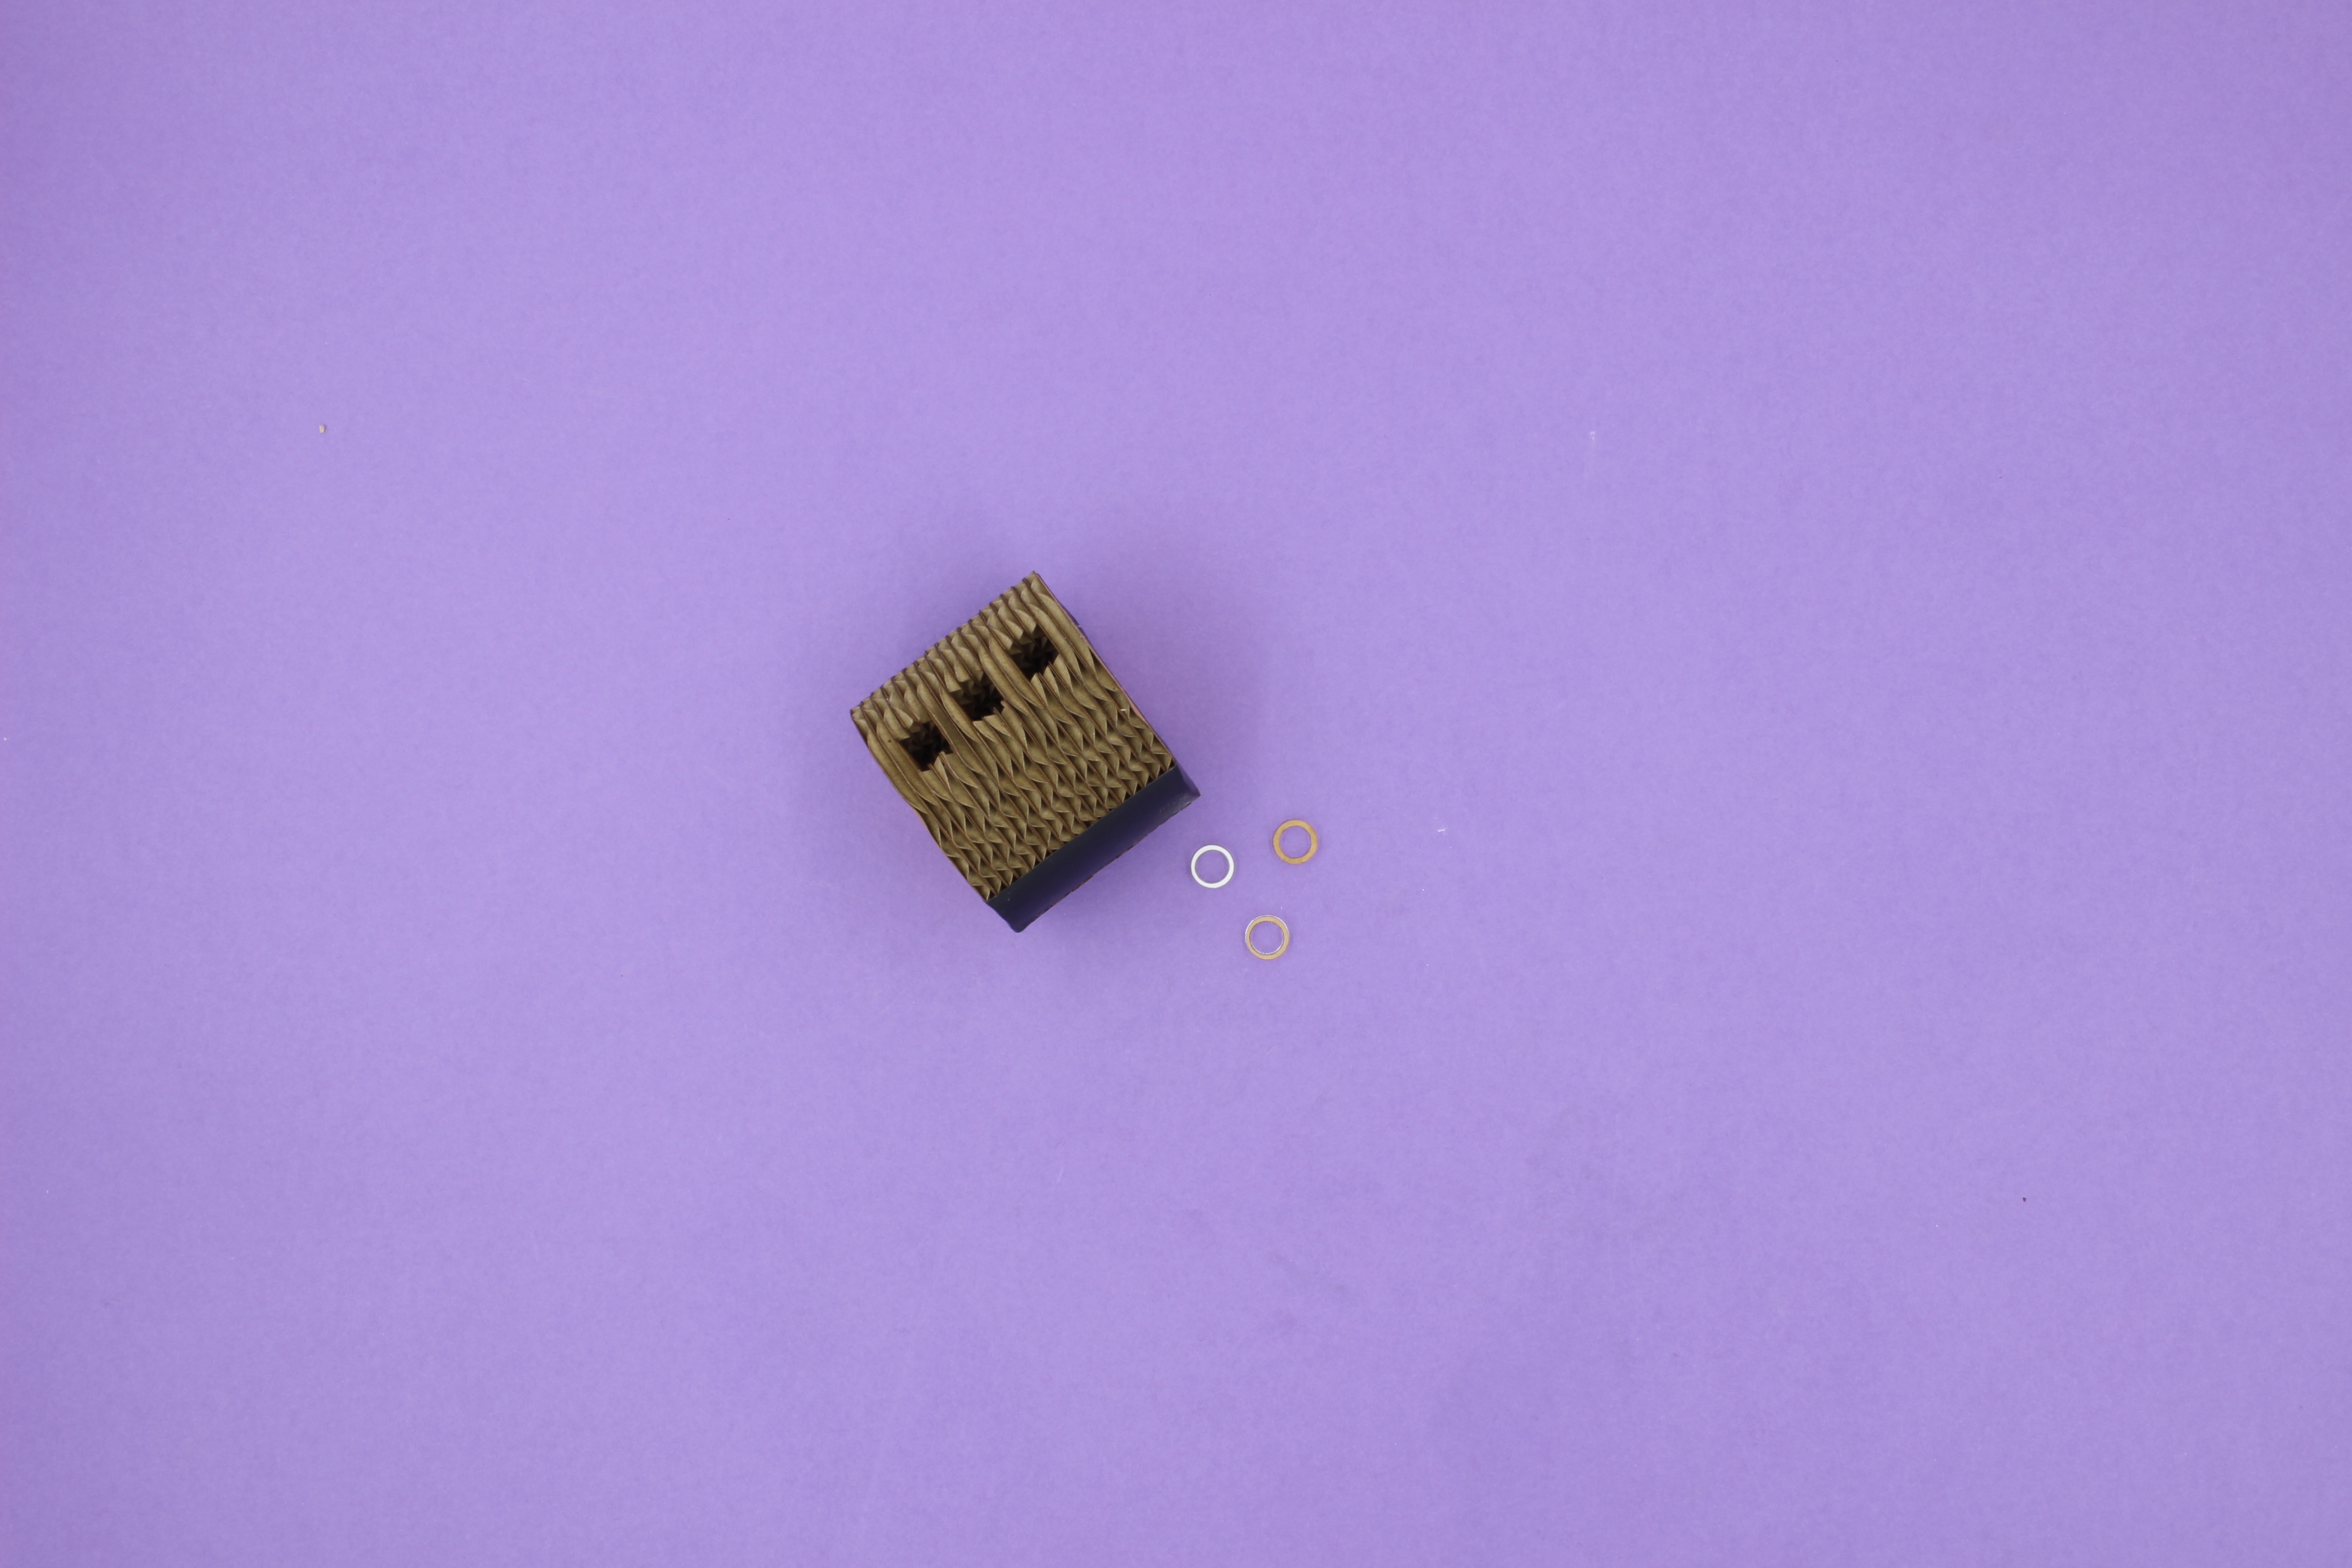
The hull consists of 9 layers. A front, back, hasp layer and filler layers.

First of all grab your layer with the hasp and carefully remove it. We are attaching the other two magnets to the hasp. Make sure the polarity matches the polarity of the magnets in the plug. An easy way to do this is to put your plug in the white tube (to make the removal of magnets easier) and let the magnets snap together on the outside. This way you'll know which side should point in or out. Make sure the magnets in the hasp don't stick out too much and add a piece of tape to keep it in place. Don't use too much as it will add unwanted friction. Put the hasp back into it's layer before the next step.
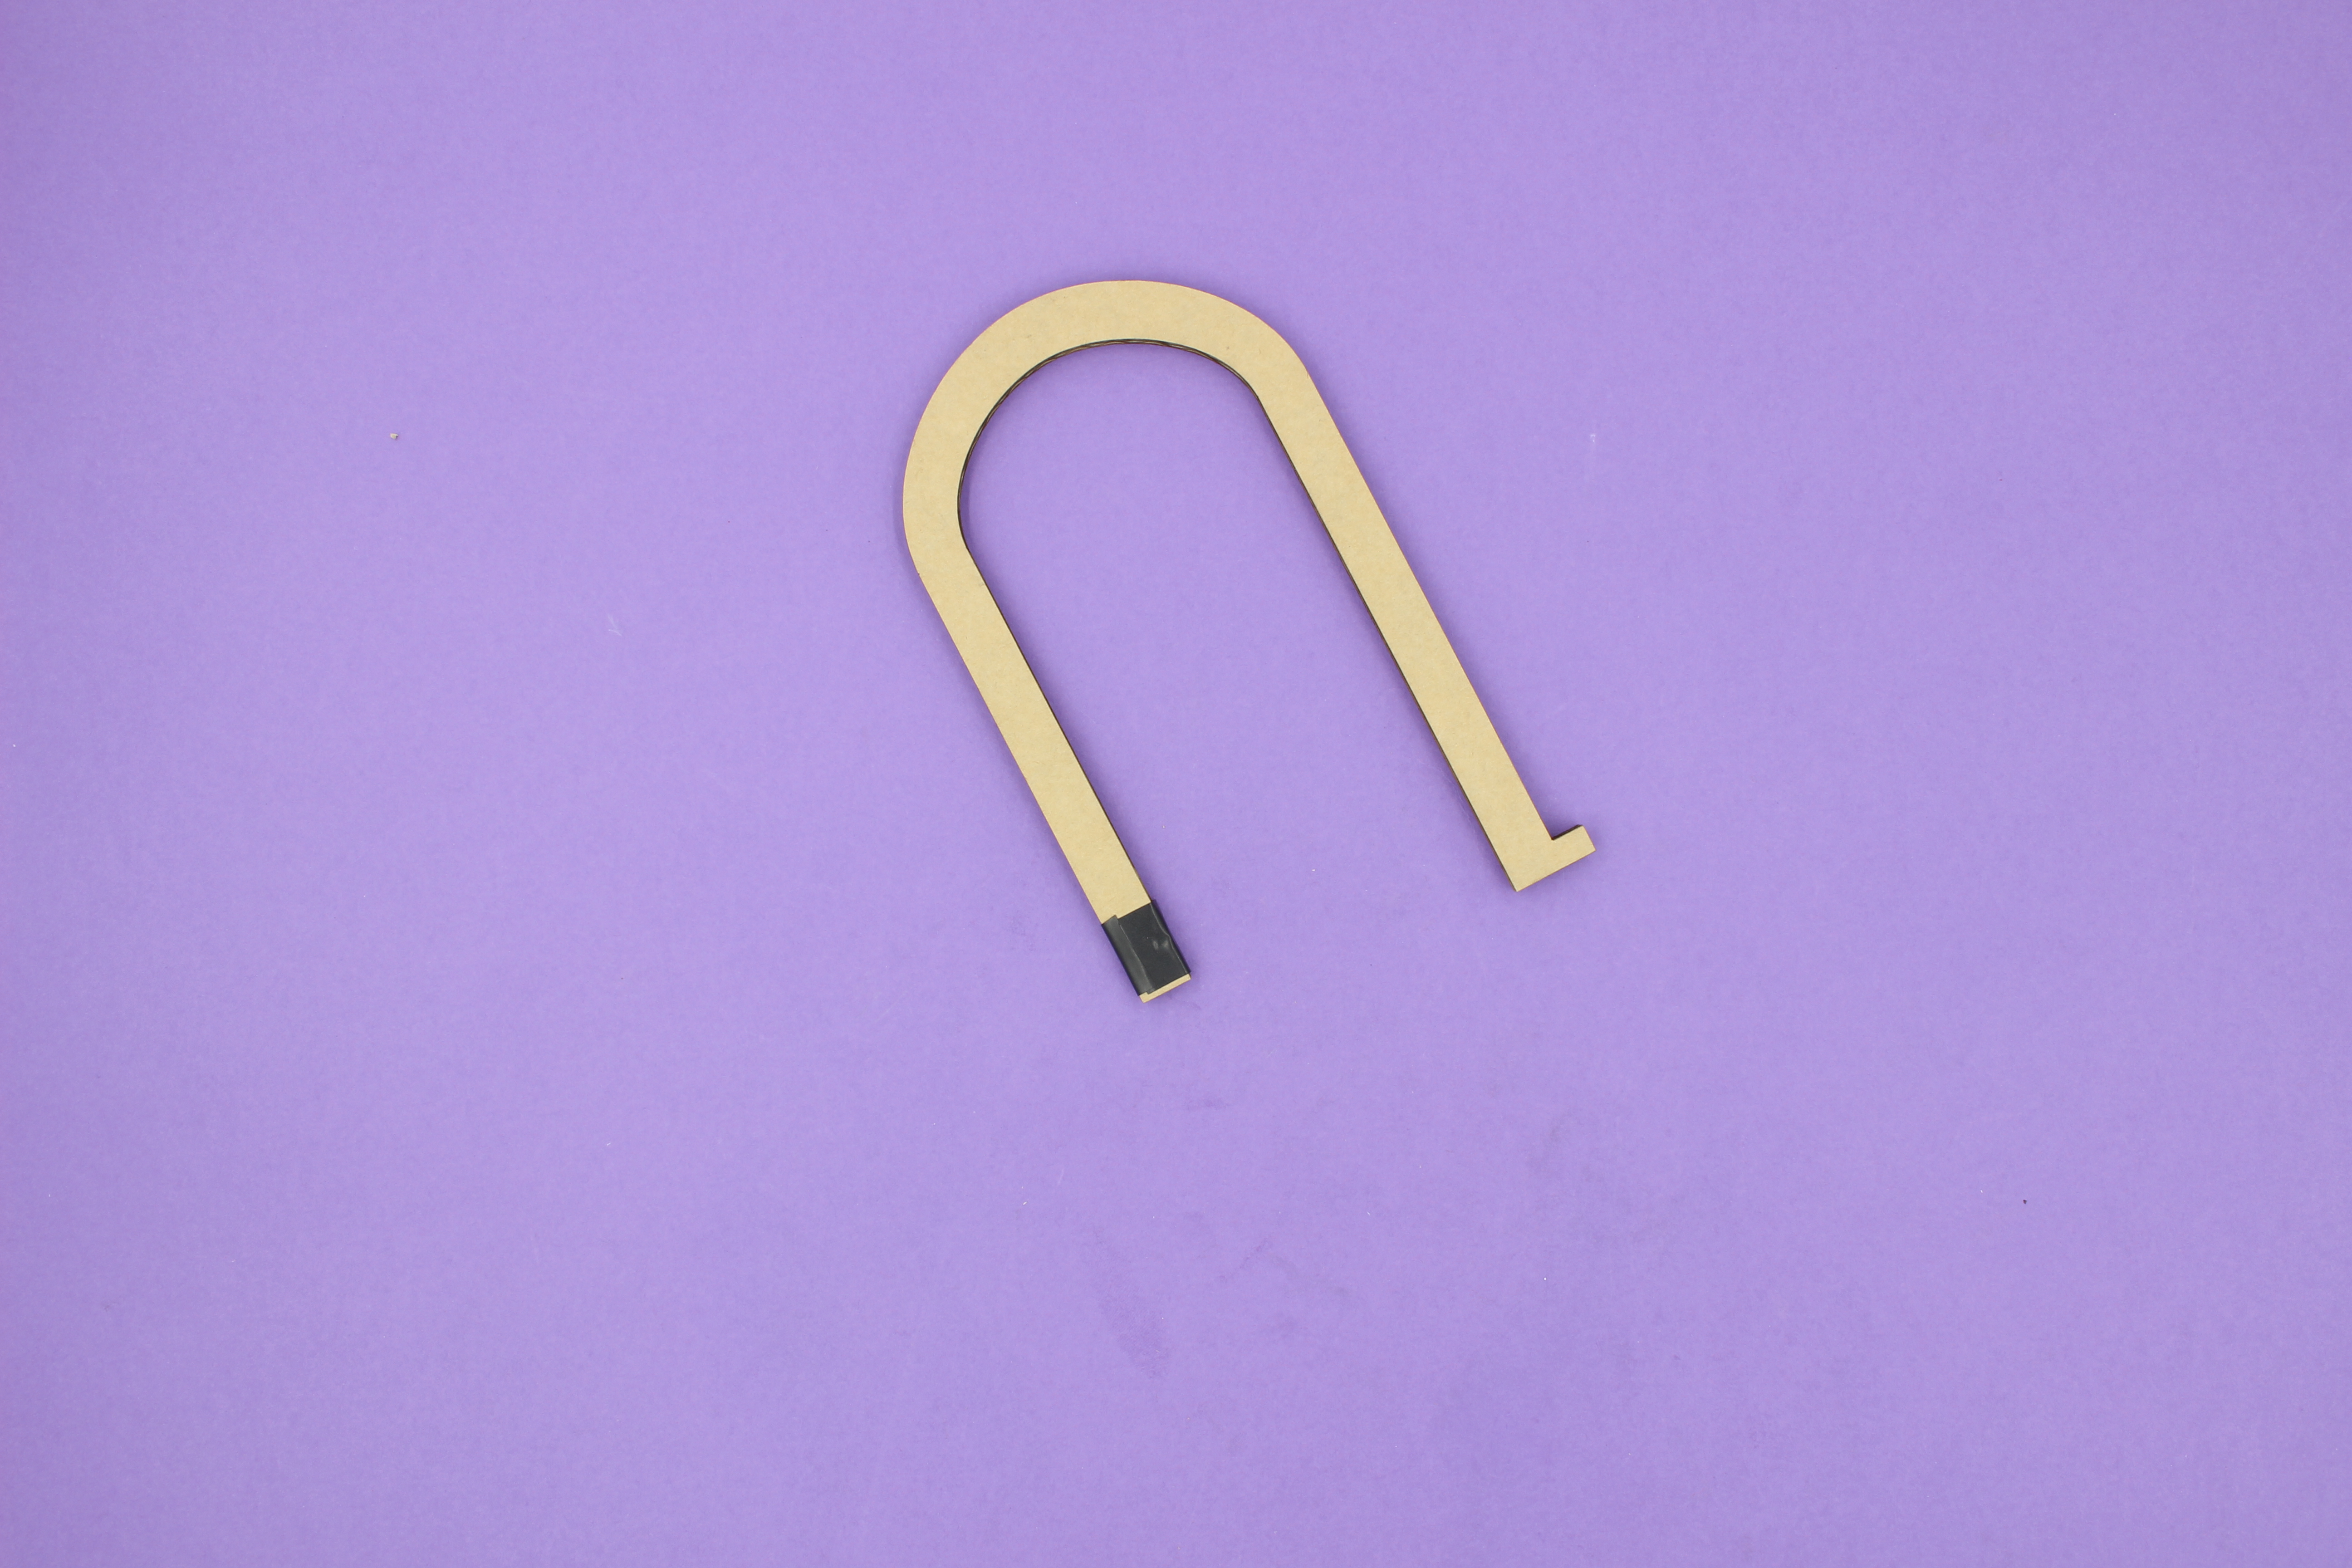
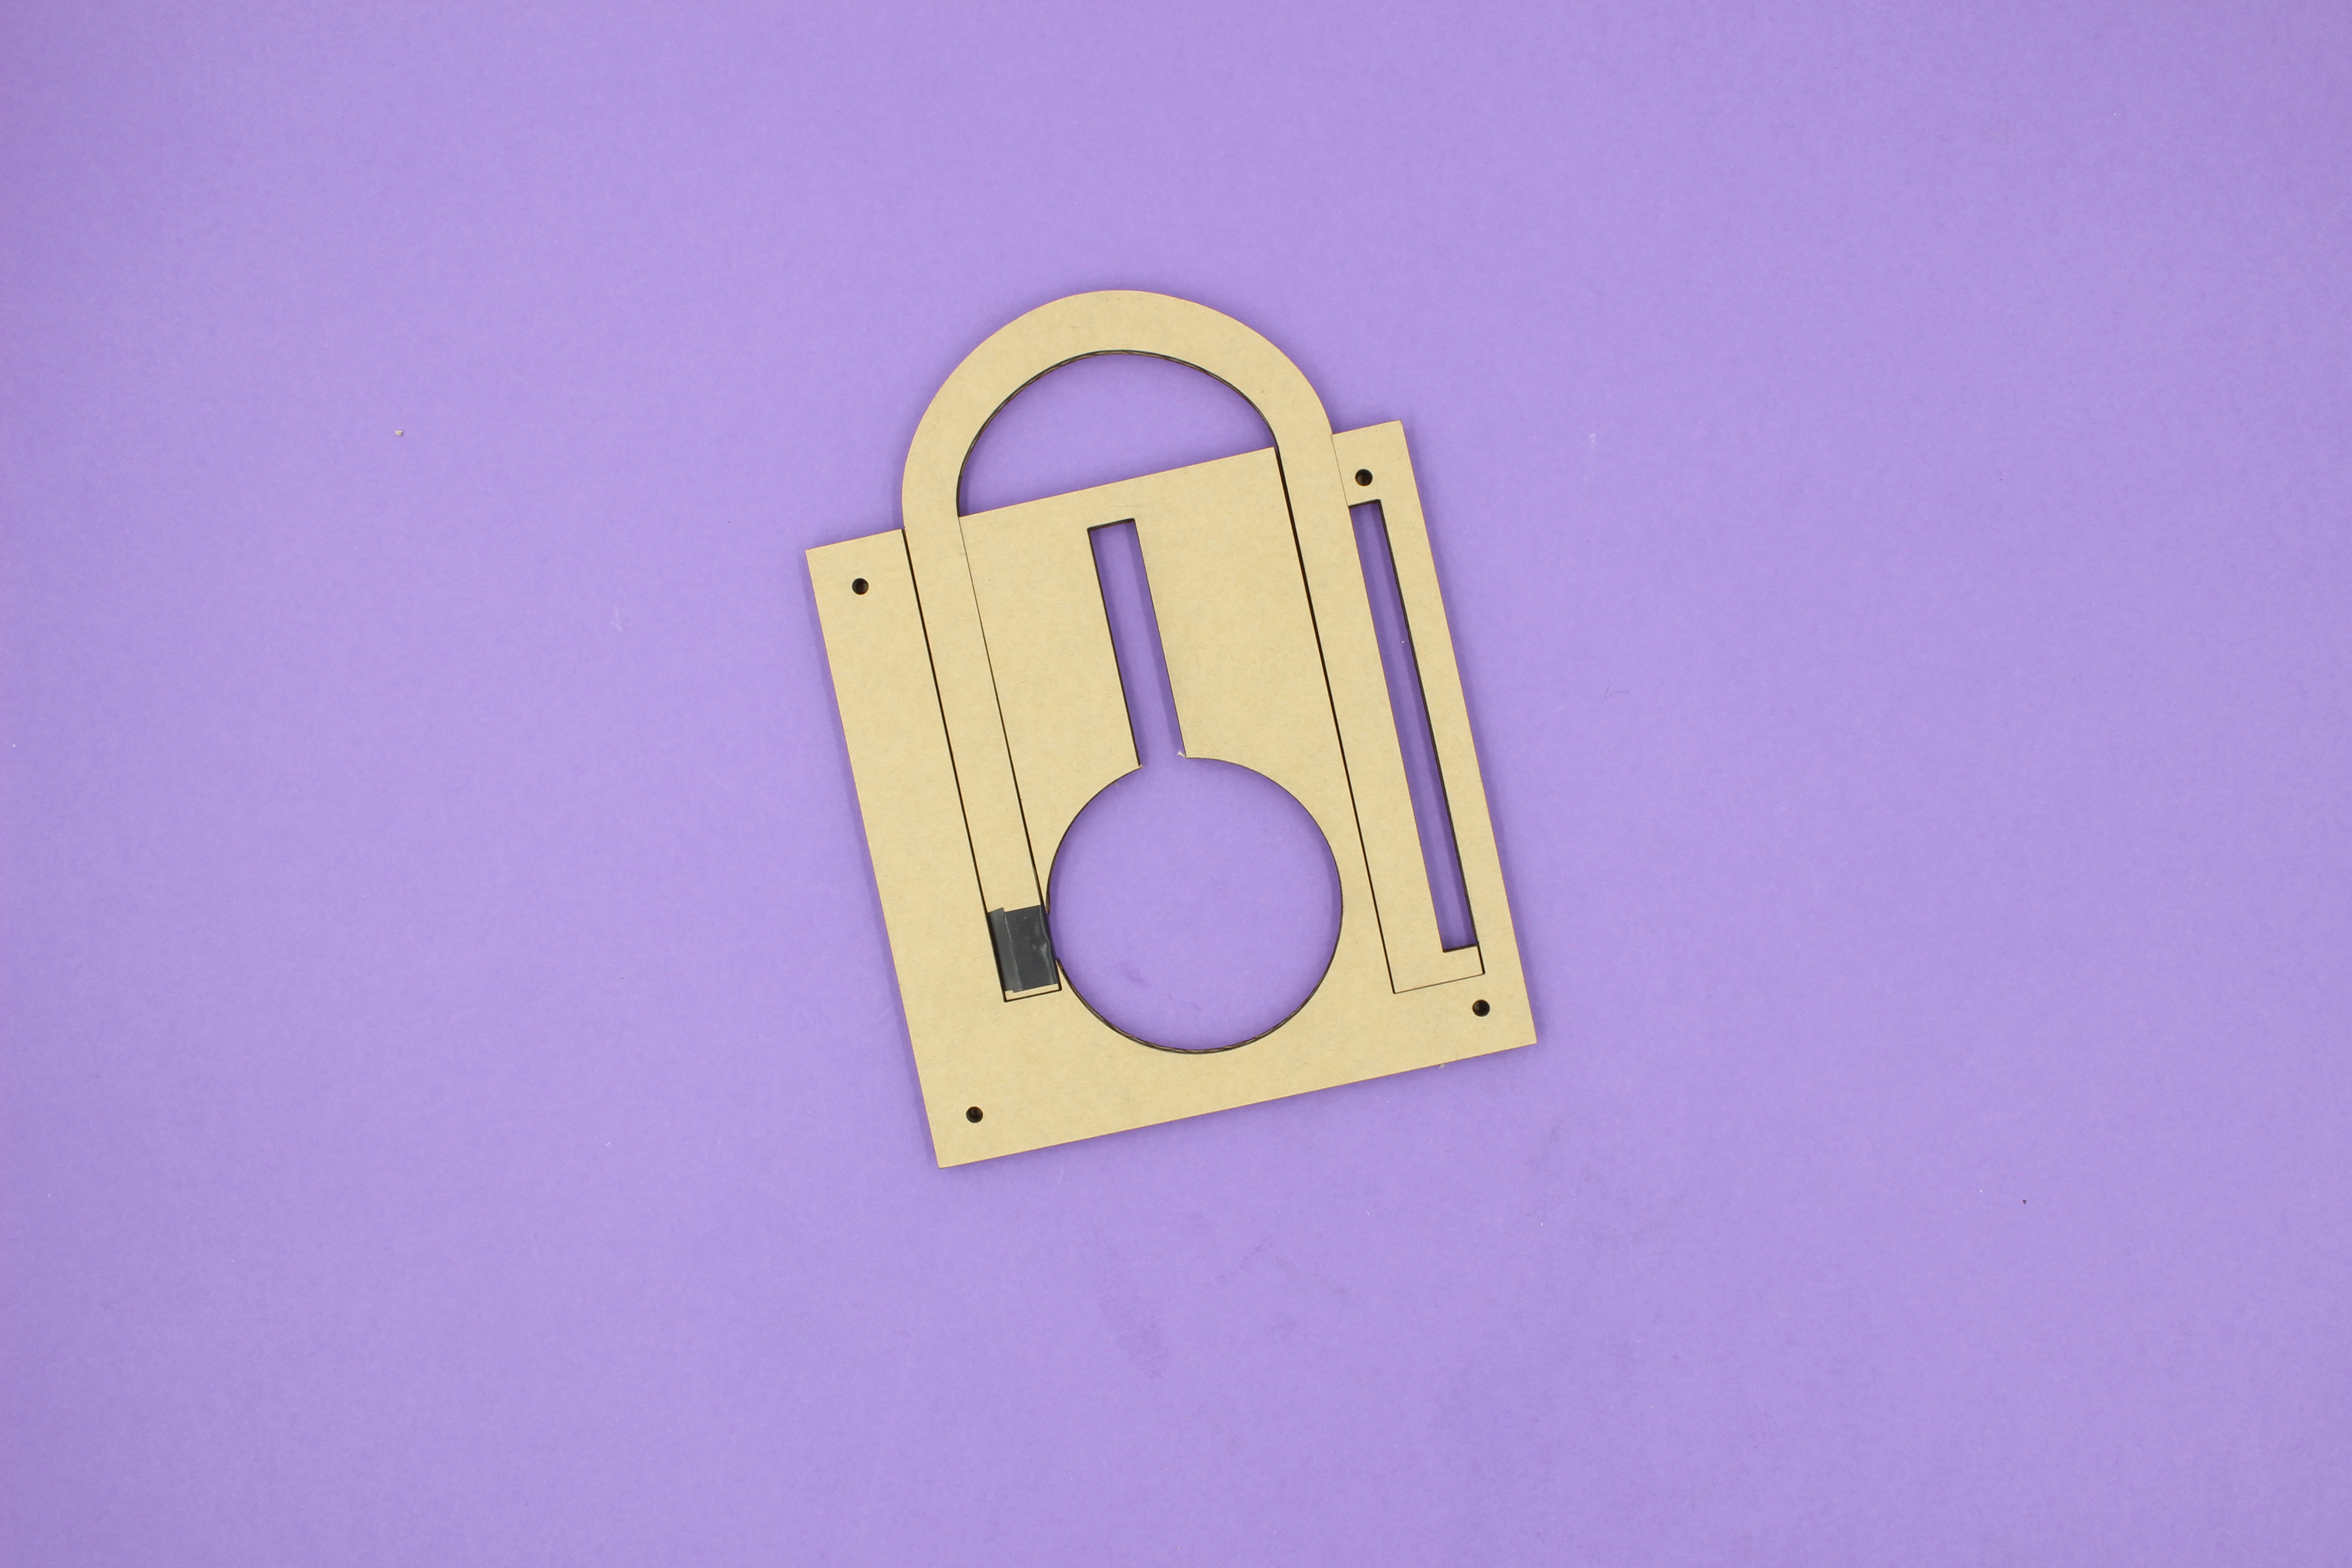
Once again, use a couple of skewers and work from the back to the front. The haps will be the middle layer (5th from both front and back). When all 9 layers are in place, snip off the skewers, once this is done we will remove the front layer for now. You can add a couple of rubber bands to keep everything together.
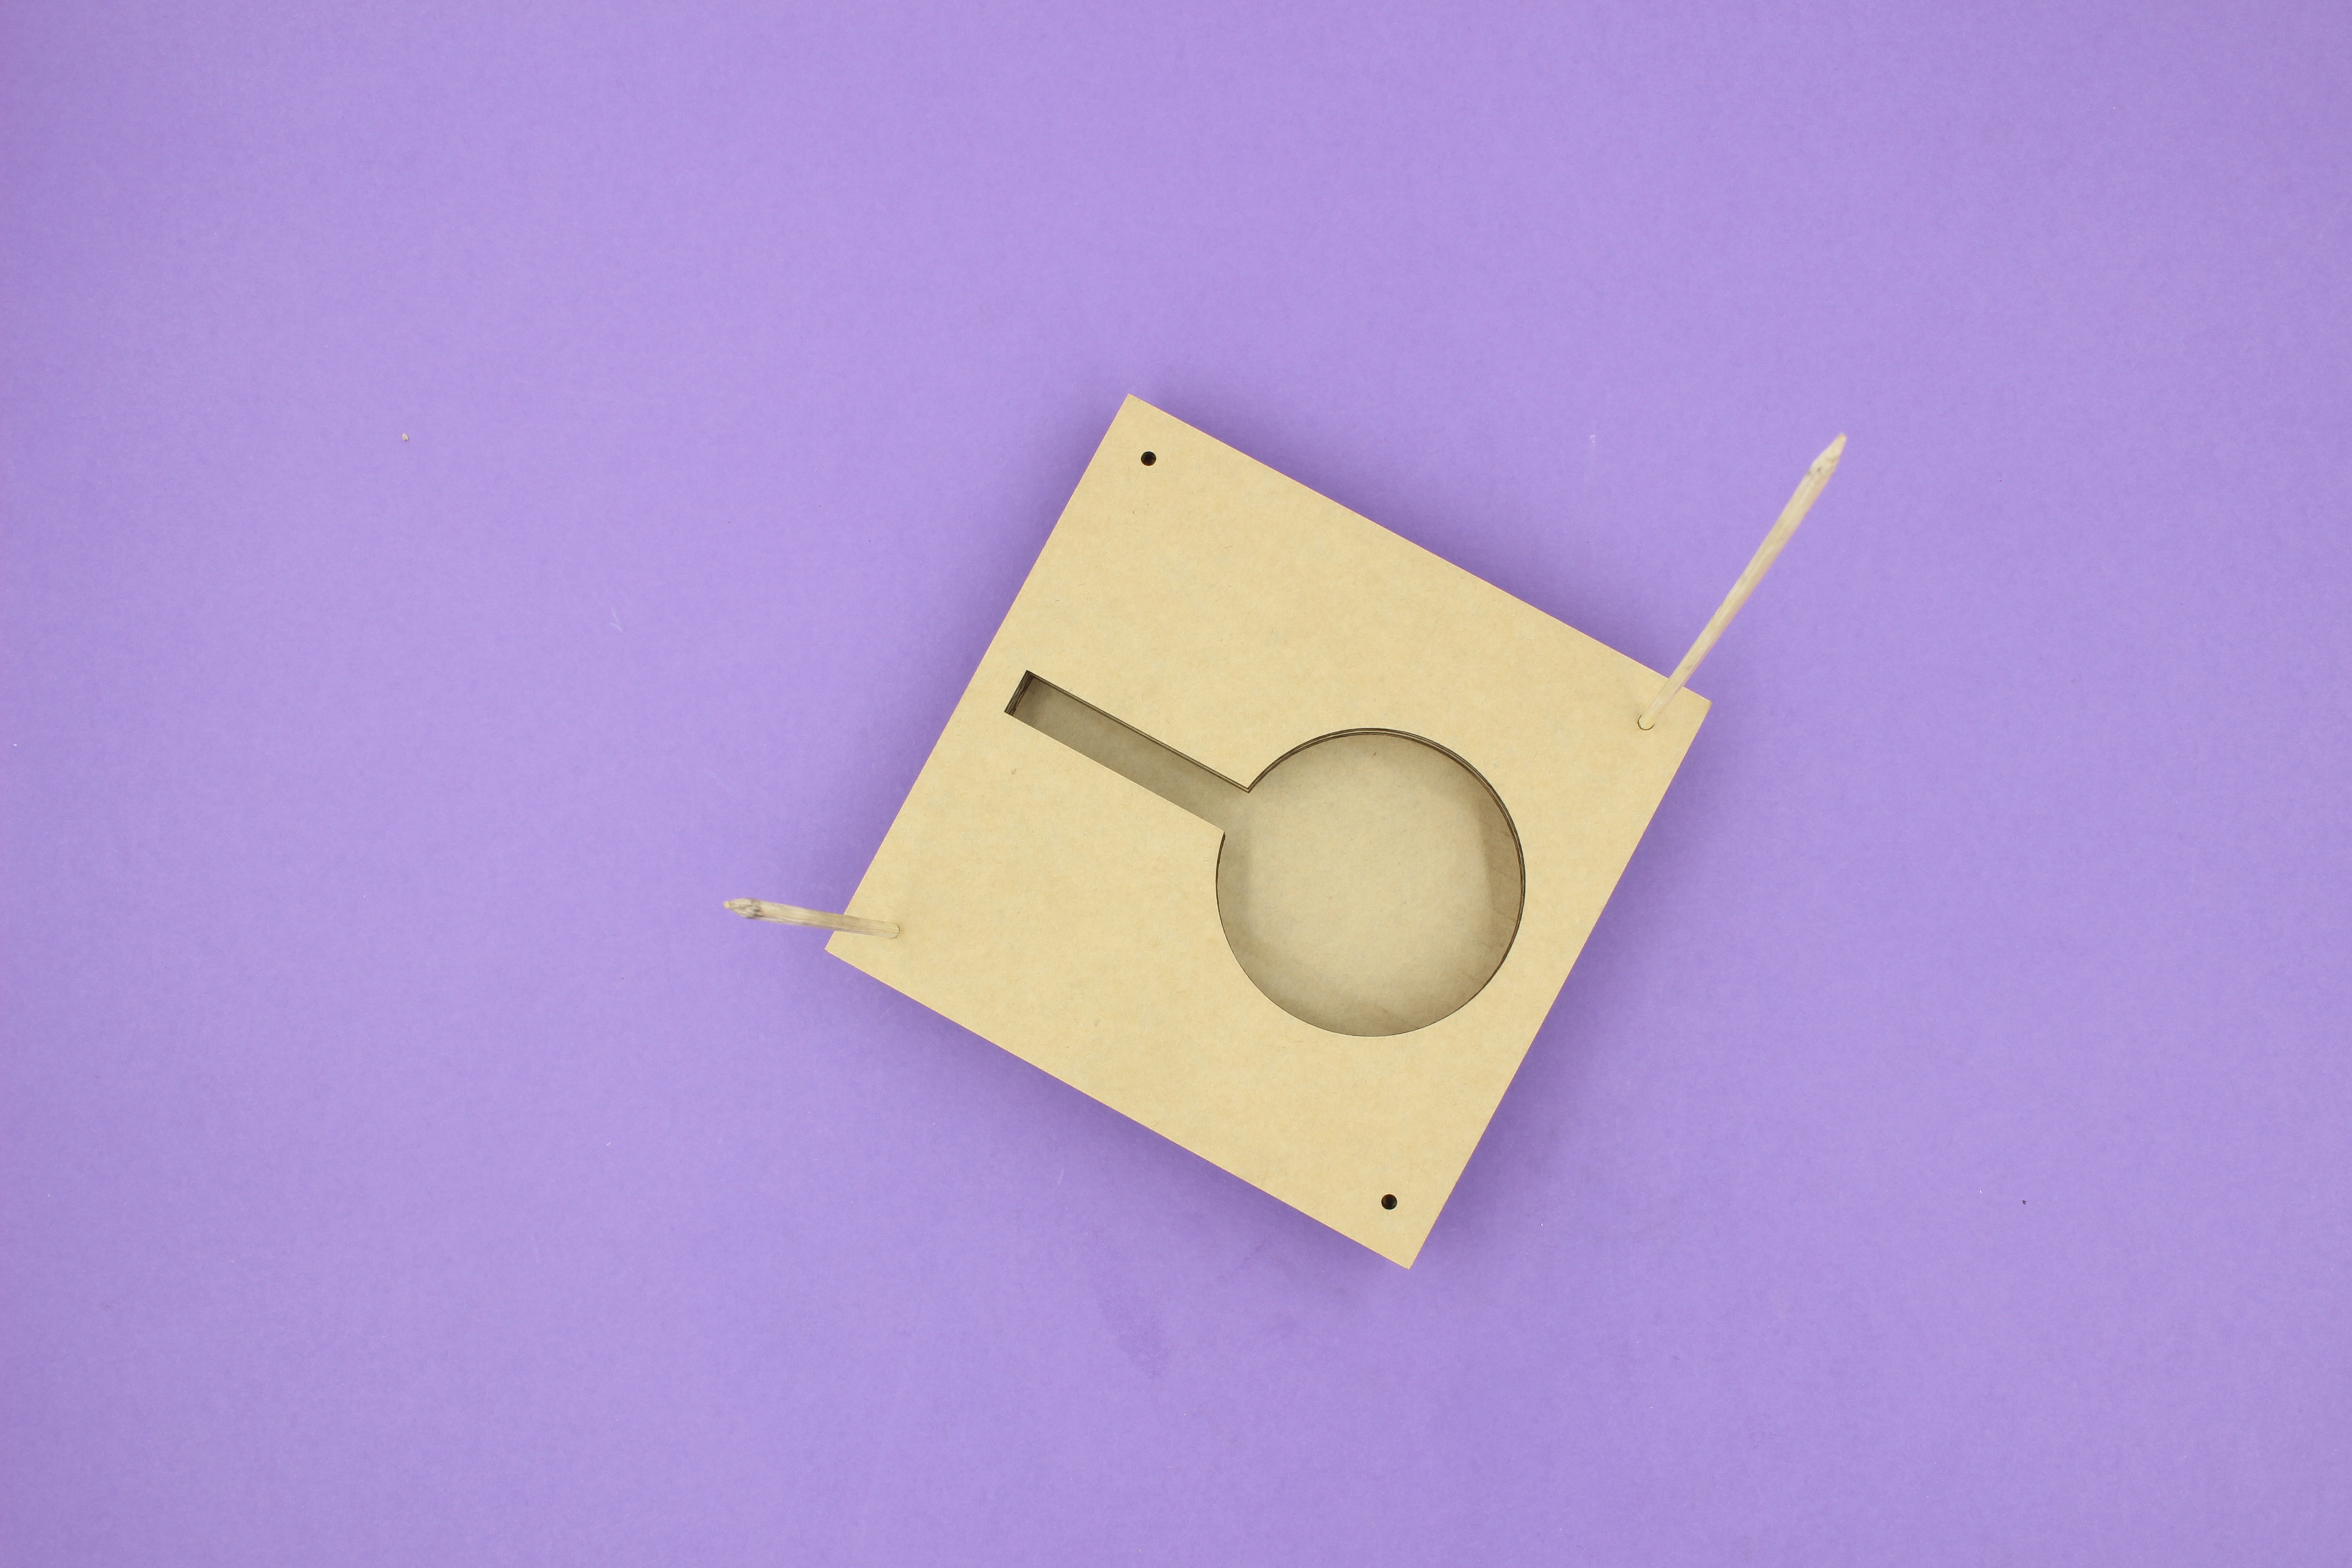

Snip off the two first skewers and reuse whats left over for the remaining two holes.
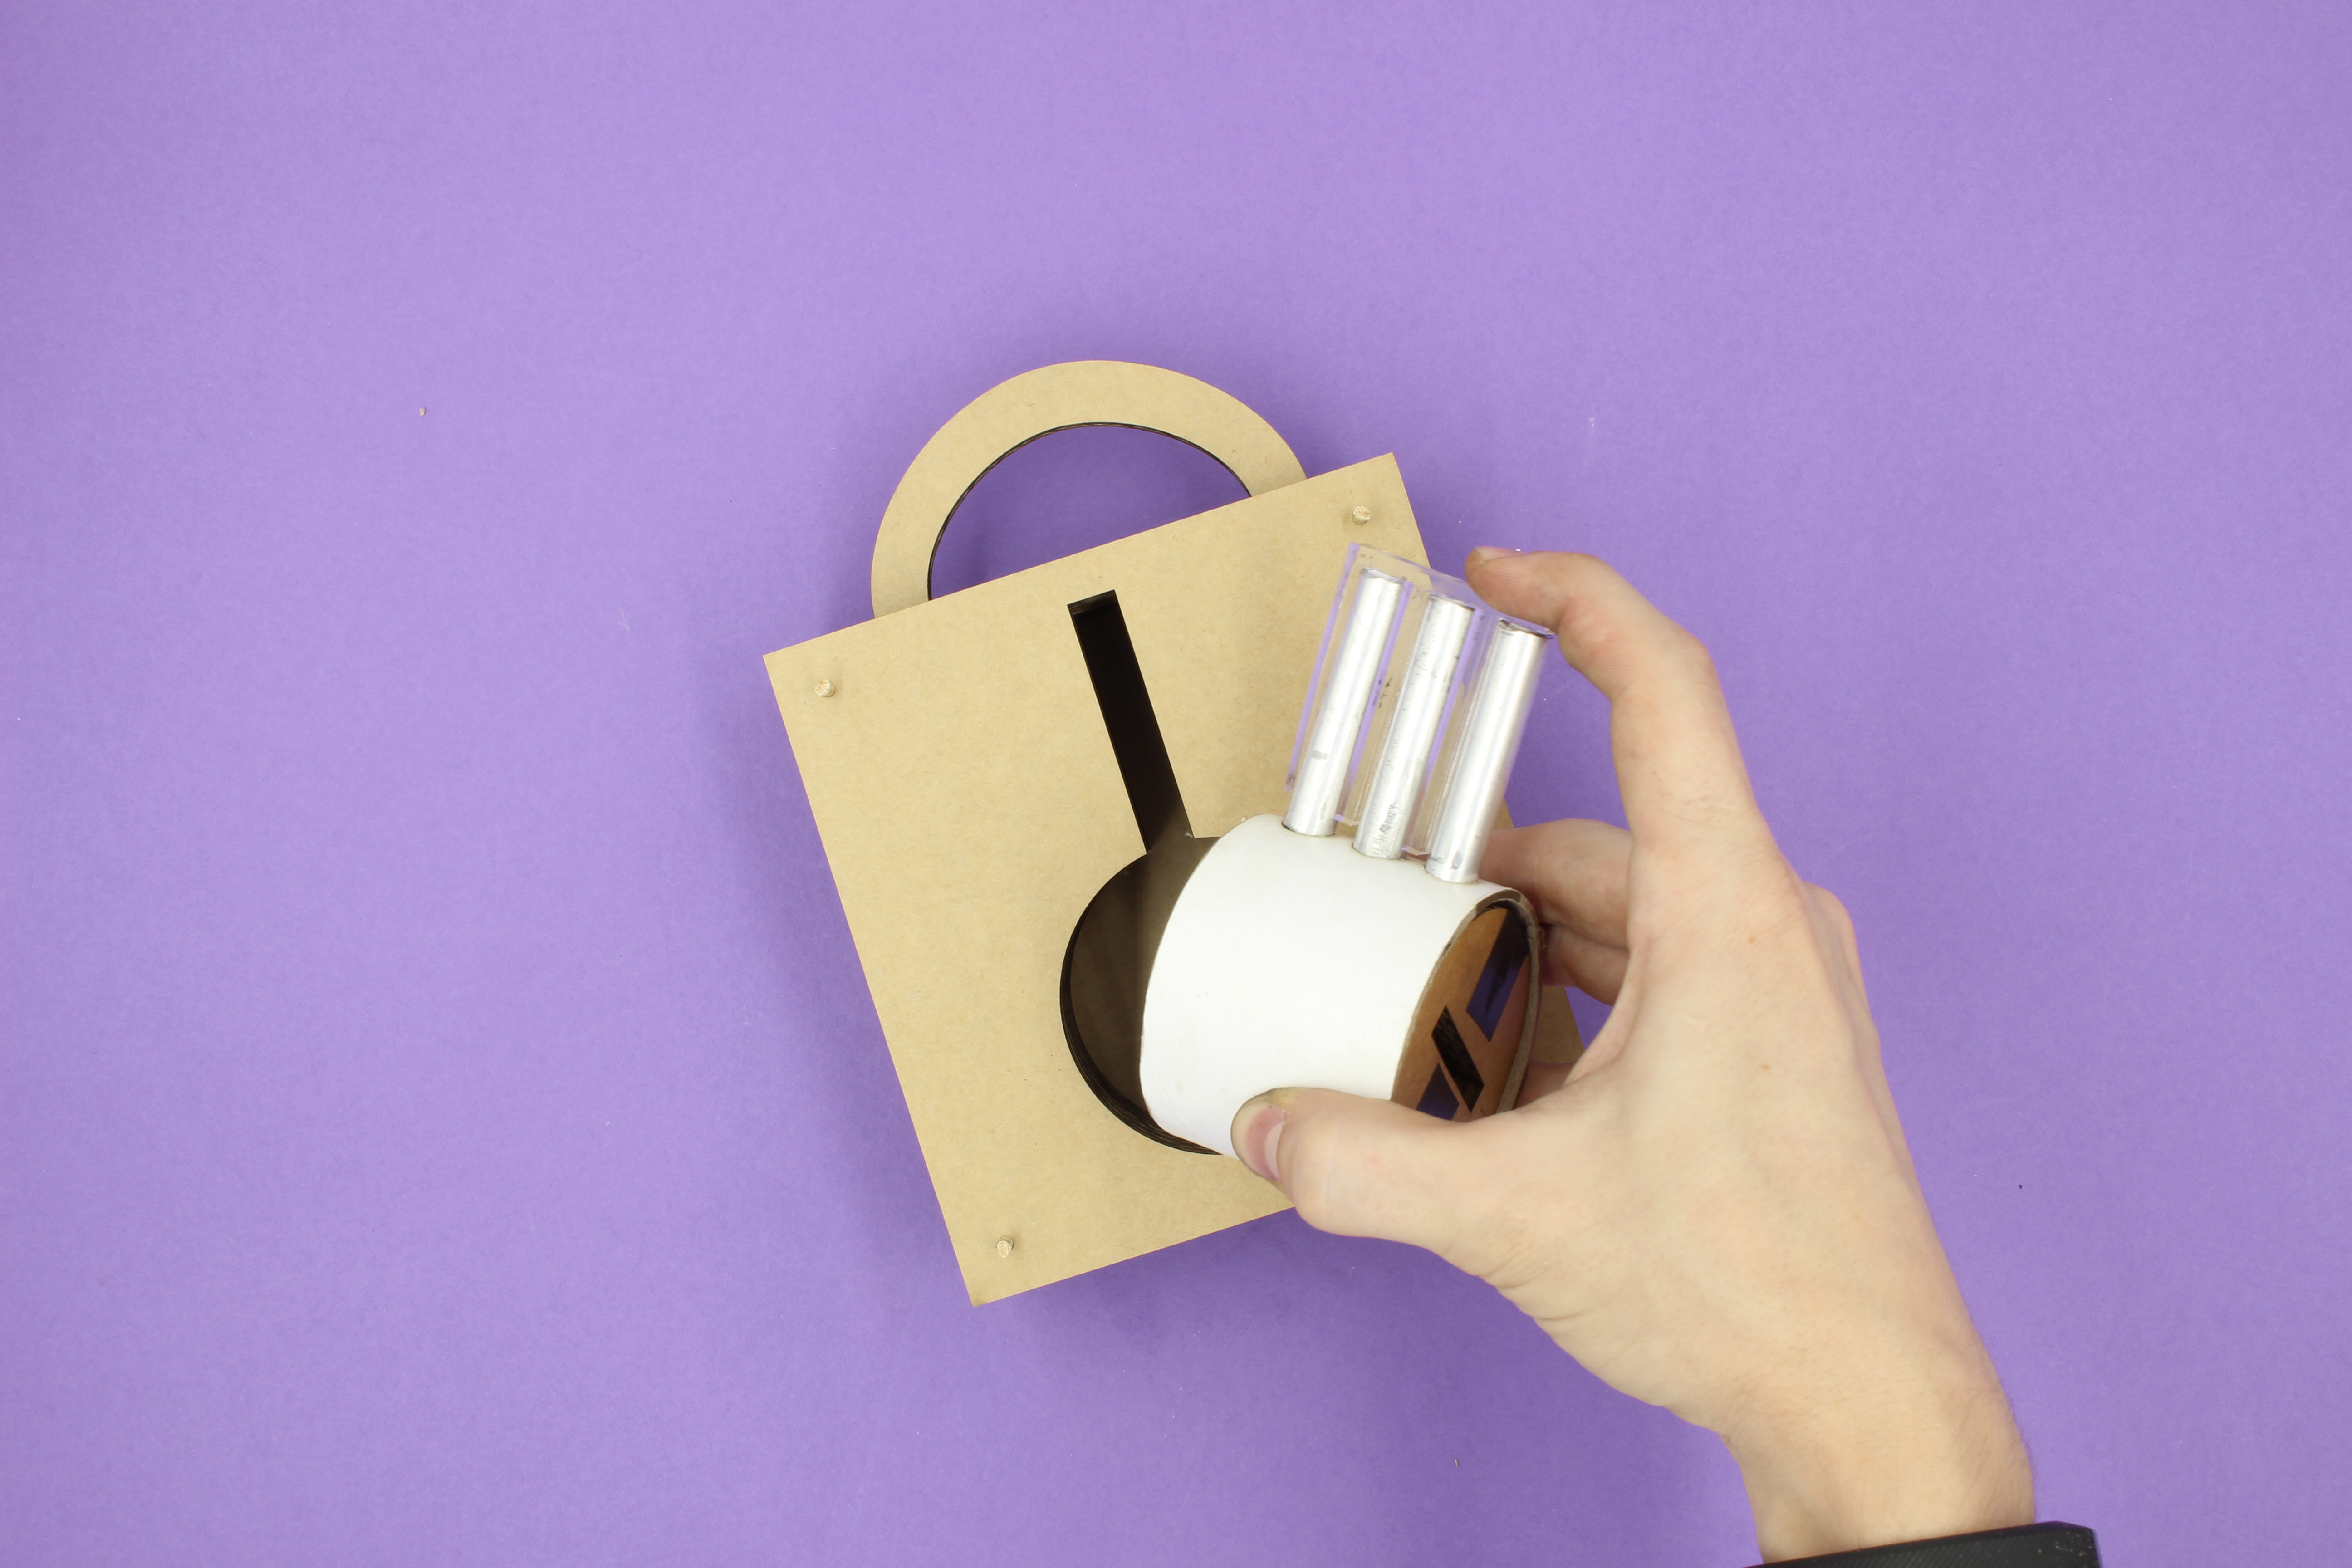
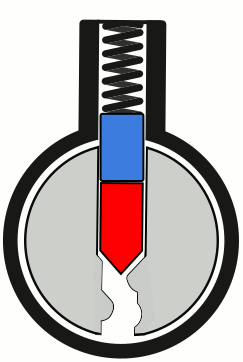
Step Four: Set Pins & Chamber
In order for our set pins and springs to have a friction-free path we will be using aluminium pipe, which we will call the chamber. The first thing we need to do is make sure it fits into the plug housing (the big white tube). You might need to work it into the holes, if you do, make sure to remove (with sandpaper) any rogue cardboard on the inside of the tube as this may cause some unwanted friction.
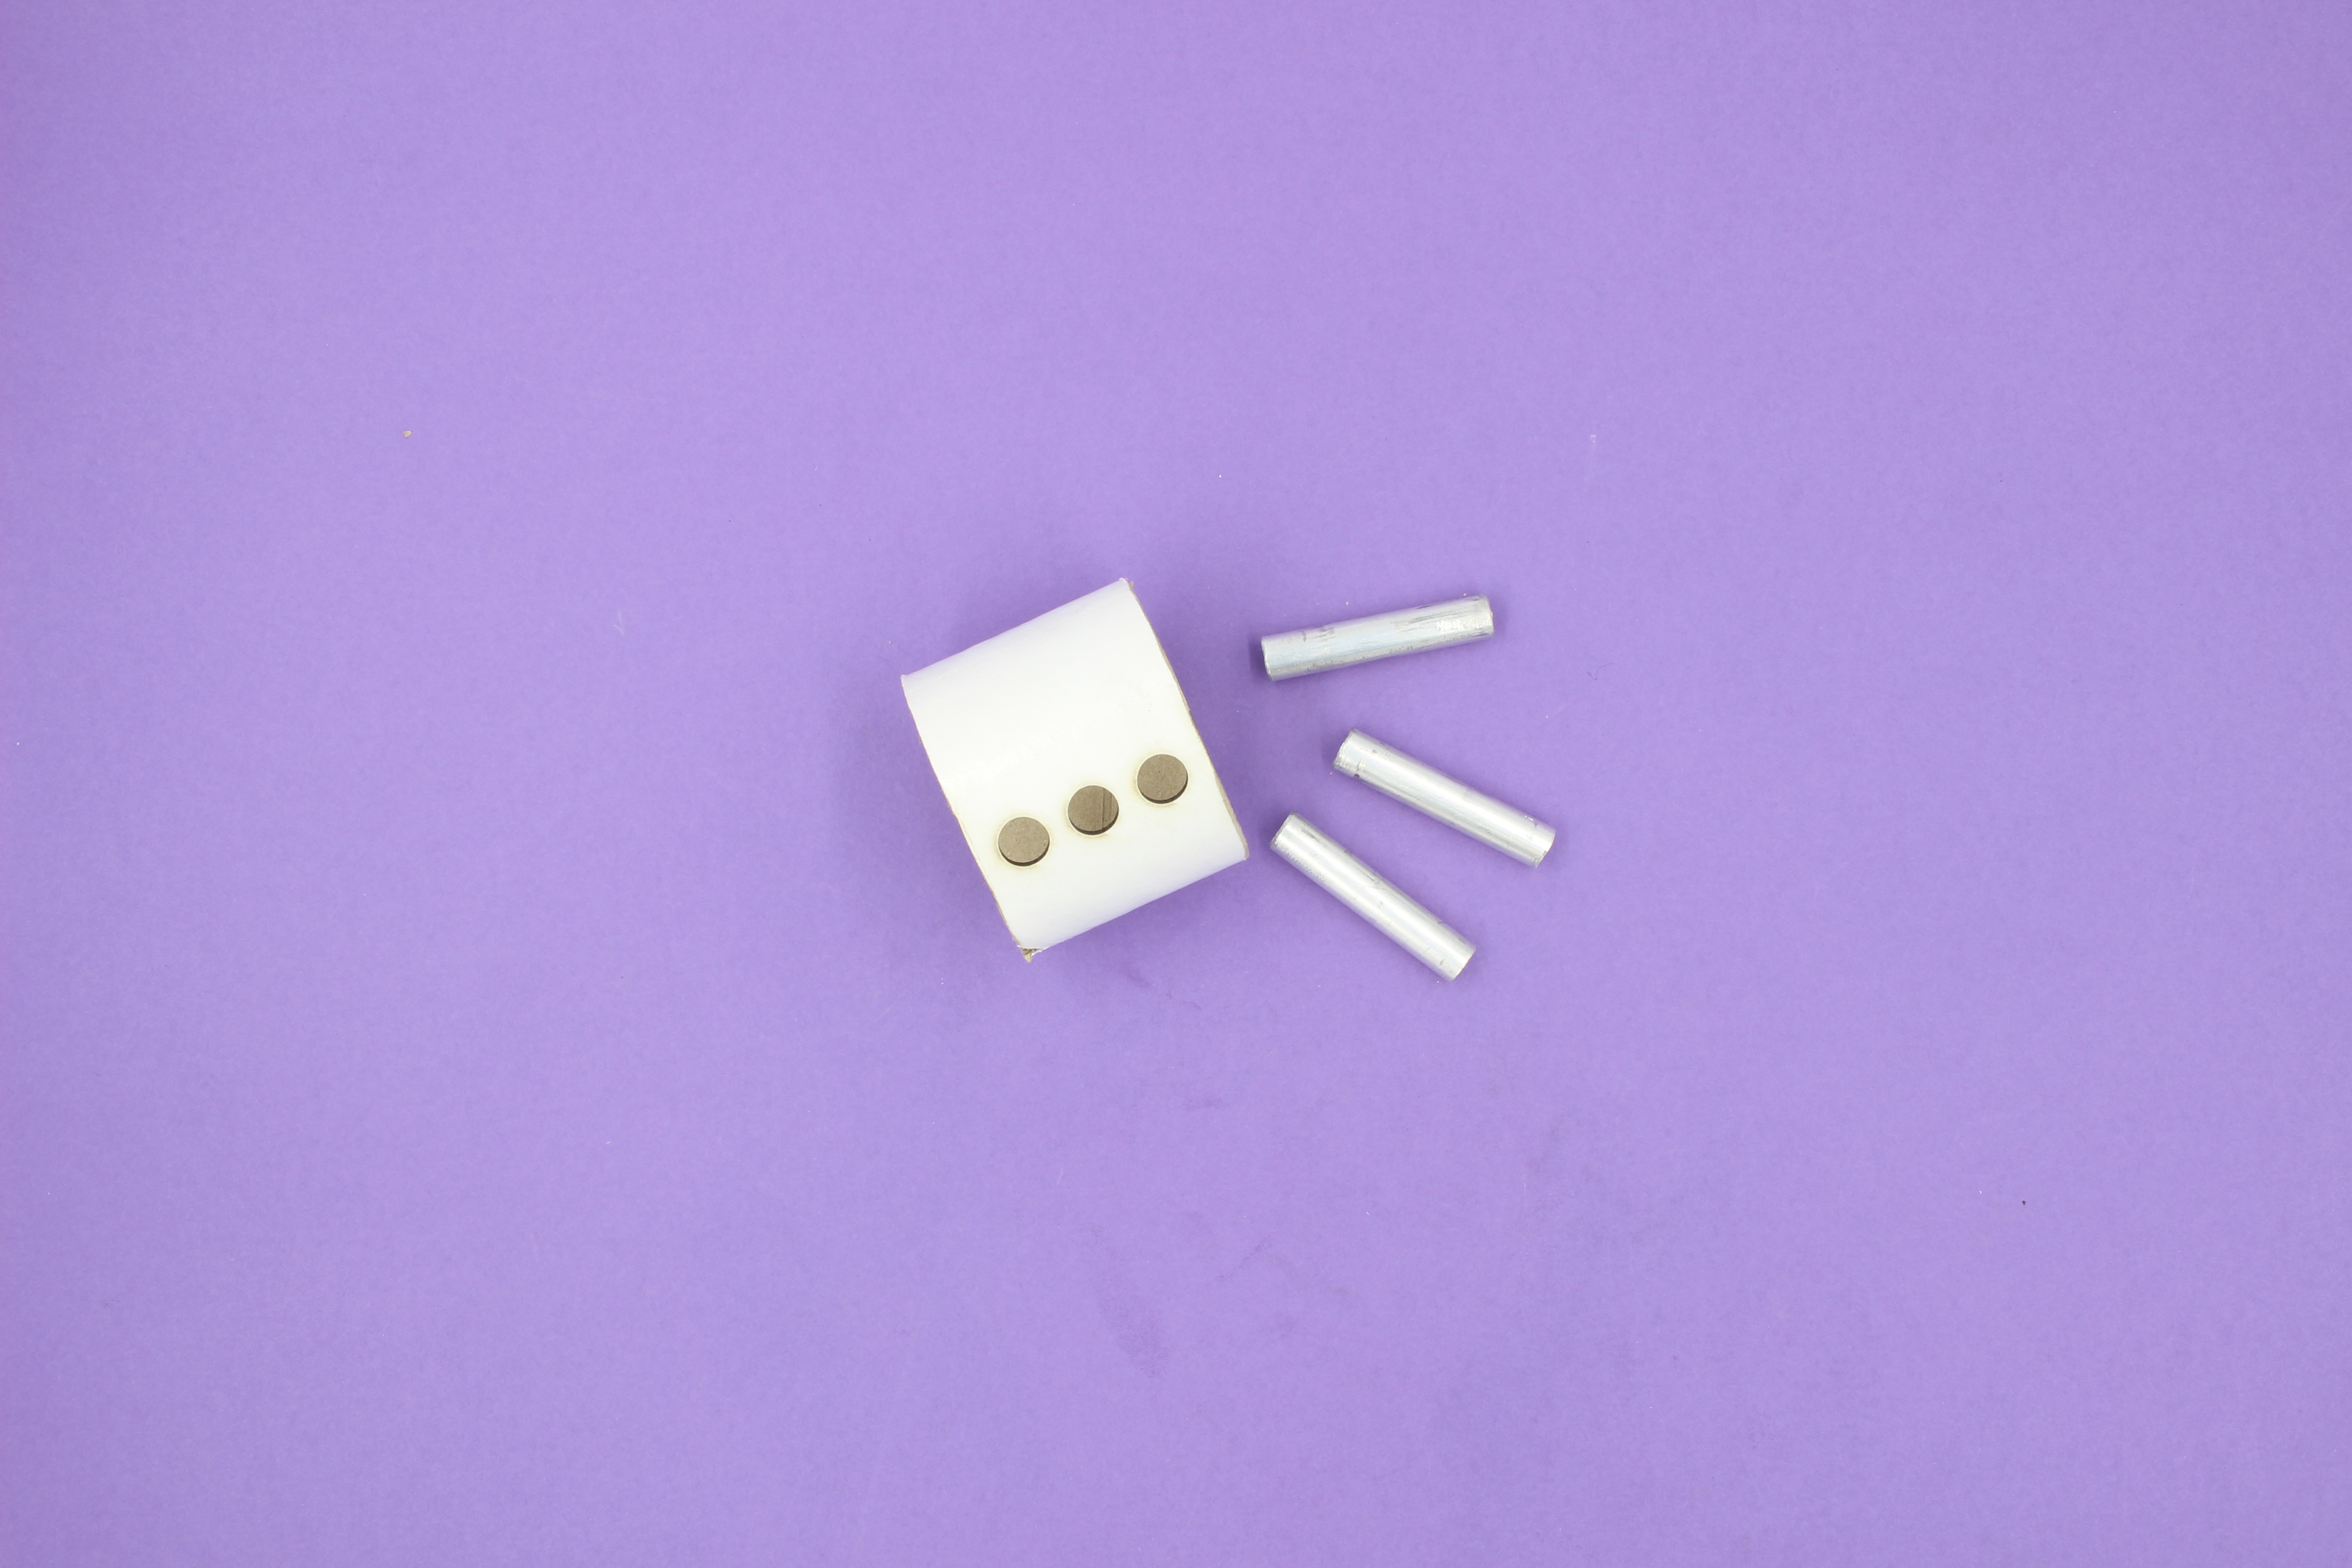

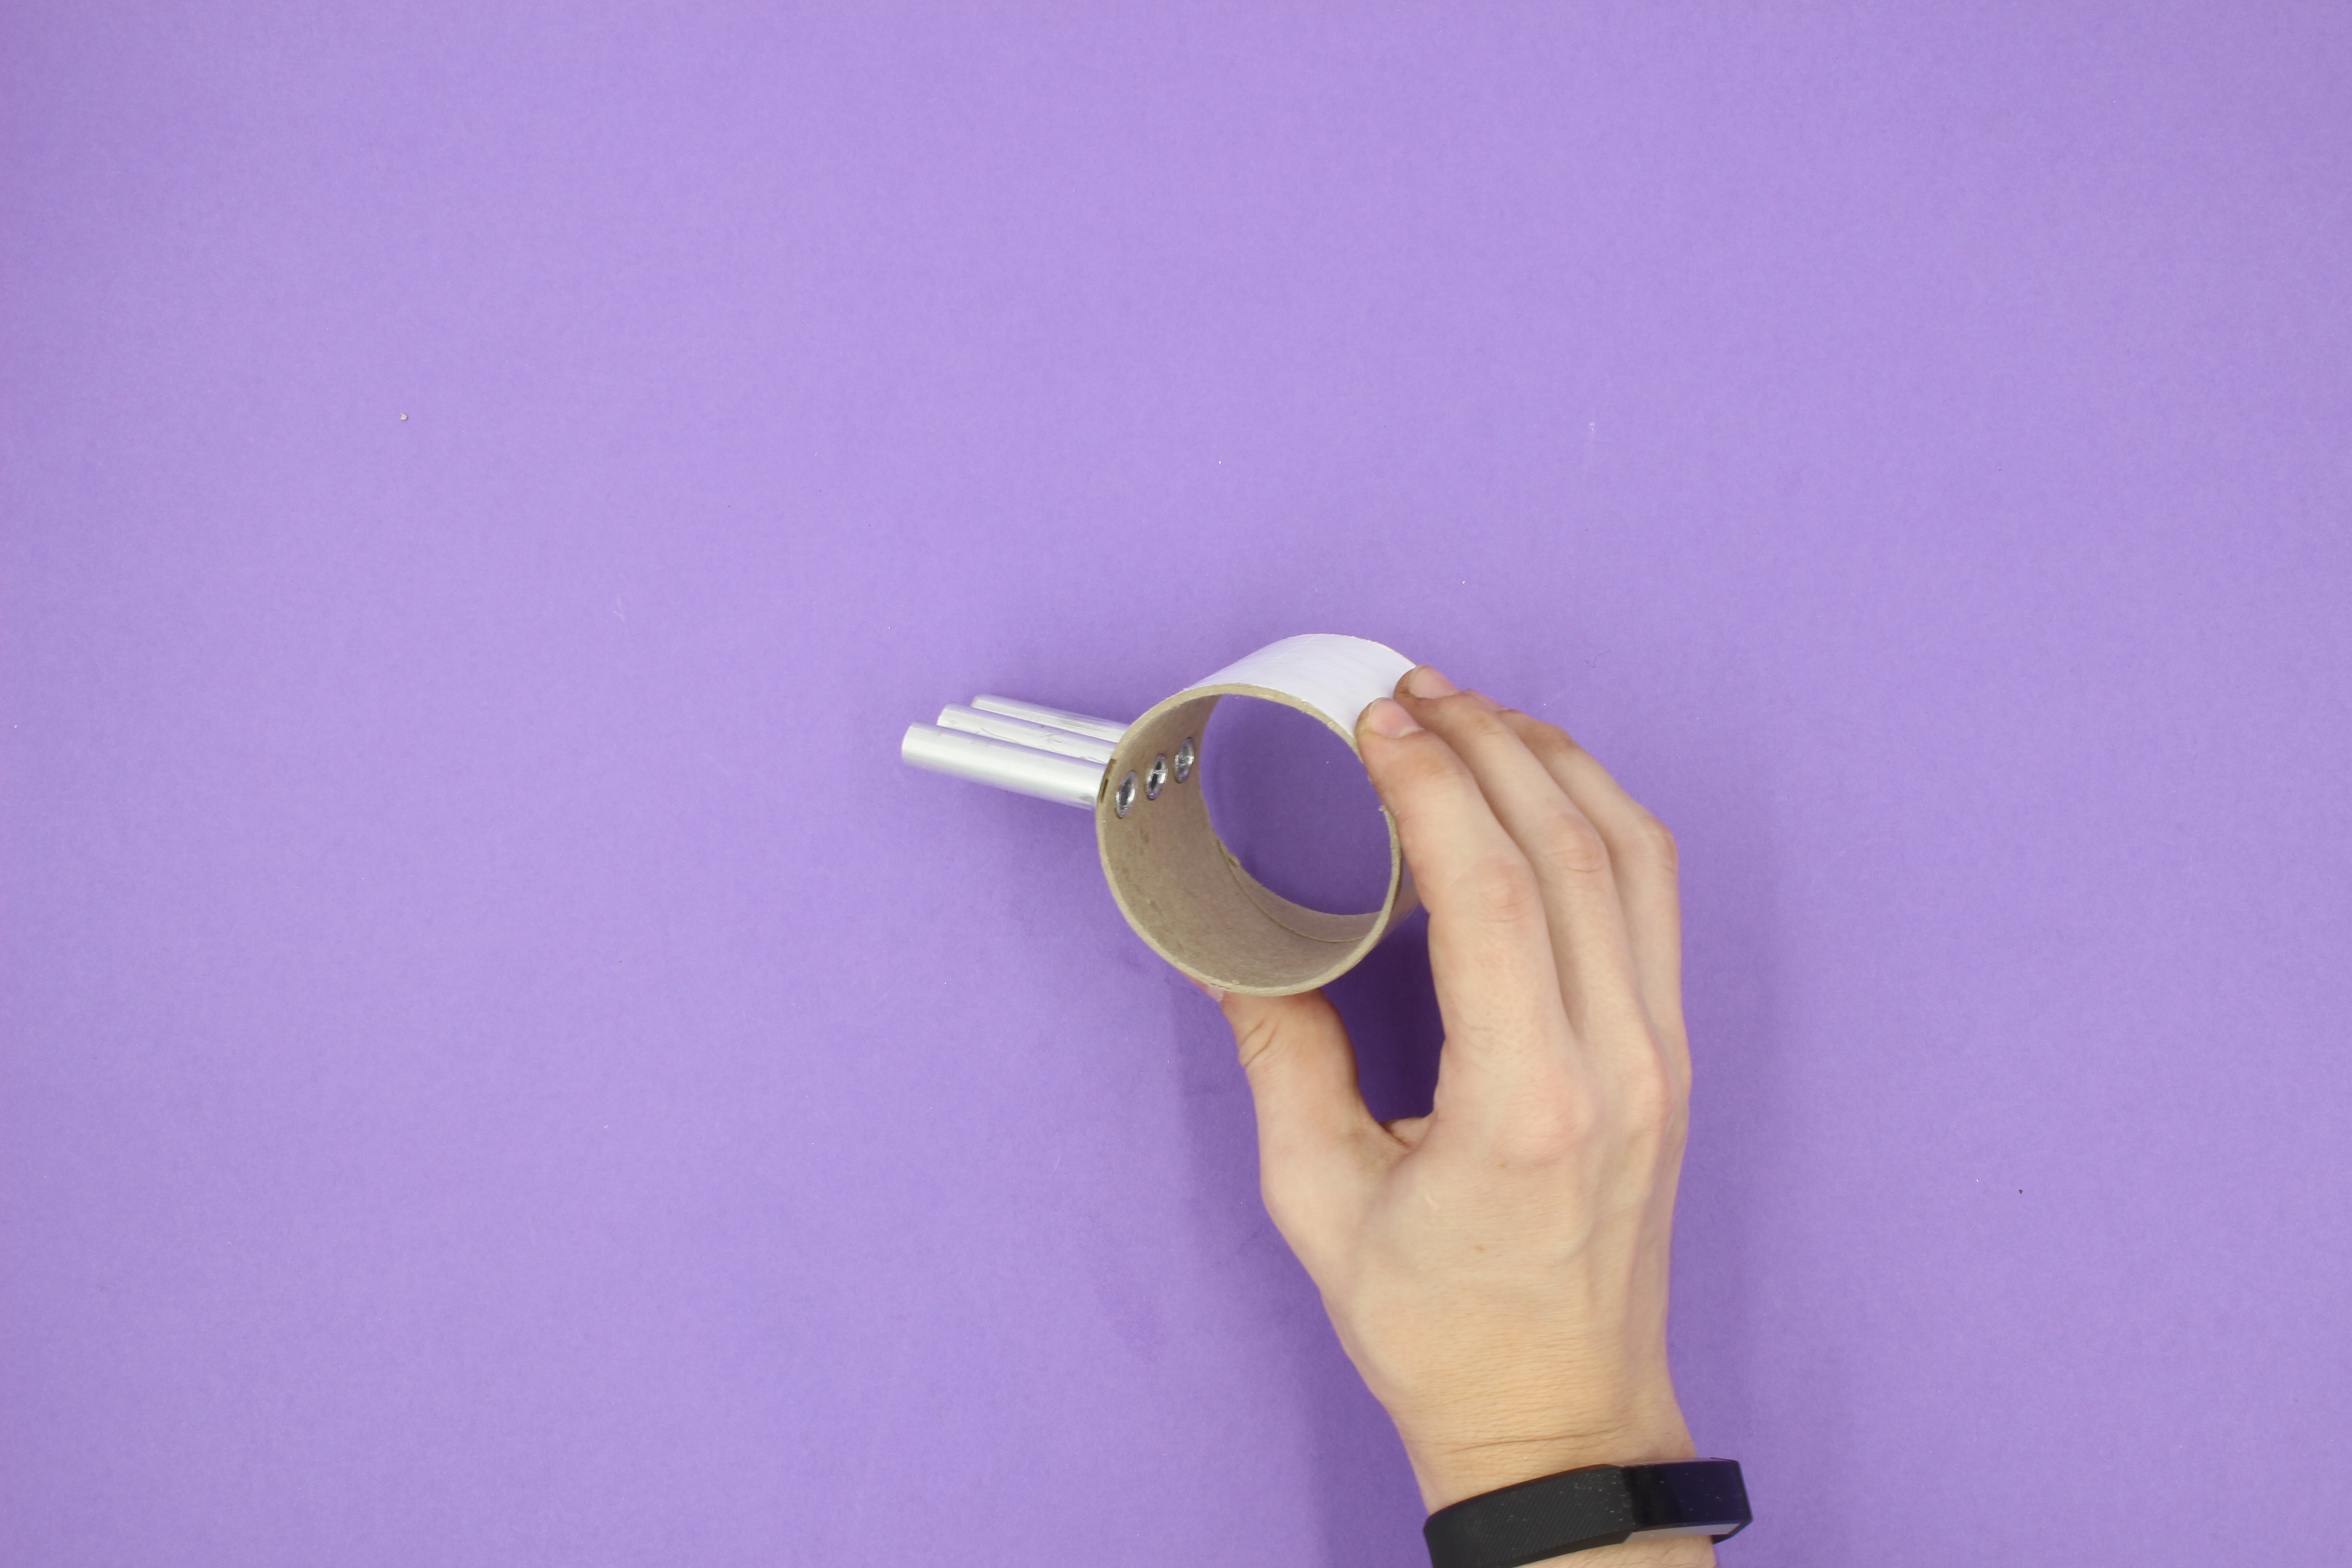
Put the plug into the housing and twist it 90 degrees. We do this so we don't accidentally push our chambers into the holes in the plug.
Once the chambers are in place drop the set pins into the the pipe followed my the springs. Make sure your springs are flush with the top of the chambers. If it isn't reaching the top take the spring out and stretch it slightly over a skewer to keep it straight and stretch it gradually in order to not make it too long. If it's sticking out too much make sure your set pin or spring aren't getting stuck in the chamber somehow.
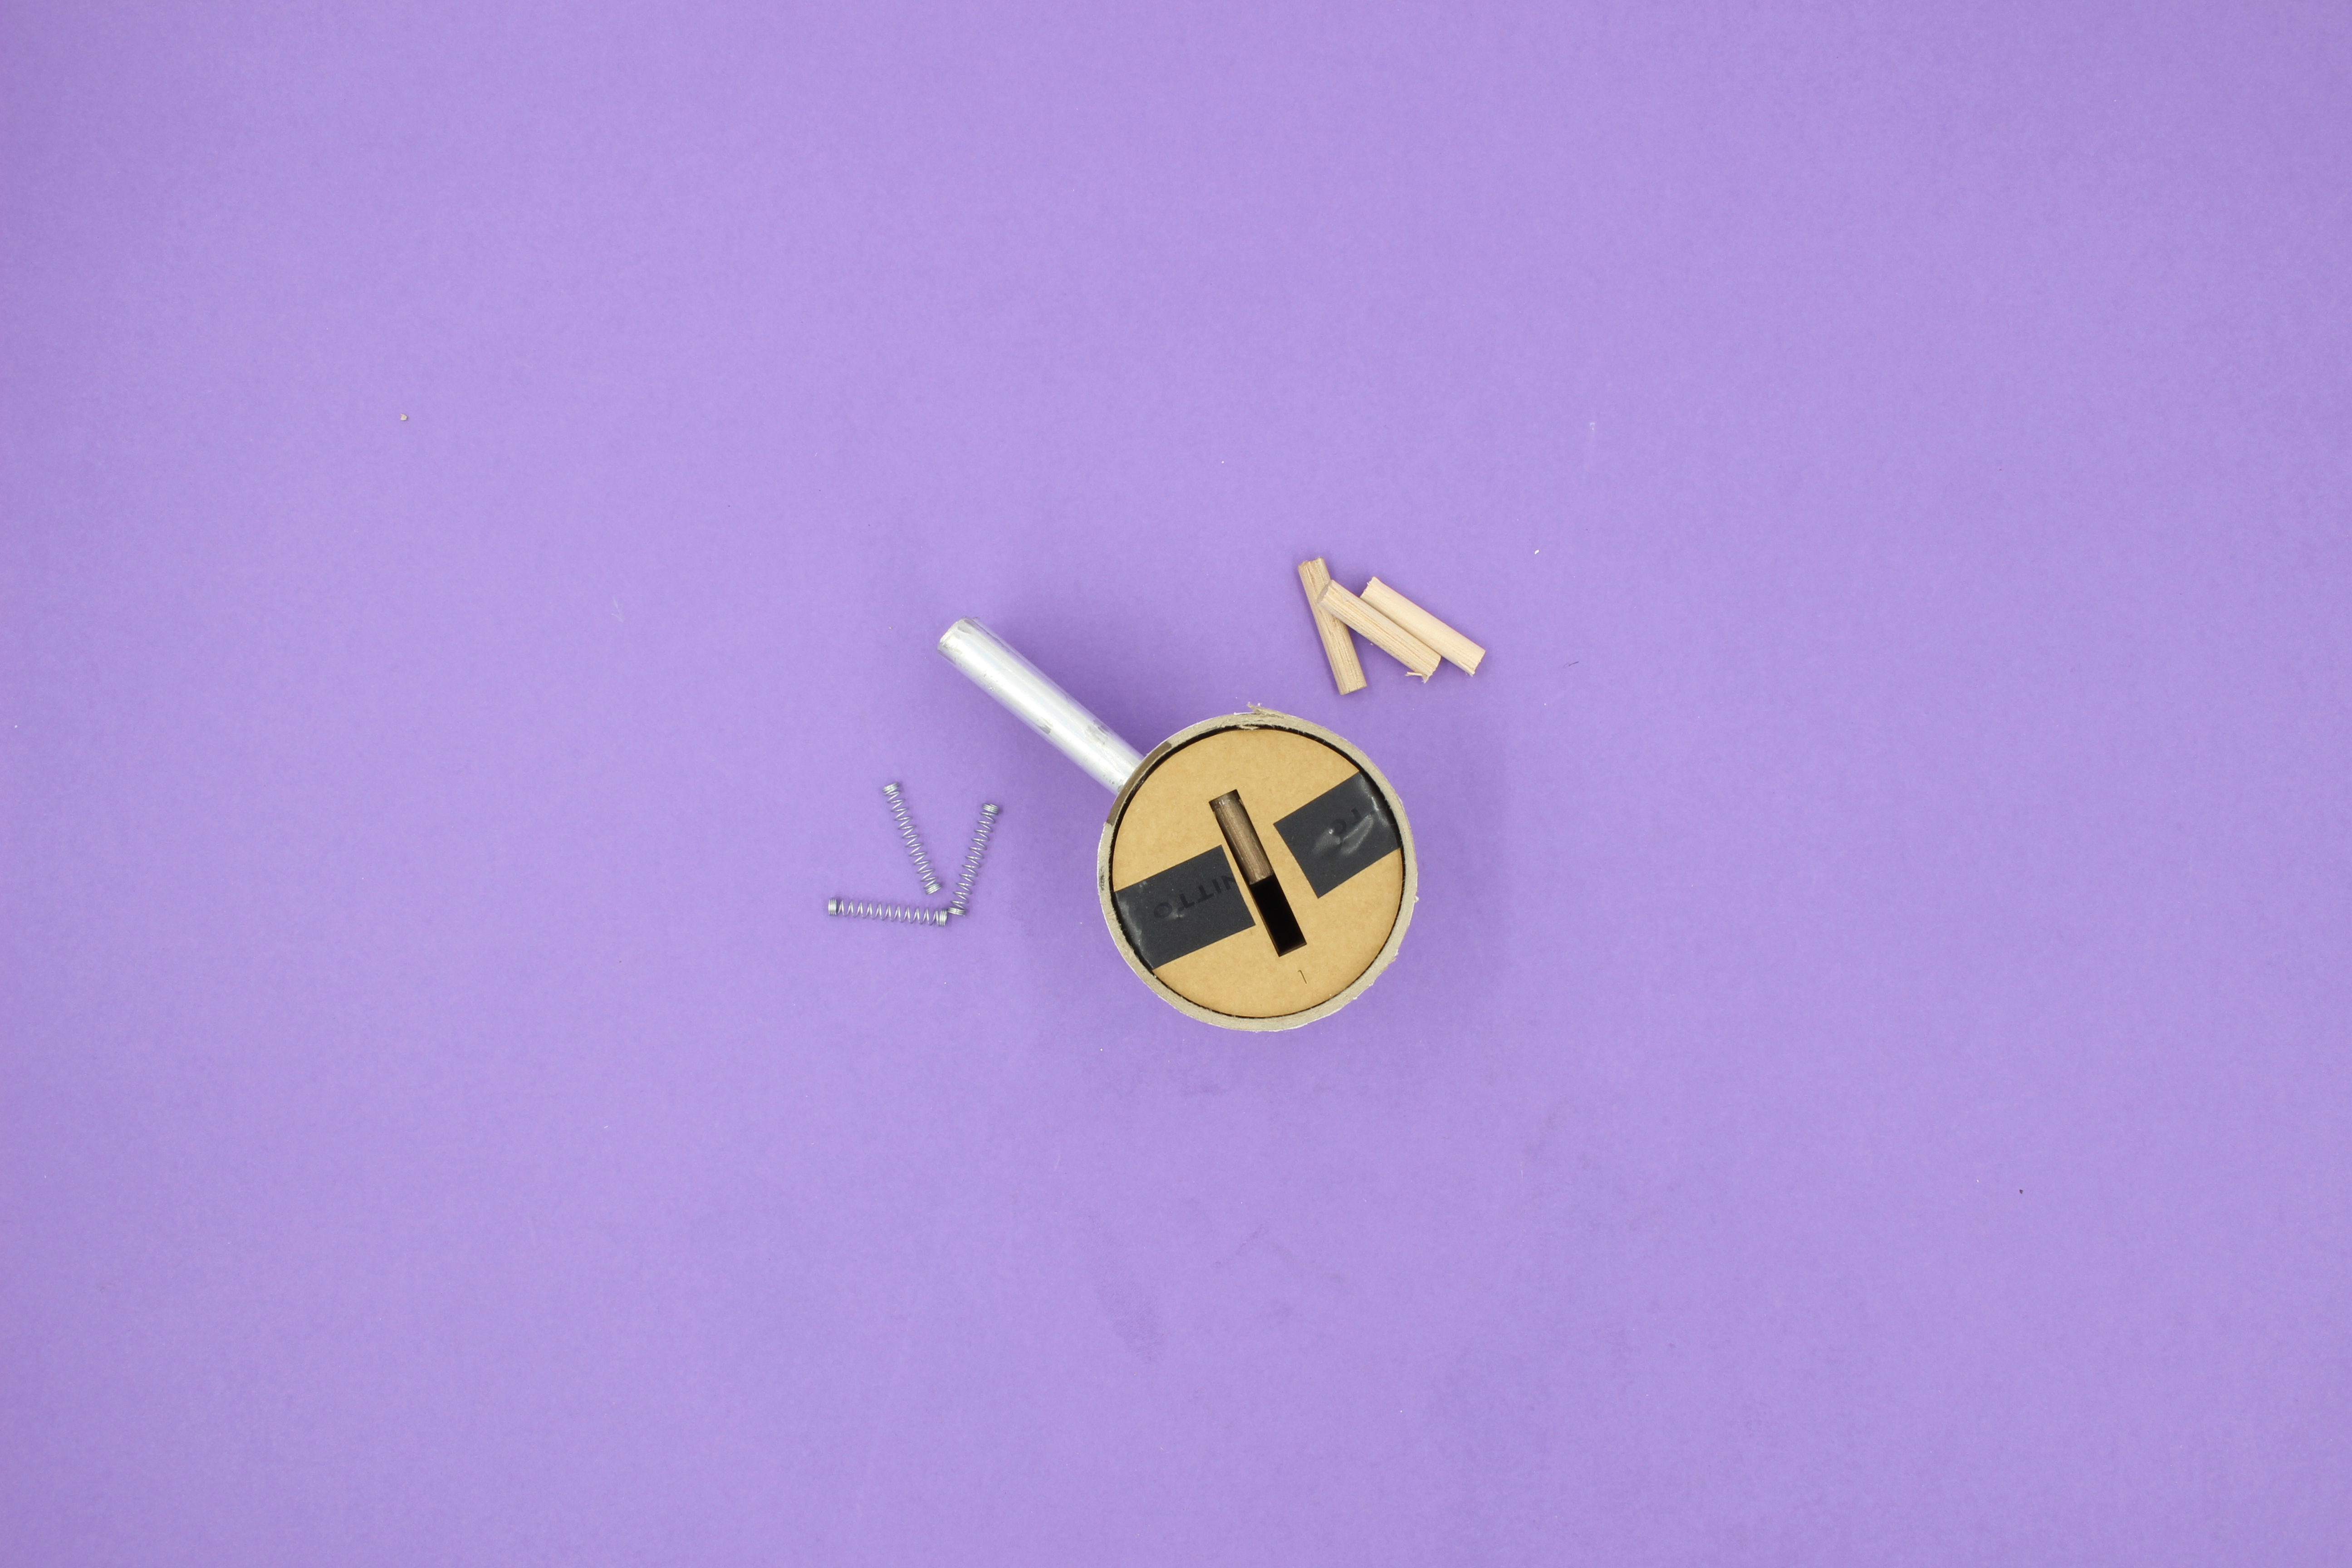
Grab the chamber support and put it over the chambers, the open end should be facing to the front of the plug/lock. It is important that you don't press the chambers into the actual plug, as it won't turn. Once the support is in place (you may need to hold it due to the tension from the springs), gently squeeze your plug housing and chambers into the hull, there should be some resistance so try wiggling in.

It is important that you do not stick the chambers too far into the plug housing as it will most likely stop your plug from turning at all. This is something to consider all the way through this workshop.
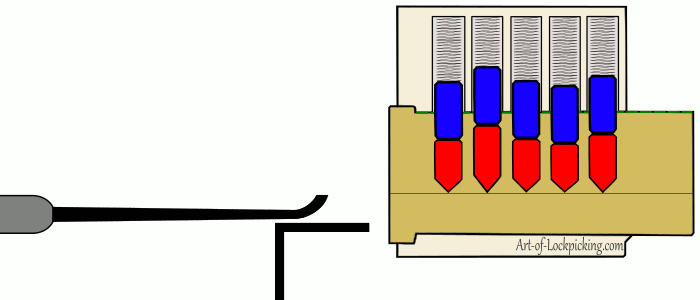
Finally, we want to make sure that our pins are working. First use your tension wrench to carefully turn your barrel back to “locked” position. Your set pins should all fall down into the plug and you won't be able to turn the plug anymore. Grab your lock pick and gently press the key pins up, when you release it the pin should get pushed back to its resting place. If something isn't working, check the step below for some common issues.
Once everything is working and you are ready to try picking it, add the front layer and use your rubber bands to keep everything nicely in place.

Step Five: Troubleshooting
There are a few things that can go wrong when putting the lock together. Here are a few things to look out for or try:
- Are your chambers (aluminium pipes) too far down and slid into the plug itself?
- You may need to remove a few layers from your hull in order to pull them back up.
- Are your key pins not being pushed back down?
- Your spring may have gotten stuck between one of your chambers and the support (there is a bit of room).
- Your spring might be a little short, check with step four to see how to fix this.
- In some cases applying too much pressure/tension to the plug causes the set and key pins to pass each other, resulting in the key pin getting wedged in.
- It is easy to accidentally push your key pins backwards or forwards, just use you pick to straighten them up and continue picking!
- Having problems picking the lock?
- When not applying tension, are all the key pins getting pushed back into place?
- Check with the facilitator for some tips or just head onto youtube to check out some video tutorials
- It is important that picking a lot takes practice and you might not get it straight away, be patient!
- Has one of your key pins fallen down into the keyhole?
- Your o-ring may have slipped out of it's groove. Ask the facilitator for a new key pin with deeper grooves.
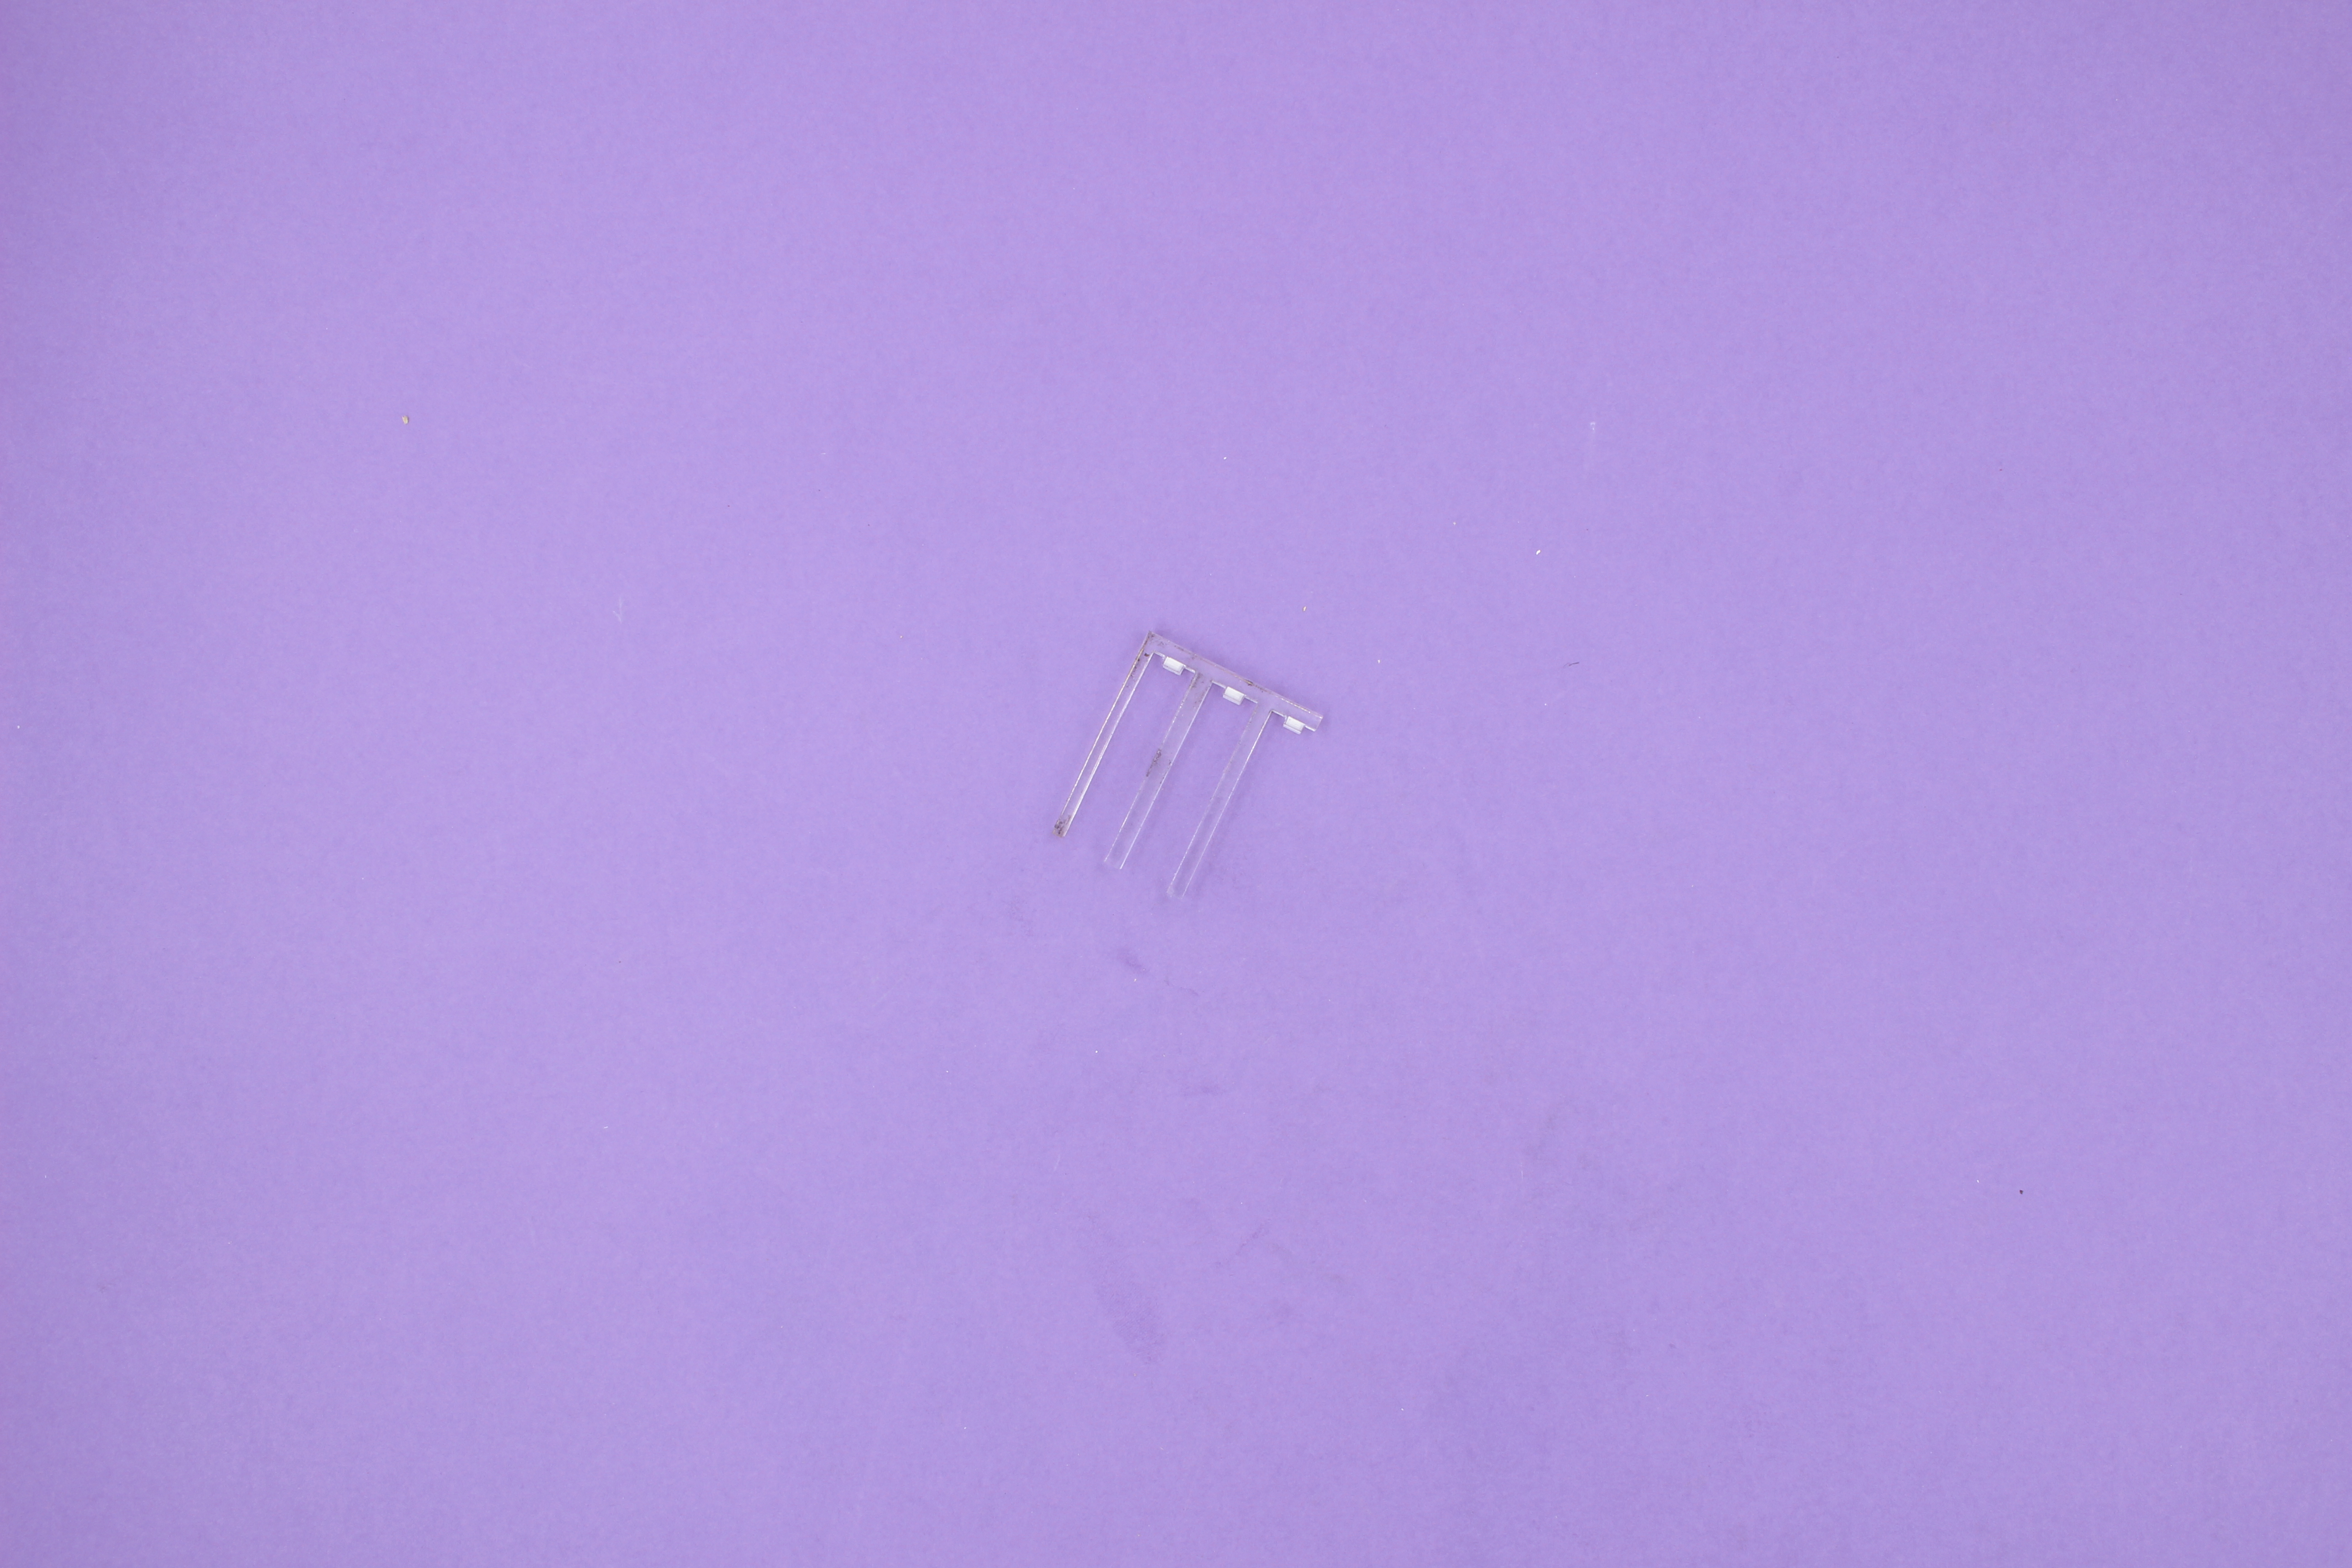
Step Six: Lock picking References

Woodford Feedback
- tape is ugly and lacks stickiness
- Cardboard is moisture vulnerable - suggest acrylic inserts to reinforce
- Some variation in chamber length (1-2mm)
- Spring length (strength) needs to be determined
- Length of plug and tube don't match (variation casuses alignment issues with pins)
- pins - if not well smoothed - stick in the inside of the
- tubes dug into plug, stopping rotation.
Woodford Solutions
- Replace acrylic rings with acylic plate insert that runs the length of the plug.
- Add acrylic collar to to hull to hold aluminium chambers in place.
References
This were you put external links like LED generator
Files
This is where you put files for laser cutting etc..