Photogrammetry Rig made with Raspberry Pi
Please replace placeholder with a high quality finished outcome pic

Add the month and year plus name of workshop developer/s
Acknowledgement
We acknowledge Aboriginal and Torres Strait Islander peoples and their continuing connection to land and as custodians of stories for millennia. We respectfully acknowledge the land on which we all meet today, and pay our respects to elders past, present and emerging.
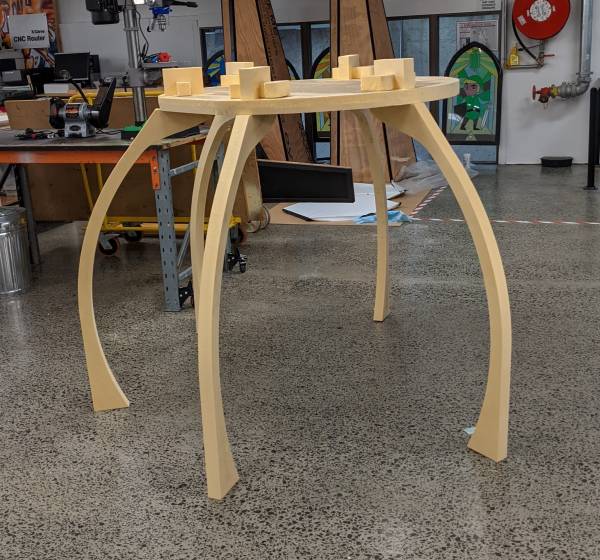 | Cut the structure in 50mm XPS foam (note the 2 layers) |
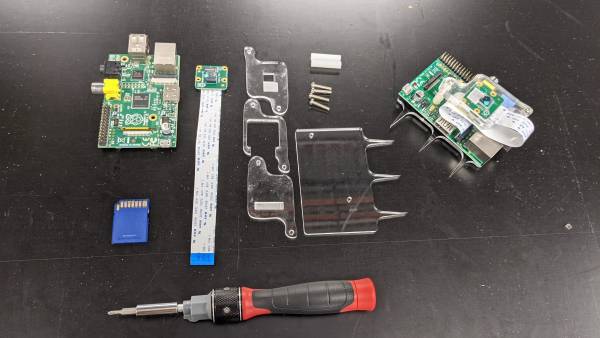 | You will need a multitude of raspberry pis with cameras, we started with 15 sets. For each set you will need: * A raspberry pi, we used the model B because they're cheap. * A raspberry pi camera module V2 (higher quality, ability to manual focus with the white knob thing in the box) * 2x standoffs with 2 open ends, at least 20mm long * 4x bolts 3M*15mm * Laser cut camera mount and backing we used 3mm acrylic. * USB cable 2m * Ethernet cable 2m |
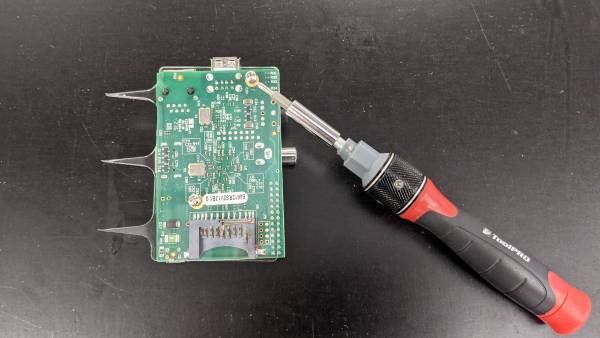 | Add the back casing with 2 of the bolts |
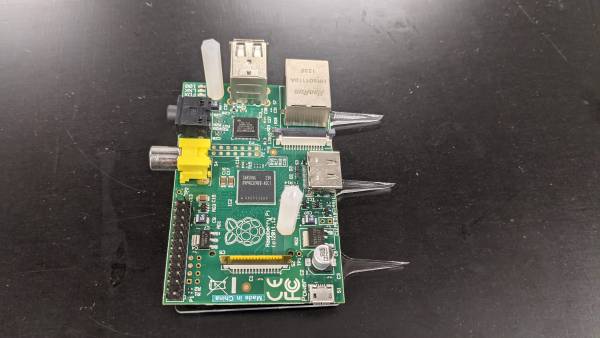 | Attach the 2 standoffs to the screws on the front side |
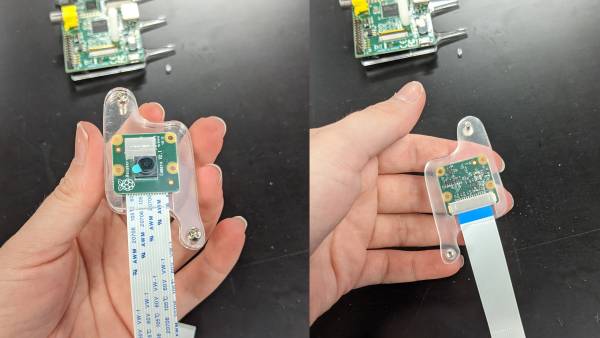 | Assemble Camera mount, 3 layers of acrylic as per picture. |
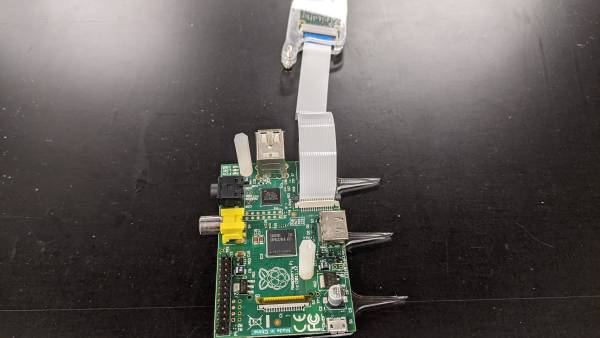 | Plug in the camera by pulling the clip up, inserting the ribbon and pushing the clip back down to secure it. Ensure the ribbon cable is facing the correct direction, and you're plugging it into the camera port (not the display one). |
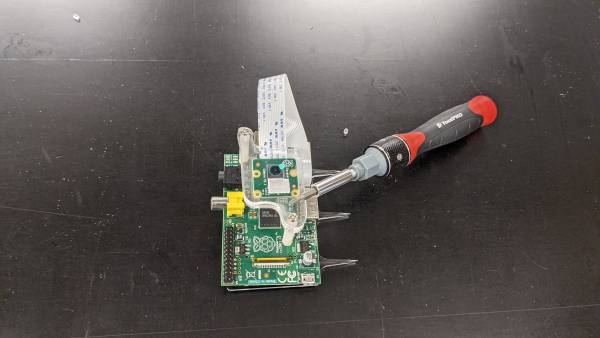 | Screw the camera mount into the standoffs. |
| Plug a usb power supply and ethernet cable into the Pi, and poke the pi into the foam. For our prototype we spaced them 3 per leg, aiming for the centre of the structure. | |
| The USB cables meet at a power supply placed on top of the structure | |
| The network cables are attached to a network switch. |
Installing OS onto PIs and setting up camera:
- follow the official instructions for setting up your SD cards with Raspberry Pi OS
- plug in SD card and open it for the first time and go through setup routine *Add detail here*
- Get camera working official instructions
- Go to main menu, open raspberry pi configuration tool
- In the interfaces tab enable the camera.
- reboot the raspberry pi
- To test the camera: open a terminal window (black window icon on the toolbar)
- type in raspistill -o Desktop/image.jpg and hit enter
- it will show you a preview of the camera's view for 5 seconds then save a picture of it to the desktop.
set up mini network
- plug pi and a linux pc into a router (local network, don't connect to greater network)
- test networking get ip addresses of each
- ping pi from linux
set up server:
- on linux PC, open terminal
- install samba
- make a directory in root called server
- change owner to nobody. nogroup
- add 777 permissions
- test touch
- create mask
Processing the images into a 3D model
HP Sprout has some software. https://www.pi3dscan.com/ has a free trial for up to 35 cameras, paid beyond that. Meshroom is a free and open source option: https://alicevision.org/#meshroom
