Tensegrity Table - Sticks and String


Kurilpa Bridge, Brisbane
Steve Collis from Melbourne, Australia CC 2.0
This workshop was developed by Peter Musk for online delivery during Science Week, August 2020.
Acknowledgement
We acknowledge Aboriginal and Torres Strait Islander peoples and their continuing connection to land and as custodians of stories for millennia. We respectfully acknowledge the land on which we all meet today, and pay our respects to elders past, present and emerging.
Summary
Tensegrity structures use carefully balanced forces of compression and tension to make things that are strong and lightweight while using a minimum of materials. The concept was developed by Buckminster Fuller from the late 1940's and used to design and construct the dome roofs of Olympic stadia and the Kurilpa Bridge spanning the Brisbane River.
Tensegrity has since been identified in nature - the human spine, the microscopic skeletons of living cells and even DNA all show how the efficiency of such structures have been favoured by evolution. Artists and architects continue to explore the concept, making elegant, strong and intriguing structures that often seem to hang impossibly in space.
This workshop introduces some basic ideas and designs by constructing working models using cheap household materials.
Skills Introduced
- Design thinking
- Accurate measurement and cutting
Materials
This activity has be designed to be completed using readily available household materials and a minimum of necessary tools. The quantity of materials available will determine the size of your construction.
Art supplies for decoration can be used at your discretion, but remember, this is meant to be a prototype
| Material | Quantity | Cost | Supplier |
|---|---|---|---|
| Cardboard | a couple of boxes | $0.00 | recycled |
| String | 50cm | $0.00 | recycled |
| Rubber bands | 8 | $0.00 | recycled |
If you decide to use these designs to make more finished products, the choice of materials will depend on your skills, available tools and aesthetic intentions.
Tools and Preparation
By design, the tools required should be readily available in the household.
These items are available for purchase in most communities if necessary.
Sharp cutting tools are required.
Adult supervision should be considered.
Tools
- Boxcutter or craft knife for cutting the cardboard (and a waste board to cut it on). Scissors could work, but will be more difficult to employ.
- Marker pen and ruler.
- Paper for sketching designs
- Stapler
Preparation
Before the workshop you will need to locate a cardboard box or two as raw materials. Most grocery shops give them away.
Corrugated cardboard will be best because it is stronger than single ply material.
Workshop Walk through
Step 1: Choosing your design
What shape to use
The size of the cardboard available will determine the size of your prototype, but anything smaller than 10cm across will make assembly difficult.
You will need two identical symmetrical shapes to make the top and bottom of your table, and more material to make the hooks. Something that could sit on a desk or shelf could be 10 - 20 cm across.
WHY?
Symmetrical shapes, like squares, triangles, circles or rectangles will make it easier to locate the tension elements so they balance the load.
If you want to make an irregular shape, you might need a jig (for example, a square of cardboard you can place at the centre of balance) to ensure the tension elements are equally spaced and the load is balanced.
How high to make it
A good size for a prototype would be 15 - 20 cm high. The taller the table you make, the less stable it will tend to be. This is important if you intend to put anything heavy on the table (like a cup of coffee).
Making the base larger than the top could help, but locating the tension elements then becomes harder.
On the other hand, a taller table emphasises the 'floating' attributes of the design.
Step 2: Cut out the top and bottom
Sharp tools required - take care
Draw your shape on the cardboard, and use care or a ruler to cut it out accurately.
You can use a convenient object to trace out the shape (a bowl for a circle, or a plastic container for a rectangle, for example), construct a shape using your knowledge of geometry, or freehand it
Use the first shape as a template to cut out another exactly the same.
Step 3: Make Locating Holes
Strings to tension your table and hold it in a pleasingly horizontal fashion run from the base to the top. To keep these strings vertical, the attachment points for each string need to be directly in line as they are made.
The easiest way to achieve this, is to align the top and base evenly, and then hold them together firmly while a skewer or awl is used to punch a hole through them both at the same time, keeping about 1cm inside the edge for strength. If your alignment is good, then the top holes will be directly above the bottom holes when the table is assembled. For most shapes, four strings, equally spaced around the edge will look best
If your design uses a top and bottom with different shapes, this is more difficult. Best to try to centre the smaller part over the larger, and try to centre them both on the centre of mass. .
Step 4: Design the hook
The top and bottom of the table each have a 'hook' that extends up (for the bottom) or down (for the top). The hooks will be connected by a tension element (a loop of string) at the table centre, and the length of this part sets the height of the table.
To get this arrangement to work, the end of the hook must extend past the centre of the tabletop , both in the horizontal and vertical directions.


Take some measurements
The diagram shows how to prepare a guide for your hook design.
The height measurement can be an estimate if your levitation skills are undeveloped.
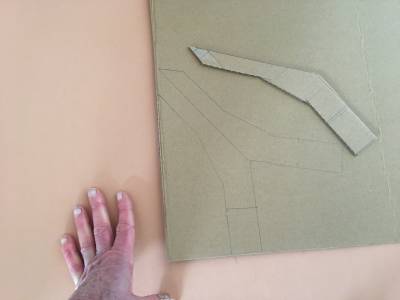
Draw a guide for the hook design
On a sheet of cardboard, draw up a design guide using the measurements for your table.
WHY?
The green lines are 1cm from the boundaries of the design.
This is so the hook ends past the mid-point, but stays inside the edge and below the top of the table.
Get creative: sketch a hook
The shape of the hook is up to you, though it is good to start with something simple like the example below.
You could do curves or cutouts, but remember you will need to be able to cut this out of cardboard with a sharp knife.
The hook in this case extends above the guidelines - this will allow for a taller table.
Step 5: Make a template to cut the hooks
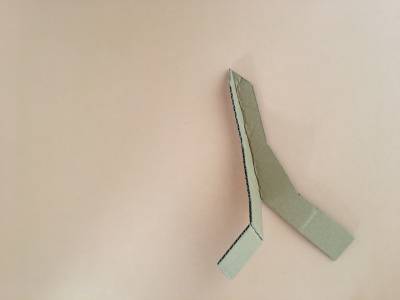
Your hook design is now ready to cut out to use as a template (remember you need two so they can attach to the top and the bottom).
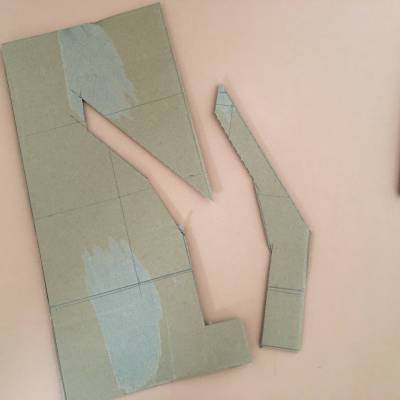
For extra strength, it is a good idea to use a double thickness of cardboard, and how to do this is explained in the next section. If your cardboard is especially robust, or your design has a curve along the top line, then this single thickness might suffice.

why?
The notch is there to provide an easy way to align the tension element with the centre of mass.
The straight edge along the top is necessary to make a double thickness hook, folding along the top for strength.
The purple line shows a gusset to help carry the load on the end of the hook, and stop it bending.
The crease line, and the extension in blue below (at least 5cm) will become an anchor to fix the hook to the table top.
Sharp tools involved - take care
Step 6: Stronger double thickness hook

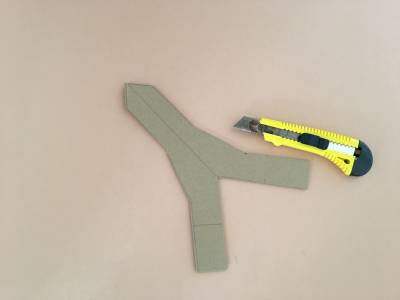
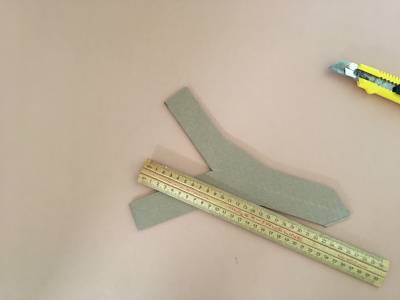
You can increase the strength of your hook by using the template you have just made to create a double thickness part.
The dotted line shows where you flip the template over, and where the part needs to be creased to double the thickness of material.
Of course, this requires a larger piece of cardboard to contain the shape, but the extra stiffness might well be worth it.
WHY?
Creasing rather than scoring is a better way to fold the double thickness hook, because it does not weaken the cardboard as much. Try setting a straight edge along the crease line, and firmly pressing the BACK of a scissor blade along the line.
The crushed line will be on the inside of the fold.
Fold the two halves of each hook together, and hold them firmly while you put a few staples in to keep them that way.
Step 7: Notch the hooks
A tension element runs between the hooks, aligned top the centre of your table.
Making a notch on each hook at the centre point will make it easier to attach this string later.
Lay the folded hook on your template, and notch where the centre line crosses the hook. Be sure to make the notch in the FOLDED side of the hook.
Step 8: Fixing the hooks
Bend the tabs at either side of the hook to make feet that you can then use to attach it to the horizontal pieces of your table.
It helps to mark the centre point on the edge where you will attach the hook, and then line this up with the middle of the hook before you fix the feet.
Crushing, and stapling works here, too.
Step 9: Make hook stabilizers
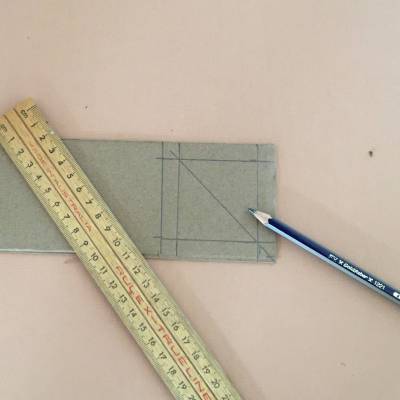
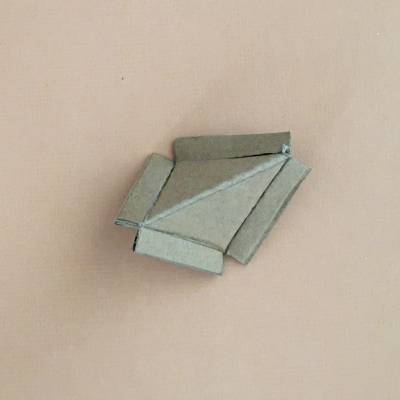
Cut out a couple of hook stabilizers, scoring and folding along the dotted lines as shown.

You should end up with a triangle of material, with tabs perpendicular to two of the sides.
Step 10: Fixing the hook stabilizers
Attaching the stabilizer will be difficult to do with a stapler, but sticky tape should be strong enough.
Push the stabilizer hard up against the vertical hook, and fix it to the hook, then the top. With a stabilizer on either side, the the hook should be held firmly and as vertical as possible.
Repeat the process with the base, only this time, attach the hook to the upper surface. When assembled, the two hooks will cross over in the centre of the table.
Step 11: Prepare the tensioning elements
Getting the top and bottom of the table to line up is easier if all the tension elements (the strings running from top to bottom) are the same length. You can choose the size you want, or lay the two pieces down and move them around until it looks good. Having a ruler to hand makes it easier to measure the distance between top and bottom.


Once you have a measurement, mark it on a piece of string (a felt pen will do this best).
Cut the strings with a centimetre or two excess at each end to allow them to be stuck in place.
Step 12: Attach the tensioning strings
Push a tensioning string through each of the holes you made earlier in the top of your table.


Push through until you see the mark just made, and sticky tape in place.
Do the same for all four strings.
Step 13: Attach the base
Place the base so that the two hooks will overlap in the middle of the table, and then push the other end of the tensioning strings through their respective holes.
Once again, push through until you see the mark, and then stickytape them in place.


Once you have finished, you will need to make a loop of string to connect the two hooks - laying the table down may make it easier to measure the length required, or you can go from the measurements in your original design.
You can use fishing line to make this loop more invisible (and increase the sense of floating), or cheat a bit and use a rubber band, as here.
If you sue a rubber band, then the table will sag out of shape if any weight is placed on top, but it might make it easier to measure the length of the loop required.
Troubleshooting
It's not straight! or One of my strings is saggy!
Check that the tensioning strings have not slipped out of place. You can adjust the heights by removing the sticky tape from one end, pulling the string through until tight and re-applying stickytape.
This problem can also be happen if the hooks are not vertical - if it looks like this is a problem, try bending into shape, or jamming some small pieces of cardboard under the base of the crook hook.
I am embarrassed to show my friends this ugly thing!
This workshop was always meant to be a prototype. Now that you have experienced the key aspects of making this design, using more rigid materials, or more aesthetic designs can be your next step. Wooden examples of all size abound on the internet, but the material you choose will depend on your tools and skills. You should at least have a better idea of which joints are critical, and how the stresses work through the design
Asymmetric designs, or using a transparent acrylic base with an opaque top would be interesting to explore
Further down the rabbit hole: sticks and string

Tensegrity designs can be developed with more elements that the simple two piece table you have already made.
The example here is the next step in complexity : a triangular prism.
Stability relies on getting the lengths of the tension (string) and compression (stick) elements just right, and with out resorting to some complex mathematics, this is best achieved through trial and error.
The following dimensions seem to work:
Sticks 178mm
Vertical strings 158mm
Horizontal strings 76mm
which is close to a 2:2:1 ratio.
References
For more inspiration, a Google image search will result in countless examples of tensegrity structures in architecture, art and design.
A thorough mathematical analysis of simple and complex tensegrity designs has been developed by Bob Burkhardt. It can be found at http://www.angelfire.com/ma4/bob_wb/tenseg.pdf.
Examples of tensegrity structures that arise in biology are detailed by Graham Scarr at http://www.tensegrityinbiology.co.uk/biology/
And if you want to see how Buckminster Fuller developed these concepts into a design for floating cities held aloft by no more than a few degrees of warmth, search for Cloud Nine.


