Memory Wire Origami

Developed in 2016.
Most of the world’s robots do not have arms, legs or a smiling face. They are machines controlled by circuits or software that are often integrated into a device and carry out a limited range of functions relevant to a narrow purpose. This activity allows students to explore the simplest forms of robotic behaviour where control is through a simple circuit, with the purpose of producing expressive movement.
Memory Wire Science
Nitinol wire is made from an alloy of nickel and titanium containing equal numbers of atoms of each. At room temperature, this wire is soft and can be bent into any shape. When heated to the right temperature, the atoms in Nitinol rearrange themselves, and the wire shrinks and becomes stiff, causing the wire to change shape.
The final shape of the heated wire can be fixed by a training process:
• fix the wire in the desired shape by twisting it around screws set in a metal plate, winding it round a rod to make a spring, or using standard tie wire to hold it in place.
• heat it to about 500oC (a red glow) for 5 minutes using an electric current, oven, a butane burner, lighter or candle (the precise time required will need to be determined experimentally, because it varies with the source and size of the wire). Try to heat evenly by starting at one end and proceeding slowly along the length of the wire.
• Rapid cooling is preferred, either in air (for thin material) or water.
Movement Palette
1) Bending and Straightening
Flower petals can open and close, butterfly wings can flap or a venus fly-trap can capture its prey by using a variety of simple mechanisms:
• Train a length of memory wire into a curve, and then straighten it before attaching to your flower petal. When heated, the wire returns to a curved shape, opening a flower or bending a finger
(see: https://youtu.be/EYsybu2fP0Q).
• Use a U-shaped piece of wire trained to a flat shape, and secure at the ends and the top of the bend. When heated, the wire shrinks, and the anchors force it to curve (see: https://youtu.be/jMPkP3HHiEI and http://highlowtech.org/?p=1448)
• W-shaped wires can be securely attached to an anchored base, with the peak of the W folding a wing along a crease (see: https://youtu.be/VfOsPAkvOd0).
2) Furling and Unfurling
Frogs' tongues and striking snakes can be made around wire trained into a coil and then straightened. Heating causes attached designs to retract like a concertina. If only one end of the coil is attached to a fixed point, then whatever is attached to the other end will spin as it retracts (like an acrobat spinning on the end of a dangling rope). Adding another wire trained to be straight, can unfurl the design when it is heated. (see: https://youtu.be/IWi74bct81I).
3) Activating Elbow Joints
Elbows and caterpillars can be made to move if two hinged parts draw together and move apart repeatedly. If a length of memory wire is wound around a metal rod to make a spring before heat training when the spring is heated, it shrinks. Attaching the ends of the spring to two elements connected by a hinged joint causes the unattached ends to move together; the longer the legs, the greater the movement (see: https://youtu.be/wKoc7-APFsk).
4) Folding and Unfolding
Faster flapping and 360o movements can be achieved by using a twisting motion (torsion springs). Wire is trained into a Z shape, and by turning one end through 360o, while keeping the other end fixed, the centre becomes twisted. The diagram below shows how this is done:
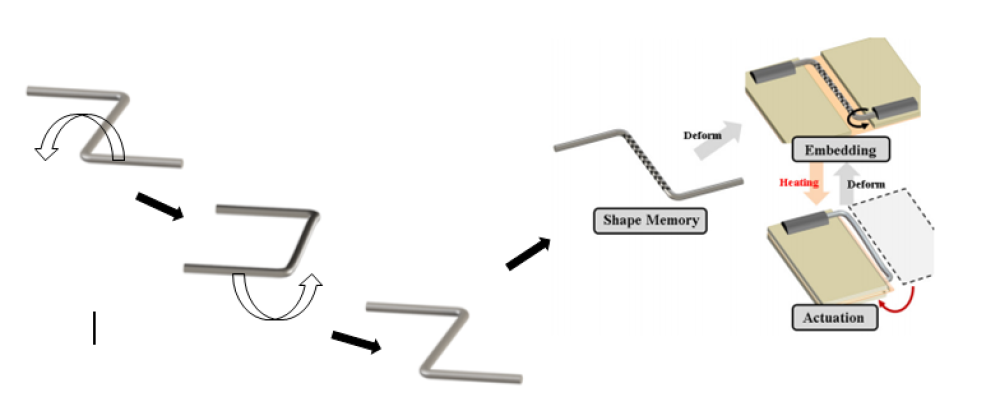
Heating causes the wire to untwist, and any segments attached to the legs will be rotated (see: https://youtu.be/wzM0hxsg2VE). Attaching two twisted elements that turn in opposite directions will allow for more rapid recovery when each is heated alternately.
Materials
These materials are per participant if not specified otherwise.
- 1 x pre-printed design on 200gsm paper (or a selection of sources for pictures and backgrounds to cut out and assemble, such as glossy magazines, picture books etc.)
- 1 x pre-trained memory wire, with attached copper circuit wire (see pre-production for how to prepare this)
- 1 x 9V dry cell (rectangular type) with battery connector
- 1 x A4 sheet 200gsm paper to make the battery holder
Tools
Tools required during the workshop. It is not required that one of each is supplied for participants but one tool per two participants is preferred.
- electrical insulation tape
- scissors
- craft knife (to score bends in design)
Training the Memory Wire
'Training' the memory wire to a shape requires that it be strongly heated while being held in the desired shape.
A simple device to do this was constructed from a pierced metal screen, recycled from a computer tower case. The cooling holes found near internal fans form a small grid, with 3mm holes. By inserting 3mm machine screws in a pattern, and using two nuts to hold them in place, a heatproof jig was made.

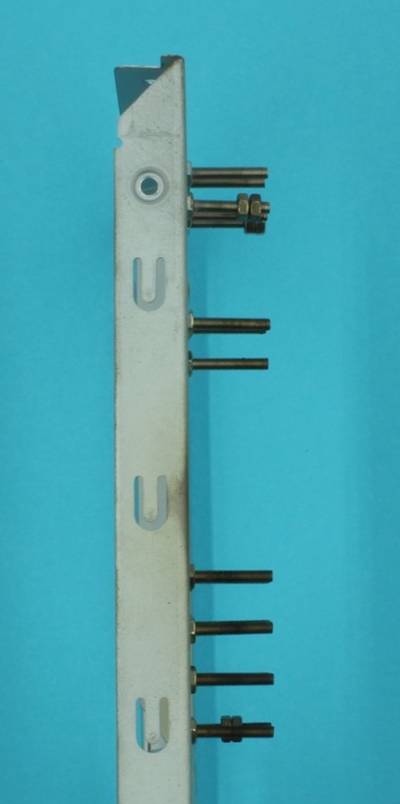
The wire was then twisted around the screws to make the desired shape, and more nuts added to fix the ends in place.
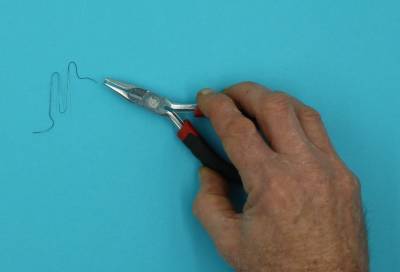
Heating was done using a portable bunsen burner (ie: a butane gas flame), moving across the wire until all parts of the wire had reached a dull red glow. After cooling, the wire was released, and the shape was fixed.

Lead wires had to be attached to either end of the memory wire shape so that the device could be incorporated into the final design. A length of multi-strand core copper woire was stripped, and disassembled to provide the thin copper wire required. Lengths of this wire were then firmly attached to the ends of the memory wire using small (imm) metal crimps available as jewelry making supplies. Firm crimping with pliers was needed to ensure a good connection.
First, a crimp was fitted onto the memory wire, and moved out of the way
Then the thin copper wire was twisted around the memory wire

The crimp was slid down over the joined wires, and crushed closed with pliers.


Instructions
Step Zero: Your Kit
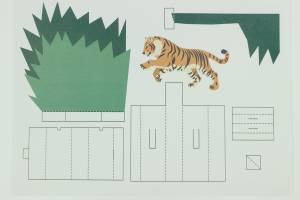
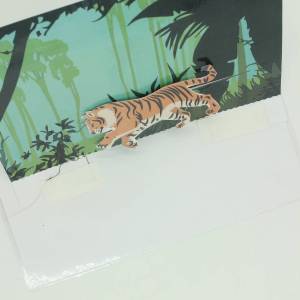
If you are using the kit, then you will have two sheets with the design printed on them as above. As usual, solid lines indicate where to cut, and dashed lines indicate where to score for folding.
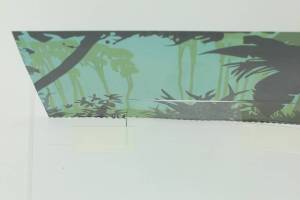
Note that the horizontal line on the right hand side of the jungle scene indicates a horizontal slit along which the tiger will slide, so take care to make this cut as clean and horizontal as possible to reduce friction (use a craft knife and a ruler).
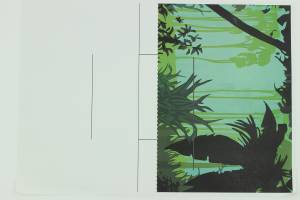
The white half sheet will serve as the base for the assembled design, with the single line showing approximately where to align the backdrop jungle scene (no need to cut along this line, but it will not matter if you do).
Step One: Prepare the pieces
Cut out the pieces using sharp scissors.

You can score along the dotted lines using a craft knife, in preparation for folding later.
Step Two: Erecting the backdrop
After cutting the horizontal sliding guide into the backdrop, fold the supports at the bottom so the outside flaps bend towards the front, and the centre flap bends towards the back.

You can now stand the backdrop vertically along the guideline on the base sheet, and use tape to hold it in place. Try to get it as vertical as possible, but this can be adjusted later if necessary.
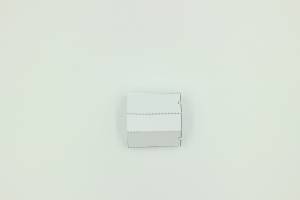
Step Three: Building the battery holder
Take the rectangular shape shown, and score along dotted lines if you have not already done so. You can begin to fold it into a box, but don't fix anything in place yet.
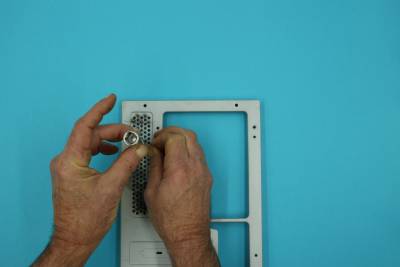
Attach the battery connector to the top of the battery (as shown), and place it inside the creased battery holder.
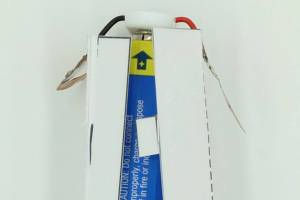
Tape the holder closed (the tab will help hold things in place), and bring the attached wires through the slots provided. Now tape the terminal connections down onto the sides of the holder, making sure that the copper contacts are not covered.

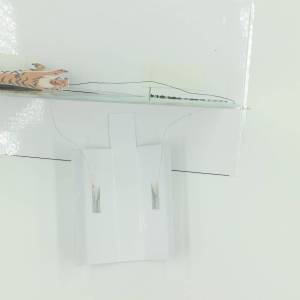
Step Four: Fitting the slider to the Tiger
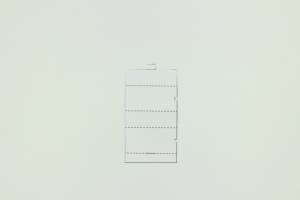
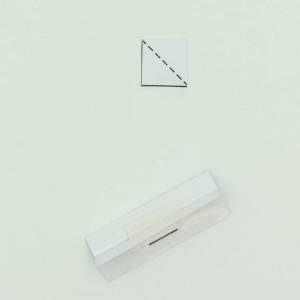
Identify the rectangular slider piece, and score along the dotted lines before folding into a hill, then closing to a T-shape.
(Don't forget to cut along the lines before this, using a craft knife).

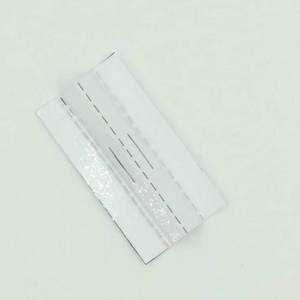
Use a short piece of tape along the back to hold the crease in place when you are sure the slots line up.
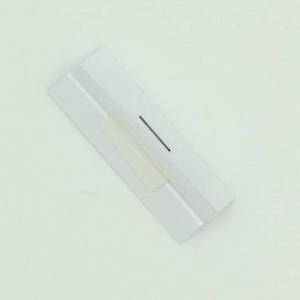
Now locate the locking tab, and score along the dotted line before folding into a triangle and taping it together.

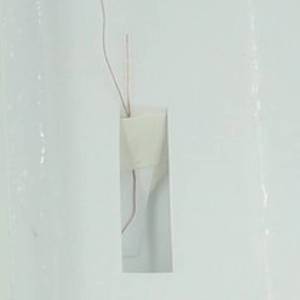
The slider is attached to the back of the tiger (or whatever moving piece you have in your design) with pieces of tape.
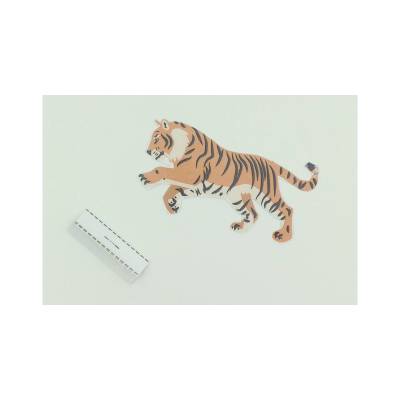

Attach one end of the trained memory wire to the leading point of the moving piece. Use small pieces of tape to hold it in place, and attach it to the back for best effect.
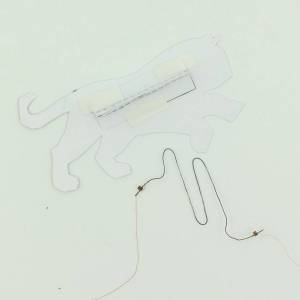
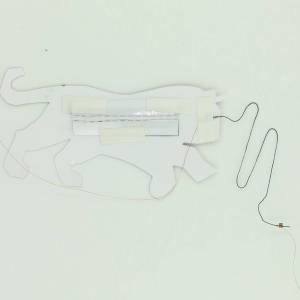
Make sure the memory wire is oriented so that movement will occur in the direction you want - this is why the wire is not straightened at this point - in this case, it will concertina along the same plane as the flat tiger image when activated.
Now slide the tiger into the slot in the backdrop, and insert the triangular locking piece into the slot in the slider to hold things in place.

Push it all the way back along the slot, and straighten the memory wire. bending the end if necessary, and fix it to the back of the backdrop with some tape.
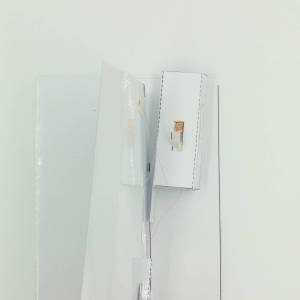
Step Five: Completing the circuit
All that remains is to connect the trailing pieces of fine copper wire to the battery cover, so that the circuit can be completed when the flaps are pressed onto the battery terminals. It is important to ensure that the naked wire is taped to the inside of the flaps, and that any tape used does not come between the end of the wire and the copper tape attached to the battery terminal.
Making a small loop at the end of the copper wire helps the connection to be made.
Now, slide the battery in the battery holder inside the battery support, and squeeze the flaps onto the battery to test that the design works.
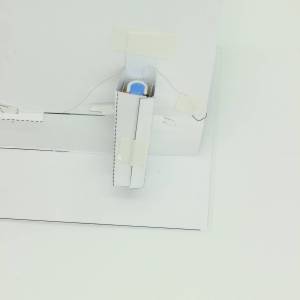
If you are happy, tape the top tab on the battery support onto the back of the backdrop, and it will help keep things vertical.
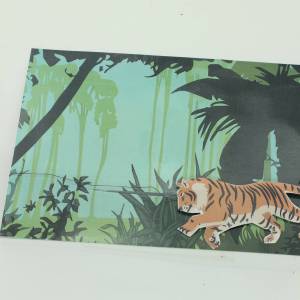
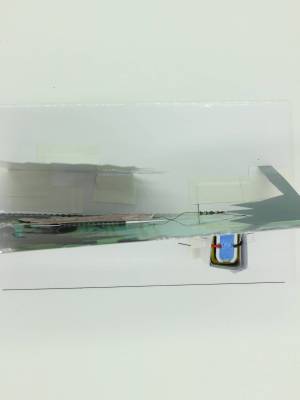
Step Six: Completing the Scene
All the remains is to add the other pieces of the scene on the base in a way that preserves the dramatic effect of the design - having the tiger hidden behind some bushes before activating the memory wire makes its movement more surprising.

You can see from this view how the pieces are offset and arranged to create a 3-D effect:
Operational Tips
When the flaps are squeezed on to the battery terminals to complete the circuit, electrical current flows through the circuit containing the memory wire, which heats up. Sometimes, wisps of smoke are released from the insulation tape adhesive - this is normal and fire does not usually result. Releasing the flaps so they move away from contact with the battery terminals will break the circuit, and heating will cease.
SAFETY CONSIDERATION
The wire heats up during operation, but because it is so thin, this heat dissipates rapidly. Warning users is still a good idea, and allowing the device to cool for 10 - 20 seconds before touching the wire is good practice.
To repeat the effect, it is necessary to straighten out the memory wire while sliding the moving part back to its resting position. After many cycles, the memory wire may become forgetful, and the effect will diminish, but the wire can be removed and retrained to this or some other shape using the techniques described in the pre-production part of this wiki entry.
Further Reading
This reference contains more information about using different types of memory wire.
This document lists a variety of (mainly Youtube) videos of memory wire being used for a variety of effects.
Some scientific papers showing more recent and practical applications of memory wire can be found here, here and here.
Files
Design files (in adobe illustrator format) for the creeping tiger are here and here.
A pdf version of the original colour design is here.
And pdfs of the design with battery holder and cutting guides are here and here.
Sourcing Materials
Nitinol Memory Wire was purchased from https://www.kelloggsresearchlabs.com/ (they also sell on Ebay).
This design used 0.5mm wire, but thicker wire works better for the twisting mechanism described in the introduction.