Printing on the Prusa i3 Mk3s
Safety
| | CHECK THAT ELECTRICAL TEST TAG IS CURRENT - CAUTION AROUND ELECTRICAL EQUIPMENT |
| | PARTS OF THIS EQUIPMENT GET HOT! - DO NOT TOUCH HOT END WHEN OPERATING |
| | THE MOVING PARTS OF THIS EQUIPMENT CAN CAUSE A CRUSH INJURY - DO NOT PLACE BODY PARTS IN MACHINE WHEN OPERATING |
 | THIS EQUIPMENT MAY CREATE HAZARDOUS FUMES CRUSH - ALWAYS OPERATE IN WELL VENTILATED AREA |
Starting Your 3D Print
| 1 | Obtain an SD card from the Fab Lab Supervisor and export a .gcode file to the card from the PrusaSlicer app. |
| 2 |  Insert the SD card into the slot on the side of the LCD screen assembly |
| 3 |  Using the Control knob, navigate to and select your file on the SD card (rotate knob to scroll, push to select). The last file saved to the card will appear at the top of the list.  The printer will automatically commence heating the nozzle and the bed to the correct temperatures for the chosen filament; printing will start when the target temperatures are reached. This can take several minutes. |
| 4 | Watch the first few printed layers to be sure filament has attached to the bed properly (5 to 10 minutes). After this you should check the progress of your print every 10 mins. Patrons are not to leave their print unsupervised. |
Failed Print Procedure
If the Print Starts to fail…
| 1 |  For a catastrophic failure press the Reset (X) button. This will abort the job and force a full reset of the printer. |
| 2 |  Alternatively, use the Control knob to select Pause Print |
| 3 | Speak to the Fab Lab Supervisor about why you think it failed |
Removing Your Print
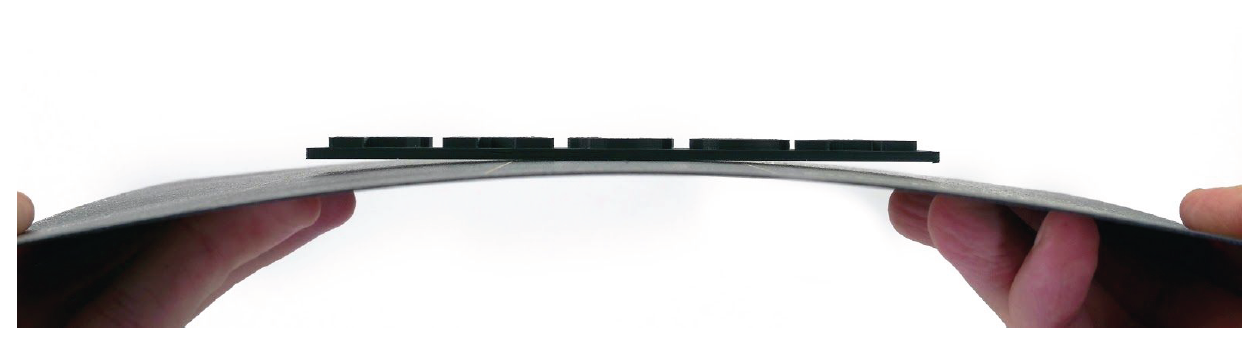
Removing printed objects from the steel build sheet is usually easy because of the ability to remove the sheet from the heatbed and flex the sheet. The difference in thermal expansion between the steel sheet and plastics used in 3D printing also helps with detaching prints after the sheet and print have cooled down.
When the printing is finished, carefully remove the steel build sheet from the heatbed by lifting the sheet at the front corners while applying an equal and opposite force on the hotbed where the thumbprint icons appear. The sheet and bed will be hot unless allowed to cool—particularly if printing with PETG filament. Once the steel sheet is removed from the hotbed, it will cool faster. Do not try to remove printed objects from the sheet while hot, as the sheet coating may be damaged. Once cool, flex the steel sheet and the print/s should pop off.
If you continue to experience difficulty with removing a printed object, you can gently introduce a non-metal flat spatula with rounded corners underneath the object to prise it free without damaging the PEI.