:workshops:prototypes:ply_lamp.jpeg
Laser cut lampshade ply edition
This workshop builds on the previous laser cut lamp workshops:
Rationale
Running workshops
- Induction to the laser
- include an introduction to Free and Open Source Software(FOSS).
- produce take away lamp
Outcomes
- Basic bitmap image processing using GIMP.
- Bitmap to vector conversion using Inkscape.
- Preparation for Laser Cutting using Corel Draw.
- Assembly and take-home of a laser cut lamp.
Tools
- Gimp for image clean-up and processing
- Inkscape for bitmap tracing and vector editing
- Corel Draw for final checks and laser layout.
Materials and Resources
- A selection of public domain images sourced from the metmuseum, found under silhouttes.
- Corel Draw template for the lamp outline.
- One 720 x 430mm sheet of 3mm single ply cardboard
- One Strala
- One Ryet or similiar.
Workshop Outline
10min
- Welcome
- Demo of the laser, lamp and assembly.
- What makes a silhouette?
- What breaks a silhouette?
- Silhouette examples..
Is this a Silhouette?
FOSS
Intro to designing for Laser cutting in FOSS - 10min
- What is FOSS.
- When to use FOSS
- When to use non-FOSS
- What is GIMP and Inkscape?
- What is Coreldraw?
Pick a Silhouette
The workshop as a whole chooses an artwork for all particpants to work on.
Use theses rules to inform your choice.
- 5 minutes cutting per lamp
- One feature per lamp
- other panels can be blank or windowed
Introduction to Gimp
Basic bitmap processing to produce a two colour image - 15 min
- Open chosen image in GIMP
- Selection and Navigation tools
- crop
- brightness and contrast
- Blur and unsharp
- convert to grayscale
- posertize
- export as a jpg.
Introduction to Inkscape
Import to Inkscape and Convert to Vectors - 20 min
- Selection and Navigation tools
- Trace bitmap tool
- select best single scan method
- adjust options (speckles, corners and paths)
- Process and close
- Export as PDF
Prepare for Cut in Corel Draw
Editing - 20min
- Trim the fat - be ruthless
- small shapes won't drop out
- complex shapes will break
- complex shapes take too long to cut
Process
- Grab theply_laser_lamp_4.0mmx1.cdr| template}} and open in CorelDraw.
- Import your artwork PDF
- Get familiar with the selection and navigation tools
- Scale your artwork up to reduce complexity
- Use the shaping controls to trim or cut by combining shapes
- Use the Shape tool (F10) to
- access individual points to correct glitches
- reduce nodes (in the menu bar)
- use the curve smoothness slider (in the menu bar)
- Drag your artwork to a panel
Laser Ready checks
- Check line widths are all hairline
- Save your design as a CDR (CorelDraw) file onto the facilitators USB stick. AS VERSION 171)
Cutting and Assembly
- Your facilitator will cut your design on the laser cutter
- Remove your sheet from the laser cutter
- Clean up loose material from the laser cutter bed
- Weed your lamp (remove cut shapes)
- Grab a light fitting and bulb
- Assemble
- Take home and enjoy!
Files
Pre-packed zip file containing DXFs exported from Fusion360. Corel Draw templates for one lamp per sheet, two lamps per sheet, and one lamp per offcut sheet.
Laser settings
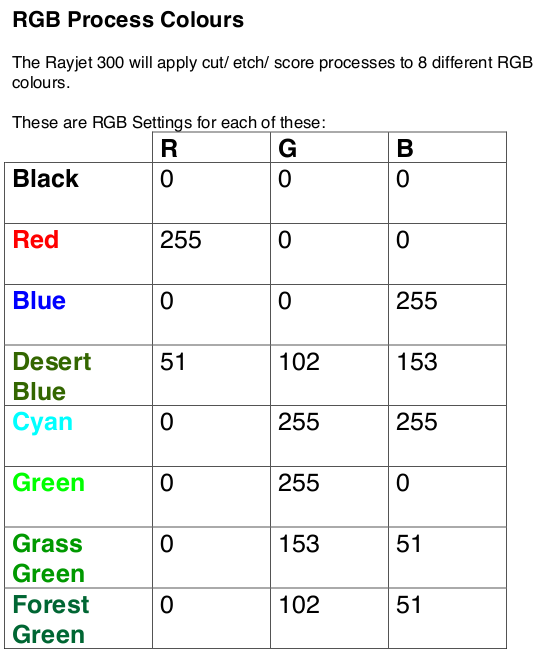
- Silhouette 85 Power 2 speed
- Cut 85 Power 2 Speed


