Learn to ThreeDee with a FUNctional print - Self Paced Starter Project
This one’s a little different than the other Starter Projects because we are not going tell you what to make.
There’s a pile of knickknacks on Thingiverse and models on MyMiniFactory that you can download and print as a first 3D print. And yes it will be exciting standing there and watching it print out…
…but that doesn’t really do much to make the world a better place does it?
Is it just going to be another lump of plastic that is going to end up choking up the ocean or entering the food chain?
Trinkets like this are regularly called dust collectors. They usually don’t change anything, they don’t solve a problem or fill a gap. They just sit on a shelf getting in the way for a while till you get sick of looking at them and throw them away.
This is where Functional prints come in… and I think it’s the best way to learn to actually use a 3D printer. To learn the skills you need to productively use the machine and start solving little everyday problems you need to find a little every problem to solve.
When people ask me,
“Mick my good man what’s the most exciting thing you’ve ever made on a 3D printer?”
I probably end up boring the brains out of them.
They expect you to talk about printing out something cool like a prosthetic for a three-legged dog or a jet engine for a model boat but I talk about something very, very boring – a replacement foot for a café table leg (you know the little feet you screw up and down to adjust the height of individual legs and stabilise a table on uneven ground).
But I’m still excited about this print (probably 10 years later) because it was a quick, simple solution to a really annoying problem and especially when I didn’t have time to muck around.
It took me 5 minutes to design a foot that would go with some M6 bolts I already had, and 30 minutes to print out 6 copies on our 3D printer. A couple of squirts of black paint and voilà - problem solved.
I think the best thing was that it saved me the 30 min drive out to and back from Bunnings, where I was either going to get stung for an expensive replacement that probably wouldn’t match or… find out that they didn’t have anything suitable. More frustration.
And this is why I like the functional print. And why I think it’s the best way to learn the skills you need. It's often replacing a simple plastic part that’s broken or gone missing. Or filling that gap when you say to yourself “I wish I just had a little thingamajig to solve that problem”. And when it works you get that buzz, the satisfaction of doing something for yourself, a friend or family.
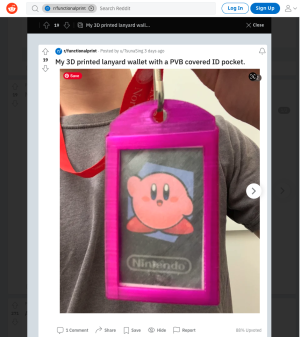
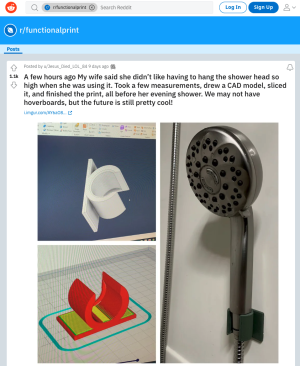
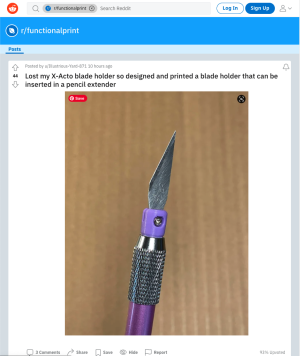
Check out the FunctionalPrint subreddit for the cool things other people have made.
And here my pick of the best 6.
So… getting started.
Page break for print
So... Your Mission if you Choose to accept it
Step 1
Have a look thru these and then have a look around your home, at what little plastic things need fixing with a little bracket or patching with a thingimajig. Or have a think about that annoying little thing you're always losing or struggling to get lined up and bring it and we’ll start making a 3D printed solution.
Step 2
Get yourself to Hack the Evening at the State Library on a thursday night (hardest part of the whole process cause you can't do it from the couch) Introduce yourself and we'll show you around.
Step 3
We'll talk about you project and make some measurements. Maybe make a basic drawing planning out how we are going solve your problem.
Step 4
Learn the basics of TinkerCad - Autodesk's free online Cad program. Like I said above its easy to learn all you need is:
- be able to read a computer screen,
- operate a mouse and
- have some patience.
Theres a TinkerCAD tutorial here
In TinkerCad we'll go thru:
- How to navigate the 3D space in the program
- We'll show you how easy it is to create functional models using the geometric solids
- how to dimension these solids using the ruler tool
- how to layout these solids using the align and drag tools
- how to how to combine these solids to create compound shapes and finally
- how to export your model ready for printing.
Step 5
Learn how to prep your model for printing using the PrusaSlicer software:
- Importing your model
- working out the best way to orient it for printing.
- Choosing your settings - resolution, infill, Support or no support
- Saving you model as a printible Gcode file on the SD card.
Step 6
Learn how to use the actual printer:
- selecting you job in the menus
- getting the printer ready to print
- And Go!

