Audacity
Audacity is free and open source audio editing software that is widely used around the world for basic audio editing. It is cross platform, available for Mac, Windows and Linux and other operating systems.
Because it is open source, there are lots of detailed guides and user support documentation online, we’ll cover most of the basics in this session but don’t be afraid to delve into more learning after this session.
Audacity is often used for Podcast and spoken audio editing, particularly because it’s free and accessible, however it is also very capable of music audio editing.
In today’s induction session we’ll learn the basics including;
- The UI (user interface)
- Recording into Audacity
- Levels
- Editing basics, including editing a piece of vocal audio
- Creating multiple tracks (adding a soundbed)
- Covering some of the effects options
Let’s get started!
All of the iMacs in the Digital Media Lab and also the HP laptops available for use in the Fabrication Lab have Audacity installed. Let’s go to our application folder or search function to find and open the program.
The logo looks like this;
![]()
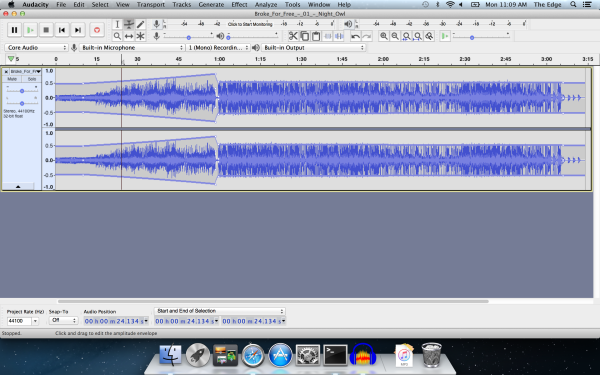
When Audacity opens, the screen you should see will look like this;

Menus
- Audacity (Mac Only) About Audacity, Preferences, System Services, Show and Hide Audacity and other applications, and Quit.
- File Working with Audacity project files and other audio files.
- Edit Altering the audio in your project.
- Select Making selections of tracks, or within tracks, in your project.
- View Change Zoom levels. Show clipping, Undo History, Mixer Board, Toolbars and Karaoke window.
- Transport Control recording and playback.
- Tracks Adding, aligning and labeling audio tracks.
- Generate Creating new audio in your project. Audio generating plug-ins will also appear here.
- Effect Processing the audio in your project. External Effects plug-ins will also appear in this menu.
- Analyze Analyzing the audio in your project. External plug-ins that act on audio but do not produce audio output will appear here, as well as tools like Silence Finder and spectrograms.
- Window (Mac Only) Minimize and zoom windows, choose the project window to bring to the front.
- Tools Additional menus for Macros and other plug ins.
- Extra The Extra menu provides access to Toolbar operations and to extra commands for track focus and movement of the editing or playback cursor that are not available in the default Audacity menus. These will be of most interest to visually-impaired users or those who have difficulty using the mouse.
Let’s look at the different sections of the interface and get familiar
Audio Control Buttons
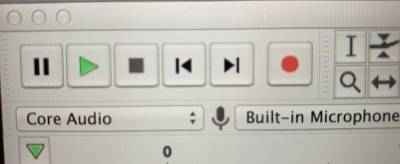
- Start recording by clicking on the red Record button
- Pause the recording by pressing the blue Pause button. You can do this at any time while recording or playing back a recording. Note: when the Pause button is selected most commands in Audacity are unavailable.
- Stop recording by clicking on the yellow Stop button. You can do this at any time while recording or playing back a recording.
- Go to the start of the recording by clicking the Skip to Start button on the far left.
- Listen to the recording by clicking the green Play button.
Importing Audio
Open an audio file by going to the File menu > Open or choose Project menu > Import Audio
When importing or opening from an audio file directly, the program may ask you if you want to make a copy of the audio file, this is to preserve the original in case you make a lot of edits and changes, it is good practice to keep a clean original audio track and make the copy.
Note: Some versions of Audacity may not open WMA files. If you have WMA file issues, you can convert them first (convert to the WAV format, for example), you can do this in a variety of programs, like iTunes or Windows Media Player.
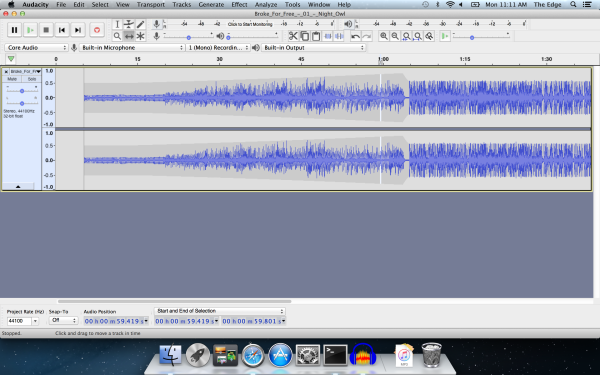
Recording Audio
You can record directly into Audacity and as with all audio recording software, you will need to choose your input (and output) depending on what set up you are using.
Connect a microphone depending on your set up; plug directly into a mic in port, or via the Line In with USB mic or use an audio adapter, or for best quality use a audio interface with good quality mic. You can use the built-in mic but the quality won't be great.
Choose via the drop down menu options in the Input & Output menu (your output might be headphones or connected speakers if not the in-built output)

Also choose from the same menu whether you want to do a Mono or Stereo recording. So what’s the difference between mono and stereo? Well a mono recording is one where the sound in the left and right channels is the same, a stereo recording has different sounds in each channel. So unless you are getting creative with your recording, best to stick with mono. Here's a link to some good info on this side of things
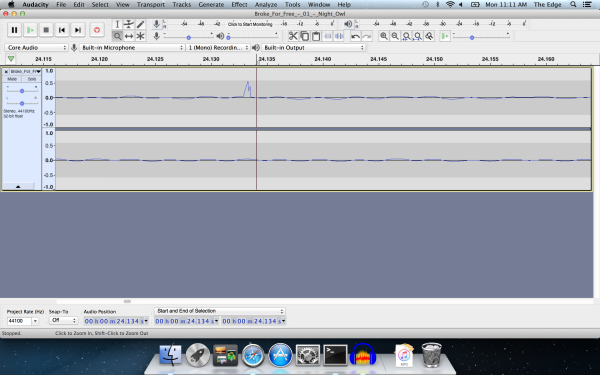
Levels and Monitoring

Audacity always launches with input monitoring off and so the Recording Meter Toolbar displays “Click to Start Monitoring”. Click in the recording meter to start monitoring, or when you press the The Record button Record button the meter will activate. The Recording Meter Toolbar again displays “Click to Start Monitoring” whenever you stop a recording or start playback.
The Playback Meter will activate when you start playback, or if you start recording with software playthrough turned on in the transport menu.
The orange color displayed here in the left channel warns that the signal is too “hot” or becoming too “hot” (approaching 0 dB). The red bar at the right of both channels indicates that clipping is occurring.
Editing
Tools We'll run through each of these quickly, the main one you will use is the Selection tool and the one that looks like a star is the Multi Tool, which will switch between each of the other tools depending on where you move your cursor.
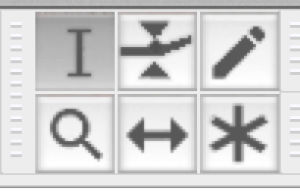
Selection Tool
The Selection tool is pretty self explanatory, and will probably be the tool you use the most. Click and drag over a piece of audio to select, or click in one spot and then you will see a pointed hand that allows you to expand the selection.

Envelope Tool
In Audacity, every track has an “amplitude envelope” which is controlled with the Envelope Tool on the Tools Toolbar.
An amplitude envelope just means that you can control a track's volume changes smoothly over time. People in the recording industry sometimes call this technique volume automation, because in a recording studio you would typically change the volume of tracks by moving volume sliders up and down, and fancy mixing boards had the ability to remember your movements and automate them from then on. Manipulating a track's amplitude envelope in Audacity is similar, except that Envelope Tool is used to create and manipulate “control points” at various points in the track. The control points then determine its volume changes over time.
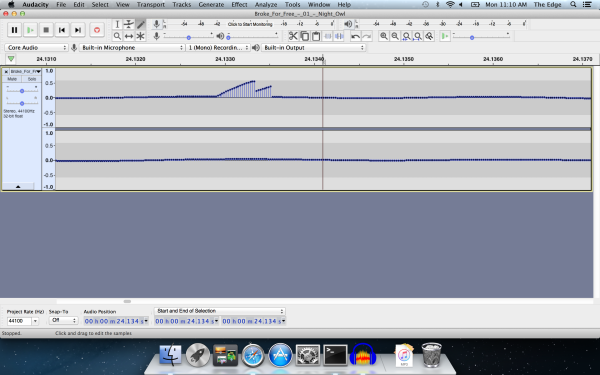
Draw Tool
Draw Tool enables you to redraw the waveform; it can be used to make volume changes to individual samples or effect repairs to clicks/noise. You need to zoom right in on the waveform to use this tool.
Magnify Tool
Another pretty self explanatory tool, used to zoom in or press shift click to zoom out.
Time Shift Tool
To shift multiple tracks to left or right, there must be a selection region in all the tracks you want to time shift, and you must drag from inside the selection region in one of those tracks.
Multi-Tool
Multi-Tool mode on Tools Toolbar lets you access all of the five separate tools on this toolbar at once, depending on the location of the mouse and the modifier keys you hold down.
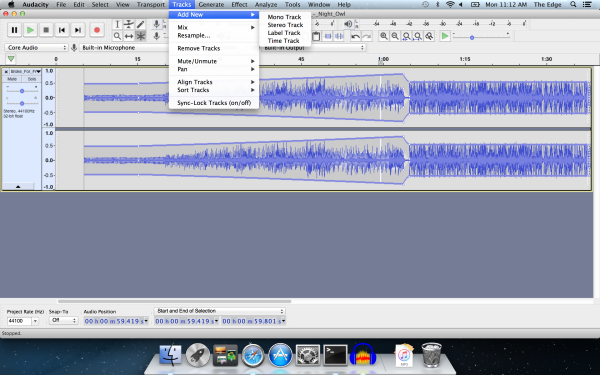
Adding Tracks
Effects
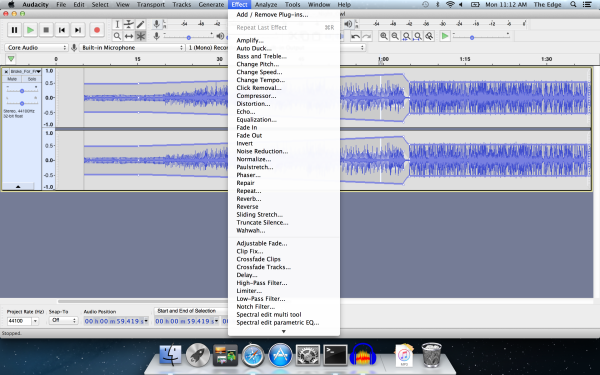
Tidying up speech
If you have a piece of plain talking like an interview, voice over or speech you can improve its quality through the following effects:
First normalise your track -this adjusts the volume so the peaks are set to a certain loudness, so you don't blow out people's speakers or the volume is too quiet even when your listeners have their volume cranked all the way up.
Then use the noise reduction function by first selecting an area of your track that should be silent and go Effect>Noise Reduction> get noise profile. The window will close. Then select all the track and click Effect>Noise Reduction>OK and wait for it to complete.
You can also set a noise gate. This is more aggressive than the noise reduction and will basically lower the volume (or completely remove it) on sounds below a certain level. Fiddle with the gate threshold to set the maximum volume of the background noise. The level reduction is how much quieter it will make the background noise (-100 for completely silent). The Decay sets how long it waits after the voice finishes to turn off the background noise, increase this value if your voice sounds a bit 'choppy'.
Next apply a limiter, changing the “limit to” setting until you have reduced any large spikes in your audio (laughing, claps etc)
Then normalise it again as it will have changed the max volume.
Then it's a good idea to apply some compression. This is sort of a matter of taste but it tends to make voices sound more 'rounded' and 'warm' and 'radio-presenter-ish'. Fiddle with the compression until you like the sound.
Then normalise the audio again as this will have altered the volume again.
You can now export and use your audio.
Practical Exercise
Download the vocal audio track - https://sampleswap.org/samples-ghost/VOCALS%20and%20SPOKEN%20WORD/MALE%20MISC%20and%20SPOKEN%20WORD/4249%5Bkb%5Dbrian-eno-lets-imagine-the-future.aif.mp3
Download the music audio track - http://freemusicarchive.org/music/Art_of_Flying/fingerface/Art_Of_Flying_-_song_for_brian_eno