Trotec Speedy 300 Laser Cutter/Engraver
The Trotec Speedy 300 is suitable for laser-engraving and cutting wood, plastics, leather, paper and many other materials. The materials we currently sell for laser use are plywood, acrylic (clear/black/white), polypropylene, and boxboard. In February 2022 we replaced the Trotec JobControl® software program that previously directed our lasers with Ruby, a new control program that is in active development by Trotec. Those of you who have prior experience with JobControl® will hopefully find Ruby easier to use. Unlike JobControl®, Ruby is both a laser program and a basic graphics drawing program. Ruby opens and runs within Microsoft Edge as its preferred browser. We expect that Ruby's functionality will expand as new versions are released by the developer.
Speedy 300 Laser Cutter/Engraver
| TROTEC SPEEDY 300 LASER CUTTER/ENGRAVER | |
|---|---|
| Inductions required | General induction, Laser cutter induction |
| Bookings | Required |
| Machine type | 80W CO2 |
| Commissioned | 2020 |
| Max. workpiece height | 200 mm |
| Machine size (W x D x H) | 1090 x 890 x 590mm |
| Weight | approx. 135 kgs |
| Technical Requirements | PC, power supply with 110-240 V |
| Max. sheet size | 735 x 435mm, 6.5mm (material thickness) |
| Cutting Materials | acrylic (PMMA), polypropylene (PP), polyoxymethylene (POM), timber, cardboard, paper, leather, textiles |
| Approved materials only. Seek approval from FL Supervisor to use alternate materials prior to booking. | |
| Available materials | Various materials are available to purchase in the Fabrication Lab Shop |
| Job Layout & File Input | Design files are imported via USB Drive and must be in vector file format supported by Trotec Ruby (.svg, .cdr, .ai, etc.) in RGB. |
The Trotec Speedy 300 is the professional version of the Trotec Rayjet 300, the previous laser operated by the Edge prior to 2020.
Laser induction can be found here
Speedy 300 Standard Workflow
1) Create your design in a vector drawing program.
 If you’re not sure how to do this, we have some wiki pages that might help! Vector Graphics talks about vector graphics generally and offers a range of options of software depending on your experience and needs. We often suggest Inkscape to people new to vectors as it’s free, open source, and very fully featured. We have put together some quick videos and a workshop you can read through online.
Regardless of the software you use be sure to:
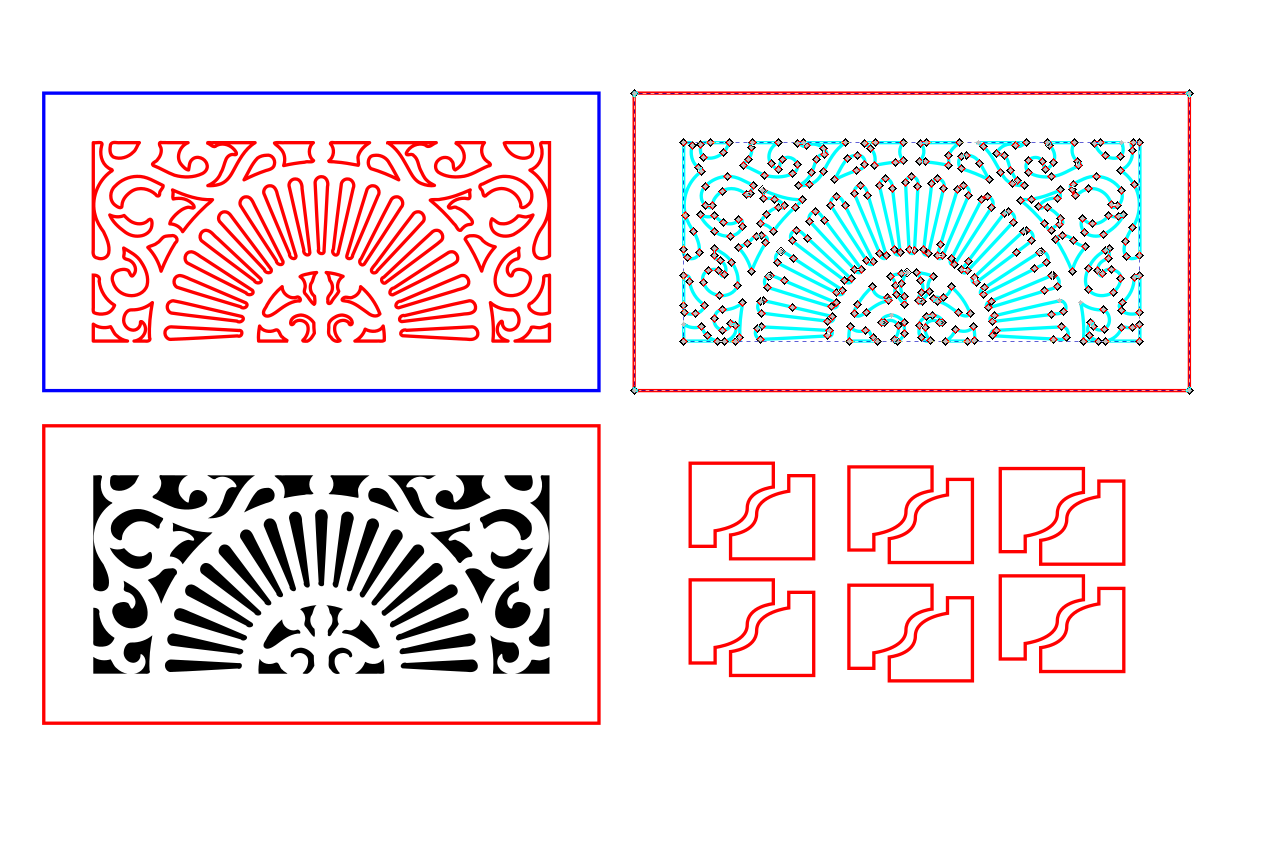
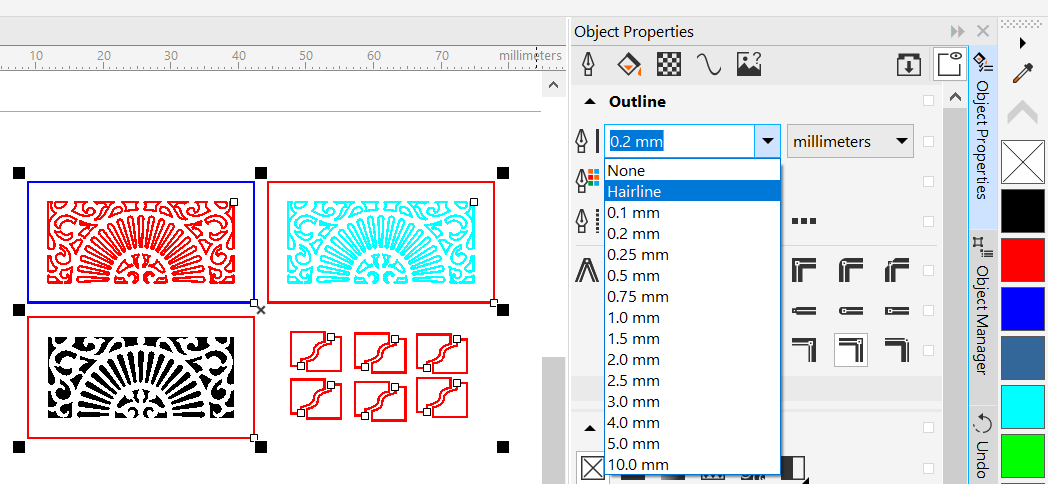
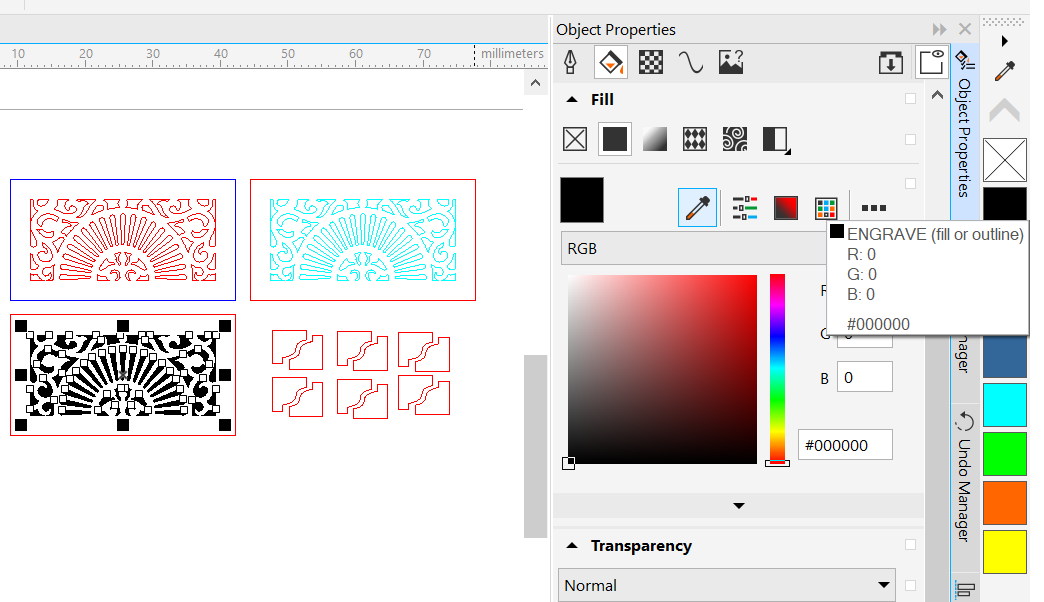
a) Colour your lines and fills in your image according to whether you want each element cut thru, vector engraved, or raster engraved. The default colours are red, cyan, and black respectively, but don't worry about getting these colours precise. The important thing is that you differentiate your desired outcomes using different colours for easy group selection later in the Ruby software. Unlike with JobControl, you no longer need to meticulously set line weights for thru cuts or vector engraving prior to importing your file into Ruby. Once lines of any thickness are coloured red or cyan in Ruby, the software automatically understands these lines are to be cut thru or vector engraved.
- Ruby is set to interpret black outlines and/or fill as standard raster engraving (approximately 0.3mm deep). Deeper raster engraving depths are programmed for most materials [blue for 0.5mm depth, green for 0.7mm depth, pink for 1.0mm depth (achieved with 2 passes)]. When raster engraving, line weight will matter (thin lines engrave thin, thick lines engrave thick).
- You can raster engrave (but not cut!) black & white or greyscale pixel images/photos, but the results are hard to predict depending on the size of the image, the material, and even the parts of the material (e.g., grain pattern in wood). Expect to need to cut a few test pieces, and have plenty of extra material at hand.
- Unlike in JobControl, Ruby recognises and executes any cuts within the boundary of a part before cutting and releasing that part from the sheet. There is no need to instruct the software to do this through the use of different line colours. Executing all cuts within the part boundary before releasing the part from the sheet provides for better cutting accuracy.
- You can vector engrave lines, which is generally a lot quicker than raster engraving and is a great way to mark pieces (especially if you use a single line font line Inkscape’s Hershey Text). Vector engraving is basically a light cut into the surface. To do so set your lines to cyan.
- By default Ruby will execute artwork in the following order: raster engraving in order of depth (shallow first, deepest last), vector engraving, then thru cuts. You can change this arrangement by dragging the tasks into a different order, but this is not recommended. All raster engraving set set to execute from the bottom (near side) of the sheet to the top (far side) of the sheet by default.
| Laser cutter/engraver behaviour | R,G,B | Set up in vector file |
|---|---|---|
| Engraving images and gradients | n/a | use a Greyscale bitmap |
| Raster engraving (approx. 0.3mm deep) | 0, 0, 0 | Fill or stroke/outline of a thickness greater than 0.2 (smaller values won’t show up) |
| Vector engraving (shallow 'scoring', great for text/markings; much quicker than engraving) | 0, 255, 255 | Line weight not important |
| All thru cuts | 255, 0, 0 | Line weight not important |
| Deep raster engraving (approx. 0.5mm deep) | 0, 255, 0 | Fill or stroke/outline of a thickness greater than 0.2 (smaller values won’t show up) |
| Deeper raster engraving (approx. 0.7mm deep) | 0, 153, 51 | As per deep engrave |
| Still deeper raster engraving (2 passes; approx. 1.0mm deep) | 0, 102, 51 | As per deep engrave |
| All other lines (won't cut or engrave, but handy for alignment, layout, etc) | Any colour but those above | Line weight not important |
b) Convert all your items to plain vectors (e.g., text and circle/rectangle/polygon shapes into plain vectors, to give yourself the best chance at a smooth import process.
- Inkscape: Path>Object to Path
- Adobe Illustrator: Type > Create Outlines
- CorelDraw: select object with right mouse button and choose 'Convert to Outlines'
c) Combine all your lines/shapes of each colour into a single shape
- Inkscape: Path>Combine
- Adobe Illustrator: Object > Compound Path > Make
- CorelDraw: select all elements and choose 'Combine'
2) Power up the laptop associated with the laser you intend to use and enter the default user name <edgeuser> and password <edgeuser>. The following laptops are linked to each laser:
- Laptop #6 for use with Laser #1 (laser s/n S3-6690)
- Laptop #4 for use with Laser #2 (laser s/n S3-6691)
Open Ruby by clicking on the icon in the tray at the bottom of the screen and log in with the user name <edgeuser> and password <EDGEuser_4101>. If you are prompted to change this password, do not do so, since all laser users must log-in using this account. The email address associated with the account appears in the upper right of the screen.
3) Switch on the laser. The power switch is located at the back left corner of the laser. The laser will initiate itself (ensure the top lid is closed so this will occur) and announce it is ready with a series of beeps. Ruby should proceed to indicate the laser’s serial number ④ and the focal length of the lens installed (typically 2.0” CO2).
4) Load your material. It is a good practice (although not absolutely necessary) to place your sheet so that it is hard against the rulers in the top left corner of the honeycomb tabletop. If you are cutting a lightweight material like paper or fabric, it may be best to remove the honeycomb tabletop and place your material directly on the vacuum table. The FL supervisor will assist you with this. If your material isn't sitting flat, discuss the ramifications of this with the FL supervisor before proceeding with your job.

5) Focus the laser. Using the X- and Y-axis arrows on the laser control panel, move the laser head out over your sheet of material. Hang the metal focussing tool on the laser head and raise the table (first quickly by holding, then slowly by quick pulsing) using the Z-axis up button on laser keypad until the focussing tool just touches on the surface of the material. Once focussing is complete replace the focussing tool back on the ledge where you found it. Each focussing tool is matched to an individual lens at the factory, and should never be swapped between lasers unless the lens is also switched. It follows that a misplaced or damaged focussing tool necessitates replacing an expensive lens also.
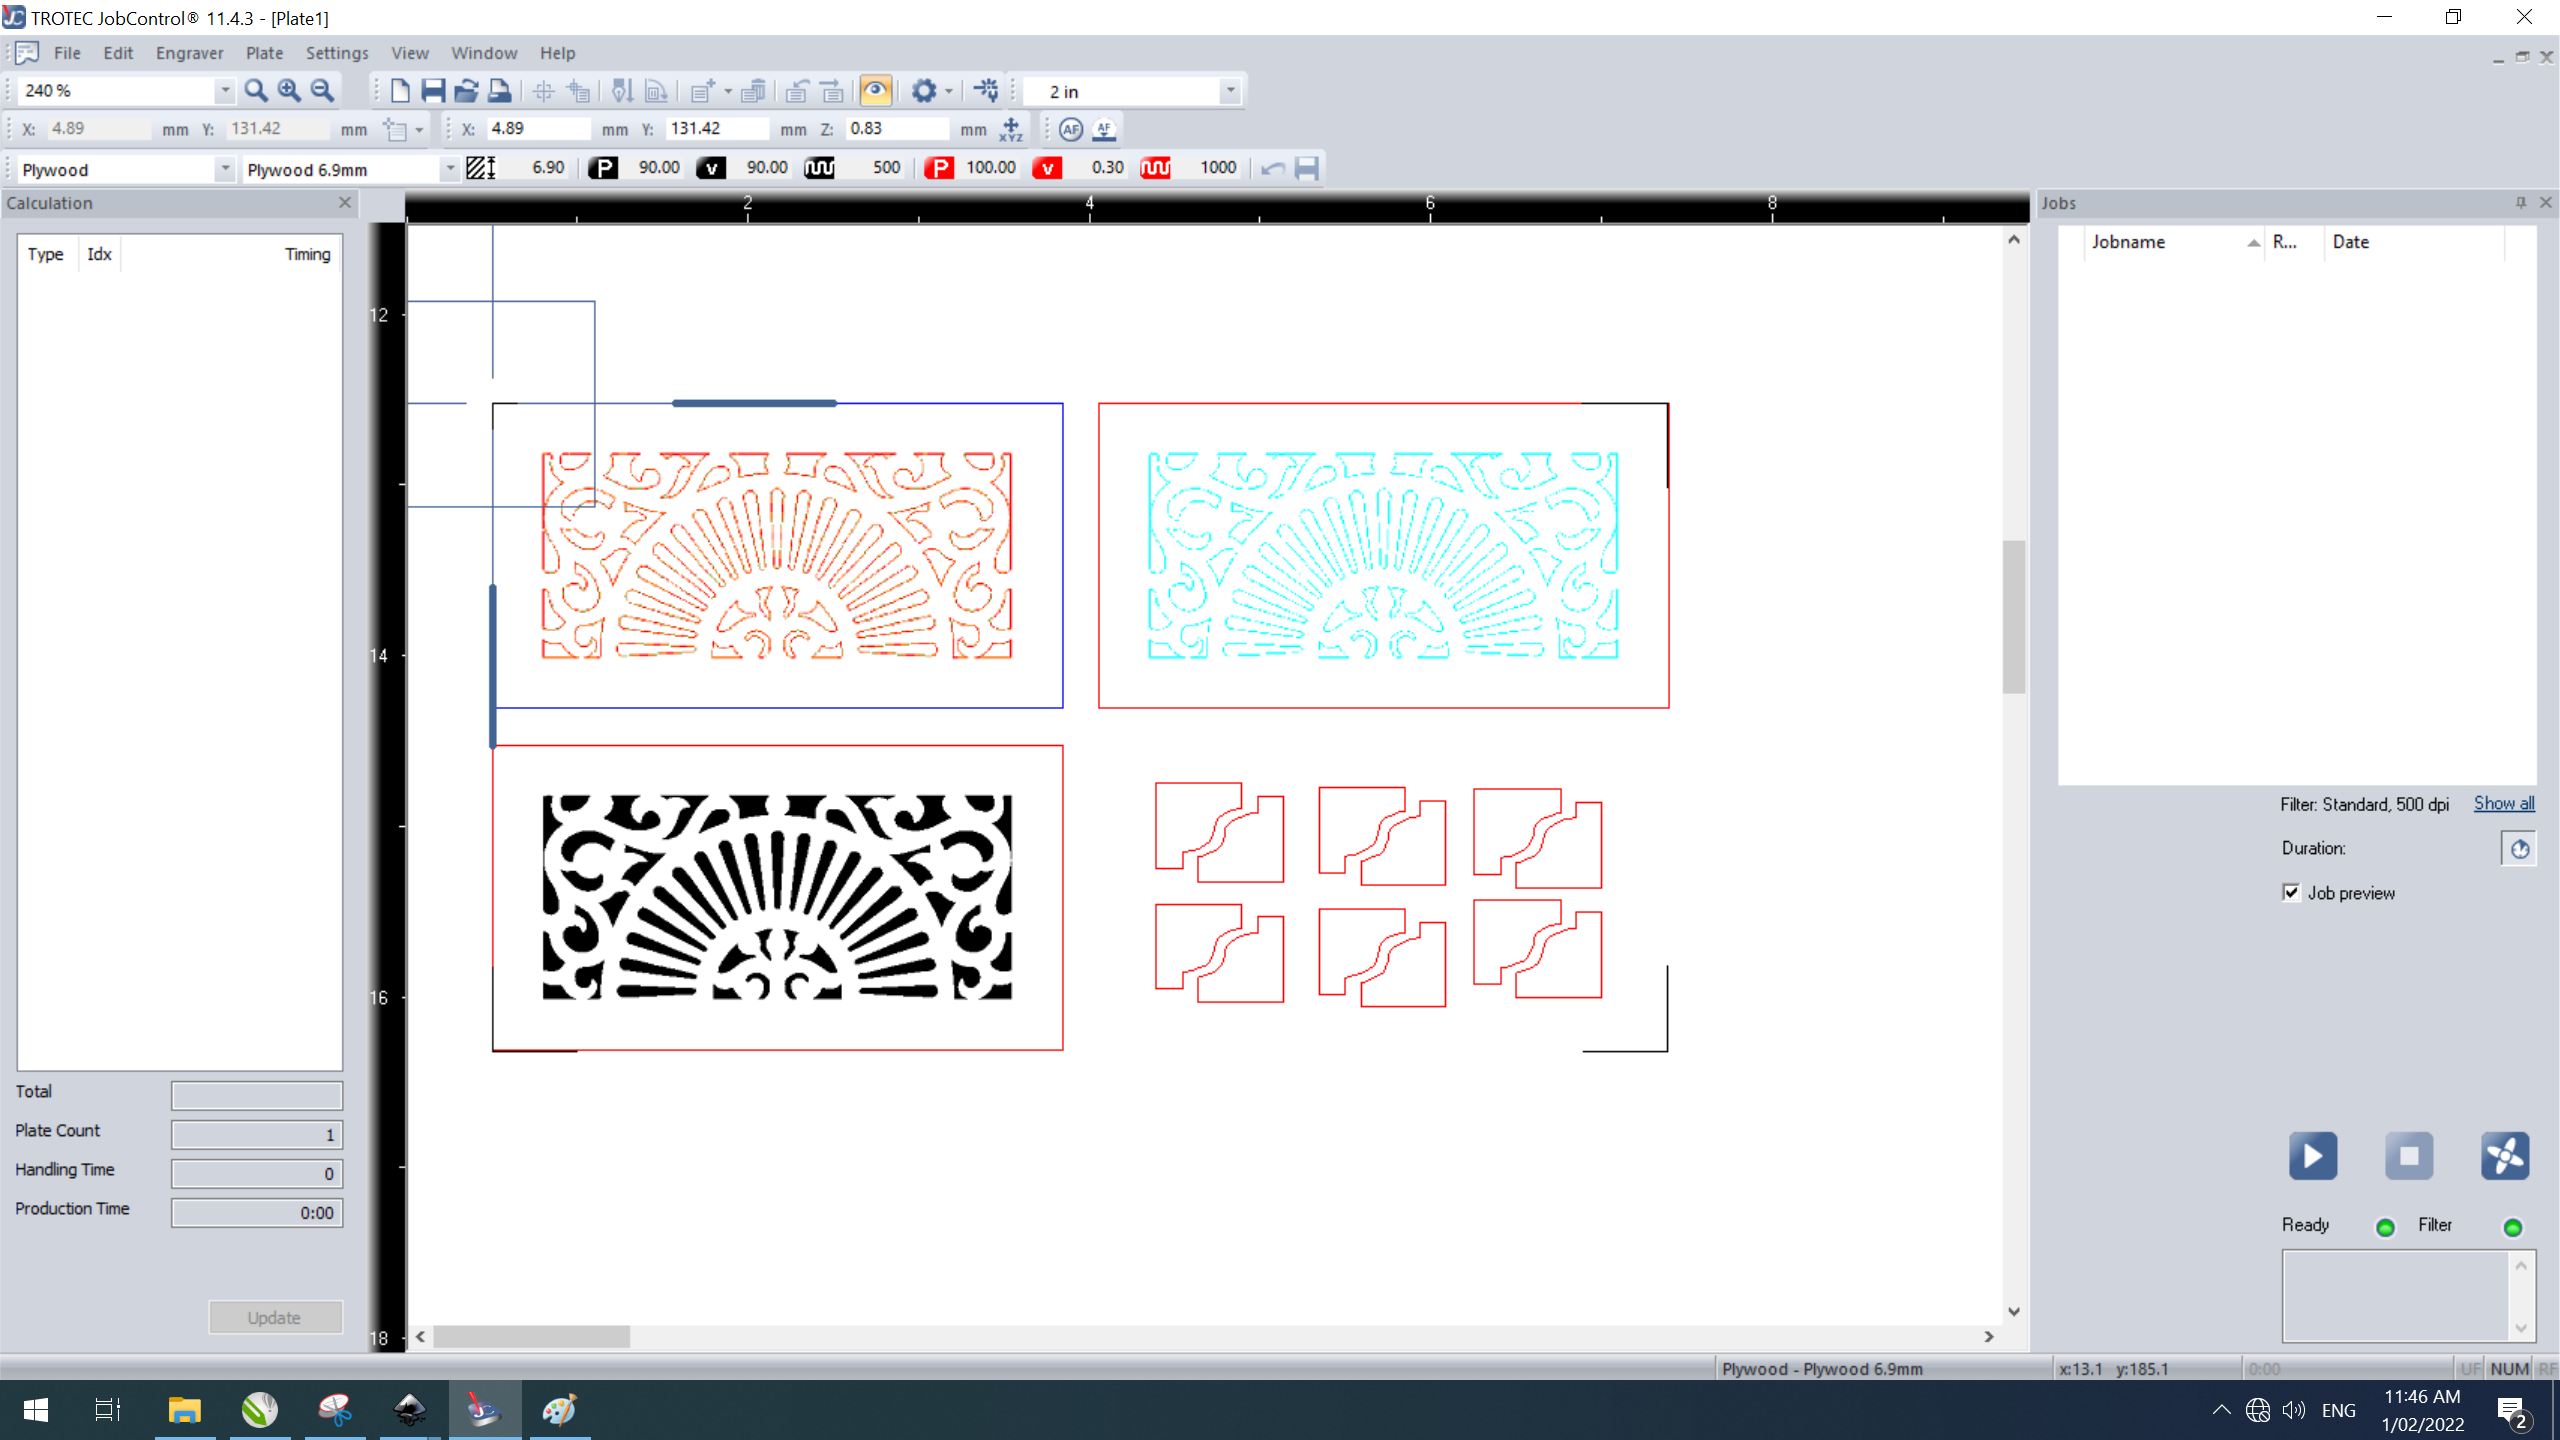
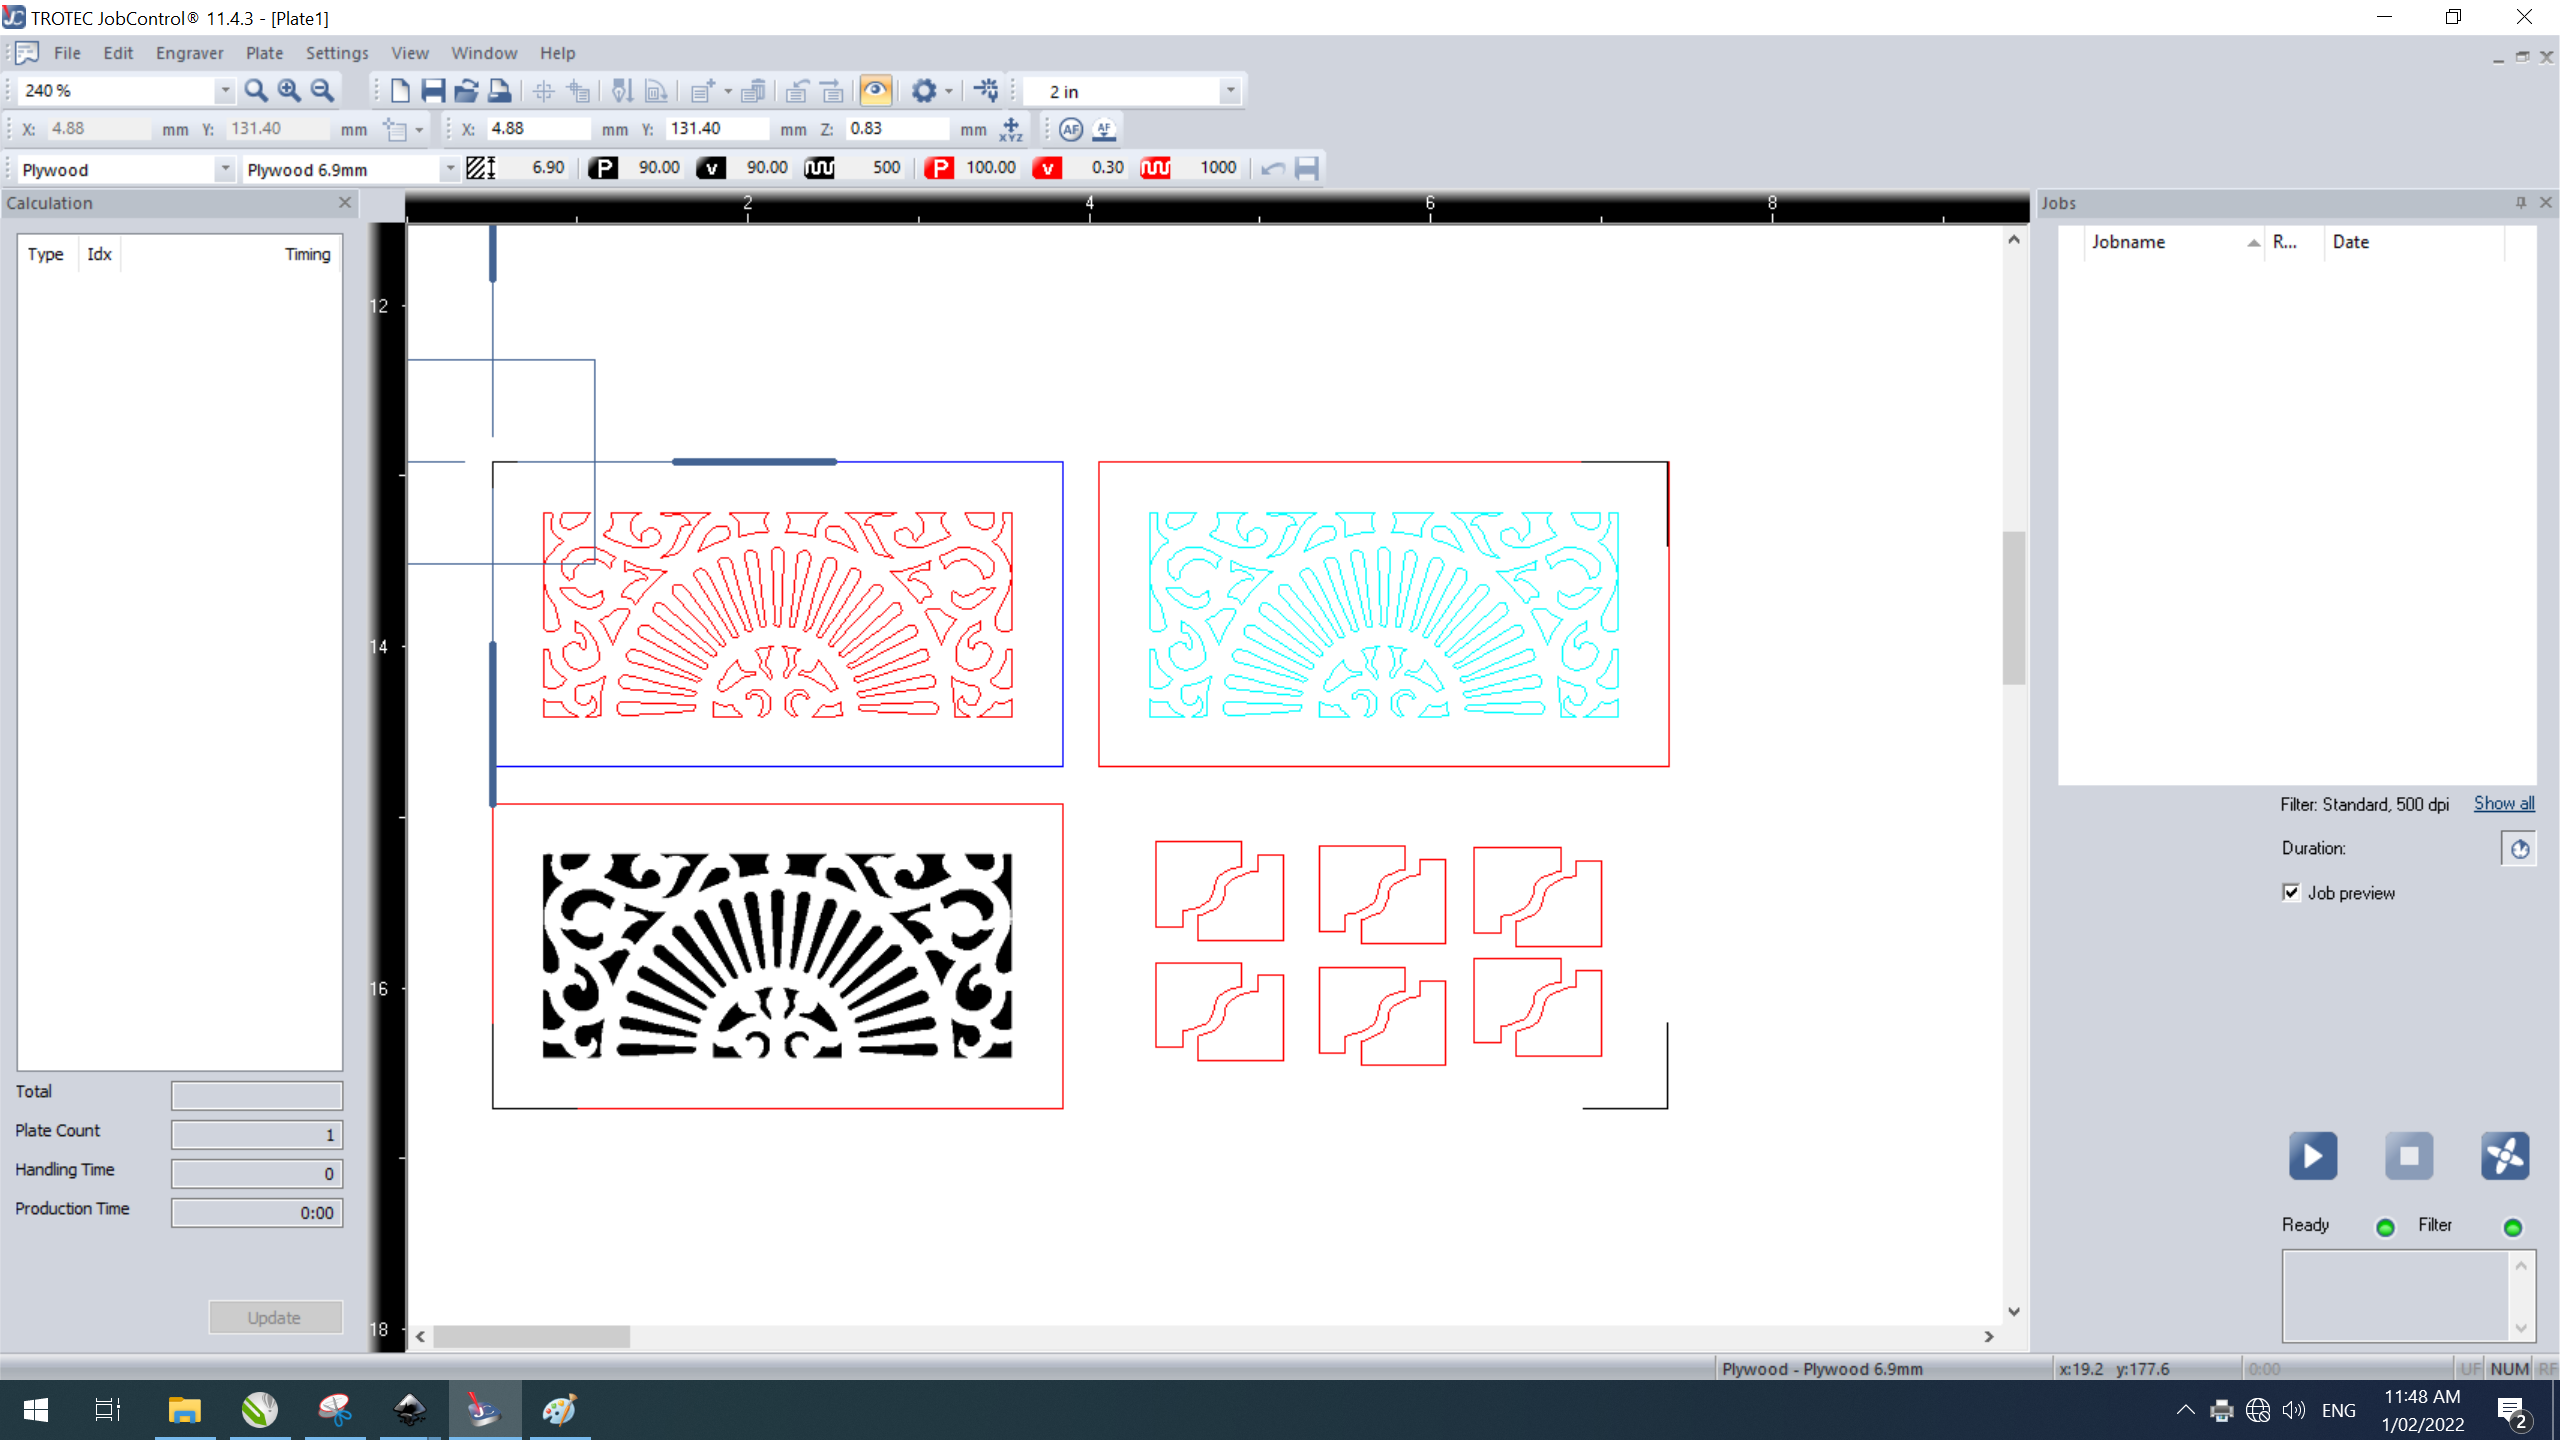
6) Import your file directly into Ruby. You no longer need to open your files in CorelDraw for 'printing' to the laser. Files can be opened by using the import command ② or dragging and dropping the file directly into the Ruby window. Once open in Ruby, the file appears as a ‘Design’. Ruby supports the direct import of the following file formats: *.cdr; *.pdf; *.svg; *.ai; *.png; *.jpg; *.jpeg; *.bmp; *.tsf; *.tld; *.tlj; *.zip. Despite this claim, anomalies sometimes occur with a particular file format. If you encounter a problem with one file format, try another.
When your artwork is imported, Ruby will organise the elements into 1 or more layers based on the number of colours Ruby recognises. If you have used exact RGB colours that match the program’s default colour assignments, Ruby will assign all red elements to be thru cuts, black elements to be raster engraved to a depth of 0.5mm, sky blue elements to be vector engraved, etc. Don’t worry if this doesn’t occur reliably. The important thing is that your artwork elements are differentiated by colour—any colour—so that Ruby knows to place them on different layers. If imported artwork element colours aren’t recognised, they will be placed in an ‘unassigned’ layer indicated by a which can be left unassigned or assigned to be cut or engraved as desired. Ruby makes it easy to assign what happens to each of these layers. To assign all elements on a given layer to be cut, simply select all elements on that layer and select the red colour from the palette using the left mouse button. Similarly, to assign all elements on another layer to raster engrave at an approximate depth of 0.3mm, select all elements on that layer and select the black colour from the palette using the left mouse button.
7) From the ‘Designs’ window, click on ‘Create Job’ to advance to the next window. The file is now designated as a job ⑦ and appears on a grid depicting the full capacity of the laser table ⑥. Always ensure that all of your artwork is located at least 2mm from the top and left edges to ensure the table rulers are not damaged by the laser. You can group select the artwork and drag it away from the edges as necessary. It is also a good idea to verify that your artwork is entirely contained on the sheet to be cut.
A default material (Cardboard, Corrugated, Single Ply) is automatically assigned ⑧ when a new job is created. Clicking on this material will expand the available options within the Materials List. Click on an alternate material to select it. The Materials List contains only materials that have been test cut and engraved at SLQ to date. If you intend to cut and/or engrave a new material not listed, you will need to first provide staff with a current SDS for this material. A staff member will then login with their administration privileges to create a new entry in the database, then test cut/engrave your material to establish its optimal parameters.
Adding ‘Effects’ to a job is a means to introduce a variety of engraving effects (for example, different engraving depths) without having to duplicate a material entry. The effects can be enabled/disabled as desired.
In ‘Job’ mode, Ruby provides nesting/array capability that can save both material and processing time. To pop-up the ‘Add Design’ window, double-click on the “>” to the right of a design on the left side of the screen.
Pressing Function+8 will place a marker in the location of the laser crosshairs. This marker can then be relocated by dragging with the mouse, or more precisely using the on-screen coordinates.
8) Seek a final check of your setup from the FL supervisor before pressing play or enter. Do not ever start the cut without having them check (even if you’re just cutting the same things again).
9) Start the job either by clicking the play button on the screen or pressing the enter button on the laser control panel. We prefer you start the job from the laser control panel, so you can react quickly to interrupt the job if a problem occurs. On the other hand, you also need to attend to the computer screen and await the message 'job ready' before hitting enter. This is because large jobs can take a while to spool. If you press the enter button before your job is ready, Ruby will proceed to engrave any previous job still in the queue—potentially spoiling a sheet of material.
Due to the very real danger of fire, you are required to monitor your job while the laser is cutting/engraving. If you need to step away from the laser, pause the job by pressing pause on the control panel. To continue the job from the point it was paused, press the pause button again. If you press enter, the job will recommence from the start.
The Atmos exhaust system will automatically start prior to the job commencing and will continue to run for a set time after the job has completed. Delay opening the top lid on the laser until all fumes have been extracted from the laser enclosure (approx. 30 seconds).
10) Remove your completed job from the laser enclosure. Once your job is complete and all fumes extracted from the laser enclosure, you can open the top lid to remove your parts. The laser head should have parked itself in the upper left-hand corner of the table. Prior to shifting your sheet and parts, verify that the laser has actually cut through the material. If not, you can run the cut program again if your sheet has not been moved. Note that the honeycomb tabletop is fragile, so take care not to damage the support structure when removing your parts.
11) You can position your job by moving the laser on the machine (using the red 4-way arrow buttons). Move the laser pointer to the top left of where you want your job to start on the machine (make sure it’s at least 5mm in from any edge). This should also move the crosshairs on the computer screen (if you can’t see the crosshairs, click the USB button at the bottom right and try again). Then on the computer click your job on the list on the right, and drag your drawing to snap it to the crosshairs.
Prep artwork for cutting etching in Vector Editor (Corel Draw)
STEP 1. Open Corel Draw

STEP 2. In the File menus select New from template

STEP 3. in the Template panel select my templates and open the Edge Standard S300 template

note the blue guides defining A3 materials and red, A2.


Prep the Laser to Cut/Etch your Job
STEP 1. Check when the lens and mirror was last checked. if it was more that 2hours ask for the FL supervisor to check its clean and ready to cut efficiently.
A dirty lens or mirror affects the strength of the light cutting your work which will impact on the quality of your job.
STEP 2. Check that the Laser bed is clear of debris
Debris can catch fire!
and that the Honeycomb bed is located on its stops. [Photo]
STEP 3. Place material on honeycomb bed making sure it is located securely in the top left hand corner. [Photo]
STEP 4. Set focal height using calibration tool [Photo]
Place the Calibration tool on the laser head assembly

Using the Z Axis jog buttons  gradually bring the honey comb bed up to touch the calibration tool


Lack of attention can result in a HEAD CRASH! at this point. Always take great care when adjusting the Z axis!
STEP 5. Replace calibration tool in its home and close the glass lid
The Calibration tool is a factory matched set with the lens. Loss of the calibration tool necessitates replacing this expensive optic component also.
SO PLEASE MAKE SURE YOU PUT THIS BACK WHEN YOU ARE FINISHED USING IT

STEP 6. Ask FL Supervisor to check your settings.
Failure to have FL Supervisor check setting may result in the member's Booking privileges being suspended. See Laser Cutter Preflight Checks - Supervisor Check.
Monitor your job, do not walk away from the machine when job is running. if you need to move away, pause the job by pressing pause  .
.

In event of fire, head crash or other catastrophic failure lift glass lid to abort job and call supervisor over immediately.
Any time that a job is aborted (lifting the glass lid) the machine may be out of zero. Always restart the laser after aborting a job to avoid causing a head crash.

If job is not progressing as expect or the machine is making a strange noise or excessive smoke pause job by pressing pause and call Supervisor over to assess.
Laser Cutter Preflight Checks - Supervisor Check
All the following items must be verified by Supervisor before commencing any job.
- Mirror & lens checked and cleaned if needed (within the last 2 hours) - verified by Supervisor
- Honeycomb tabletop (if used) is correctly seated - verified by Supervisor
- Lens is focussed - verified by Supervisor
- Material on table corresponds to material selection on screen - verified by Supervisor
- Workpiece presents no danger of laser head impact - verified by Supervisor
‘Interlock Open’ Message and Resolution
The Speedy 300 lasers are fitted with multiple magnetic safety interlocks which prevent the lasers from being operated if the side access panels have been removed, the front door left open, or the acrylic top lid has been raised. Moving the laser enclosures will sometimes result in misalignment of the interlocks on the side panels. The result will be the pop-up message ‘Interlock Open’ in Ruby, and the laser will not be ready to run. This issue is resolved by unlatching the side panel door with its corresponding hex key, allowing the panel to settle properly into position, then retightening the latch with the hex key. If the ‘interlock open’ message hasn’t dismissed, this procedure may need to be repeated. Your Supervisor must perform this task.
Resources
Corel templateedgestandardspeedy_.zip