Workshop 01.0 - Hardware Elite 8100-8300
Today we'll:
- Identify your computer
- Learn its components
- Disassemble/reassemble it quickly
The Computer
See basic information on the label:
- Manufacturer: Hewlett Packard.
- Model : 8100 Elite.
- Form Factor (size): Small Form Factor (SFF) - meaning it's a smaller case (Important for purchasing new hardware).
- Computer Type: PC - Personal computer.
Safety First
Unplug the power cable before opening the case.
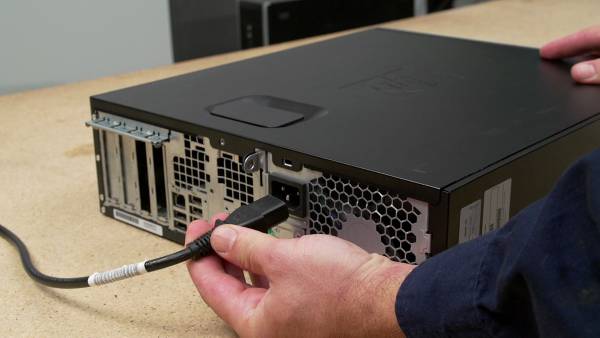
- Plug/unplug cables holding the connector, not the wire.
- Be careful with sharp screwdrivers/sharp edges on components.
Take a break if ever frustrated. Help is always available.
Tools
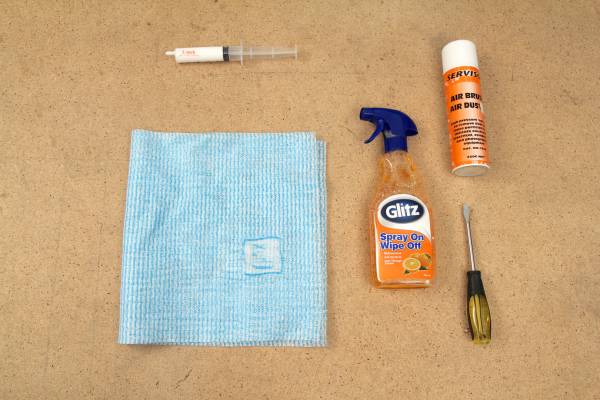
You require patience, bench space, and tools:
- Screwdrivers
- Wipes
- Spray and wipe cleaner
- Paper towel
- Thermal paste
- Vacuum cleaner/Compressed air
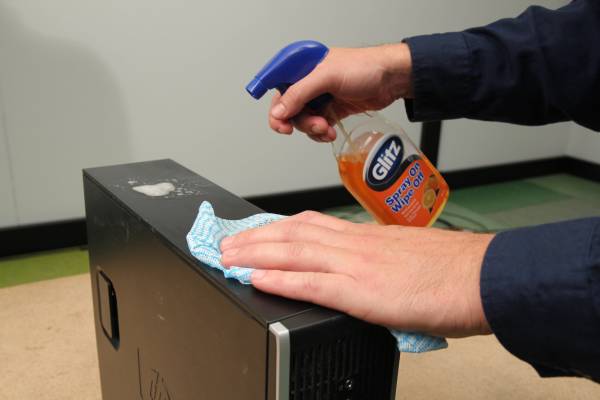
Case Exterior
Ports/Sockets/Buttons
Standard connection points (ports or sockets) vary so we connect things correctly:
Power
A three-pin power socket on the Power Supply Unit (PSU).

USB
Universal Serial Bus (USB) ports connect to USB devices.

Video
Ethernet
An ethernet port uses a network cable for network/internet access.

Audio
Audio sockets connect to audio plugs/jacks:
- Blue = audio in (microphone, etc)
- Red = audio out (headphones, speakers, etc)

Legacy Ports
PS/2 ports connect to older keyboards/mice:

Serial ports connect to older industrial devices:

Inside the Case
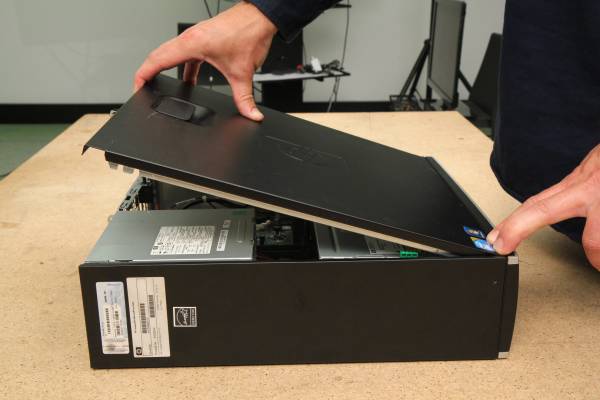
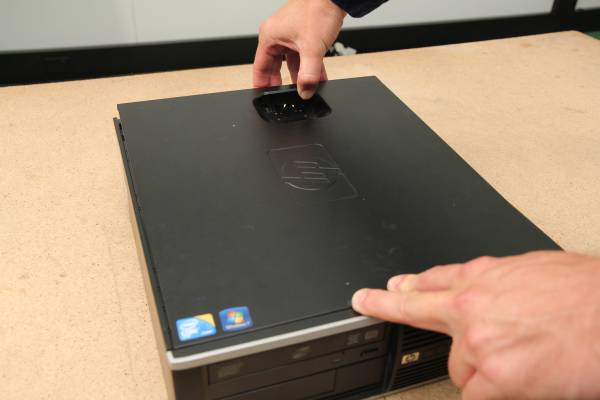
Place computer flat facing you. Open case with the back latch.
Use the lid as a tray to store parts together.
Discharge Static
Touch a large metal object to discharge any static before touching things, as static 'shock' can damage components.
Clean
Clear dust around the vents/fans from outside with the vacuum/compressed air. Be careful - don't hit components.
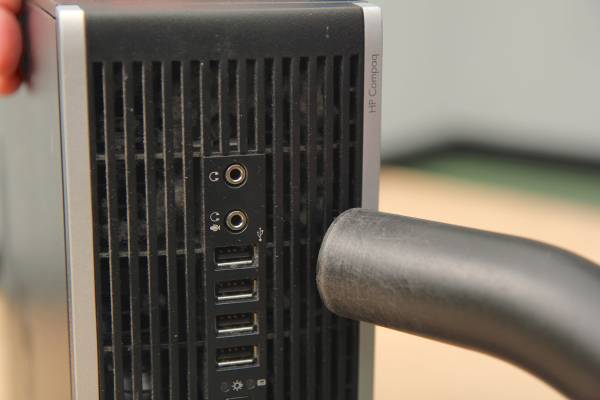
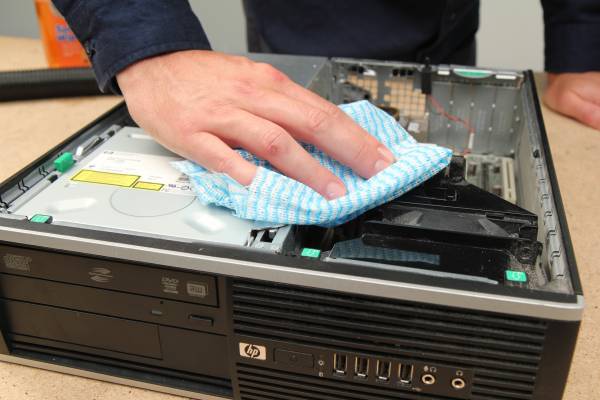
Then clean inside:
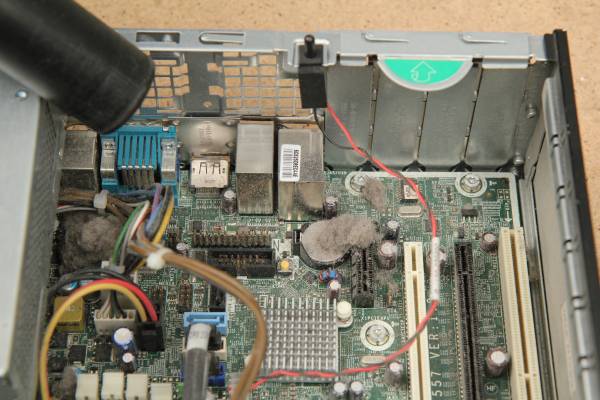
Wipe the case interior with a cloth.
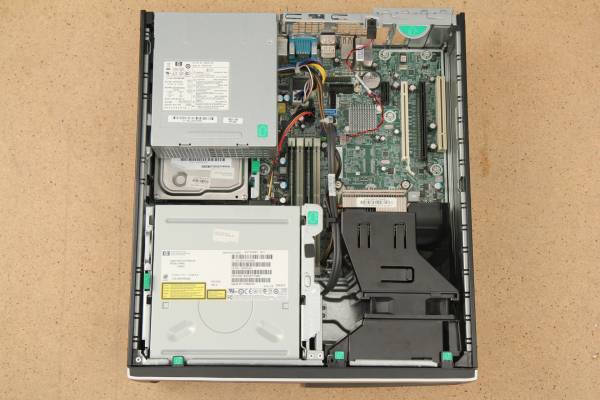
Components
Power Supply Unit
Power Supply Unit (PSU): converts electricity from your mains voltage (240 volts), into smaller voltages for your computer.
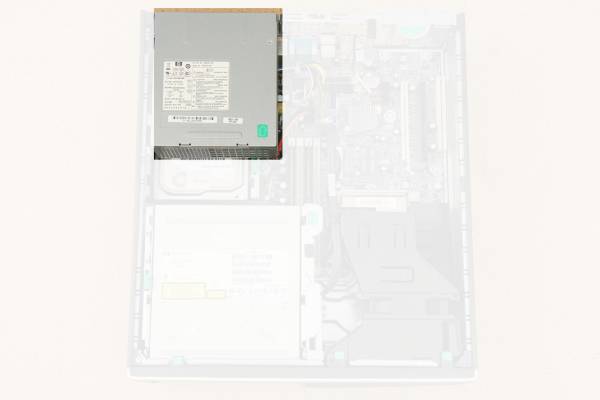
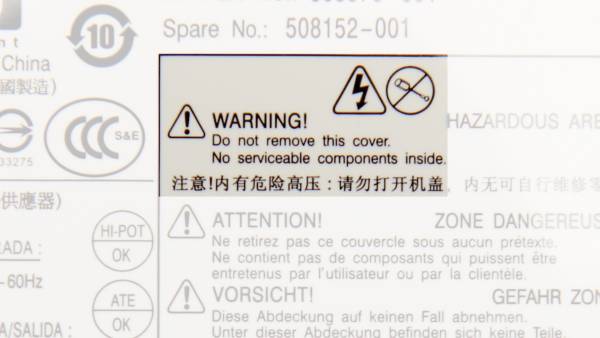
It can hold dangerous voltages even once switched off/unplugged. Never disassemble!
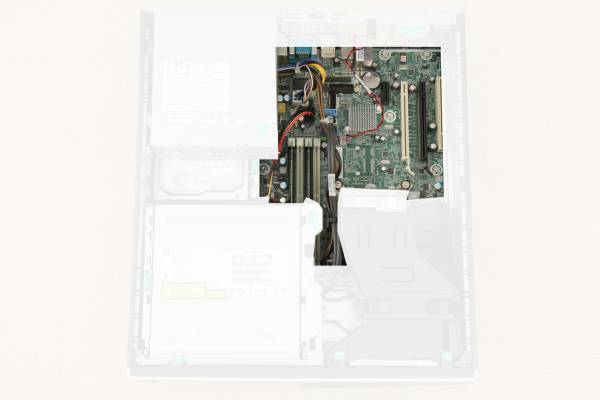
Motherboard
motherboard: allows components to communicate together.
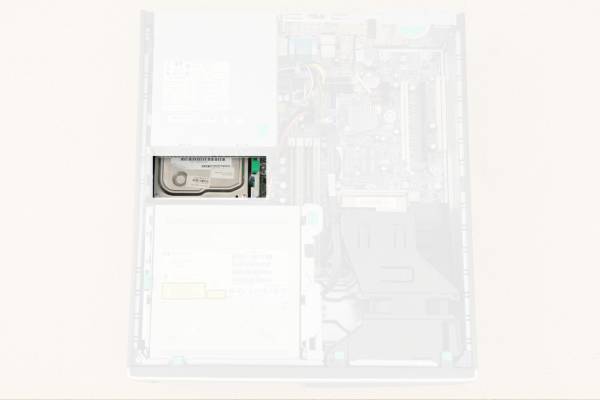
Hard Drive
Hard drive (hard disk): permanently stores data (eg, your files).
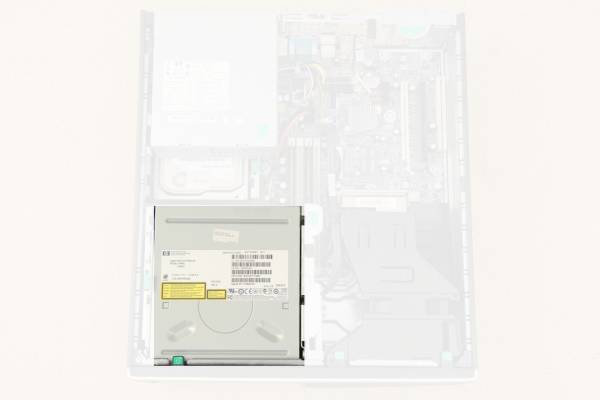
DVD drive
DVD drive: reads/writes Digital Versatile Discs (DVDs).
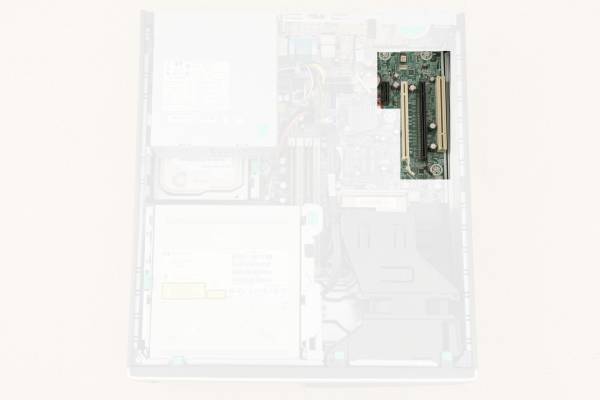
PCI expansion slots
Install expansion cards to add additional functionality - eg, video cards
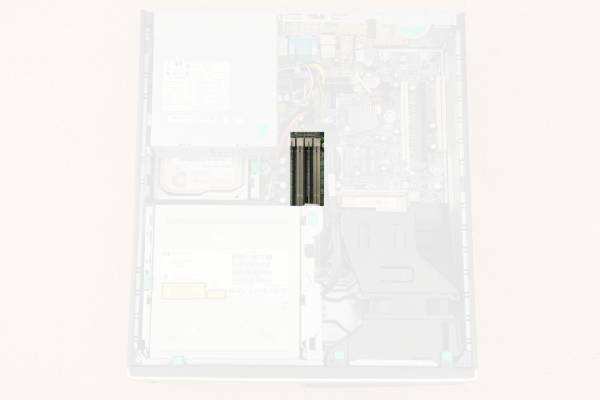
Random Access Memory (RAM)
RAM: stores data used to run programs. Data in RAM disappears when your computer turns off.
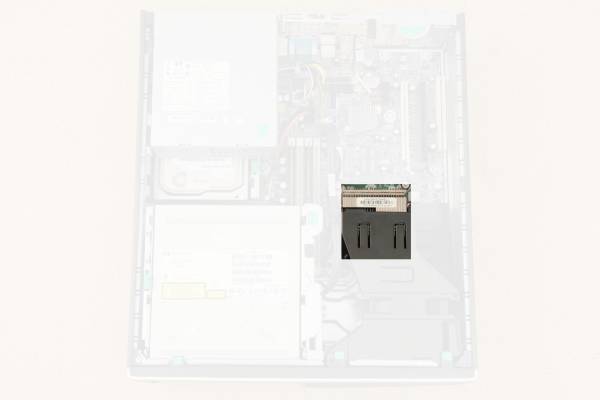
Central Processing Unit (CPU)/Heatsink
CPU: the 'brain' of your computer. The heatsink regulates its temperature.
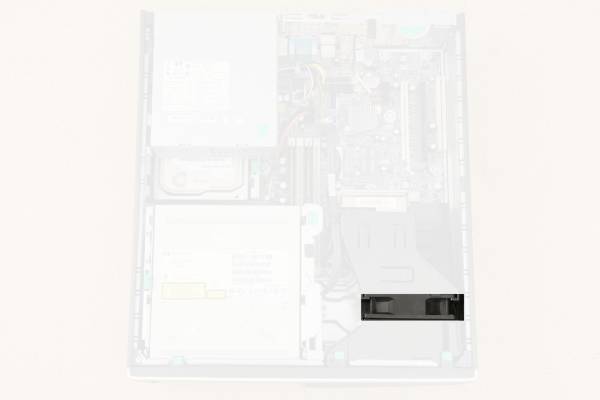
CPU fan
CPU fan: directs air over the CPU/heatsink.
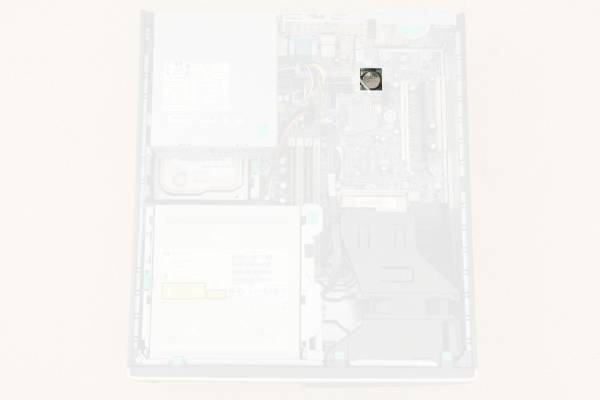
Battery
Cables
Power cables: carry power from the PSU to components.
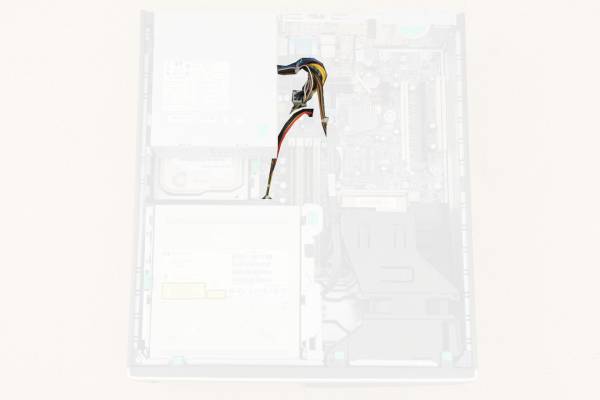
SATA data cables: carry information between components.
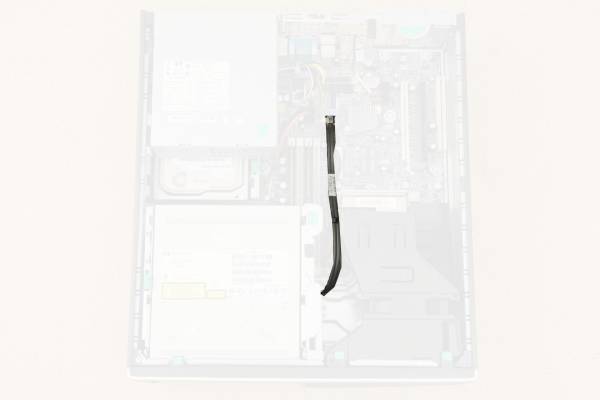
Disassembly
Before we disassemble, photograph the components for your reference.
Green tabs/catches help you remove most components without tools.
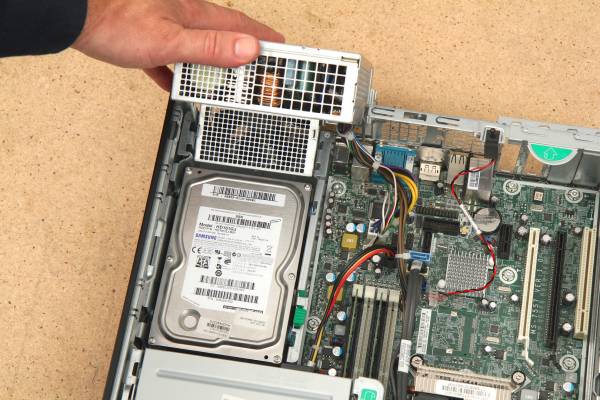
DVD Drive
Flip the PSU up to make room. The DVD drive's in a movable bay for easy access.

Pull the green tab on the right up - the bay will swing up.
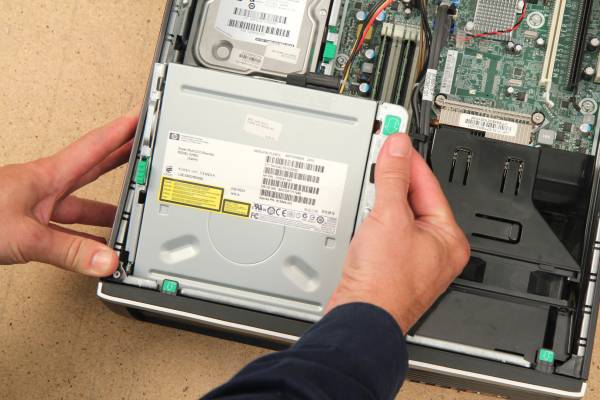
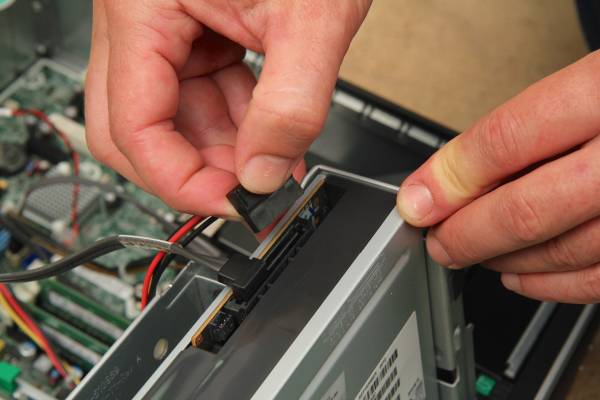
Unplug the power/data cables from the drive.
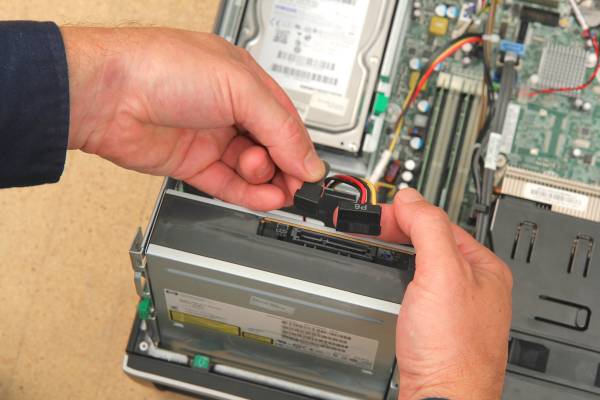
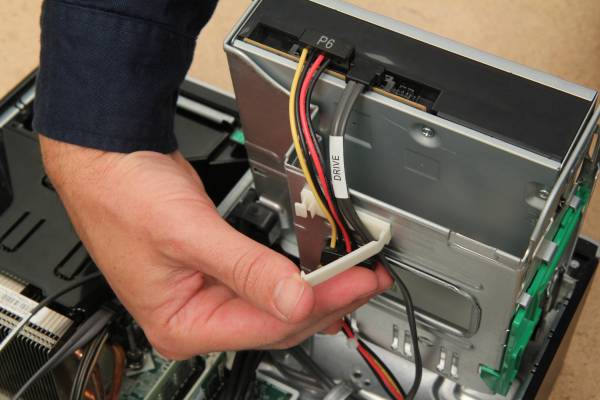
Unclip the cable guide and free the cables.
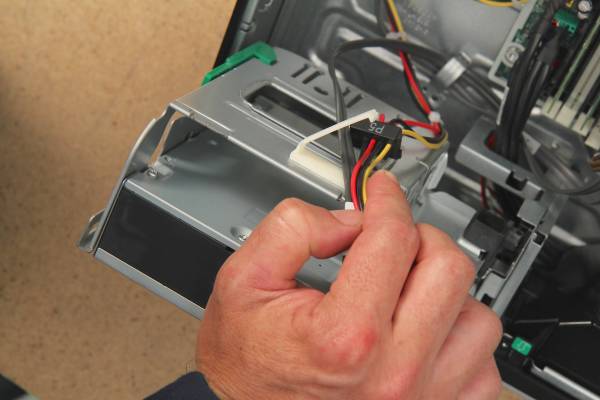
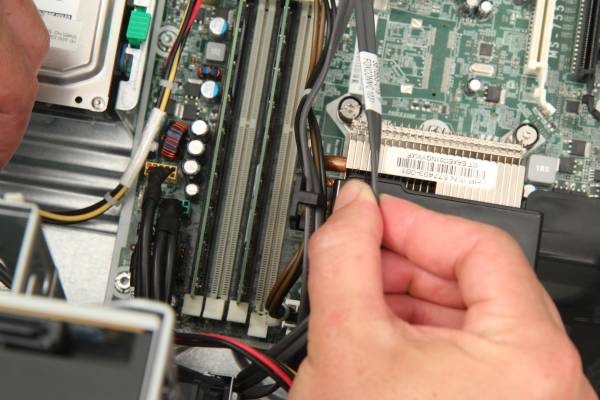
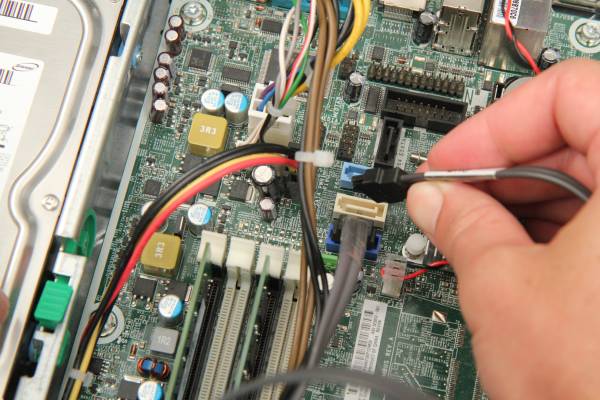
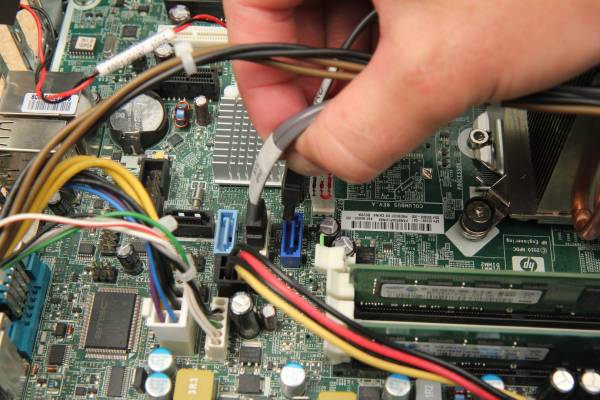
Unplug the SATA cable from the motherboard.
Push the DVD drive bay back down, then hold the green button on the left.
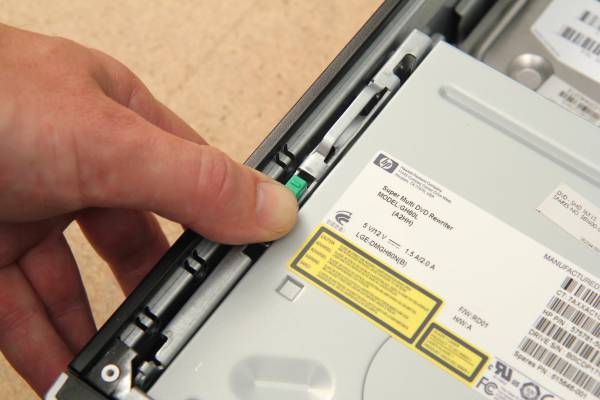
Slide the drive forward, and lift straight up to remove from the bay.
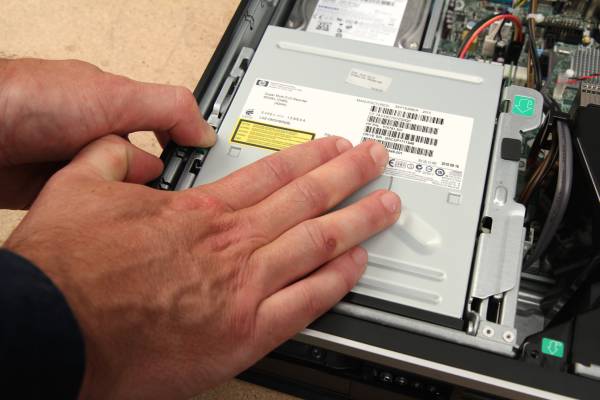
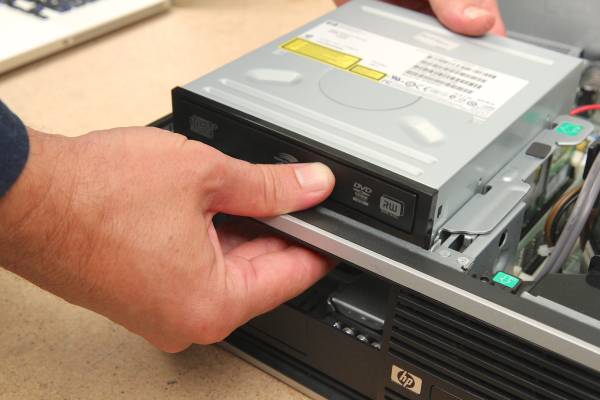
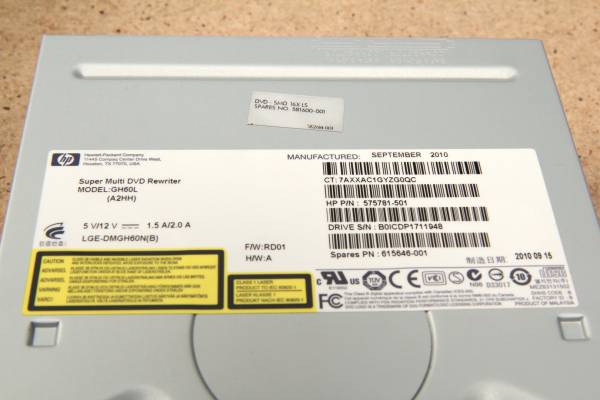
The drive label contains information to help replace/upgrade the drive.
Hard Drive
Unplug power and SATA cables from the hard drive.
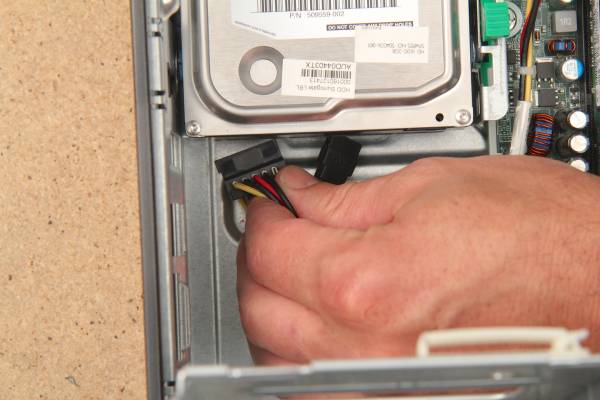
Push down the green tab on the right of the drive bay. Slide the hard drive forward.
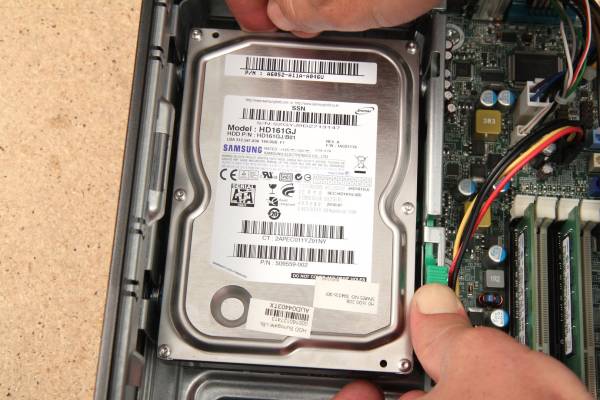
Lift it straight up and out.
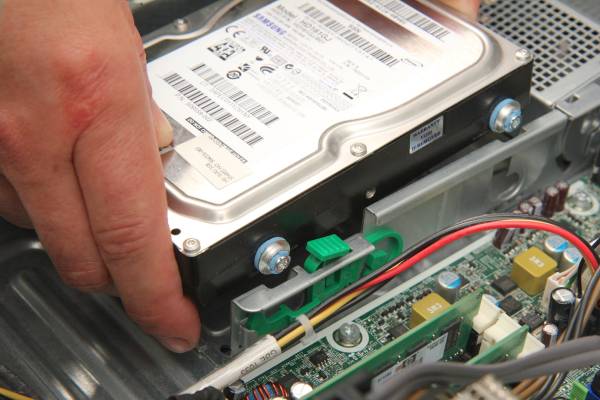
Free cables from the cable guide.
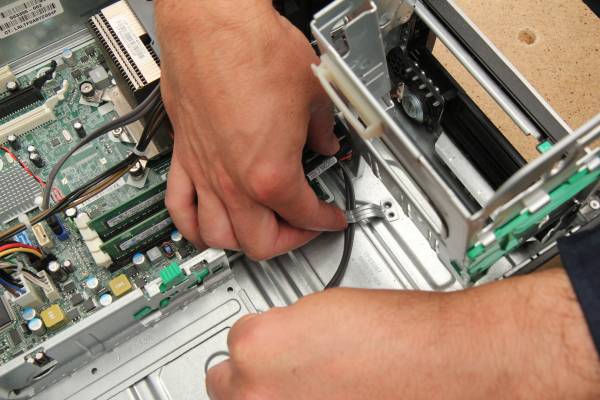
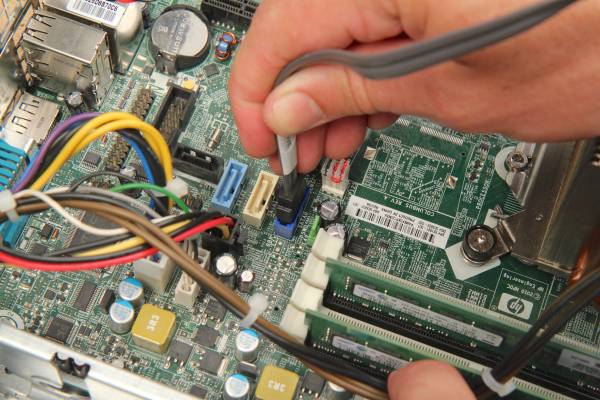
Unplug SATA cable from the motherboard.
The drive label contains information to help replace/upgrade the drive.
PSU
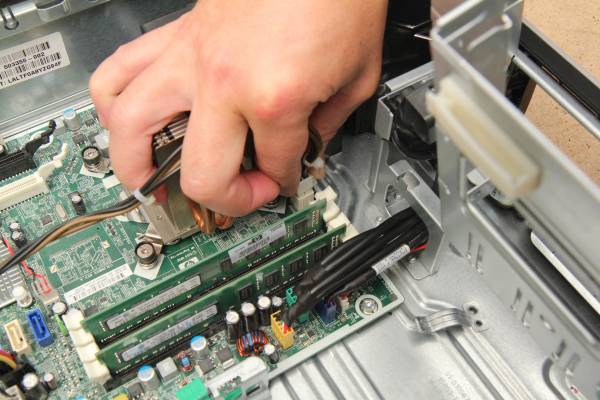
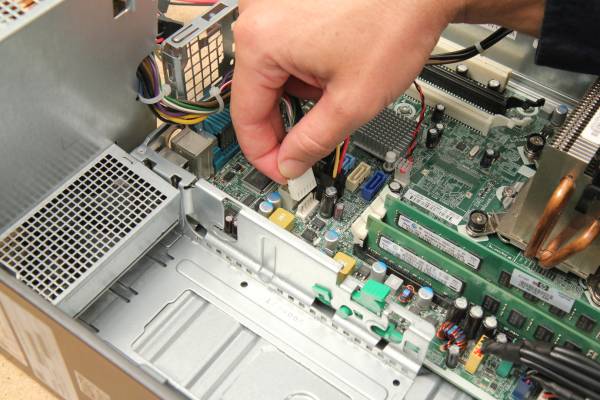
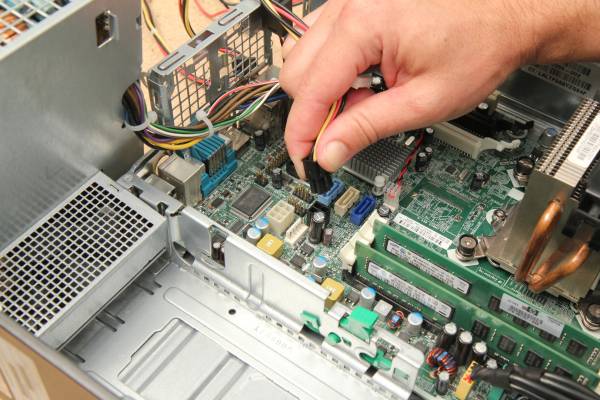
Unplug power supply cables on the motherboard.
- The connectors have squeeze tabs - squeeze them and wiggle gently to release.
The front cable supplies power to the CPU:
Another powers most components:
The one with black connectors connects the motherboard to the drives.
Clear the cables, then tilt the PSU and lift straight out.
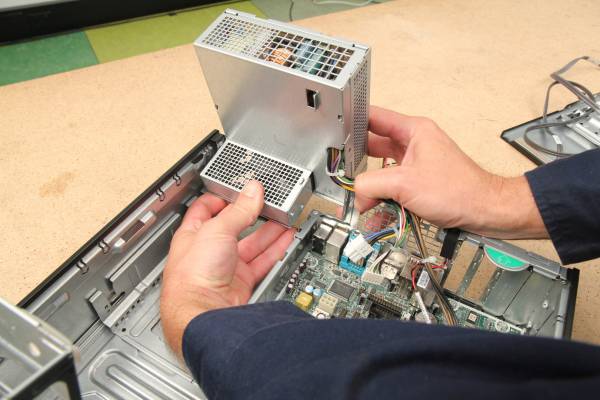
The label contains:
- Input voltage(s)
- Output voltages
- Maximum power (in watts)
RAM
The RAM is held in by tabs (or clips) in sockets on the motherboard.
Press tabs hard on either side of the first RAM stick.
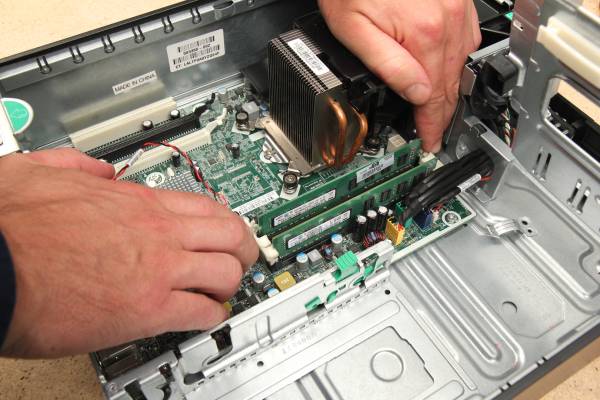
Pull it out.
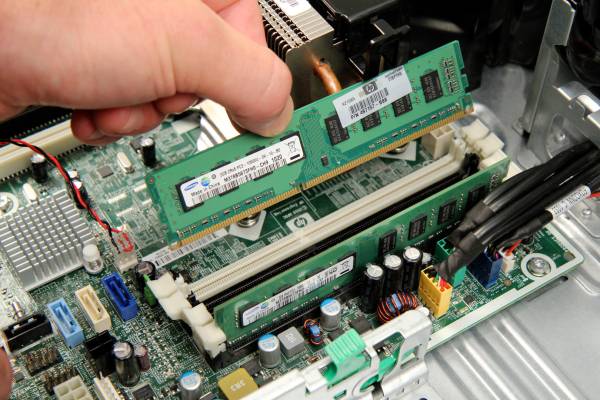
Don't touch the gold parts on RAM, as skin cells/sweat can cause corrosion
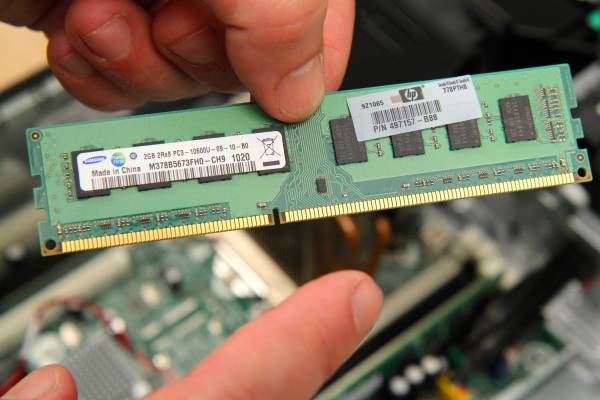
Don't touch the memory chips. Static electrical discharge can easily damage or destroy them.
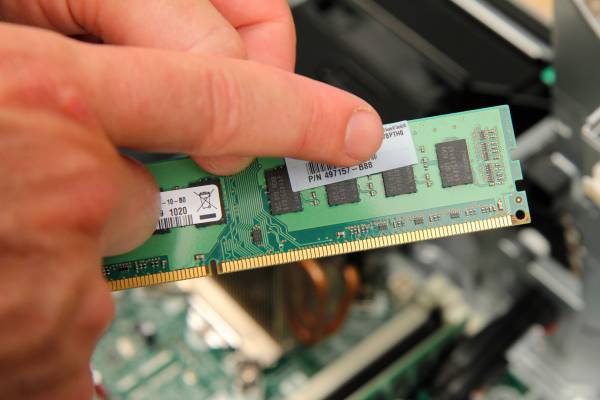
Put RAM down carefully and repeat for the second.
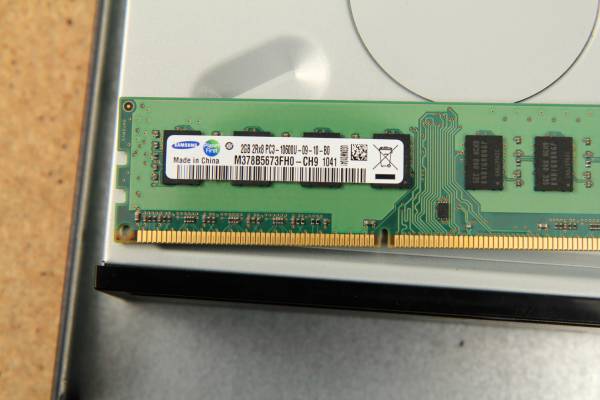
The label contains information to help replace/upgrade your RAM. RAM has a module name (written on the stick) you'll need to match to its standard name (how RAM is sold) to replace/upgrade.
| Standard name | |||
|---|---|---|---|
| DDR3-800D | PC3-6400 | DDR3-1600G* | PC3-12800 |
| DDR3-800E | DDR3-1600H | ||
| DDR3-1066E | PC3-8500 | DDR3-1600J | |
| DDR3-1066F | DDR3-1600K | ||
| DDR3-1066G | DDR3-1866J* | PC3-14900 | |
| DDR3-1333F* | PC3-10600 | DDR3-1866K | |
| DDR3-1333G | DDR3-1866L | ||
| DDR3-1333H | DDR3-1866M* | ||
| DDR3-1333J* | DDR3-2133K* | PC3-17000 | |
| DDR3-2133L | |||
| DDR3-2133M | |||
| DDR3-2133N* |
Front Face
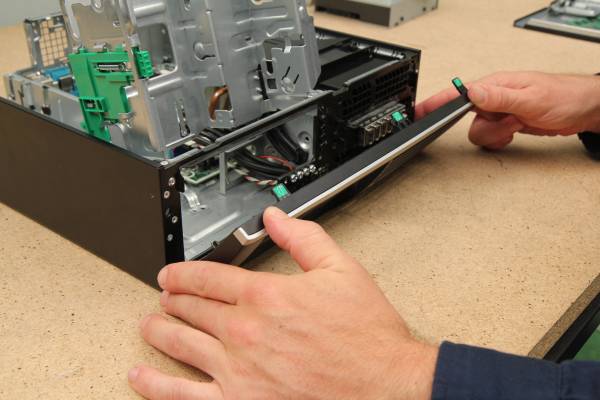
Remove the front panel with the power switch button.
Lift the three top tabs:
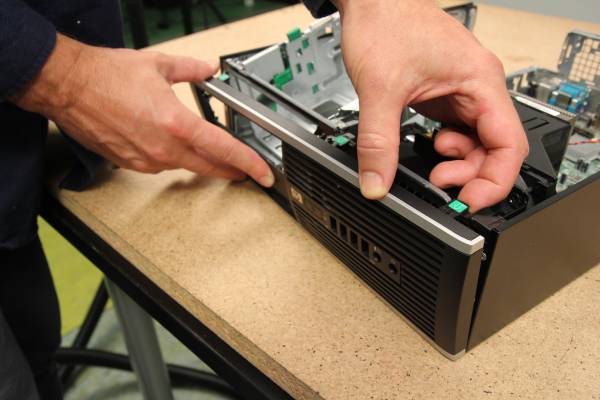
And remove.
Front Fan
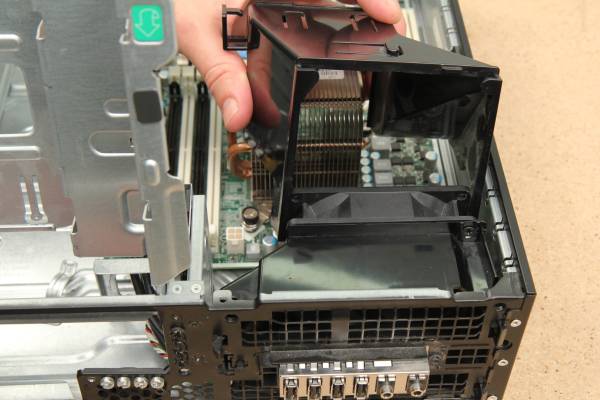
Remove the black plastic air-guide first.
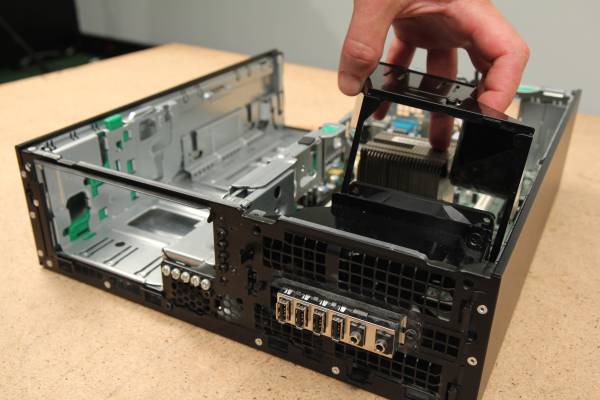
Four tabs on the fan connect it to the chassis. Squeeze in the top two tabs:
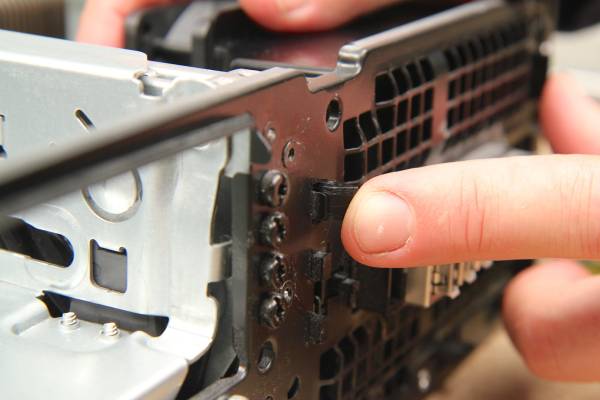
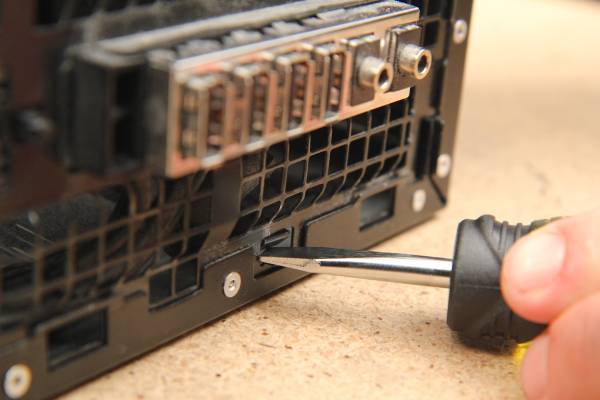
Then push the two button tabs. If you have trouble, use a flathead screw driver.
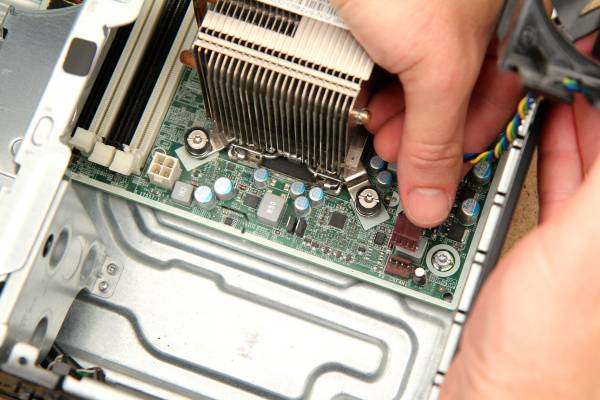
Unplug fan cable from the motherboard header. Clean it if needed.
Motherboard/Heatsink
Unplug the remaining cables connecting to the front panel. They connect to headers on the motherboard (lower left). First the power header:
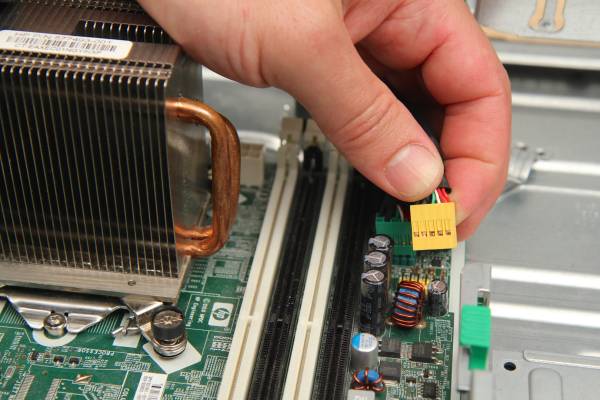
then front USB header:
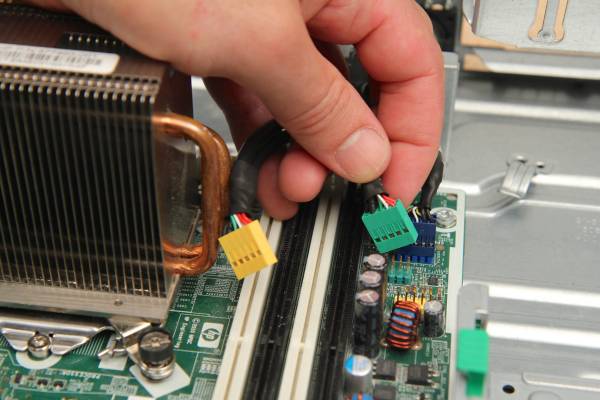
front audio header:
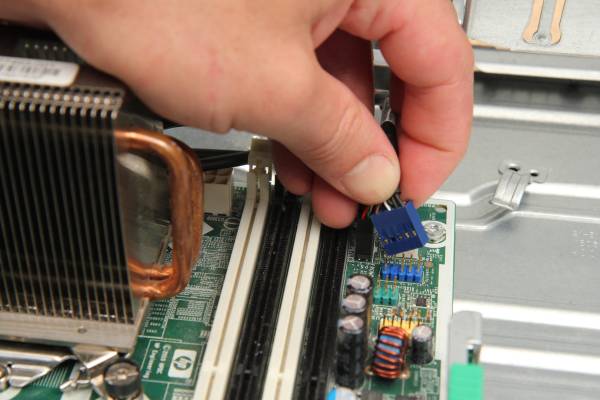
speaker header:
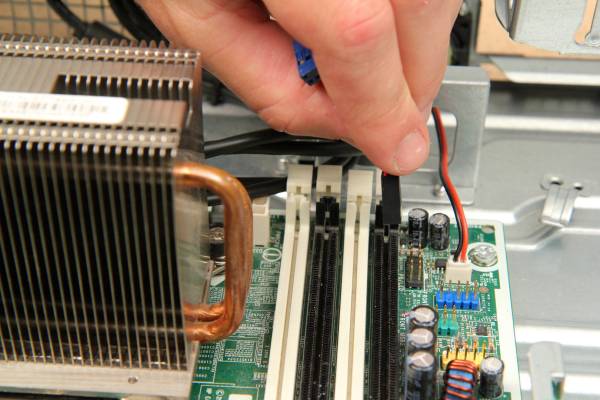
and intrusion switch.
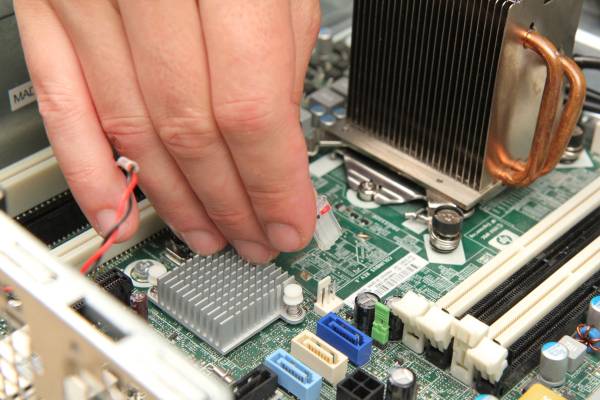
Remove the eight screws securing the motherboard. Leave the four screws around the CPU for now.
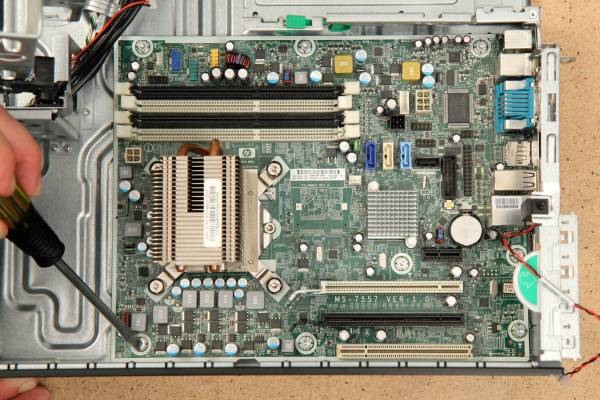
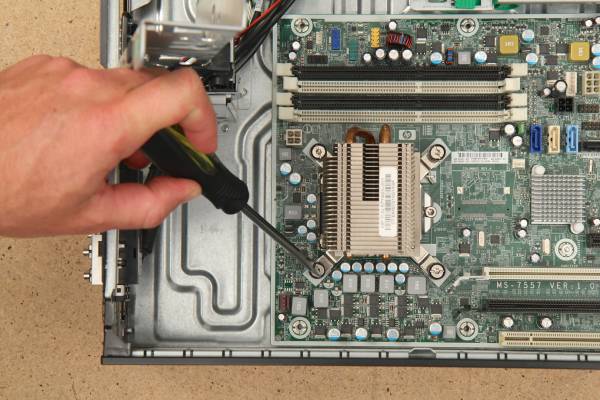
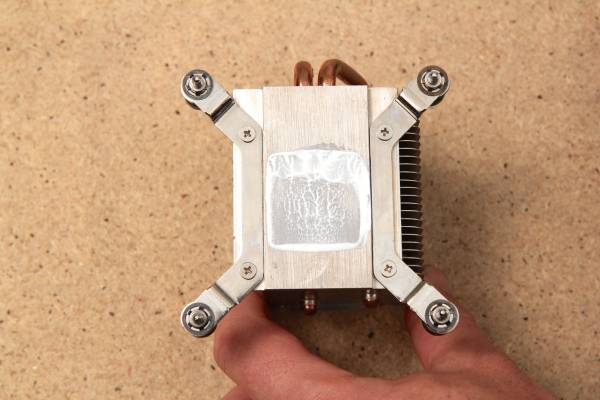
When removing the heatsink do not touch the sticky paste on the heatsink/CPU. This thermal paste improves heat transfer between these components.
The heatsink is secured under pressure with four screws. Unscrew them:

Lift the heatsink straight up:
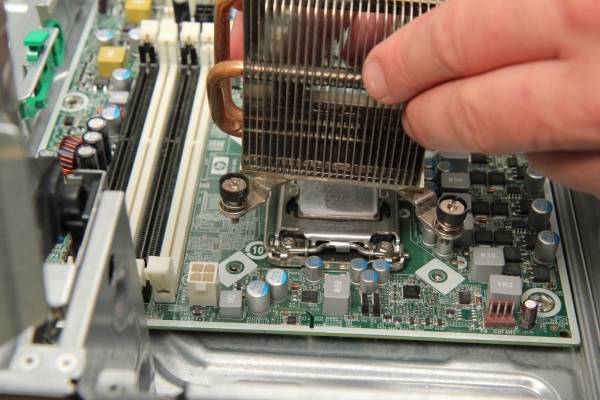
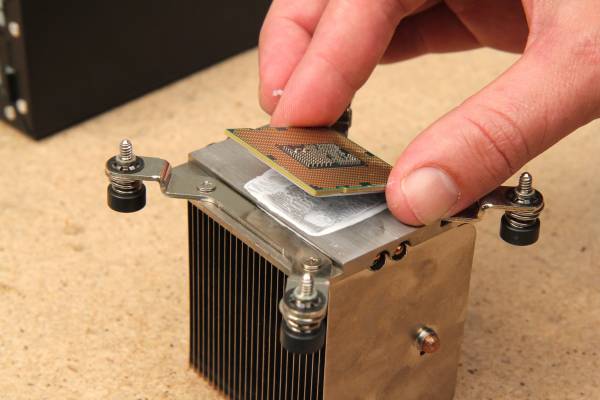
Place carefully upside-down to avoid smearing the paste.
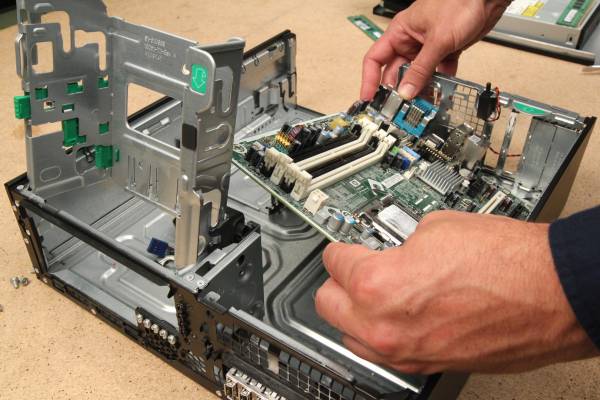
Motherboards are only removed at a certain angle. Proceed carefully.
Lift the motherboard from the front, then slide gently forward to free the back sockets.
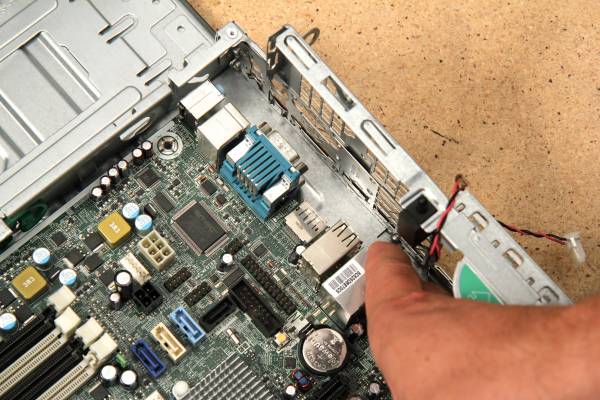
Lift and twist to clear from the case. Lay in a clear space.
Find labels for:
- PSU connections
- Front panel connectors
- USB and SATA connectors
:engagement:siganto_digital_learning_workshops:workshops:siganto_digital_learning_workshops:072_cpu_gate_open_1920.jpg
CPU
The CPU and CPU socket are very delicate. Be extremely careful.
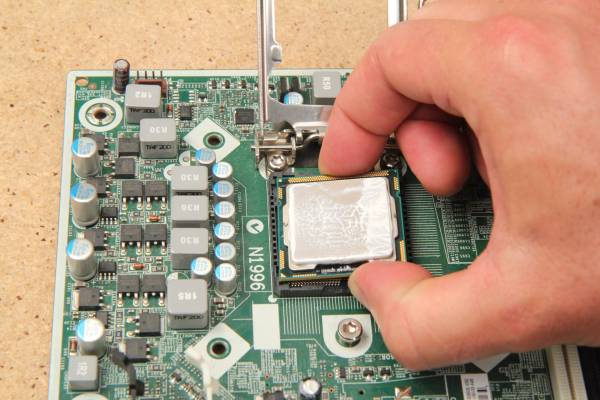
It attaches to the motherboard in a socket. Press down and push the lever to the side. It will pop out.
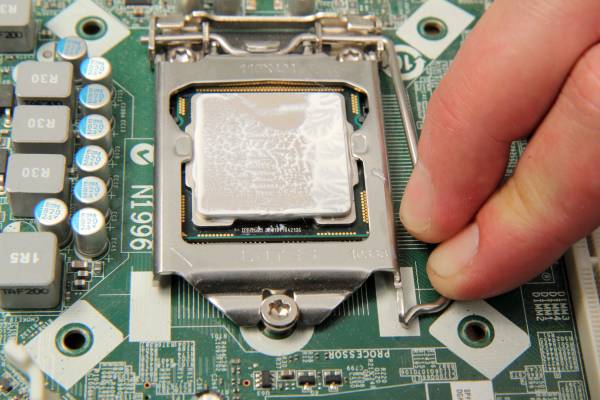
Lift the gate:
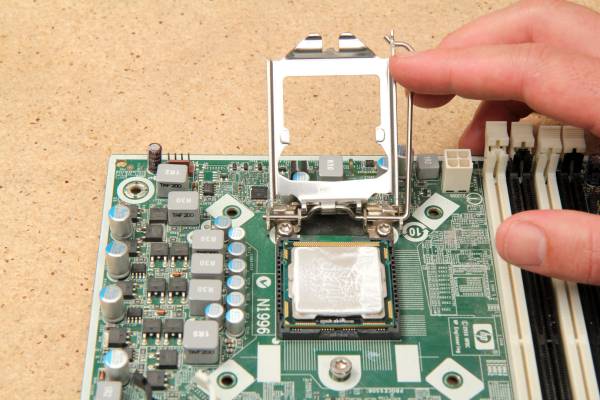
Carefully remove the CPU with two fingers, from the edges with small notches in the socket.
Look at the underside of the CPU - don't touch the gold parts.
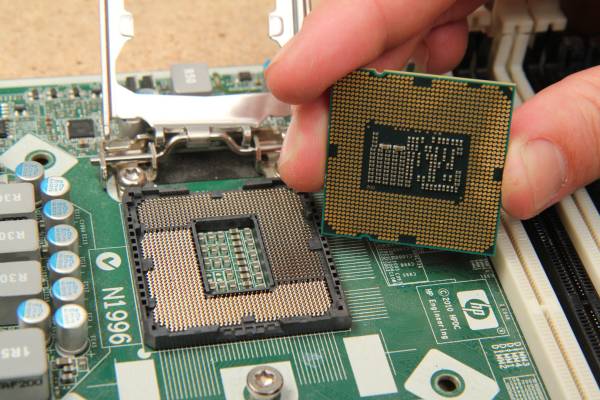
Hundreds of pins each connect to a gold circle on the base of the CPU.
Place the CPU upside-down on your heatsink.
::hp8100:078_all_components_1920.jpg
Reassembly
Let's follow almost the same steps in reverse - refer to your photo if needed.
::hp8100:079_cpu_wipe_1920.jpg
Clean CPU/Heatsink
Once exposed to air, heatsink paste dries. Scrape away old heatsink paste and apply new.
Lift the CPU off the heatsink and flip it. Wipe clean with your cloth until you can clearly read the text.
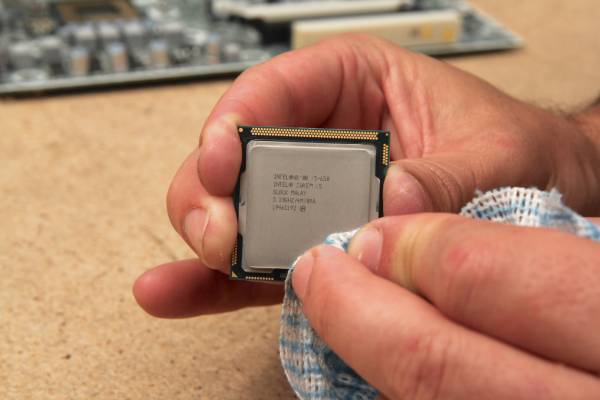
Can you read the:
- CPU speed
- Model number
- Where it was made?
Place the CPU gently back in the socket with notches lined up - it only fits one way!
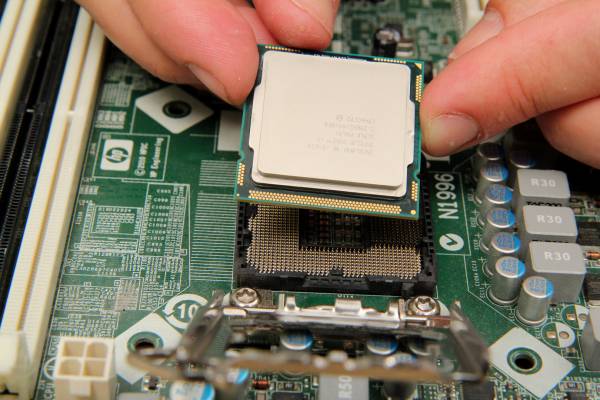
Clean the heatsink with your cloth - wipe with the grain.

::hp8100:082_cpu_thermal_paste_apply_1920.jpg
Apply Thermal Paste/Reseat CPU
Lift CPU out of the socket. Squeeze a rice-sized drop of thermal paste onto it.
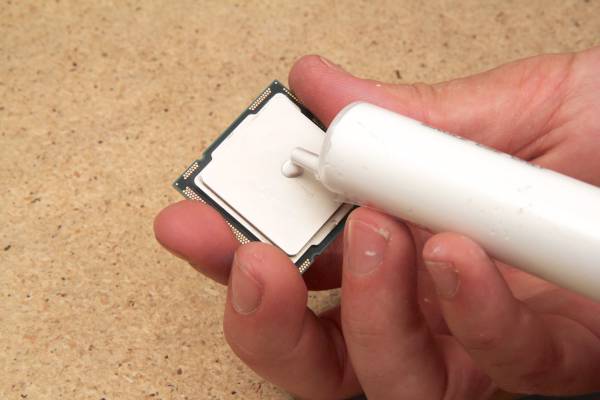
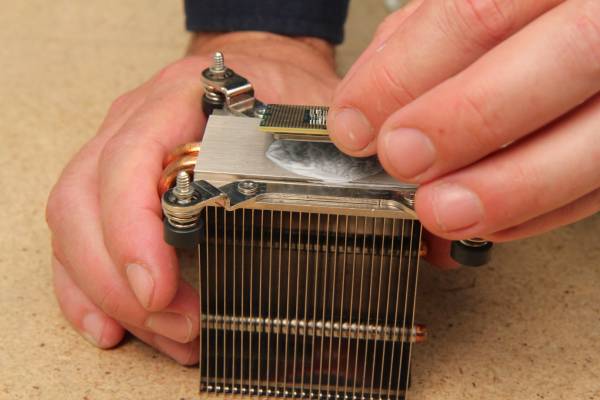
Flip and smooth the paste onto the heatsink until the CPU is mostly covered (not essential)
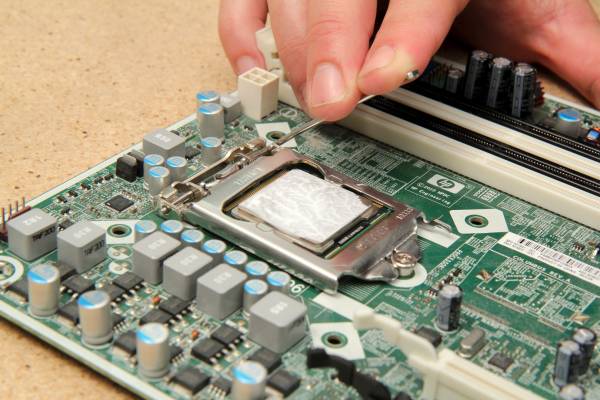
Put CPU back in the socket and close gate.
Motherboard
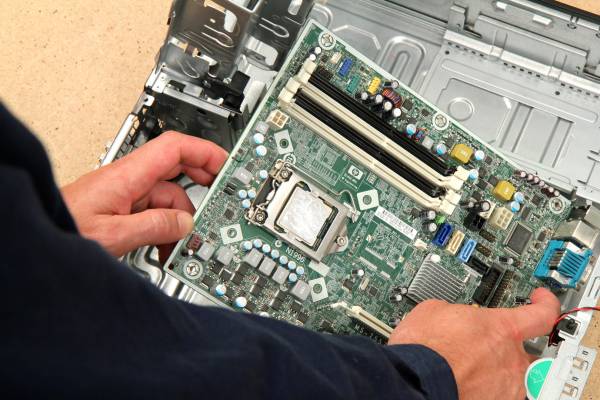
Ease motherboard back in. Tilt, line up back sockets, then gently lower into place.
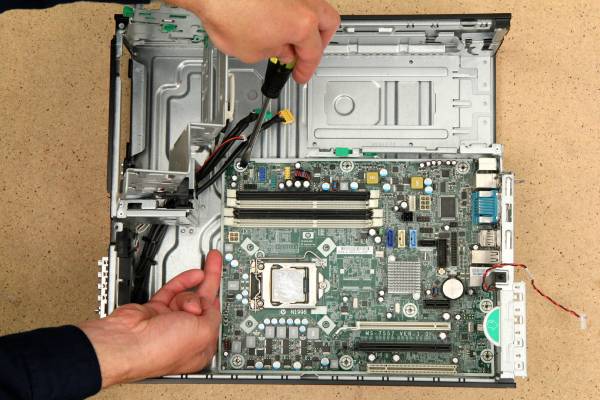
Replace and tighten the six screws (don't use heatsink screw holes).
Heatsink
Line it up and gently lower onto the motherboard. Replace screws and tighten firmly.

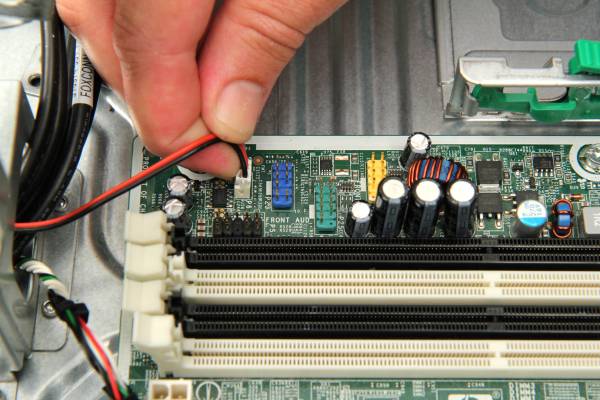
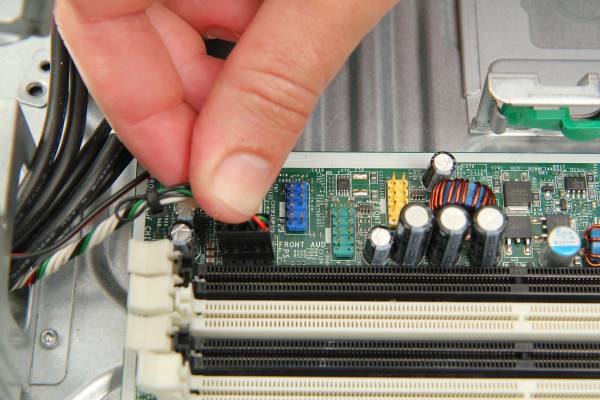
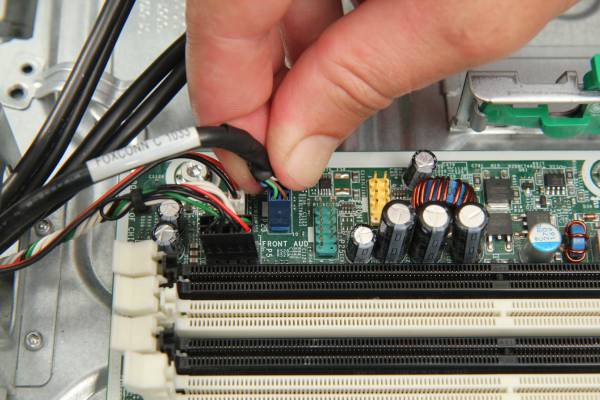
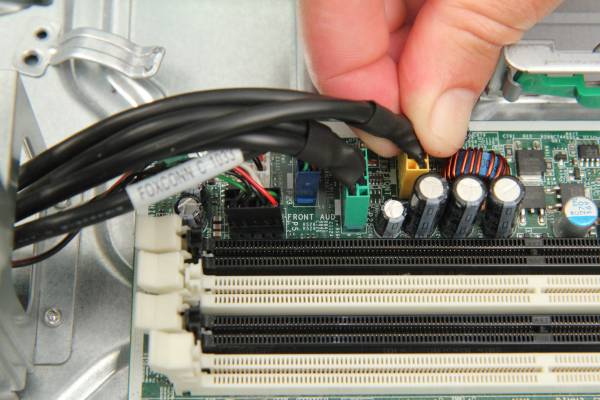
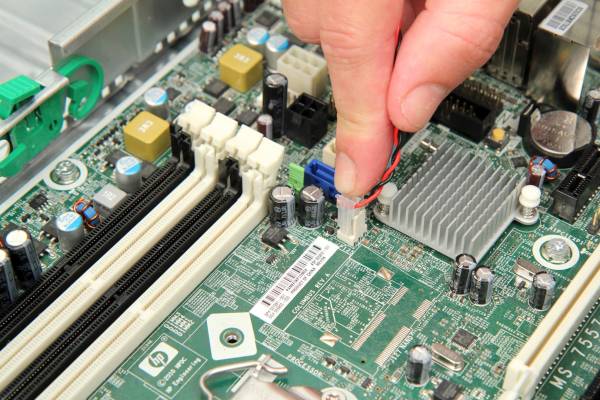
Front Panel Headers
Replace front panel headers one at a time, matching the colours.
Fan
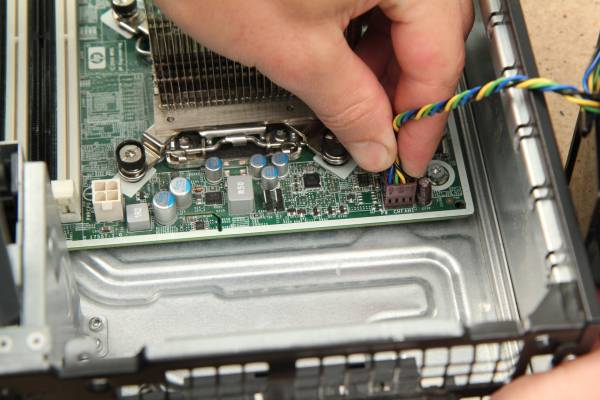
Reconnect motherboard header cable:
Click fan back into place:
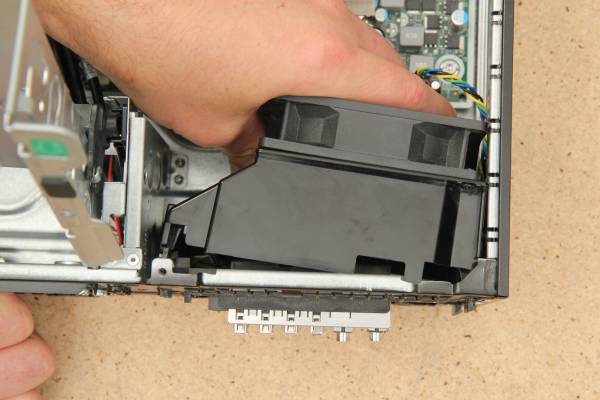
Replace air guide:
Front Panel

Install RAM
Replace one stick at a time.
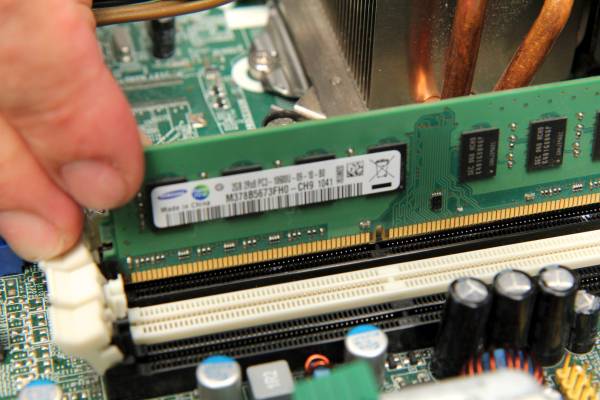
Notches will line up with breaks in the socket.

Push in firmly. Tabs on the socket will grab and hold the stick. Repeat with the second RAM stick.
PSU
Carefully replace the PSU.
PSU screws will align with the slot on the case. Slide PSU down and forward, following the angle of the slot.
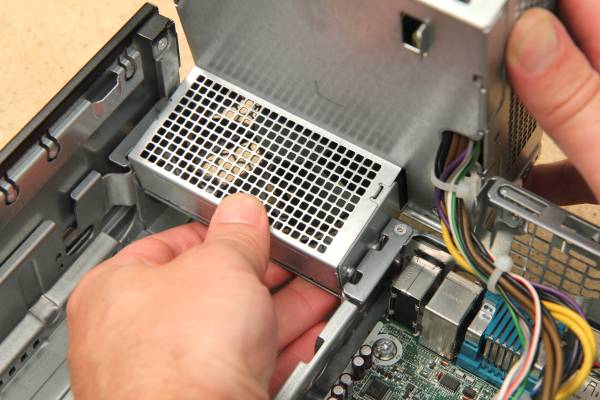
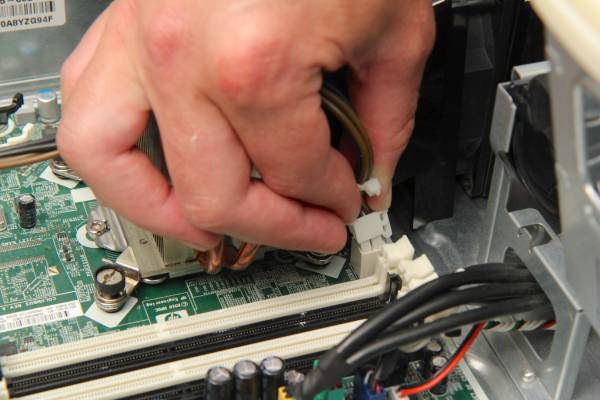
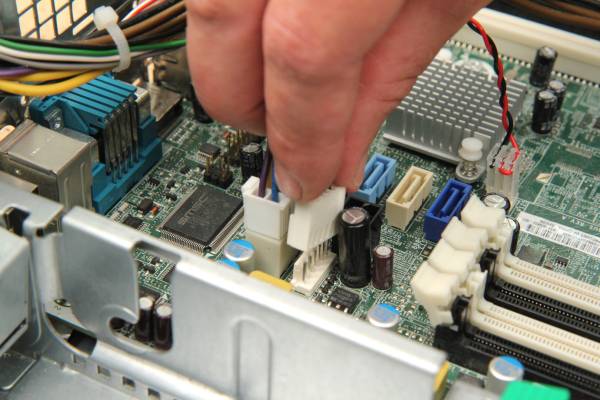
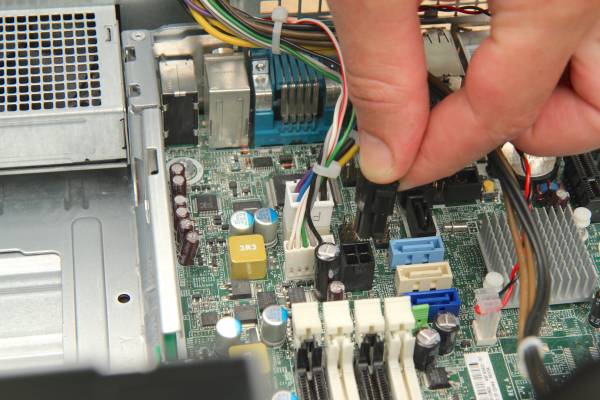
Re-connect the PSU cables to the motherboard (they only fit one way).
Hard Drive
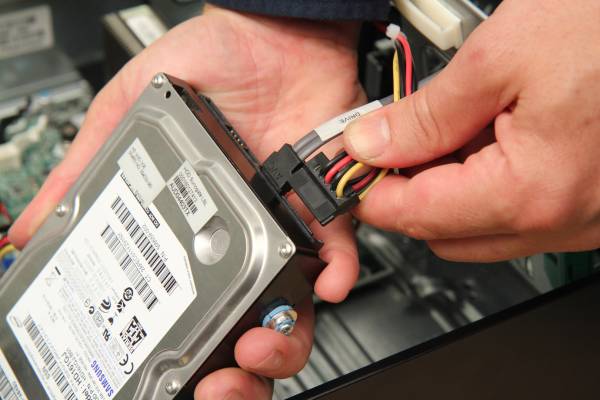
Connect power/SATA cable to the hard drive. Use the L-shaped connector on the drive.
Lift up the PSU, slide hard drive into the bay, then push forward to lock.
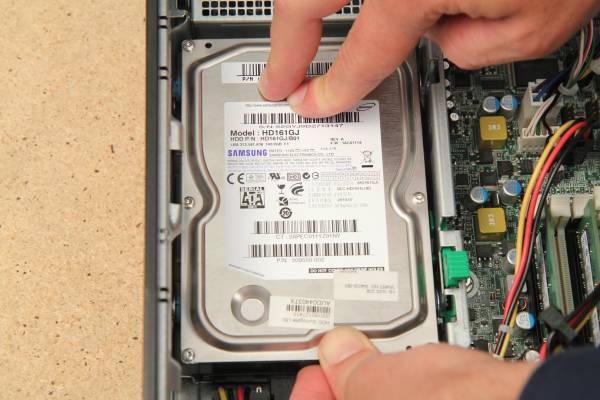
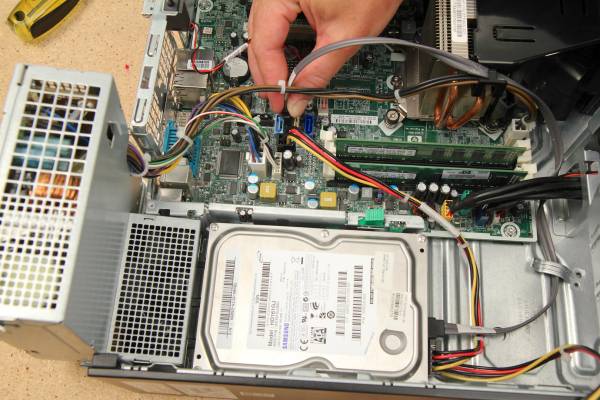
Plug SATA cable into the motherboard.
DVD Drive
Slide DVD drive into the bay.
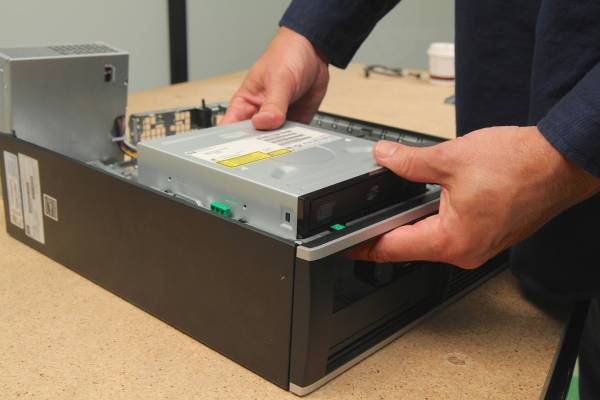
Push forward until it clicks.
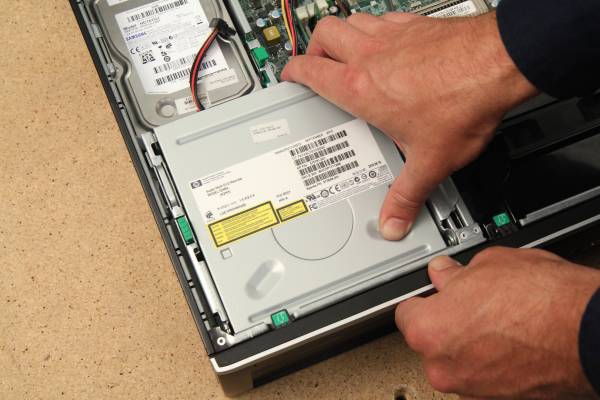
Connect power and SATA cables to DVD drive.
Ensure cables run through the cable clip.
Plug SATA cable into the motherboard.
Lever drive bay back into place.
Close the Case
Check that cables are routed neatly through the clips.
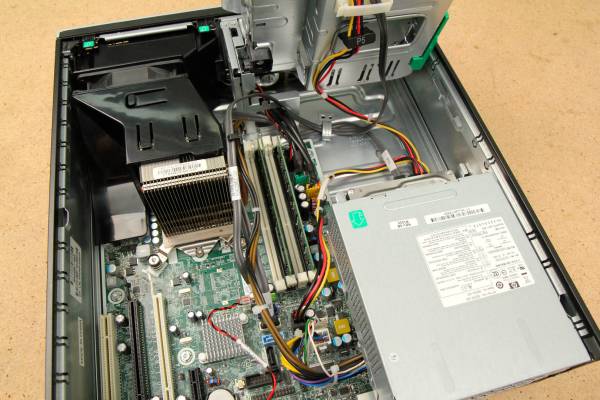
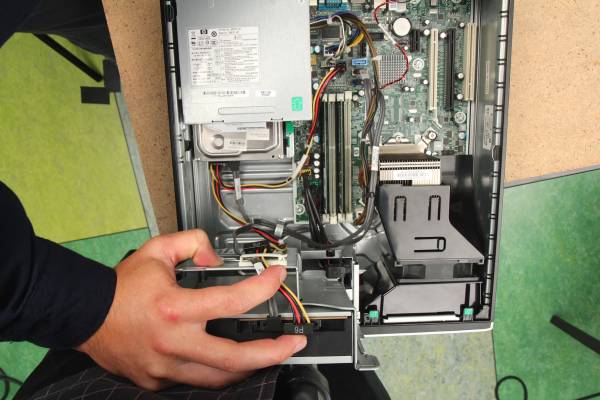
Check DVD drive bay and PSU swing down flat.
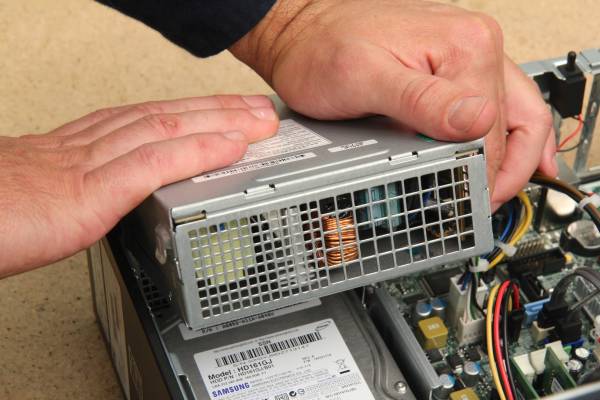
Shut the case. Complete!
