2022 Bookbinding - Laser cut covers, hand sewn spines
This is the 2022 adaption of Billie's Laser Cut, Hand-Bound Books: Crafting the Grumpus' Treasured Tomes workshop adapted by Mick & Sarah. If you are interested here are the notes we kept during this adaptation process.
Acknowledgement
We acknowledge Aboriginal and Torres Strait Islander peoples and their continuing connection to land and as custodians of stories for millennia. We respectfully acknowledge the land on which we all meet today, and pay our respects to elders past, present and emerging.
Target Audience: Adult members of the public (16+)
Cadence: 3 sessions, fortnightly
Capacity: 10 persons per cohort
About
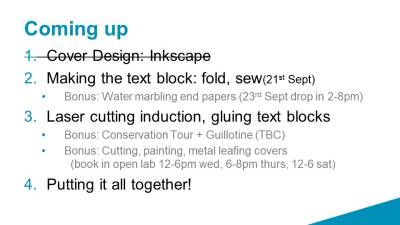
Throughout this workshop series you will take the stories produced by the world-writing workshops and bind them into a beautiful book to display as part of the Great and Grand Rumpus exhibition in the State Library Gallery later in the year.
To craft these creative chronicles we will be combining the traditional handcraft of book binding with the contemporary skills of digital fabrication. Along the way you will learn how to:
- Design a cover in Inkscape (vector graphics software)
- Cut and etch that design on our laser cutter (maybe even including a laser cutter induction)
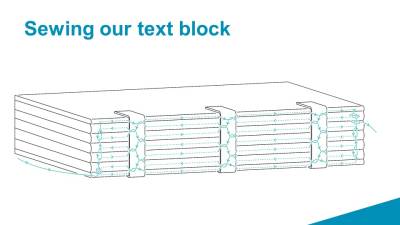
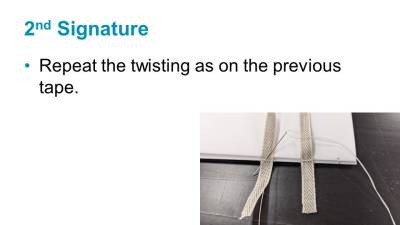
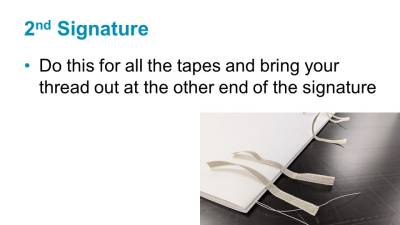
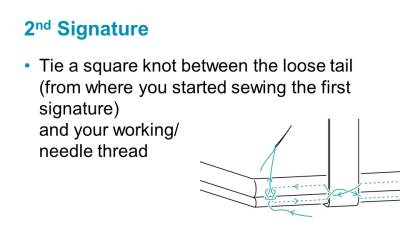
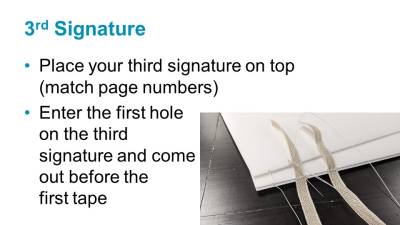
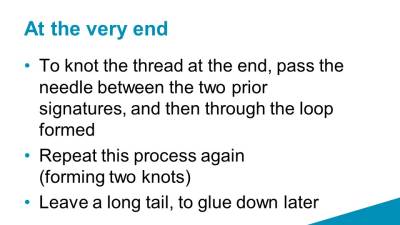
- Sew up a text block from loose leaves of paper (the stories) using traditional materials and methods
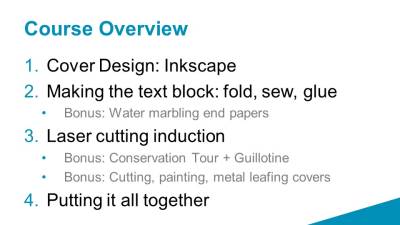
- Turn our laser-cut pieces into a cover and complete our books.
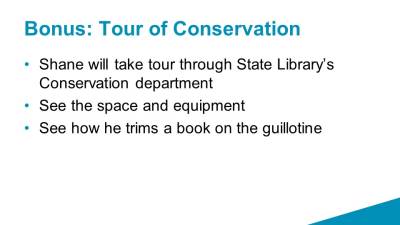
We’re also blessed to have a member of the library’s Preservations Team co-facilitating this workshop series, and there will be an opportunity to visit their workshop here at the library in a bonus daytime session midway through the workshop series. There you will get a rare glimpse at the place where some of the real magic of the State Library happens, learn how real book binders carry out their works and see their super fancy guillotine as we trim up our books.
There are no special skills required, and bring your creativity, ideas and enthusiasm to each of the 4 fortnightly workshops starting Tuesday the 7th September to bring the book to life! You must be at least 16 years old to participate in this workshop.
As with all our workshops we will also be releasing the workshop structure for free via our wiki (where the outline is being drafted currently) so that if you want to run a similar workshop in your spaces after we have run ours, you have a head start with all our resources!
Session 1
Session 1
Design & InkscapeSetup
Tools & Materials
Per participant:
- Sample inkscape file + cut demo from laser for reference
- Template for covers file (outline on base layer, include good image for live trace) on laptops have layer 2 active.
- Laptop +power supply
- Inkscape installed (all on same version)
- Internet connection
Prep
Set up demo cut on laser cutter
Send email to participants:
Help
Cutting Template
Inkscape Help
Or check out Inkscape's own resources; guides community
Remember too, the power of google! Inkscape is very popular software and if you're asking how to do something, chances are someone else has before too.
I've also made some videos specific to the kinds of things we're doing in this session below↓
Videos
| Video | Transcript |
|---|---|
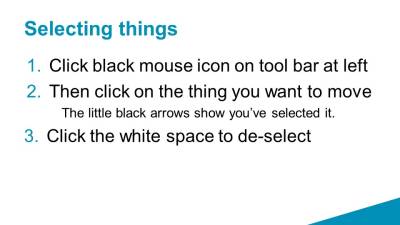
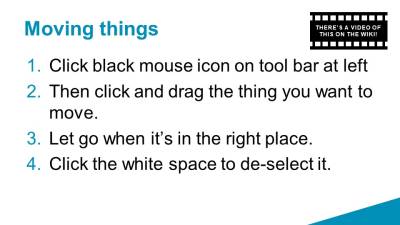
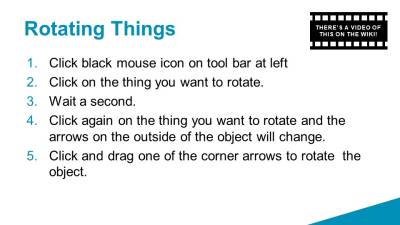
| Adding simple shapes often makes up the foundation of a graphic. To start, click on the rectangle tool on the left hand bar, then click and drag it to make a rectangle on your screen. You can hold down ctrl key and drag at roughly a 45* angle from your start point to force the rectangle to be a square. Similar with the oval tool, you can hold down control to force it to be a circle. You can also make pac-man shapes by changing the start an d end degrees of a circle. Holding down control while using the polygon tool snaps the corner you’re drawing out to an angle increment of 15 degrees, Which allows you to snap things to be vertical or horizontal. You can also change the number of corners of a polygon using this box. Once you have a shape you can move it by clicking the select icon and then clicking and dragging the object, and releasing it when you have it in a spot you like. When moving you can snap corners to other corners by hovering them near each other until this “corner to corner” tooltip appears. We can also resize our object using these arrows…. and we can click on the object again to bring up rotate… and skew tools. To de-select an object click somewhere that’s blank on the canvas. |
|
| Sometimes you want a graphic you can’t find, and thankfully Inkscape offers a few ways to make your own. The simplest way is by using multiple primitive shapes to create more complex new ones, which you can do via various options listed under the Path menu You can combine shapes using union You can cut one shape from the another by selecting the one you want to keep, then shift-clicking the one you want to remove and using difference You can keep just the area that two shapes overlap using intersection Or just the bits they don’t overlap using exclusion You can also use one shape to cut parts of another shape So you can more or recolour segments of it using division. You can combine these methods to build up some pretty complex forms, but if you want even more flexibility it’s time to look at Bezier curves. With this tool you can draw straight lines by left clicking to form your first point, then clicking again to form your first line, and again to form another, connected line. You can also make curves by clicking and dragging a new point, then releasing your mouse when you like the curve. And you can close a shape by clicking the first point once more. You can also edit your shape using the node edit tool. We can now click on these points and move their handles. You’ll notice we can now move one handle to be long and one short, which allows us to further refine our shapes. But say we have a curve here but we want a corner. We can change it using this button. I can now drag this handle to make a corner. Similarly we can convert corners to straights again using this option, or to equal straight using this one. If you have a hand drawn picture you can scan that in and import it, then trace over it with a Bezier curve to make your graphic. That can be a good way to get a feel for things when you’re just starting out wit Bezier curves. |
|
| Sometimes you want a graphic you can’t find, and thankfully Inkscape offers a few ways to make your own. The simplest way is by using multiple primitive shapes to create more complex new ones, which you can do via various options listed under the Path menu You can combine shapes using union You can cut one shape from the another by selecting the one you want to keep, then shift-clicking the one you want to remove and using difference You can keep just the area that two shapes overlap using intersection Or just the bits they don’t overlap using exclusTo change the colour of a selected object we can click on a pre determined colour from this palette at the bottom of the screen but if we want to choose a colour that isn’t listed here, we need to open the fill and stroke tool from the object menu. The fill is the main colour of the shape. To change it click on the flat colour icon, and change the colour mode to Wheel. from here we can change the colour by clicking and dragging the little bar on the rainbow ring, and the circle within the triangle. We can also make the colour transparent using this alpha bar. If we want to give our object a gradient, we can do so using the linear gradient icon. We can also edit the gradient by clicking on this icon. From here we can change a colour in our gradient by clicking on the point and changing it using the wheel or a swatch. We can add more colours to our gradient by double clicking anywhere on the gradient line and editing that dot lie we did the beginning and end dots. We can also change the direction of the gradient by clicking and dragging these points at the end of the line When we are happy with our gradient click off our object to set it. We can add boarders to our objects. These are called Strokes. To add one, select your object Then head to the Stroke Paint menu and click the Flat colour icon. You can pick a colour for it here. You can change various aspects of the line in the stroke style menu, like the width… dashes…. and corner type. This allows you to really make objects look and feel your own. |
|
| Converting pixel-based images to vectors While you can manually trace a bitmap image in inkscape to make a vector file, for complex images it can be very time consuming! This is where Inkscape's “Trace Bitmap” function comes in. It allows you to take a bitmap image and will attempt to convert it to a vector for you through various methods. Brightness cutoff, tries to separate the image into black and white. This method is really good for images that already look a bit like stencils. click update to see a preview. Threshold changes the midpoint, or the point where it splits black and white, fiddle with it to capture the right amount of detail. Colours tries to seperate an image into the colours it's composed of. Good images already look like paper cutouts, or logos, with several distinct colours. You can specify the amount of colours it looks for by changing this setting. results may vary as computers interpret colour differences differently to humans, and sometimes it's easier to use brightness cutoff to split your image into parts and add colour after the fact. Centre line new feature, aims to reproduce your drawing with single lines, try it with very simple lines as complex ones are likely to crash. What If/Next: No matter the mode you're using playing with speckles, smooth corners, optimise can help further refine results. These changes won't show in preview, so Click apply to see the results. you may wish to make some changes and try again. You may also wish to edit small parts of your traced image after its made, or if you can't get the results you are after, you can go back to manually tracing images, check the end of the 'custom shapes' video to learn more. |
Slides
 | Before session: Email participants: Can bring own laptop, install inkscape (link to), bring mouse with scroll wheel that can be clicked in!!! (else have laptops here) Bring USB to transfer files home Divvy up books between participants, give them links Finalise webpage including videos of inkscape Set up laser with demo cut Materials: Per participant: Sample inkscape file + cut demo from laser for reference Template for covers file (outline on base layer, include good image for live trace) on laptops have layer 2 active. Laptop +power supply Inkscape installed (all on same version) Internet connection |
 | |
 | Mick and Sarah = Not a bookbinders, just an enthusiastic makers that should know better, Shane = Conservation Team = real book binder! :D |
 | |
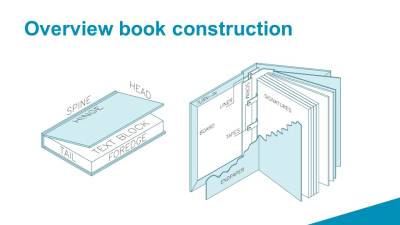
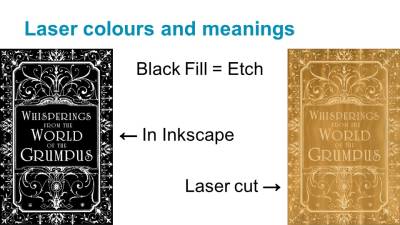
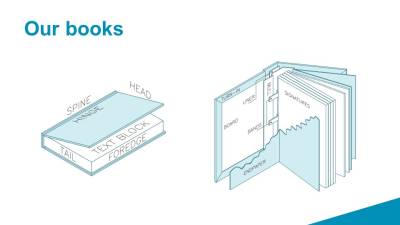 | Demo pieces Laser cut plywood cover, painted and metal leafed, traditionally bound rest Headband & ribbon Show inner workings at back page, talk about gluing We’re starting on covers today |
 | |
 | Allows us to make intricate things oncemore, as a lot of the fine work in many handcrafts have been pushed out by mass manufacturing due to time/labour costs involved in hand making something like this. Very customisable, don’t need to make a big brass stamp for each book cover, or lots of little ones, manually carve something like this. Also very repeatable! Can expect the same results from the same file. Opens it up to people who haven’t got the dexterity or practice, as this is very accurate, and being able to design it first digitally is a lot more forgiving than hand carving something! |
 | |
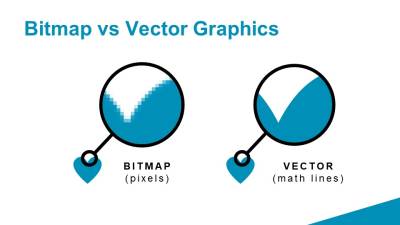 | bitmap = pixels (like photo) = bad vector = lines made of maths infinitely zoom in and will always be crisp Because they are just maths, they are very easily read by laser cutter We don’t need to know maths! Special software allows us to make it. Inkscape is one such example. Most digital images we use day to day (such as JPEGs, GIFs and PNGs) are called bitmaps, they are made up of thousands of little blocks of colour called pixels. These are great for photos but they don't provide enough information for a lot of digital fabrication technologies (such as CNC routers and laser cutters). They also can't be made larger without the image “pixelising” and looking ugly, so bitmaps are not well suited to various graphic design applications like logos. This is where vector images excel. Vectors are essentially lines made of maths, so you can zoom in and out infinitely without the image blurring, and they are much easier for machine software to interpret. Thankfully, we don't need to program the maths these lines are made of, we have software that will work all that out for us, and they are able to save the images out in various vector formats, some of the most common being SVG and DFX, though PDFs can also contiain vectors (but it gets confusing because they can also contain other things like bitmaps!). |
 | Because open source, plugins for all kinds of things. Download Inkscape at home here for free: https://inkscape.org/ |
 | |
 | |
 | |
 | |
 | |
 | |
 | |
 | |
 | Don’t worry if it’s a bit uncomfy now! You will get the hang of it in no time. |
 | |
 | Inserting image Video on wiki |
 | |
 | |
 | |
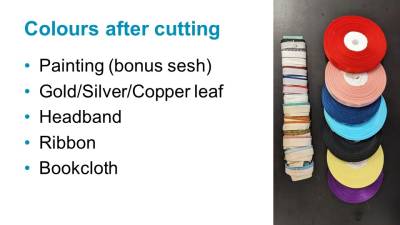 | Can bring your own ribbon (60cm) or acrylic paint if you wish. |
 | |
 | One way to generate artwork quickly (without the laboured creative decision making that can get people unstuck in workshops) is for us to introduce the idea of using an AI text to artwork generator for the cover artwork. 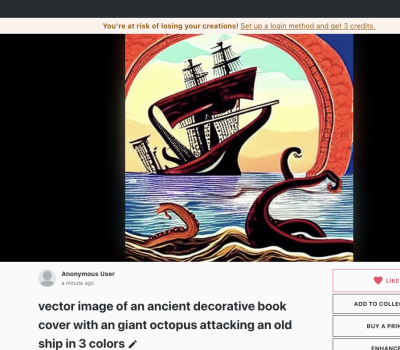 it took 2mins to come up with this. and another 2 mins to reduce it down to 3 colours in illustrator/ inkscape 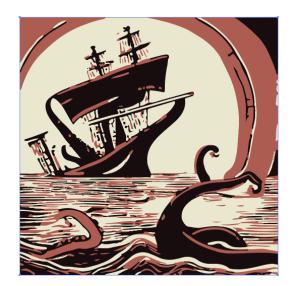 |
 | https://archive.org/details/StencilCatalogsCutStencilsForTheUseOfPracticalMen/page/n51/mode/2up?view=theater https://archive.org/details/ExcelsiorFrescoStencils/page/n43/mode/2up https://archive.org/details/250stencildesign00kpra/page/30/mode/2up https://www.pinterest.com.au/billieruben8695/book-covers/ https://publicdomainreview.org/ |
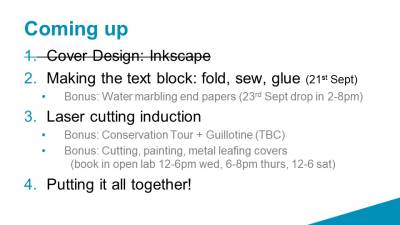 | Next fortnight we will be sewing and gluing our text together! |
  | Template above Download Inkscape at home here for free: https://inkscape.org/ If you don’t have a computer at home you can come in and work on it here during open lab times Draft cover for next session in a fortnight on template! Email Inkscape (SVG or PDF) files to me to me by Monday 6 Nov |
  | Wiki page for this course: https://wiki.slq.qld.gov.au/doku.php?id=workshops:prototypes:laser_cut_books_v2 Wiki page for Inkscape: https://wiki.slq.qld.gov.au/doku.php?id=facilities:fablab:software:inkscape |
Session 2
Session 2
Sewing Our Text BlocksSetup
Tools & Materials
Prep
Before session:
Email participants after first session with homework
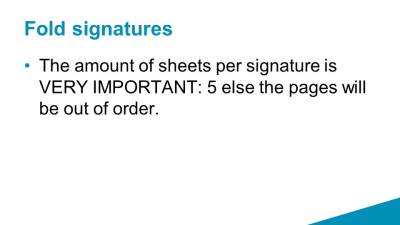
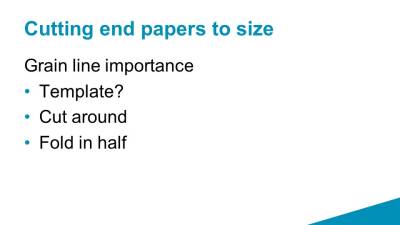
- Have the books printed (5 sheets per signature, grain line running along short edge,
- Have end papers printed
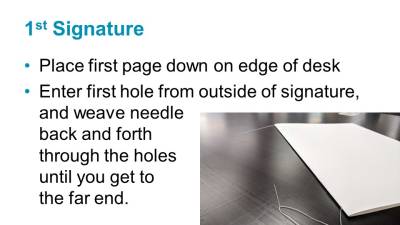
- Finalise sewing video
- Gather materials:
- Bone folder each
- Brayer each
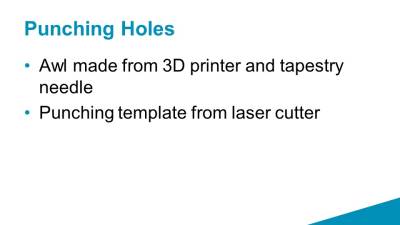
- Awl each awl_3d_printable.zip
- Punching template each
- Printed pages each
- Scissors each
- Sewing needle each (blunt thin good, can sand down tip)
- Waxed linen or polyester thread each (enough to weave back and forward between all signatures)
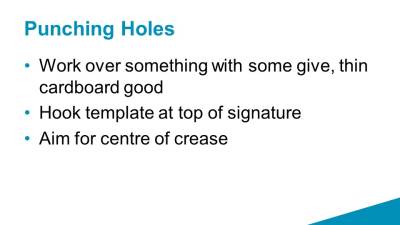
- Single ply cardboard each (for under punching)
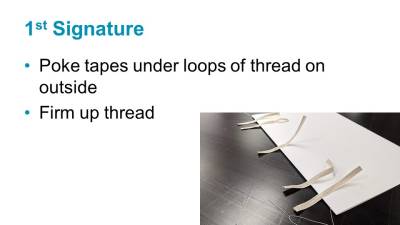
- Tapes each
Help
Slides
Session 3
Session 3
Laser InductionSetup
Tools & Materials
Manilla folders
Prep
Before session:
- charge ipads
- set up cut files on lasers
- gather manilla folders
Slides
Session 4
Session 4
Putting it all togetherSetup
Tools & Materials
For each participant have:
- Pens
- PVA/EVA Glue (share between pairs)
- Brushes each
- Waste paper
- Knife
- Mat
- Steel ruler
- Wood
- Clamps
Prep
Slides
 | |
 | |
 | |
 | Finishing Front Covers Painting (Acrylic) Gold leafing: Brushes Size: https://artmaterialsupplies.com.au/shop/jo-sonja-tannin-sealer-and-gold-size/ Leaf |
 | |
 | |
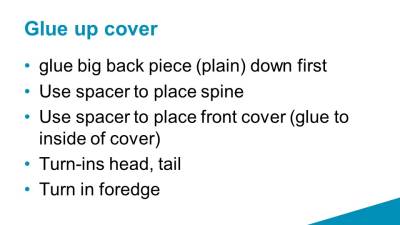
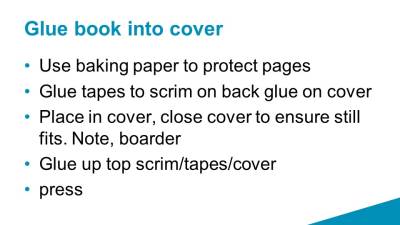
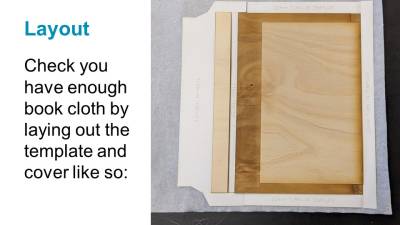 | making the case (cover) Why use book cloth (impermeable to glue, protects from water/dirt etc) Methylcellulose and PVA Mix (PVA glues quick alone) Thicknesses/ measurements around edges laser cut spacers and trimming guides (with measure and description e/g for edge) sharp thin utility knives steel rulers cutting mat need knitting needles 3 per person if doing flippy back bit, 2 else. mounted to boards would be good. need presses for each person, or heavy things. non-stick stuff polyester film? Waxed paper? pressing boards felt brayers More info: how to make fabric into bookcloth https://www.youtube.com/watch?v=ek2-1VJfskY |
 | |
 | |
 | |
 | |
 | |
 | |
 | |
 | |
 |
Slides, editable
Proposed non-grumpus workshop overview
Session 1
- Inkscape
- Sewing
(don't finish either of these during the session, take home with them)
Session 2
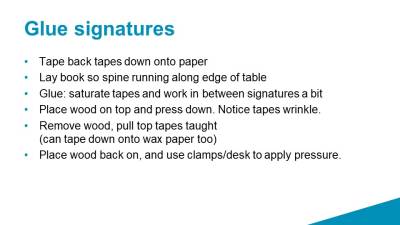
- gluing spines & pressing
- Laser induction (practical being cutting bookcloth templates for next week)
- adding mull, headbands and bookmarks
Session 3
- Painting/gold leafing covers (or dying with ink, as it keeps the texture better. Art spectrum liquid spectrum work well (NOT THE PIGMENTED KIND).
- Might be able to tee this up with Rachel Spano and also do marbling with paper conservators group? If not doesn't matter, I've purchased some marbled papers for the endpapers.
- Adding endpapers (if not marbled, else next week)
Session 4 Putting it all together
- creating cover (attaching laser cut pieces to bookcloth)
- 'casing in' (putting text block into cover)
Billie's Recomendations/ Notes
- Make them a fixed size, e.g. A5 (they can come back to make different ones. Templates will need to be updated accordingly, and paper of the right size gathered or cut.
- I believe I have purcahsed all required materials, they can be found in the bookbinding tub, or in the tubes with the paper type things (bookcloth and spine lining material is here)
- I returned the press we borrowed from preservations. We might be able to borrow a few, else clamps and plywood works well too.
- I would get preservations/ Shane Bell to trim all the books to size for us after Session 2.
- Might be nice to have some 3mm plywood for the covers. We can do it with 4mm, it's just a bit thicker than usual.
2022 delivery-Laser cut covers, hand sewn spines - bookbinding
In 2022 Mick & Sarah were tasked with running this workshop series over the course of 3x 4hr sessions a fortnight apart.
see this fork over here
