Edison Lunar Rescue
A activity for participants aged 10-16

Description
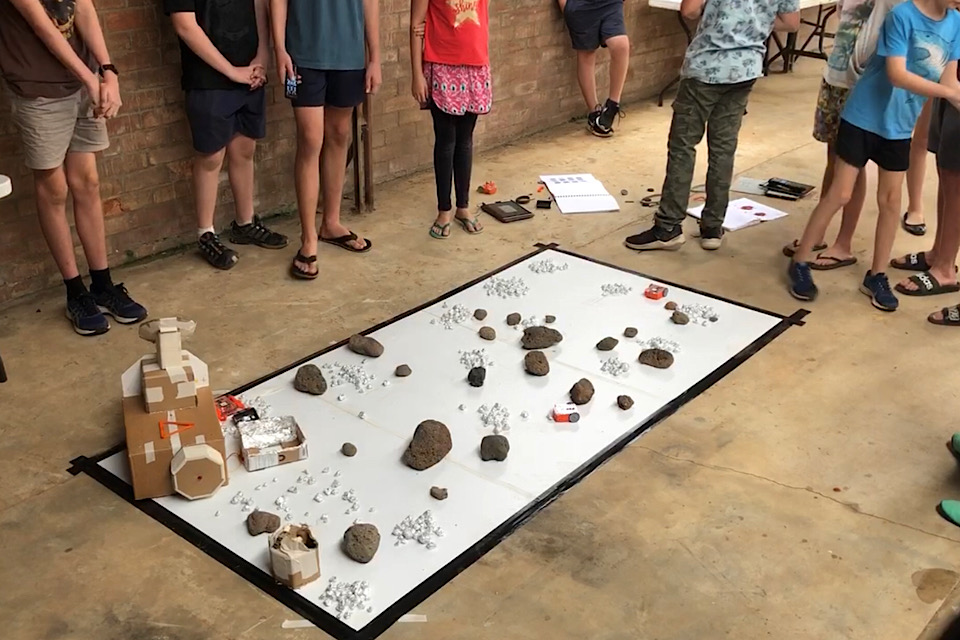
Edison Lunar Rescue is a group activity where participants work together to construct, code and remote control Edison robots to restore power to the library located on the moon. Using a simulated environment, participants need to navigate the rocky landscape, gather power rocks and transport them back to the base to re-enable the power generator, all in a limited amount of time and with limited resources.
Duration
4 hours and 30 minutes, including a 45 minute break
Participants
- Minimum 8 people aged 10-16
- Participants work in teams of 2-3, depending on numbers
- Each group collaborates on the creation of a single vehicle, using 2 Edison robots and an EdCreate kit
Facilitator Experience Required
This activity can be facilitated by anyone. It is does not require prior experience with Edison robots. You will need, or have to have time to get familiar with the following:
- A basic understanding of using and controlling Edison robots
- A basic understanding building LEGO kits
- A very basic understanding of electronics
Outcomes
- Introductory understanding of Edison robots
- Practical understanding of the components of the EdCreate kit, how to connect them, and how they can be controlled by the Edison robot
- Introduction to block based coding
- Engagement in collaborative design
- Realisation of a design
Venue Requirements
- A room with a flat floor, minimum 5m x 5m
- 4 x tables
- Whiteboard
About the Edison Robot and EdCreate Kit

The Edison is an Australian based robot which is LEGO compatible, the Edison can be converted into a myriad types of machines with the EdCreate extension pages, LEGO blocks, or whatever you might have lying around! Edison can be coded via its own block-based coding language - EdBlocks, or via barcodes, and can be driven with any infra-red remote control unit.
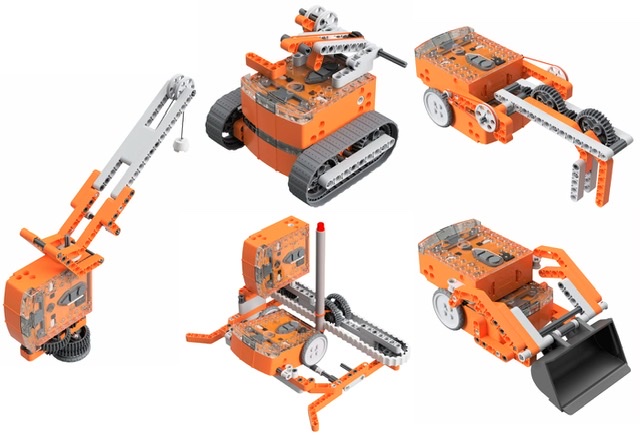
The EdCreate Edison robot creator’s kit is a 5-in-1 expansion pack construction system. Designed to work with the Edison robot, EdCreate enriches students’ STEM education experience through interactive engineering and programming projects.
The EdCreate system can be used with Edison robots to complete five EdBuild projects:
- the EdTank,
- the EdDigger,
- the EdRoboClaw,
- the EdCrane, and
- the EdPrinter.
The EdBuild projects require progressive levels of coding capabilities, making them a perfect addition to the Edison programming and robotics curriculum.
EdCreate can also be used in a wide range of open-ended engineering, design and programming challenges. Open-ended projects, including the EdCreate EdChallenges, promote creative problem solving and give students opportunities to find STEM applications to real-world scenarios.
Edison resources on the SLQ Wiki
Meet Edison
Meet Edison - EdCreate Kit
Material Requirements (per group)
- 2 x Edison robots
- 1 x EdCreate kit per group
- 1 x EdComm IO cable
- 2 x universal TV Remote controls (each programmed to a single Edison robot)
- 1 x Tablet with the Edware software install
- Internet connectivity for the Tablet (required for the Edware software)
Notes:
- Each Edison robot should be labelled to help identify which robot belongs to which group and which universal remote control it is coded to. This can be done by labelling the devices 1A/1B for group 1, 2A/2B for group 2. Label the universal remote controls also 1A/1B.
Moon Base Materials
- Painters tape
- Cardboard boxes
- Al-foil
- Any recycled materials or toys that can be made into a obstacles
Cardboard Models
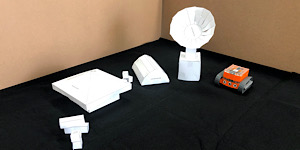
 Below are various cardboard plans that can be created to fill out your moon base!
Lunar Box/Storage Model (PDF)
Lunar Box Bunker Model (PDF)
Lunar Hut Model (PDF)
Lunar Satellite Model (PDF)
LED Circuit
The LED circuit is used to simulate power restoration at the moon base. This is achieved by placing the al-foil balls over 2 al-foil sheets to complete the wire circuit.
A resistor is required to ensure that the LED does not burn out from the battery, or the battery does not provide too much voltage to the LED. You can use this resistor calculator to find out what resistor you require based on the LED you have and what battery you are using.
As an example, you can see the following LED has a forward voltage (or voltage drop) of 5V and a forward current (or current rating) of 20mA.

Assuming we are using a 9V battery, we can use the resistor calculator to work out the resistor we need for the circuit.
This calculation shows we would need a 200 Ohm 1/8 watt resistor. When shopping for resistors, make sure you get a resistor that is 200 Ohm, the wattage is the minimum required so if you cannnot find a 200 Ohm 1/8 watt resistor, a 200 Ohm 1/2 or 1 watt resistor would be fine.
Example Circuit
To create a simple single flashing LED you will need:
Once you have the above components, you can simply connect up the circuit as follows:
If you want to run multiple LEDs, you will need to wire the LEDs and resistors in parallel as per the circuit diagram below.
Construction Guides
Having the following guides as printouts can help participants in constructing certain vehicles. While these are a great starting point, some groups may need to customize the designs to reach the desired outcome.
Other Materials
- Name tags
- Marker pens
- Cardboard plaque for team names
- A countdown clock (optional)
Workshop Summary
3 hours and 45 minutes total, plus 45 minutes of breaks
| Duration | Activity |
|---|---|
| 45 minutes | Introduction, Team Building, Safety Briefing |
| 45 minutes | Barcode, Coding and Remote Control Testing |
| 15 minutes | Snack Break |
| 45 minutes | Construction and Testing |
| 30 minutes | Lunch |
| 90 minutes | Customisation, Fixes and Testing |
Setup
This activity requires to be run in a space where there is room for simultaneous workshop space and building, and the lunar surface.
The space should be setup in four workstations, all facing the presenter at the front of the room.
Each workstation should be numbered to match the Edison kits. Have two distinguished spaces in outlined in consistent colours.
- The Workshop Space - The defined area for construction of a vehicle
- The Storage Space - For storage of any parts that will be required throughout the Edison robot construction process. The idea of this space is that it's contents are not to be touched without specific instructions for the presenter.
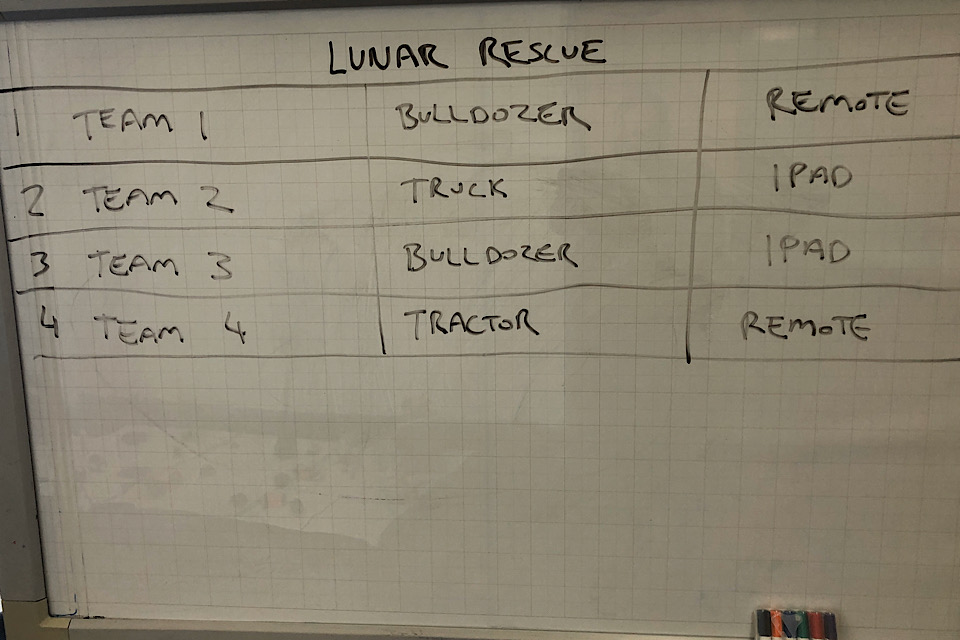
Whilst the goal of the activity is having fun, learning robotics, and saving the moon library, a level of coordination between the groups is required, after all if everyone built the same thing then we would not be successful. Setting up a whiteboard that contains the groups and what they plan to build will help keep the groups focused on their part of the plan.

Detailed workshop breakdown
1: Intro, Team Building and Safety Briefing
(0:00 - 0:45)
Introductions
Upon entry to the workshop, Ask participants to sit on the floor in a circle in a clear space away from the workstations. I also ask them not to touch any of the equipment on the workstations until they are instructed to do so.
A strong and through introduction is important for:
- Setting up a positive working environment
- Builds a feeling of trust
- Letting go of any nervous energy
- Building the foundations of a consistent and clear way of working
Introductions can include:
- Acknowledgement of country
- Introduce yourself as the presenter, your background, experience and interest in the workshop topic
- Introducing any other staff that might be in the room
- Unpack the 'ground rules' for collaborating together in a positive work environment (kindness, generosity, respect, do your best)
Team Building
Many workshops we have seen jump straight into the workshop content without making time to set up these important foundations. By focusing and uniting the group - the participants will work together better and achieve more. You can find team building activities on our Activity Planner page.
Play a Game!
Team building helps form the working groups that we will be forming into for the remainder of the day. It is important to get groups set up as best as possible early in the session to avoid any conflict or difficulty later on. We often begin with a group game to allow an opportunity for the group to get to know each other and have fun in a low-pressure way but this is also an opportunity for us to gauge the dynamics of the room an allow us to make a more informed choice when it comes to group selection.
Team Selection
In the process of selecting groups for this activity, We take into account the following:
- Participants that are here with a friend or family member
- Participants that are not here with a friend of family member
- Participants that made connections with someone else during team building
- Allow female participants to work with other female participants, or anyone else in the group
Create groups based on the preferences and personality dynamics of the group. If there are younger participants, paring them with older participants can help with skill sharing and focus throughout the day
Team Naming
We ask participants to come up with a team name, even if it plays no role within this activity. This initiates group discussion and continues team building. Give the groups 2 minutes to come up with the name, then share with the group. Write their team names up on the board as they do so.
We also ask each group to write their team name on their cardboard plaque.
We are now ready to allocate each team to their workstations. Before participants travel, don't forget to remind them not to touch anything!
Safety Briefing
The safety briefing for this activity can run as follows:
- Safety is the most important aspect of this Activity
- Do not touch any of the equipment without being instructed to
- Be careful with the equipment - some of it is delicate
- IMPORTANT: Do not touch the battery within the moon base
- Do not put anything in your mouth
- If something is broken, do not pick it up or try to fix it. Get a staff member immediately
Project Briefing
A clear briefing helps participants understand what they need to achieve and allows them to direct their focus as they work through each step of the activity. It also important to set the scene and make the participants feel part of the story.
Setting the Scene
We have to come clean; we have been secretly running a library on the moon to hold our most important books and comics.
A week ago we received communication from the library that there had been an explosion in the power reactor and that they were trying to fix it before the spare batteries go flat.
That was 2 days ago, and we have heard nothing since. By our calculations they are running out of life support and radiation is starting to creep into the building.
We have managed to take a few photographs of the library and recreated the layout here. We can see that the backup generator is fine but is powered by power rocks found across the surface.
This is where you all come in. In front of you is all the technology that we have up at the library and it is up to you to work together and come up with a solution to collect the rocks, place them into the backup generator and restore power.
You are going to have to work together to build the equipment needed for this task. That could be diggers, loaders, transporters and cranes to make this a success. Some of these will be remote controlled while others will need to be coded using a tablet.
Time is critical as the robots only have enough power run test simulation for 2 minutes. Also as the radiation grows, some robots, tablets and remote controls may stop working.
Unpack the Process
Briefly unpack each part of the process, having a activity schedule breakdown somewhere in the room to help participants orientate where they are up to in the process and where they are heading next.
This workshop can be unpacked through the following steps:
- What has happened to the library on the moon?
- What we need to do to save the library?
- Building our vehicles
- Test simulation
- Customise our vehicles
- Final simulation
2: Barcode, Coding and Remote Control Testing
(0:45 - 1:30)
During this activity, each group uses the barcode printout above, the remote control and tabet to go through and try out using the different control methods. During this groups are NOT permitted to construct anything or use the lunar surface to test.
Each person in the group is to have a turn in controlling the Edison.
The recommended timeframes for each method are:
- Barcode: 10 minutes
- Remote Control: 15 minutes
- Tablet Coding: 20 minutes
3: Snack Break
(1:30 - 1:45)
Snack Break. An extremely important aspect of any workshop.
If possible, make sure the group take the snack break in a different space, preferably outside to keep the workshop space focused.
Before participants re-enter the room, remind them not to touch anything when and wait for instructions.
4: Construction and Testing
(1:45 - 2:30)
Gather everyone in their groups and start the discussion on what needs to be built to collect the power rocks and place them into the backup generator. Using the whiteboard, assign the vehicle construction to groups and start building. The group discussion should only take 2-5 minutes.
Groups go back to their workstations and start construction. They will have around 40 minutes to build their vehicles. During this phase, there is no testing on the lunar surface.
5: Lunch
(2:30 - 3:00)
If possible, make sure the group take the lunch break in a different space, preferably outside to keep the workshop space focused.
Before participants re-enter the room, remind them not to touch anything when and wait for instructions.
6: Customisation, Fixes and Testing
(3:00 - 4:30)
After lunch, gather the groups to place their vehicles onto the lunar surface and do a test run. The test run is to last 2 minutes. Afterwards, have a quick discussion with the group about what went right and what went wrong. What do the groups need to be get a successful run?
Going back to the workstations, complete any work that need to be done. 40 minutes after the first test run, gauge on where the groups are up to in their constructions. At this stage, the groups can have a second 2 minute test run, or if not yet ready, give the groups an additional 40 minutes before having a final test run.
Remember, groups are not permitted to test their vehicles on the lunar surface outside of the test runs!
Radiation/Storage Lockers Concept
The story introduces the concept of radiation and time being an issue. This mechanism can be used to change the difficulty either within the activity or between groups.
During the activity, you can change the difficulty by using radiation (to take away) or storage lockers (to give back) LEGO parts, Edison robots, tracks, remote controls or tablets.
However do not make too many changes, nor make them too quickly as groups may need to redesign their vechiles to work within the changes which could be time consuming!
Completion
That is the end of this workshop resource. We hope you have found it useful!
For any questions in regards to this resource, please contact James Collins at State Library of Queensland on james.collins@slq.qld.gov.au or at 07 3842 9978.


