~~REVEAL~~
Technology Induction - Intro to Arduino
Developed by Phil Gullberg in collaboration with the State Library of Queensland, March 2019.
Summary
This Arduino induction focuses on teaching participants to understand and work with the Arduino micro controller hardware. Arduino is a great tool to create digital devices and interactive objects that can sense and control both physically and digitally. The induction is divided into a handful of practical activities using basic in and output components. It also includes a short lecture on the background and purpose of the Arduino project. By the final activity participants will be able to troubleshoot and use both analogue and digital components such as sensors, lights and motors with the Arduino and have the understanding to pursue more advanced projects. This induction will not include any coding and relies on the standard Arduino example sketches as well as some customized sketches below.
Introduction to Arduino
Materials
One of each of the following components are required for the workshop per participant, spares are recommended for LEDs and Resistors. Each participant will require multiple jumper cables of all variations. Length is not important.
- Arduino UNO
- USB Cable
- Laptop/Computer with the Arduino software installed (or the plugin to use the web editor)
- 10kΩ Resistor
- ~270-1kΩ Resistor
- 9g Servo
- Piezo Buzzer
- Breadboard
- Pusbutton
- Basic LED
- Jumper Cables (F→F, M→M, F→M)
For all activities you will need the Arduino, Breadboard and Jumper Cables. The rest as per activities below.
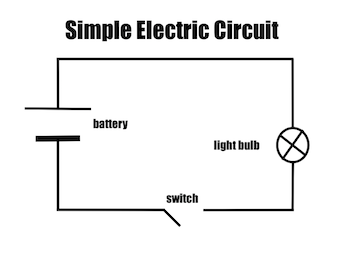
Basic Electric Circuit

Breadboard
The breadboard, in this the 170 point mini breadboard is used to connect electronic components without the need to solder. Each side consists of 17 rows of 5 points each. Each row of 5 points are connected.

Activity 1: Built in LED
Plug in the Arduino to the computer via the USB cable. Time to set up our Arduino in the IDE.
- Tools → Board → Arduino Uno
- Tools → Port → Choose USB port (COMX)
- Tools → Get Board Info
The following message will appear if you've chosen the correct port, if it doesn't show up, choose a different port and try again.

Once the Arduino IDE has found the Arduino board its time to open an example sketch and make sure the connection between the two is working correctly.
File → Examples → 01.Basics → Blink
Press the upload button and the built in LED on your Arduino board should start blinking, one second on, one second off.
Activity 2: LED
Just like the previous exercise we will be making an LED blink, this time using a separate LED (and a resistor). This allows us to choose the LEDS color, intensity, temperature as well as extend the LED using cables.
Open the 2. LED_Blink project
You will need:
- LED
- 270-1kΩ Resistor

Activity 3: Servo
A servo is a little motor that can turn up to 180 degrees, we can tell it to go to a specific position or just go back and forth. This can be useful for attaching artwork or other components move.
Open the 3. Sweep project
You will need:
- Servo

Activity 4: Buzzer
A piezo buzzer is a very primitive speaker that can be found on the inside of computers for example. We can play different tones using code.
Open the 4. Buzzer project
You will need:
- Piezo Buzzer
- (Resistor)

Activity 5: Push button and LED
This activity brings everything together and we're able to combine the previous components and control them with a push button. We're using the button to decide when to turn the light on and off.
Open the 5. Button_LED project
You will need:
- Pushbutton
- LED
- 270-1kΩ Resistor
- 10kΩ Resistor

Activity 6: Experimentation
It is now time for you to add, remove and adapt your circuits.


