Up Mini 2 - Regular Maintenance
Schedule
- Fortnightly: Change hot end nozzle
- 6 monthly: Clean printer interior
- As needed: Clean print head
Change Hot End Nozzle
Remove and clean nozzle
- Remove spare nozzle from acetone bath and gently scrape off any burnt plastic with a ruler or similar. Avoid the nozzle tip if possible.
- Power Up Printer, Launch Up Studio application and Intialise printer as per normal startup procedure.
- Enter the maintenance menu and click on the 'Withdraw' button. This will heat up the nozzle and the feed stepper will reverse the filament out so it can be removed.
- Now click on the 'Extrude' or 'withdraw' buttons to maintain nozzle temp at operating temperature (~260 deg C) you may need to do a few times as it only last for 1 min
- Remove nozzle with wrench. Be careful not to burn yourself on the hot metal. Add the dirty nozzle to the acetone bath for soaking.
- Screw in the clean nozzle from step 1 - be careful not to cross-thread the nozzle in the hot end and again be careful not to burn yourself on hot metal. Tighten nozzle firmly but do not over tighten.
- Reload filament as per normal operation.
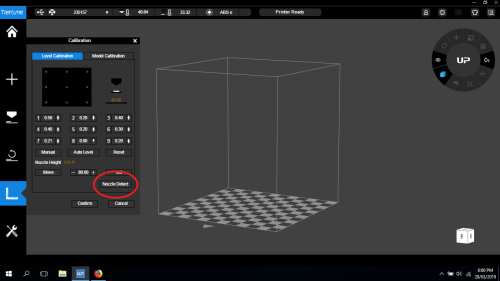
- In the maintenance menu, click the 'Nozzle Detect' button. This will gently touch the nozzle to the switch at the back of the bed and adjust the nozzle height measurement as appropriate.
Ensure hot end is at operating temperature before attempting to remove or replace nozzle
Calibrating Z height and Bed leveling
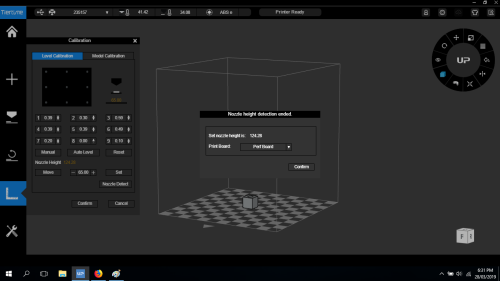
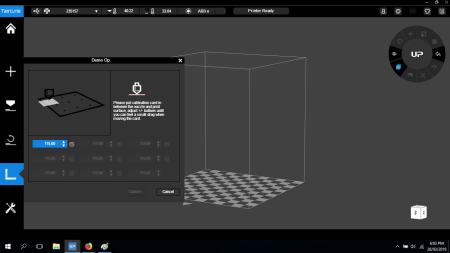
- Enter calibration menu and click Nozzle Detect. The print head will then touch off on the metal switch at the back of the bed. You will be asked to confirm the new z height.
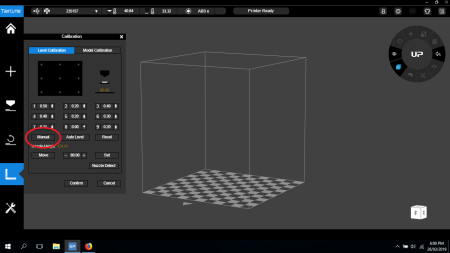
Auto Bed Calibrate does not work on this model of printer so you need to do the next part manually
Calibrating the bed allows the Printer to be trimmed virtually (in the software ) to cater for the small physical variations in the z axis across the bed.
- Enter the new z height into the dialogue with a (-) and a (+) and click Move. Be careful not to enter the wrong value here as it can cause a head crash!
- The Bed is divided into 9 quadrants. The next step is to establish which of these quadrants is the highest. When we have established which quadrant is the highest elevation on the z axis we can adjust each quadrant for the variations in the software. Usually the Front centre and middle centre quadrants but not always.
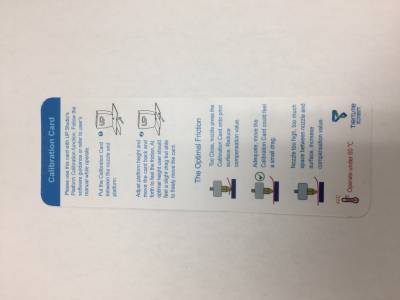
- Use the Up calibration card provided as a gauge and zero this highest quadrant. When placed between the bed and the nozzle, the card should feel like it has a slight drag, without being gripped too loosely or too tightly by the nozzle.
- Then move onto adjusting the other quadrants up so they have the required card gap also. When you have completed this process press Set to save these adjustments.
Test Print
Clean print head
- Remove the two top panels from the printer case
- Withdraw the filament as described here (link)
- If the print head is unable to withdraw the filament, use a pair of wire cutters to snip it off. This is not a preferred method as it can slow things down later on.
- While the nozzle is still hot, use the wrench to unscrew the nozzle from the print head
- Scrape the bulk of any built up debris from the nozzle with the tweezers, being careful to avoid the nozzle tip
- Place the dirty nozzle in the acetone jar for soaking
- Turn the printer off
- Unplug the rainbow cable from the top of the print head
- Firmly but gently slide the print head up off its tracks. You will feel when it comes free. Be careful, the nozzle will still be hot!
- Locate two screws on the fan side of the printhead and use the screwdriver to remove them
- Unplug the black and red wired small plug from the same side of the print head
- Gently tip or pull the print head free of its outer shell and put the shell aside
- If you cut the filament in the initial steps, you may have to trim it shorter to prevent it getting stuck while removing the shell
- Orient the head with the nozzle pointing towards you
- Gently slide the flat angular wind shield off the heat sinks and put it aside. Be careful to keep it oriented the same way as this will make reassembly easier.
- Use the small allen key to remove two screws from the small white plastic feed gear cover located in the middle of the heat sinks
- Carefully prize the feed gear cover free and put it aside
- Use the tweezers to clean excess material from the feed gear teeth, blowing away any dust
- Reconnect the partially disassembled print head to the printer. No need to reinstall filament at this time.
- Click either 'extrude' or 'withdraw' to heat the hot end. Do this as often as needed to keep the hot end heated.
- If you cut the filament in the initial steps, use a pair of pliers to firmly grip the filament stub and try to pull it free. If this does not work, remove the print head from the printer and skip ahead to removing the heat sinks.
- Use the paperclip tool to poke down through the filament path, wiping any removed material onto a paper towel. Be careful not to touch the hot parts!
- Keep doing this until the filament path feels clear and no more material is being removed
- Turn the printer off
- Remove the print head from the printer as previously described
- Use the medium allen key to remove the four screws holding the heat sinks in place, tweezers may help with this
- Remove the heat sinks and put them aside, being careful to note the orientation of each piece
- Use paper towel to remove the old dried thermal paste from the joins between the heat sinks
- If the hot end will not unclog using the previous method, take the following steps
- Unplug the hot end from the print head, grip the plug firmly with tweezers and wiggle it free
- Soak the hot end in acetone until all the filament is dissolved. This could take up to a week depending on how badly clogged the hot end is.
- Visually confirm a clear path through the hot end
- Reconnect the hot end plug to the print head
- Apply a tiny bit of fresh thermal paste to the joins between the heat sinks
- Slide the two side heat sinks into position and screw in place with the two short allen key screws
- Clamp the hot end in place between the bottom heat sink and the bottom plate
- Wipe up any thermal paste that got squeezed out from between the joins
- Screw this assembly onto the motor with the two longer allen key screws
- Reposition the feed gear cover and screw into place
- Gently slide the wind shield back over the top of the heat sinks with the widest part towards you
- Replace the print head back into its outer shell
- As the print head slides into the shell, use the tweezers to manouver the led strip into its slot, while making sure the wires dont get jammed against the inner structural supports
- when reinstalling the two shell screws, be sure to get the threads lined up correctly and not to over tighten
- Reconnect the black and red wired small plug, use the tweezers if needed
- Retrieve a clean nozzle from the acetone jar and visually confirm that it is clear of debris. Blowing into the nozzle can sometimes clear the tip, just be careful of any trapped acetone.
- Screw the clean nozzle onto the exposed hot end
- Reinstall the print head into the printer
- Install the filament as described here (link)
- While the nozzle is still hot, use the wrench to tighten the nozzle, supporting the print head the entire time
- Replace the top panels onto the printer case and check the back door is closed properly
- Do a nozzle height check using steps described here (link)
