High-Resolution Laser Scanner: Konica Minolta Vivid 9i (a.k.a VI-9i) Non-Contact 3D Digitizer
Before Starting
You will need a general induction in order to use this machine, and a staff member will also need to train you how to use it. We don't currently have a formal induction or booking process for this machine as it's not commonly used, come in during an open lab or hack the evening and chat to a staff member to get started. :)
User Instructions
Picking a good item to scan
light coloured, matte, not transparent (chalk paint good option) we can scan different sizes, and we do have different lenses, but start out with the basic set up and an object roughly fist-sized.
it might also be handy to have some black plasticine to hold your item on the various angles required to scan all areas (black becasue it's less likely to be scanned by the laser)
If you would like to scan a part of a human, it's nearly impossible (and dangerous!) to do directly. Instead, make a body cast of the part of the person and either scan the cast if all areas would be accessible (e.g just the front of a face for a mask) and flip it later in the software, or make a blank from the cast in plaster, and scan that.
How the whole system works
- calibration panel -use when setting up the machine or changing lenses (see manual)
- turn table
- Different Lenses for different depths of feild (focus). Macro has most range, tele least, middle is middle and a good place to start.
- manuals can be found on the table the scanner is on: “Basic Operation Guide for Polygon Editing Tool”, “Non-contact 3D digitiser vivid 9i/VI-9i Instruction Manual (hardware)”, “Polygon Editing Tool Instruction Manual”
Safety
It's a laser, a low level one but you do not want to look into the lenses. Please also only use the laser in a position where the laser is facing a wall/random passers-by can't accidentally look into the lens.
Scanning Instructions
Picking a good item to scan
Light coloured, matte, not transparent (chalk paint good option) We can scan different sizes, and we do have different lenses, but start out with the basic set up and an object roughly fist-sized. It might also be handy to have some black plasticine to hold your item on the various angles required to scan all areas (black because it's less likely to be scanned by the laser) If you would like to scan a part of a human, it's nearly impossible (and dangerous!) to do directly. Instead, make a body cast of the part of the person and either scan the cast if all areas would be accessible (e.g., just the front of a face for a mask) and flip it later in the software, or make a blank from the cast in plaster, and scan that.
Starting to Scan
- Remove dust covers.
- Turn on laser scanner. It will initialise and ask you to remove lens cap and click any button on the machine. Do so.
- Remove the 2 lens caps (it has two lenses because there is a 'photo' camera on top which is used for texture and autofocus and a laser scanner on the bottom, used to capture the geometry. Screen on back of scanner should now say “STANDARD 800MM”
- Turn on stage (turn table) box on top of computer
- turn on PC (and monitor if necessary)
- log into edge user (no password)
- open the application called PET from the task bar at the bottom of the screen.
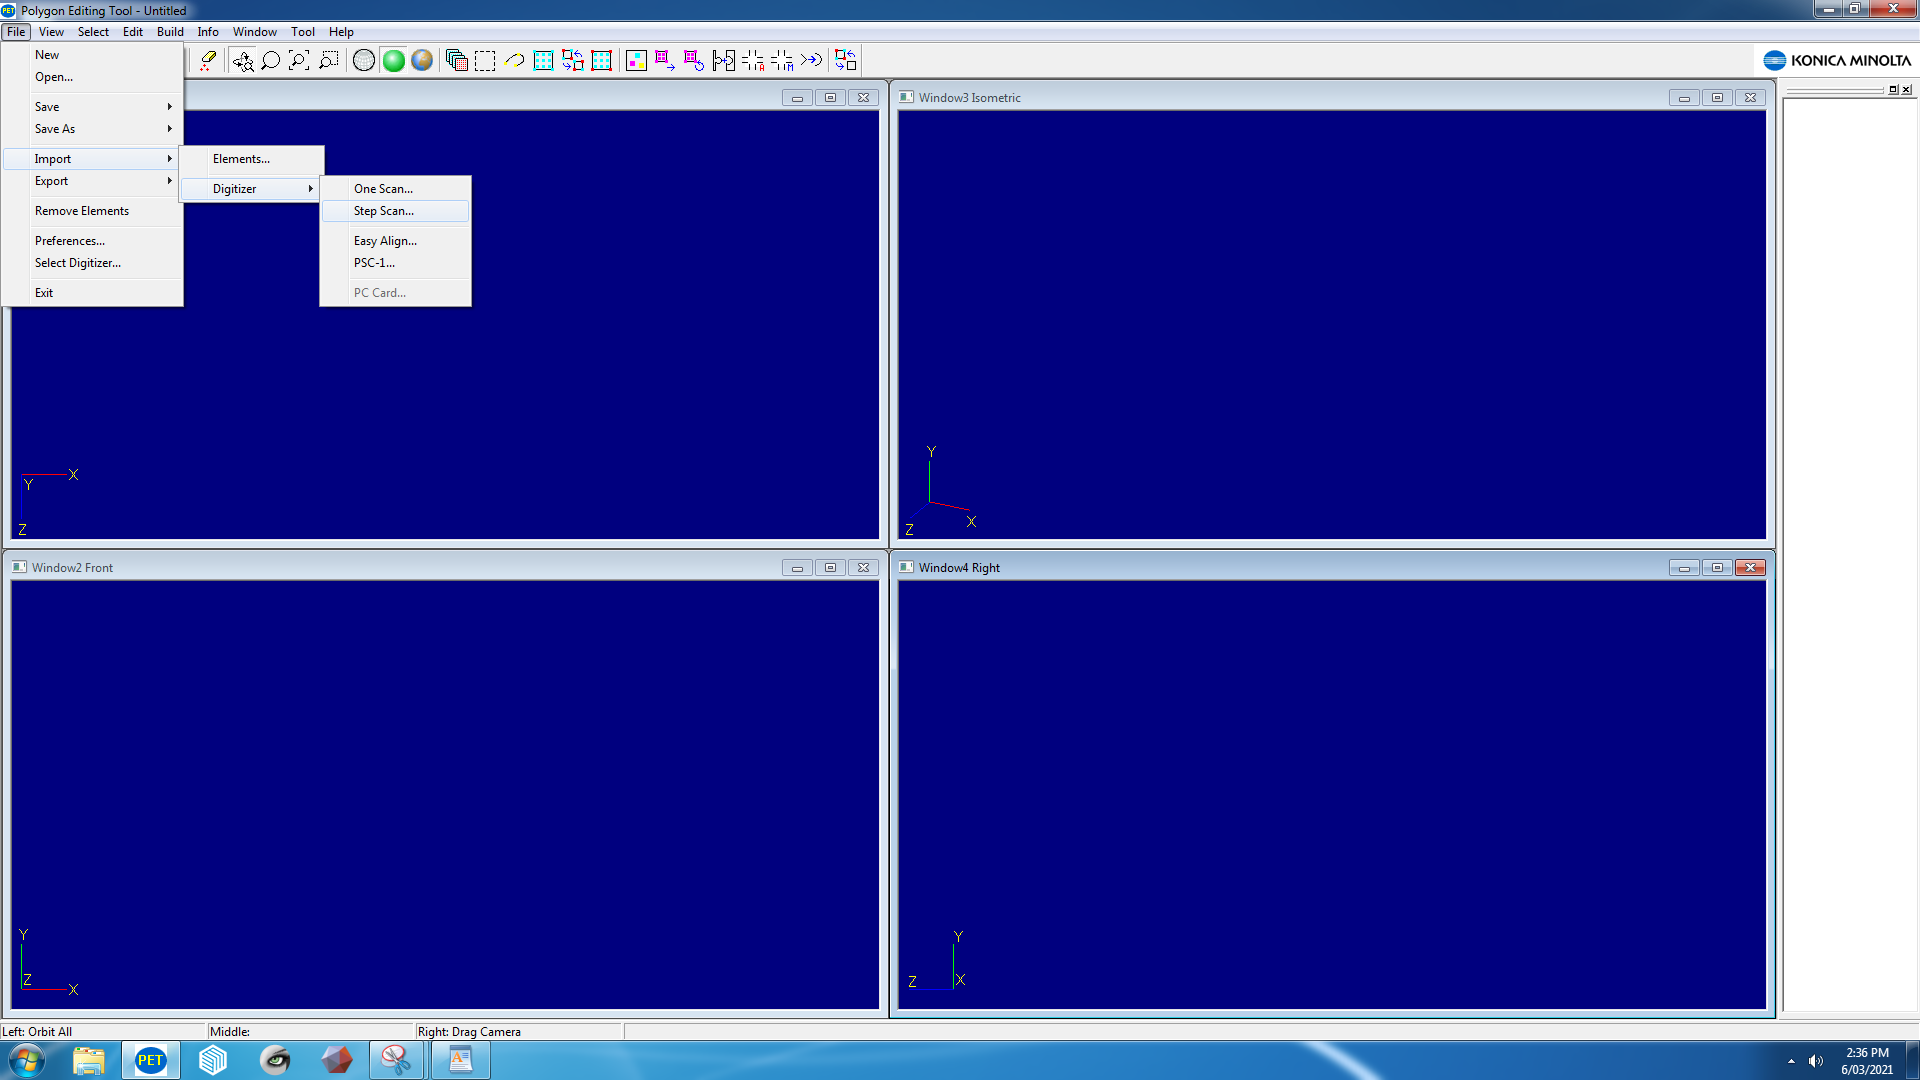
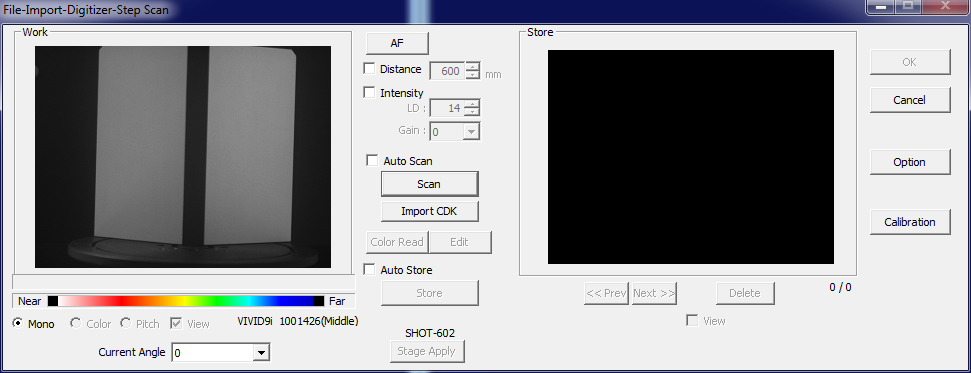
Go to File>Import>Digitiser>StepScan
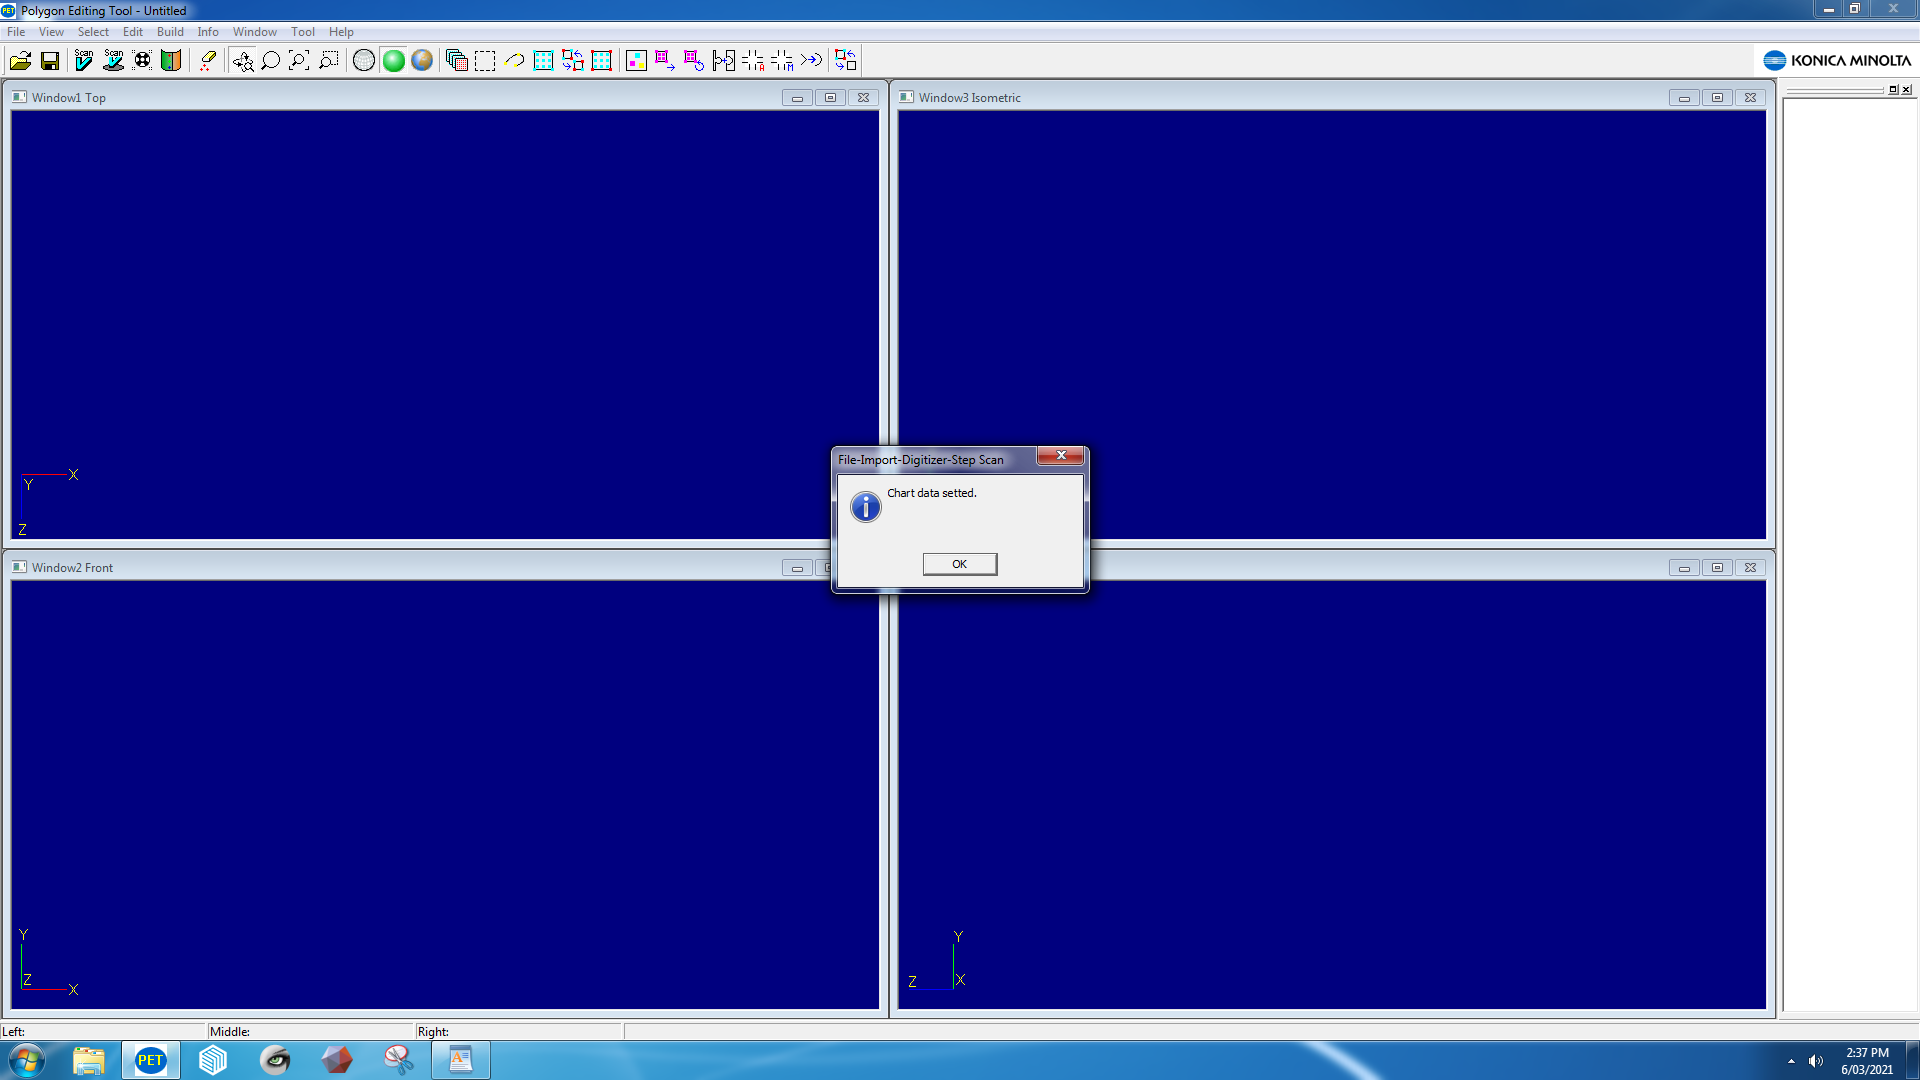
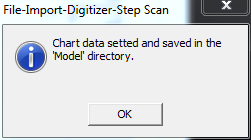
If should come up with a notification saying “Chart Data Settled” hit ok

It will bring up this screen
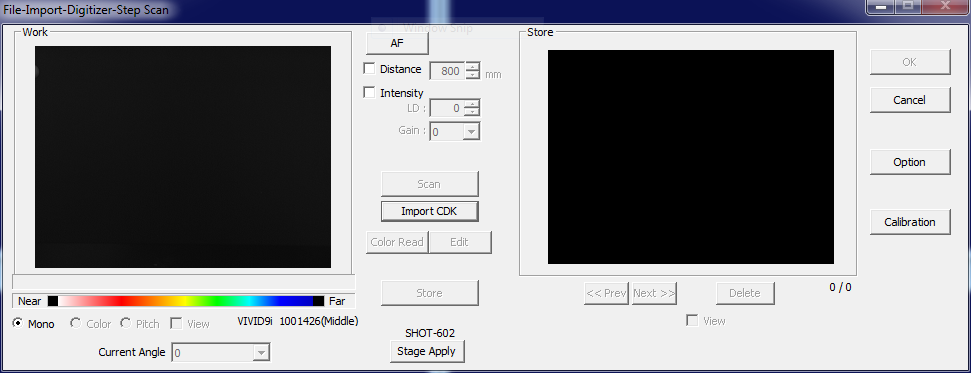
Hit [Stage Apply] to connect to the turntable. If it doesn't connect successfully, turn the control box for the turn table off and on again and hit [stage apply] again (the control box sits on top of the PC Tower)
Arrange your object so it is in the centre of the screen, on top of the stage/turntable.
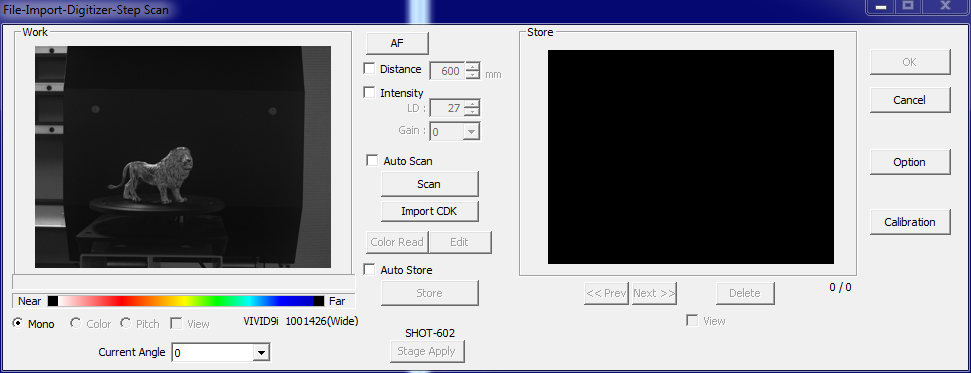
Put your object on the turntable
Look at the left black box in the step scan window, if you can't see your object, you may need to raise or lower your item above the turn table until the object is entirely visible in the left black box. (don't use the white angled calibration panels, a cardboard stand can be handy! as can the black plasticine)
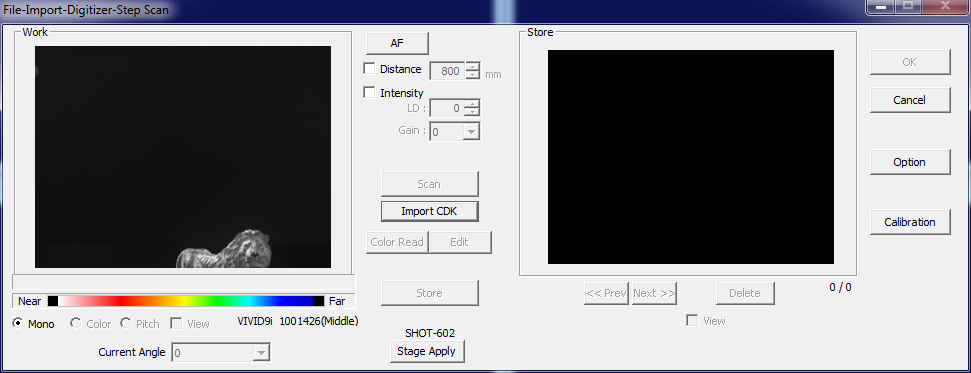
Before:
After:

Click [AF] to autofocus the camera and laser.
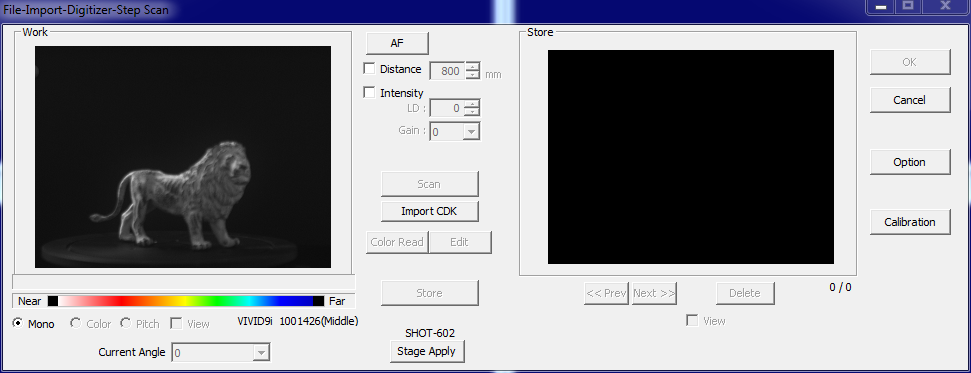
The image should become clearer

Hit [AF] to focus the camera/laser. It will make a little rustling noise.
hit [scan] to test the laser.
If you get an autofocus error, it's probably because the line of sight from the laser (at the bottom) to the object is obscured by something.
click [Option] and in the window that appears, click [Apply]
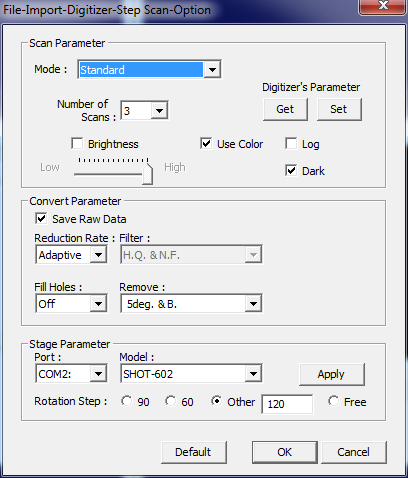
If an error appears saying “Turntable Not found” then check that the turn table is plugged into the connector box on top of the PC and that box is plugged into the PC and into power (and that all the connectors are properly seated in their sockets and arranged as pictured). Check Port: is set to “COM2” and Model is set to “SHOT-602” then hit [Apply] again. If it still comes up with an error, try switching the connector box off and on again.

when the Turntable is properly connected it will rotate a bit, and the Stage parameters will grey out as pictured
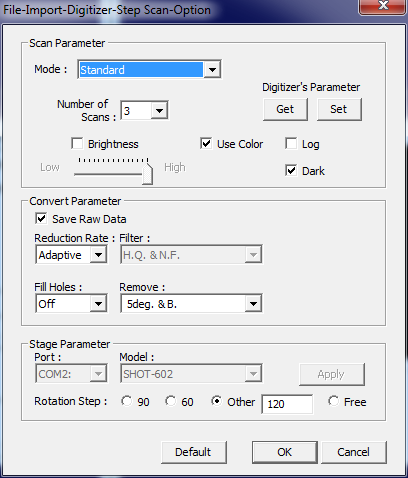
The rotation steps indicate how many degreed the turntable/stage will move before starting each scan. More of these will generally equate to a more accurate scan. 90 degrees will scan 4 times (because 90 fits into the 360 degrees of a circle 4 times). 60 degrees will scan six times, and you can set your own rotation steps in the 'other' field.
30 degrees generally produces a good quality scan.

Hit [OK] when you are happy with your settings to return to our preview window.
ensure the turn table is positioned so the side the cable is coming out of is facing away from the camera/laser, and that Current Angle is set to 0.
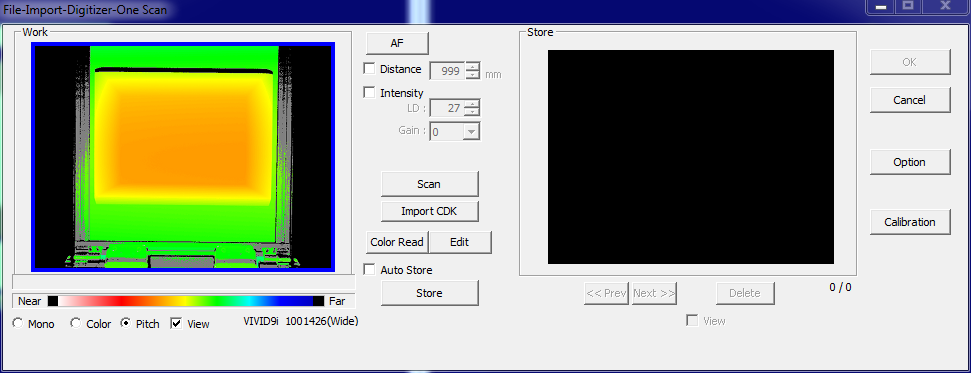
click AF to focus it. then click the checkbox by Distance to lock the autofocus.
click scan
check preview, you want no background showing and you want the centre of you model in the centre of the colour band. Tick the distance and edit it if need be, then repeat the scan.

once well focused
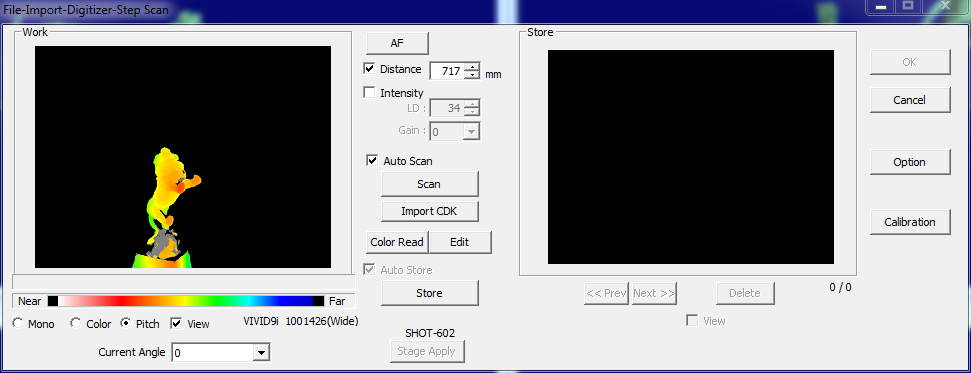
Open options. Change angle to 30 Tick Autoscan Click scan and confirm. It will now do a full rotation of your object.
If the stage/turntable makes a grinding noise your object is too heavy, so you will have to remove the stage do it manually instead. storing each scan and rotating it manually.
Aligning models
After the step scan is complete you will need to align and merge your models.
Click on the top left window and switch the view to wireframe

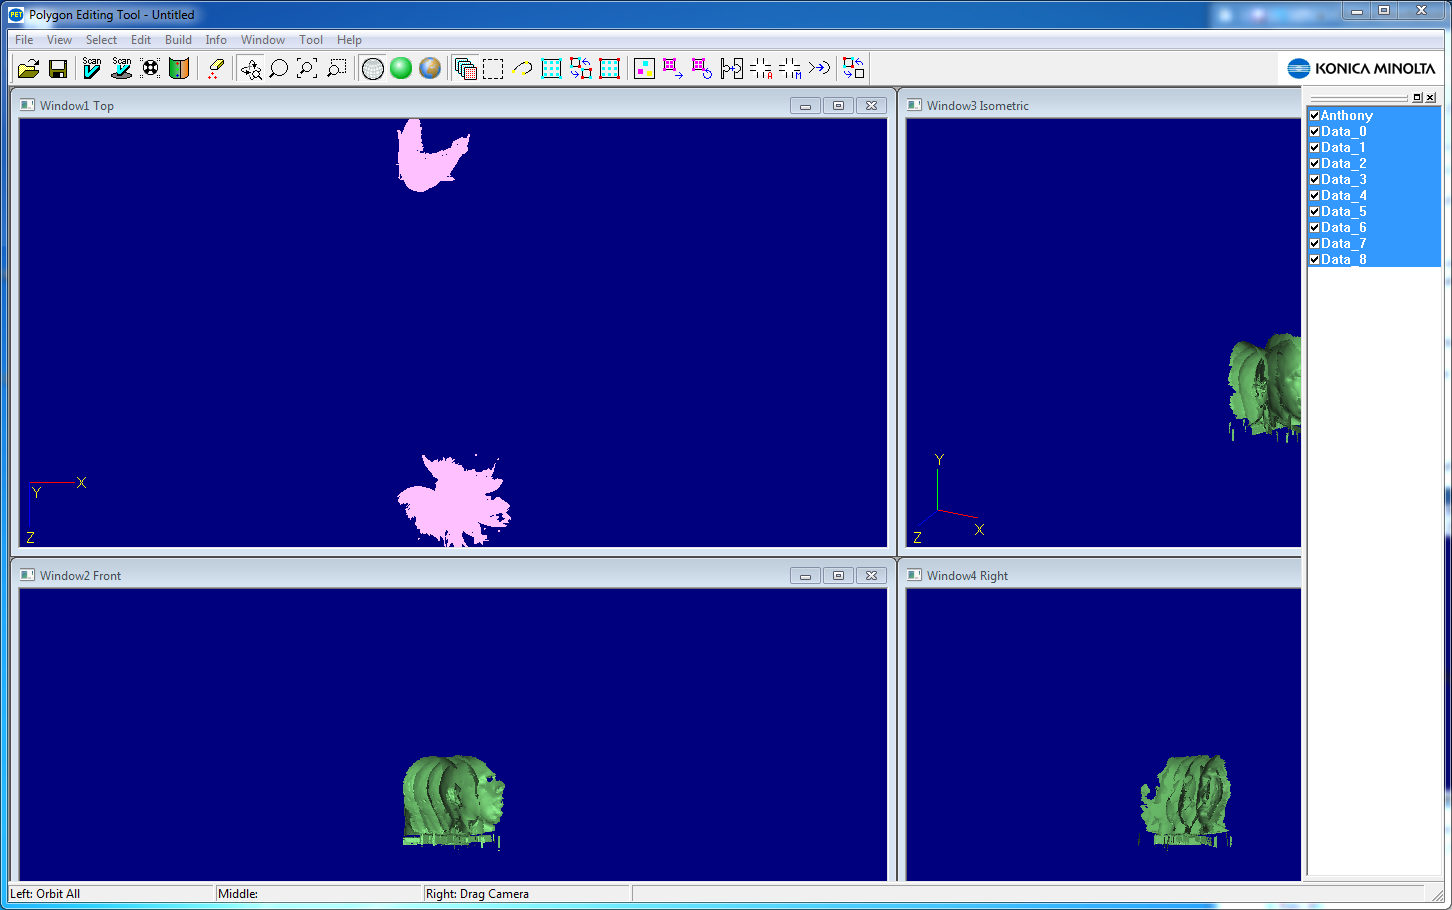
Select all the objects in the left panel so they're highlighted blue.
Click the Toggle Points button to select all the points in the scene (the points are like the corners of all the faces in the object). Nothing will change on the screen, but it will have selected everything.


Click Show/hide vertices to see the points


Click Select>Select by elements select all the parts in the right-hand list so they show blue.
go build>registration>initial>auto
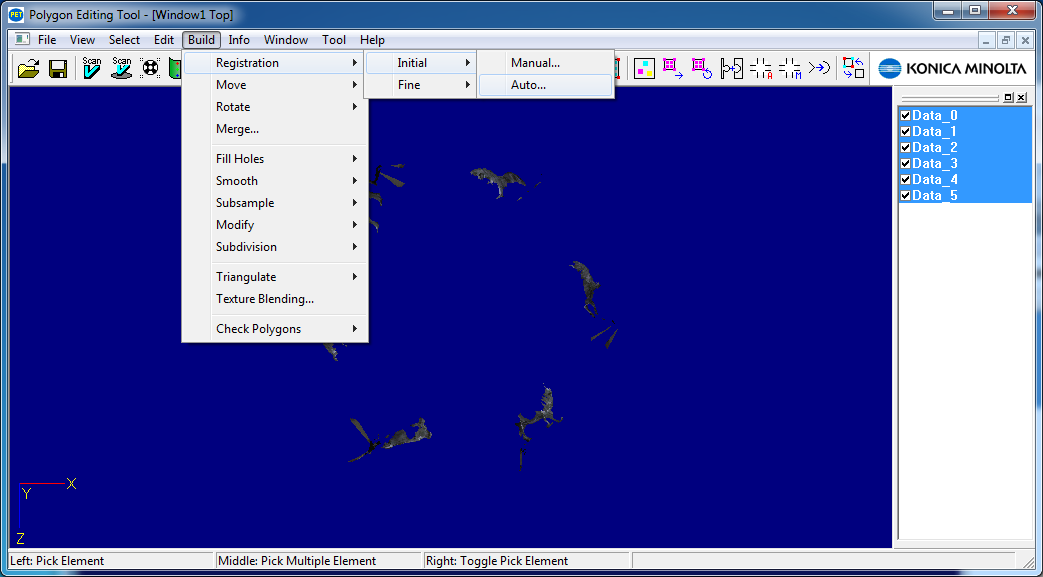
it will ask you to select a base element, chose your most complete scan, if this is your first rotation then just select your first scan.

it will take some time to align them then a popup will appear confirming the elements are registered.
After this you can then go Build>registration>fine>elements and let that run to make it even nicer.
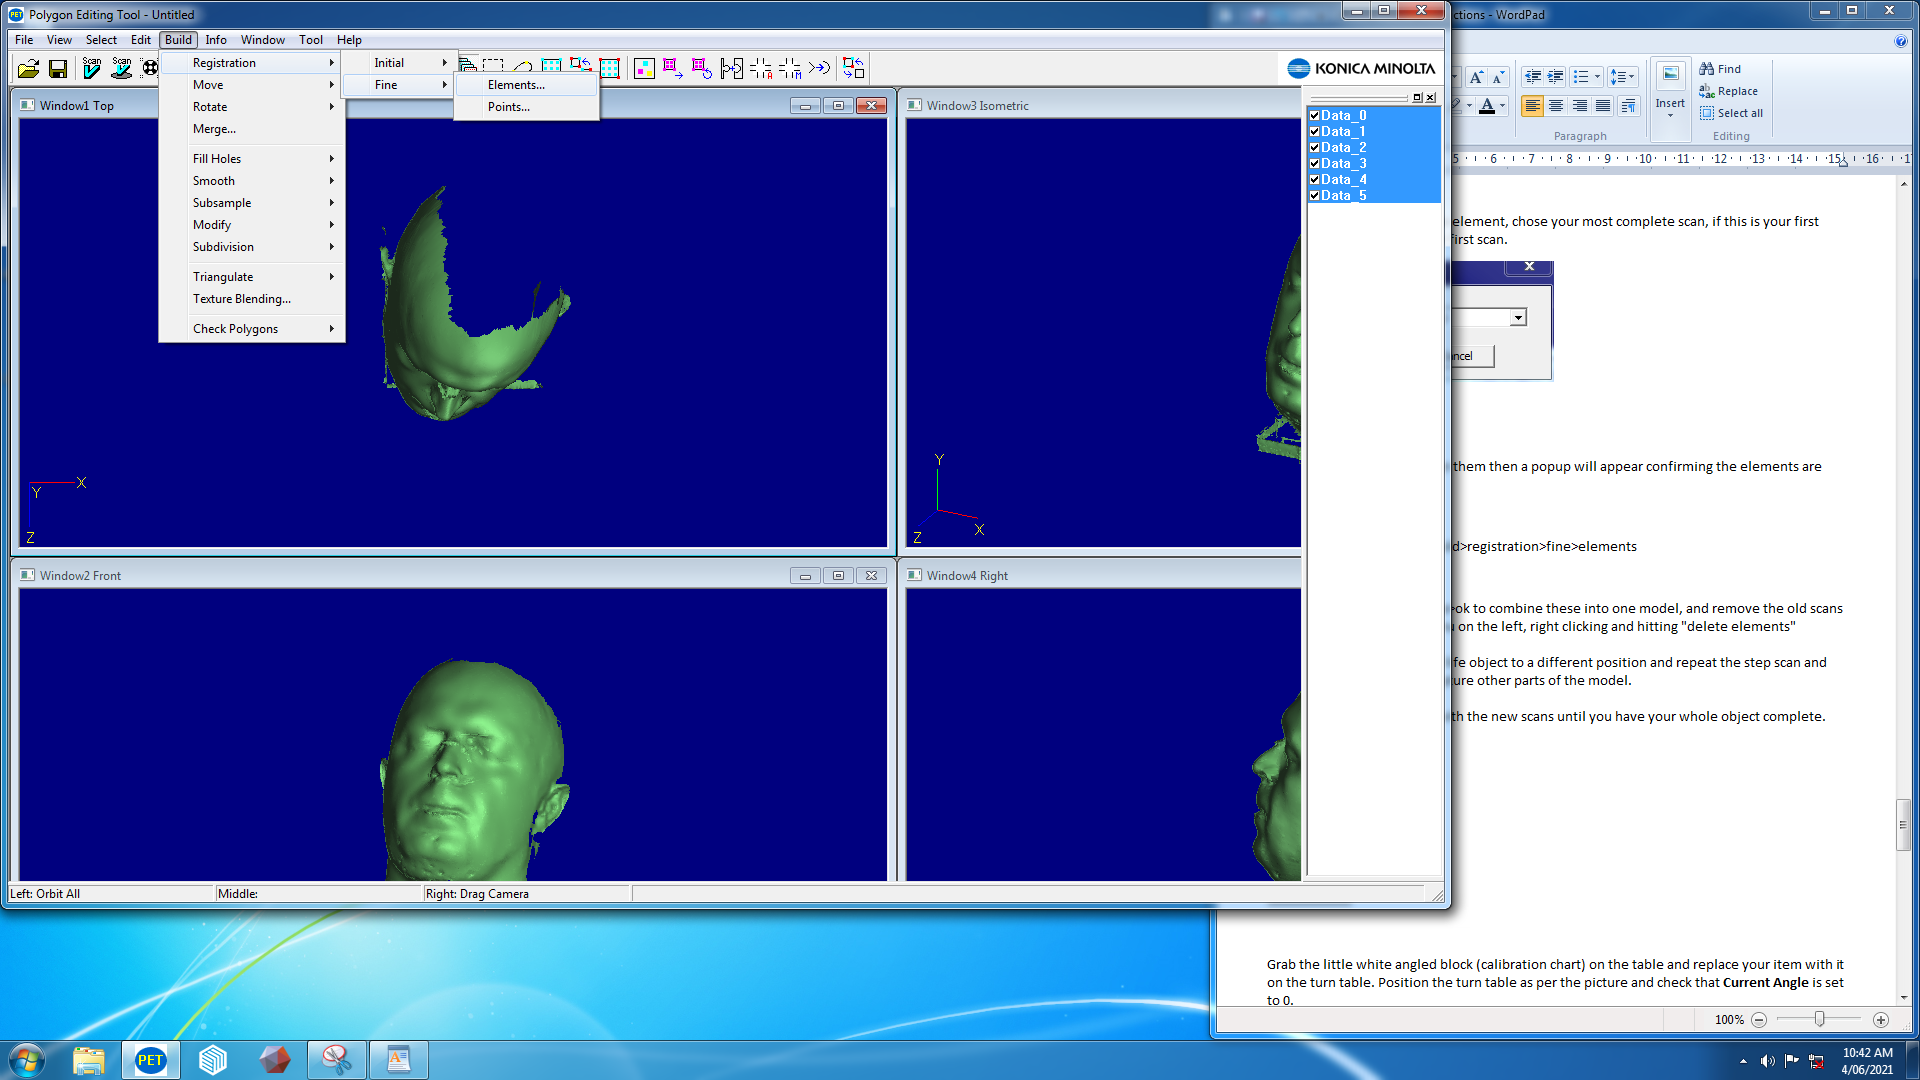
Then you can go build>merge>ok and give it a name to combine these into one model, and remove the old scans by selecting them in the menu on the left, right clicking and hitting “delete elements”
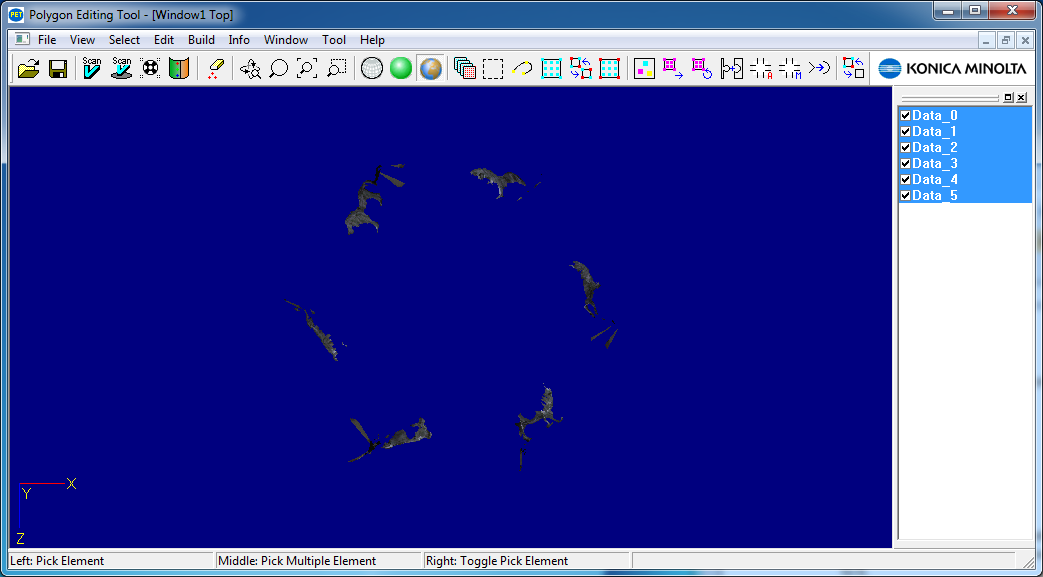
Then you can move your real-life object to a different orientation and repeat the step scan and registration/alignment to capture other parts of the model.
combine this merged file with the new scans until you have your whole object complete.
Exporting
Grab the little white angled block (calibration chart) on the table and replace your item with it on the turn table. Position the turn table as per the picture and check that Current Angle is set to 0.
Click [AF] then [Scan]. the machine will make shutter and beep sounds.
If it comes up with an error, or just a coloured scan, move the position of the turn table (with calibration chart on it) and try again.
When successful it will come up saying “chart data settled and saved.”
you can now replace the calibration panel with your object again.
click the [scan] button
Troubleshooting
field calibration whenever having issues or changing lenses.
Error Codes
make sure laser cover is open and press any key = remove lensed caps and press any key. You may have to open the calibration box and clear away any items between the scanner and the calibration box too. *needs work*
Calibration
If you are experiencing issues the laser may need calibration. To do so open calibration panel, there are two sizes, depending on which lens you are using. The big one (opened on top) works for the wide angle, the small one (opened at the back) works for the other two lenses.
Go to File>Import>Digitiser>StepScan, hit [AF] to autofocus it, then hit scan. It should make some whirs and beeps and present you with a scan of the calibration panel:
Yay! It scanned. click [Calibration] and OK and it will scan it again and set the calibration. Hit Cancel, close the calibration panel and place your object on the table.
Changing Lenses
You can change lenses to change the overall field of view of the laser, to essentially scan larger or smaller objects. 3 sixes are available; tele (largest), middle, macro (smallest). *add table of sizes here* When changing the lenses, it's important to ensure you are placing 2 lens caps on the removed lens and removing two from the new lens. The lens caps are on either side of the lens. it's very easy to miss one and then nothing works. :)
It's also extremely important to insert new lenses by matching the red dots at all points copy instructions from manual else the calibration will not work.
Packing up
turn computer and laser scanner off replace the two lens caps replace dust covers