Table of Contents
13 Ways to Start a Fire

Summary
This workshop was developed by Peter Musk for delivery at The Planting Festival (Woodford) in 2017.
It acts as a vehicle for engagement and learning about science and safety related to fire, and provides demonstrations, experiential activities and some construction challenges.
The venue was a tent (earth floor), and this workshop may need revision if staged in an indoor environment.
Safety
Fire is a dangerous thing. Avoid pain, disfigurement, property loss and potential bankrupting lawsuits by
- Making sure you workspace is uncluttered and free from unexpected accelerants
- Prepare a hearth by scraping a hole in the ground or making a circle of rocks
- Have your fuel ready, but not too close
- Have a handy means of smothering the fire if things get out of control – a shovel, blanket, water or green branches.
Activity Summary
Participants are introduced to the deep history of fire in human development and basic safety considerations related to the immediate environment. The workshop begins with an introduction to the making and use of tinder (cotton wool, charcloth, unpicked sisal rope), and then moves to a few guaranteed methods of fire starting (lighter flint and cotton wool, 9V battery and steel wool).
Different methods of fire starting are covered, grouped by the form of energy used to generate the ignition conditions (kinetic, electrical, light, chemical). Beginning with easy, proven fire starting techniques that participants can implement with little practice and effort, increasingly difficult methods are described and demonstrated, with the final 30-40 min of the workshop given over to individual attempts at these challenging techniques.
Materials
Each participant kit contains the following (see Production Notes below for preparation of these items):
- 1 emptied disposable cigarette lighter (used as a flint)
- 1 cotton ball
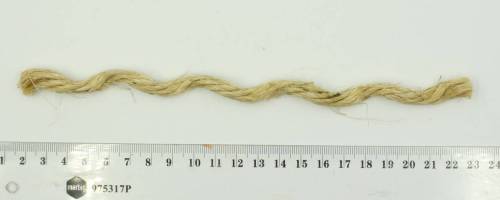
- 100mm of about 3mm diameter sisal or hemp rope
- 1m of 3-4mm paracord (with sealed end), or similar thin rope
- 1 100mm x 30mm swatch of steel wool (medium grade is fine)
- 1 A6 piece of paper
- 1 9V battery (with both terminals on the top)
- 1 approx 300 mm length of 12mm pine dowel, shaped as a bow drill stick
- 1 small block (about 75 x 50mm) of scrap wood or MDF, prepared as a bow drill socket
- 1 300mm length of approx 100 x 24mm pine, prepared as a hearth board
- 1 1.2m bamboo stake (at least 1cm diameter if possible), prepared as a drill bow
- 1 workshop booklet
Each Workshop group also requires the following:
- 1 250 x 250mm fibre cement fireproof mat for each participant
- a shallow tin with a close fitting lid that has a small hole punched in the top as a container for maikng charcloth
- a few handfuls of 50mm square pieces of 100% cotton fabric for making into charcloth (knitted material is best)
- a few old steel files
- a selection of broken quartz, granite or other hard stone, in pieces comfortable to hold in the hand
- a few torches (min 50mm diameter reflector, larger is better)
- roll of cling wrap
- a few clear plastic disposable water bottles (and water to fill them)
- aluminium polishing compound, and rags or chux
- several clean, empty aluminium drink cans
- a cordless electric drill
- fire safety equipment (fire blanket, extinguisher)
Optional accessories:
- demonstration example of a fire piston
- demonstration model of fire drill
- samples (a few m) of ethically sourced grass tree (Xanthorrhoea spp.) dead flower stem (20mm diameter or more if possible)
Tools
- Cordless drill
- gas camping stove for making charcloth
The following are handy to have on hand for repairs and adjustments:
- craft knife
- extra batteries for the cordless drill
- matches or lighter to seal the ends of the bow drill cord
Instructions
Each participant receives a workshop kit which contains a booklet with instructions for all the common activities they will attempt, and a few that will be available as optional activities for those keen enough.
This workshop is best when activities begin with guaranteed success for the participant, and therefore the sequence of activities below does not follow the historical sequence in the booklet (which can be found as an editable word doc here: 13_ways_final.docx and in a printable pdf form here: 13_ways_to_start_a_fire_booklet_v3_singles.pdf)
Step One: Anthropology
Begin with a discussion of the archaeological and anthropological evidence of human fire management (see booklet). Additional information can be found at http://rstb.royalsocietypublishing.org/content/371/1696/20150164 and https://www.thoughtco.com/the-discovery-of-fire-169517.
Step Two: Tinder
The preparation and use of tinder is essential to all the methods described. Participant kits include cotton wool, natural fibre twine and charcloth as examples of useful tinder, and a demonstration of making charcloth is a good initial activity.
- prepare raw material by cutting 100% cotton fabric into squares of about 50mm. Knitted cotton (t-shirt material) works well, and avoid black if possible
- prepare a small, shallow tin with a close fitting lid by punching a small hole in the top with a nail
- place several squares of material in the tin, push the lid on, and place it on a gas burner (or in a nest of hot coals).
- white smoke will soon begin to emerge from the hole (this is mainly steam and some ash from the material inside)
- when the smoke has ceased (5-7min), remove from heat (or turn off the gas flame)
- allow to cool completely
- remove the lid, and the material inside should be black, dry and brittle: this is the charcloth.
- teasing the charcloth into threads or small pieces makes it more flammable.
Charcloth has a low ignition temperature, and burns slowly. Usually no flame is produced, and the material burns as a glowing ember. The burning charcloth needs to be placed on another tinder layer (cotton wool, unraveled twine) to create flames. Blow on the glowing ember, or better yet, fan air onto the parcel to make a burning bundle that can then be used to light a fire. Note that blowing onto a glowing coal has the disadvantage of the moisture present in expelled breath reducing ignition (which is why fanning works better).
Step Three: Flint and Steel
Using a lighter flint to ignite cotton wool.
- tear off a small piece of the cotton ball, and tease it apart to make a nest of tinder
- place the cotton wool on the heatproof mat, and direct sparks from the lighter flint onto the tinder
- eventually, ignition will occur
- placing another heatproof mat on top of the burning tinder will extinguish the flames if required
The cotton wool can be enclosed in a tangle of untwisted twine to make a larger tinder pile.
The 'flint' in the lighter is actually an alloy called ferrocerium, which contains iron, cerium and other rare earth metals. This material has an ignition temperature of about 170C, which is reached when small fragments are physically shaved from the 'flint' by the striker. More information can be found at https://en.wikipedia.org/wiki/Ferrocerium.
Traditional methods using natural stone and hard steel are much more difficult, but this is a technique that participants can try using the files and rocks.
Step Four: Electricity
Using a battery and steel wool.
- tease apart a piece of medium grade steel wool, about 150 x 15mm, (smaller pieces will work, but may burn out faster)
- remove protective caps from the terminals of a 9V battery (easiest to use a battery with both terminals on the same side)
- prepare a nest of teased cotton wool or twine on the heatproof mat, and poke the steel wool into it
- apply both terminals of the battery to the steel wool, and it will glow and burn, setting the tinder alight
Electricity passing through the thin wires of the steel wool encounters resistance, and this causes the wire to heat up. Note that the thicker the wire, the less resistance, so steel wool works best. Copper wire conducts with little resistance, and so is not suitable for this experiment.
An extension of this technique uses paper covered alfoil (such as found wrapped around sticks of chewing gum, or other confectionery). The wrapper is twisted once or twice in the middle, and the exposed foil ends placed in contact with the terminals. Beware of the paper catching alight while in the hand.
Step Five: Sunlight
Using sunlight and a torch reflector.
- unscrew the reflector from your torch, and remove the bulb if necessary
- fold a piece of paper or tinder so that it fits through the hole at the centre of the reflector
- holding the fuel in place so it sits where the bulb was, aim the reflector at the sun
- adjust until the sharpest concentration of light appears on the fuel (sunglasses might help here)
- hold steady until the fuel bursts into flame
A torch reflector works by capturing the light spreading in all directions from the bulb, and reflecting the light along parallel paths to create a beam of light. By aiming the reflector at the light coming from the sun, it works in reverse: the sunlight is reflected onto a single spot, where the bulb was mounted. Provided the reflector is large enough, and the apparatus is held steady, the concentrated energy from the sunlight will ignite the tinder.
Other methods can use similar lensing effects to concentrate sunlight and ignite tinder: the curved top of a clear plastic water bottle; a spherical, water filled balloon of clingwrap and the polished base of an aluminium can. All of these methods create a much less efficient reflector or lens than a torch, so are more difficult to deploy. Patience, a steady hand, and attention to positioning so that the most concentrated spot results are all important. Using a piece of paper that is black, rather than white (such as newsprint text) may help.
Step Six: Friction
Using a bow drill (This takes a while, and demonstrating the effect using a drill stick in an electric drill can make the demonstration more effective initially).
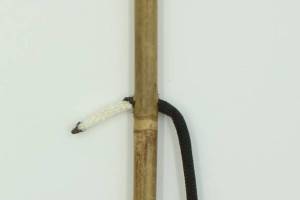

- prepare the bow by threading a 1m length of 3mm cord through the pre-drilled holes on the bamboo drill bow provided. Push the cord through the hole, and tie a knot in the end to anchor it, then do the same with the other end.
- ensure the cord is not too tight as it needs to have enough slack to make a twist around the drill stick. Adjust by retying the knot if necessary.
- place a hearthboard on the ground, parallel to the direction of the bow. The hearthboard has prepared start holes (complete with a v-shaped notch to allow sawdust to build up outside the drilled hole).
- put something below the notch (a leaf, piece of paper or bark) to catch the sawdust that will result, and to allow you to move the ember when it forms.

Drill Stick (15mm diameter minimum)
- twist the drill stick into the bowstring, making sure the bow ends up on the opposite side to your body (the pointed end goes UP).
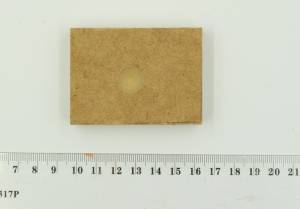
Socket (block with a shallow dimple in the centre)
- The purpose of a socket is to reduce friction in the hand, and harder materials (such as bone or metal) are sometimes used. Hold the socket in your non-dominant hand, and centre the pointed end of the drill stick into the dimple pre-drilled in the socket.
- place the blunt end of the drill stick into a hearthboard hole. Push down on the socket to steady the drill stick as vertically as possible and rapidly saw the bow back and forth.
- if the drill stick does not rotate, you will need to tighten the bow string (some adjustment can be done by holding the bow string against the bow with your dominant hand)
- after a few minutes drilling, smoke should emerge, but keep drilling. Remember to breathe fresh air!
- when dense clouds of smoke are coming from the drill stick, and a good pile of sawdust is visible, stop drilling, and see if smoke continues to come from the pile of sawdust. If not, resume drilling with more vigour.
- when the sawdust (also known as punk) continues to smoke when drilling stops, fan or blow gently on the pile and a glowing ember should be seen
- transfer the ember to a pile of tinder, continue fanning or blowing, and flames should result.
Making the glowing ember takes longer than you think, as it requires enough friction to reach the ignition temperature, as well as to generate a big enough pile of sawdust to act as fuel. It is common for the drill stick to make a hole right through the hearthboard if this is too thin (a hearthboard 20-30mm thick works better, but something 12 - 20mm thick can work too). If a hole is made, move the hearthboard along so another dimple lines up with the growing pile of sawdust, and continue drilling.
Other techniques using friction can also be made available for participants, like a pump drill, fire plough and a hand drill (this works with the right wood - Xanthorrhoea flower stem works well, especially if thick enough (15 - 20mm is ideal)). All these techniques take longer, and require their own particular skills.
Step Seven: Pressure
Using a fire piston
This is best prepared earlier, and supplied as a demonstration, since manufacture requires tools and materials not included in the workshop kit.
- place some tinder in the notch in the end of the piston
- insert the piston into the cylinder, and place on a stable flat surface
- strike downwards forcefully, pushing the piston into the cylinder
- remove the piston, and the tinder should be alight. If not, try again.
Making a successful piston relies on a very good seal (it must be airtight) between the piston and cylinder. Adding some grease or vaseline to the o-ring or twine used to seal the piston helps.
Step Eight: Chemical
These methods are almost guaranteed to work, and serve as a good finale to the facilitator led part of the workshop.
Using chemicals: Condy's Crystals and Glycerol (easy and guaranteed)
- place a heatproof mat on the ground
- place 1 -2 teaspoons of potassium permanganate in the centre of the mat
- add a few drops of glycerol (up to 1mL)
- stand clear until purple smoke and flames appear (this is a delayed reaction, and it may take 15 - 60 seconds for ignition to occur)
- the materials will leave a solid crust on the mat, which can be brushed off when cool. Products are not toxic, but the smoke may be irritating, so ensure adequate ventilation.
Using chemicals: Condy's crystals and white sugar (easy but less certain - practise is advised)
- place a heatproof mat on the ground
- place a couple of teaspoons of potassium permanganate crystals in the centre of the mat
- add an equal amount of white sugar
- mix thoroughly, and apply pressure (grind as if using a mortar in a pestle)
- spontaneous and vigorous combustion should result
Ask participants if any suffer respiratory sensitivities, and advise that irritating smoke will be produced during this activity. Have a means of extinguishing the fire on hand, since this method produce vigorous burning, and will be influenced by the quantity of materials used.
Step Nine: Free for All
In the final stage of the workshop, allow participants to try whatever variety of techniques you have available.
Troubleshooting
Safety
Remember to advise participants to keep a clear workspace, model the extinguishing of fires using a heatproof mat, and ensure hair, papers and other potential fuels are kept clear of the work area. Work outside if you can, especially when the free-for-all might involve 15 people vigorously bowing their drills.
Tinder
Making charcloth works better if the pieces of fabric are not packed too tightly into the tin. Pieces about 50mm square are about right. If the 'cooking' goes on for too long, the charcloth will become brittle and crunchy - it is better if the material can be teased apart to expose individual threads - so make sure the container is removed from the heat as soon as the smoke ceases to be produced.
Flint and Steel
The cigarette lighter flints are almost always successful. If not, ensure the cotton wool tinder is well dispersed (allowing more oxygen to enter), and adjust the aim to direct sparks directly onto the tinder.
Using a file and hard rock is much harder - a substantial force is required to shave hot metal from the file, and sparks are often meagre. The sharp rock is held firmly, and the file needs to strike the edge at an angle of 20-30 degrees. Holding a piece of tinder in the same hand as the rock can help catch the brief sparks.
Battery methods


The 9V battery will work consistently, though a 1.5V battery (like a AA) will not have enough energy to work. If two 1.5V batteries are joined in series (+ to -) and held together with some tape, there may be enough power to set the steel wool alight.
Be aware that the battery will get hot during this process.
Cover the battery terminals to prevent short circuits during transport
Sunlight
The torch reflector needs to be clean to be effective. In some designs, the lens over the reflector cannot be removed, and while it will still work, smoke fills the cavity making repeated use difficult.
Plastic bottles and clingwrap are very difficult, since getting a sharp focus is not always possible. Try different shaped bottles, and avoid water dripping from the clingwrap onto the tinder.
Use commercial aluminium polishing compound and a soft cloth (chux works well) to shine the can to a mirror finish. Coarse grits (or steel wool) can be used to start, but they will leave scratches that make this method fail. Again, finding a sharp focus point requires patience and some skill.
Friction
The type of wood used makes a difference. Dry pine (eg: pallet timber) or western red cedar works, but hardwoods should be avoided (especially for the hearthboard). Timber with too much resin (seen in distinct dark rings or veins) is not a good choice. Damp wood (or air) also makes this technique fail. Be sure to have a nest of tinder available before starting.
If the drill stick becomes glazed, friction will be reduced. You can try cutting a x-shaped notch in the end of the stick, but this probably means one of the types of wood being used is inappropriate.

The drill stick needs to be at least 15mm diameter to be effective. Thinner material will smoke, but will not produce enough sawdust for ignition to occur. Because friction is desired, using dowel with a smooth circumference is better (grooved dowel may not work). Natural woods can be substituted, but straight pieces are required so that the drilling is easily controlled (and remove the bark).

The purpose of the socket is to reduce friction in the hand, and harder materials (such as bone or metal) are sometimes used. Adding some lubricant here (grease, vaseline , oil or even saliva) can be of assistance. The socket wood can be of a different (maybe harder) variety.
During drilling, more downward pressure at the beginning will maximize the production of sawdust. Less pressure and faster speeds can be used later, to maximize friction.
Making a demonstration pump drill would be a good addition. If you wish to have a demonstration fire plough on hand, the literature suggests that having a plough stick made from harder wood than the hearthboard works best. The plough stick needs to be at least 15-20mm diameter, and about 600 to 800 mm long. The plough hearthboard needs to be long enough for the operator to sit on one end to hold it steady.
Pressure
Consider purchase of a commercial fire piston to increase the chances of success. If you intend to make one, remember that the pressure generated may be high enough to shatter the cylinder (acrylic should be avoided - thick wood or metal work, as does high pressure PVC pipe).
Chemical
Gently grinding the potassium permanganate crystals before use to make a finer powder will ensure a more prompt result (don't be too vigorous, though, since this is an unstable chemical). Practice this technique so that you can get a sense of the time delay before ignition. If no flames occur, adding a bit more glycerol can sometimes get the fire going, but do not linger in the area because the extra fluid might have an immediate reaction. Disposal of the products is best as a dry material, into the landfill waste stream. The sugar variation is more difficult, and practice is definitely required for any guarantee of success.
References
There are lots of websites with pictorial guides to many of these methods, and some further insights may be gained from the research material collected here:13_ways_to_start_a_fire_techniques.docx.
Production notes
Instructions
Original artwork for the pictures in the booklet are here: 13ways_ai_files.zip
1. Feedback:
Solution:
2. Feedback:
Solution:
3. Feedback:
Solution:
4. Other observations: