Table of Contents
Queensland Architecture in Miniature 2022
~~HERO-SUBTITLE Laser-cut dollhouses, booknooks, and other delights! ~~

Prototype developed by Billie Reuben 2021, workshop developed by Michelle Brown and Rozina Suliman October 2022
Acknowledgement
We acknowledge Aboriginal and Torres Strait Islander peoples and their continuing connection to land and as custodians of stories for millennia. We respectfully acknowledge the land on which we all meet today, and pay our respects to elders past, present and emerging.
Summary
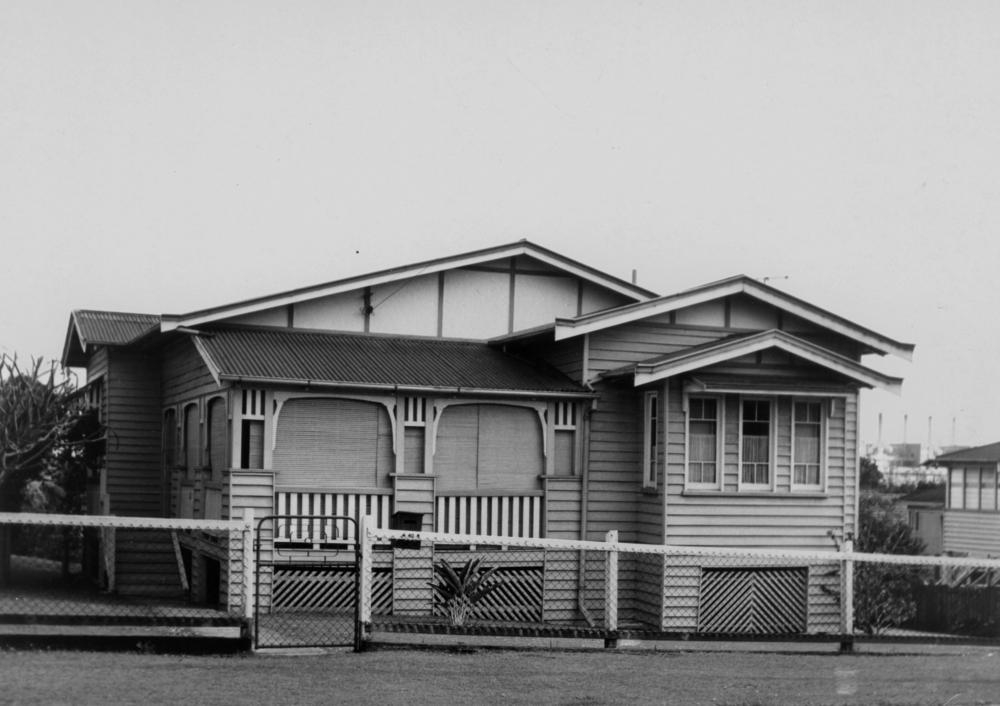
Fretwork, breezeblocks, casement windows, VJ walls and hardwood floors; there’s a lot to love about Queensland architecture.
Join us as we dive into State Library of Queensland’s collections and bring to life the rich histories of the houses around us through digital fabrication techniques such as laser cutting and engraving.
Supported by skilled facilitators you will create a miniature piece of QLD architecture (e.g. part of a doll’s house, a book nook, a mini facade or diorama).
This journey will see you:
- getting inspired by Queensland architecture through the enormous wealth of the collections here at State Library of Queensland.
- learning to create vector files suitable for the laser cutter in free and open-source software (Inkscape).
- laser cutting your files
- assembling some of your creation
- completing a laser cutter induction, so you can come back and make more! (Completing a General Induction will be required before you can book the machine)

Session Overview
Materials
Cutting Materials (per participant)
- An A2 sheet 4mm plywood (outer Nook)
- An A4 sheet 0.5mm thick craft card (optional)
- An A4 sheet 1.5 to 2mm ply or boxboard (building up rails, doors and for breezeways)
- An A5 sheet 0.7mm PETG film or 1.5mm acrylic (windows and door panes)
- Tacky craft glue / UHU glue
- Gouache
- Watercolours
- Acrylic paint colours
- Acrylic medium (gloss and matte)
- Sharpies or other coloured pens (for stained-glass painting)
Tools
- Small brushes
- Palettes (painting)
- Bags for sorting pieces
- Pipettes (glue/paint)
- Skewers (gluing/painting)
- Tweezers
- Masking tape
- Exacto knives
- Computers running Inkscape
- USB sticks
- Laser Cutter
- Inkscape design software
Health & Safety
Running this workshop at The Edge?.. You should familiarise yourself and your participants with:
- DML Risk Assessment
- Innovation Lab Risk Assessment
- Laser SOP
- Knife SOP
Session 1
Session 1
Research and Vector Design with Inkscape

Acknowledgement of Country
Welcome
- Check everyone in and set up on a computer
- Why did you sign up? what are you hoping to get out of this series?
Overview of series & presentation

- Getting inspired by Queensland architecture through the enormous wealth of the collections here at State Library of Queensland
- Designing a small model/book nook at 1/23 scale using a combination of pre-drawn and cut pieces and elements of your own
- Elements participants will focus on for their own designs are a heritage archway, back window casement, the stained glass window above the front door and swinging door casements and the fretwork breezeway above the side door
- Learning to create a couple of vector files suitable for the laser cutter in free and open-source software (Inkscape)
- Completing a laser cutter induction, so you can come back and make more!
- Laser cutting your files
- Painting your creation
- Assembling your creation
- External finishing your creation
This is a 4-part workshop, you must be able to come to all the dates as each session builds upon the work of the previous.
End goals of Session 1
- An idea for the final design of your book nook
- A basic understanding of using Inkscape to edit our template files and design our own items
- Started on the design for your individual design pieces
Research and Design
What defines a Queenslander?
State Library key resources


QLD architecture terminology
Let's get familiar with some of the terms used to describe internal architecture, with some specific references to Queenslander style.
- Fretwork
- Picture Rails
- Dado/Belt Rails
- Wainscoting
- Ironwork
- Breezeways
- Hall arches
- Architraves
- Cornices
- Skirting boards
Checkout some of these links for more info and inspo;
House Histories - https://www.househistories.org/
Catalogues of Queenslanders 1920-1930 - https://www.househistories.org/queensland-house-designs-1920-1930
Federation Homes website - https://federationhome.com/2018/03/12/queenslander-tropical-styles/
Renovating Queenslander blog - http://renovatingaqueenslander.blogspot.com/2014/07/mouldings-picture-rails-skirting.html?m=1
Scale
Miniature scale varies, as there are several standard sizes and you can buy items to suit the different sizing.
Standardized sizes for modern dollhouses include 1:6, 1:12, 1:16, 1:24, and 1:48, while antique houses are often a custom size.
Here's a collection of images and links to help determine scale.

The Spruce Crafts website image guide by Lisa Fasol.

Image from - https://everythingverysmall.com/dollhouse-miniatures-1-12-scale-or-1-24-scale-or-others-some-insights/
Most Book Nooks are 1:18 to 1:24 scale.
Designing our Nooks
Base Design
We've got a base design for you, which includes a few key design elements like engraved paneling and rails. We'll be cutting these before the next workshop session to provide to you then.
You can choose to edit the base before we cut them if you feel your skills are up to it without too much support required, you will need to provide the file at least one week before the next session.
Making the base design
We used a box generator to get the design, there's a few online free options, and we'll give you a quick demo on how you can use them.
Box generator - https://www.festi.info/boxes.py/
The dimension of our Nooks is listed further below.

Design Elements


During this workshop series, the end goal for participants is to choose their own designs for the following parts of our Nook;
- Hall archway
- Breezeway
- Door paneling
- Stained glass window
- Window casements


Apart from the archway, the pieces of our Queensland Miniature will be using different material to our 4mm ply base nook.
We have thinner ply options and thick card, we'll talk you through the differences, but mainly it's your own design choice!

Design process

When you starting a design project, it's always great to start compiling references and narrowing down your ideas (or maybe not!).
It's great to use a Moodboard when we work collaboratively or solo on projects.
Be aware of copyright and IP if you want to trace a design, which you can read more about here.
State Library reference
- Pages 116 onwards of 99 everyday homes: https://www.slq.qld.gov.au/research-collections/queensland/built-heritage
Other references
Making our files
Inkscape
Why
- Free and open
- Extremely powerful
You can also use Adobe Illustrator or Fusion 360 or any similar design program, as long as the file is able to be saved to an editable format that the laser cutter can use. SVG, PDF are good formats for our laser workflow.
We're going to be running through the full Inkscape Tutorial during today's session.
During this tutorial we will concentrate on the pen tool option of tracing, outlined in this video
To get started in Inkscape, we're going to take a screenshot with the Snipping Tool of a design we want to use to learn with (search snip in your Windows search bar).
Here's an example we can use are from the back pages of 99 Everyday Homes, where there are casement windows and doors plus other great images to practice using the pen tool to trace with.

Sizing our Nooks
It's always important to get your sizing right, as it will save time and material wastage.
We need to know our material thickness before we start designing because this will impact our cutting and design process, for our Nook outer shells we're using 4mm ply. If using a Box maker program than you should already have noted and included the material thickness.
This is our Nook template measurements (assembled/internal);
height - 160mm (151mm)
width - 105mm (97mm)
length - 170mm (155mm)
Door Sizing for scale - 87-88mm height


For our individual archway designs, the internal width is 97mm, but keep in mind if you intend to cut and add wall rails to the base template walls, you will need to adjust the rails or archway to include notches to accommodate the fit.


Make sure to use the nook template to line your archway and notches up with the railing designs in Inkscape.
If you want to use one of our pre-made archway, you can choose from the vector file templates below, you will need to measure and re-size to fit your end nook design and make notches for any rails (e.g 3mm deep if rail is 3mm material).
Homework
During the time between our next session, consider practicing your new Inkscape skills so it starts to stick, and you can come with more designs to cut on the laser.
Session 2
Session 2
Laser Induction and further designAcknowledgement of Country
Welcome and Check in
What we are covering this session:
- discuss where participants are at in terms of design work and their needs for the session
- give participants their pre-cut book nooks
- laser cutter induction - 1.5 hour
- research and design time - at least 2 hours to finish archways, stained glass, doors and breezeways designs
- refine any designs for cutting and laser as required after induction completed
- research and look at choosing paint colours if time permits
Laser Induction

Each participant will undergo a laser induction from our Fabrication Lab supervisor during this session.
You can learn more about the State Library's laser here - Bookable Resources - Laser Cutter / Engraver
Research and Design - Queenslander Colours

During this session we want to trial and test some paint colours and combinations, we can use some of our scrap ply pieces. To get a true Queenslander look, dive into some of the below resources at State Library.
Books at SLQ (request and collect from Level 3):
Online Resources:
- https://en.wikipedia.org/wiki/Queenslander_(architecture)
- https://www.deluxpainting.com.au/blogs/popular-queenslander-interior-colour-schemes/ (mix of modern and traditional)
- https://www.pinterest.com.au/carey1419/queenslander-colour-schemes/ (mix of modern and traditional)
Books for purchase: https://www.restorationstation.com.au/garden-homewares/books
Images from previous sessions for colour inspo


End goals of Session 2
- A basic understanding of using State Library's laser cutter and completion of a laser cutter induction
- Finished, or near finished design for your individual design pieces (it is ok to finalise and do more cutting in the next session)
- Have a good idea of the colours you'd like to paint your book nook including the floor finish
Homework
Further design work if participants are keen to keep designing, especially for testing on laser cutter in the next session or providing to facilitators to test cut between sessions.
If you haven't already chosen a window engraving design, think about what you might like before the next session or bring one ready to cut.
Session 3
Session 3
Laser cutting & paintingAcknowledgement of Country
Welcome and Check in
What we are covering this session:
- Finalise design files and prep for laser
- Laser cutting; getting comfortable with the laser after last fortnight's induction
- Painting and some assembly
End goals of Session 3
At the end of these session we hope each participant will have the base Nooks painted with their preferred colour scheme and also have cut their design items.
You should have completed designs for;
- Hall archway - design your own or use the vector files in the templates section that will need to be resized for your Nook and notched for rails
- Rails, door surrounds and breezeway (above side door)
- Door panelling - 3 x doors (1 x side door, 2 x swing doors)
- Window casement - back window
- Window panels/engraving - 3 x panels (1 x back window, 2 x swing doors)
- Stained glass window - above front swing doors
Don't worry if you don't have any of these designed yourself, we have the basic designs available for you and will have pre-cut options.

Session 4
Session 4
Finish and assemblyAcknowledgement of Country
Welcome and Check in
What we are covering this session:
- Painting
- Hinges or fastenings
- Assembly
- Exterior Finishing


Painting Nook pieces
2 x coats of paint is recommended for walls and roof, you can also paint the outside of the nook to compliment. For the floor, a stained look works nicely, make sure to test on scrap pieces of ply wood. If you are using boxboard, beware of too much soaking in.
Be careful when painting near the notches, if you add too much paint into the notch parts, it can make assembly of the final Nook more difficult as it adds extra dimension to a tight design.
For painting the stained glass windows, pens are recommended, kids coloured pens work well with a few coats, sharpies work ok but leave some pen marks which you can dab away with paper towel before it dries but can be fiddly.
Windows and doors
Depending on the designs you have chosen or created yourselves, you will need to do the following;
- Glue the 'mottled glass' cut piece to the back of the large casement window using the Uhu glue, this then gets glued to the back Nook wall (make sure to glue it on the right way! The open hole on that piece is closest to the base/floor as remember, Queenslanders have high ceilings).
- If you chose the generic side door, it just needs a paint, may need the hinge parts cut out a little more after painting to allow for the below. If you chose a design that has 'glass', you will need to collate the 4 pieces - 2 outer frames, internal frame that the mottled glass sits in and the glass itself, use the Uhu glue to assemble.
- Glue the stained glass window to the backside of the front Nook piece
Hinges or fastenings
This is the trickiest part of the Nook process, the metal hinges are a bit too small to try to use nails or screws, and only certain glue will work with the metal and wood.
Here are the options we have found that can work, and it is your preference on which way you might like to go;
- use small pieces of tape as hinges, works well and stays in place, however is visible even when painted and does not look the best
- small magnets attached to doors and frames, seems to work well, may need to use the knives to cut deeper recesses for placement, also still relies on glue and wood (the Uhu glue we provide worked fine with the first magnet tests)
- Mick to add his test here
Assembly
It is recommended that all painting is completed and external parts glued to each piece before gluing the final Nook together, you may need to use the knife to make sure extra paint hasn't added size to the notched parts as this can cause gaps.
End goals of Session 4
Nooks assembled and photos taken!
Provide you with inspiration for further adding to your designs with things like small LED lights, 3D printed parts and furniture, all things you can do at State Library's Fabrication Lab.
Design File Templates
Basic nook with archway design

Our nook dimensions file - nookdimensions.pdf
| Template | Material | File |
|---|---|---|
| Base book nook design with door | 4mm ply | Nook design file |
| Rails, door and window casements | 1.5 mm to 3mm ply or boxboard | Rails, window & door casements |
| Mottled glass design for windows | 1.5mm acrylic or 0.75mm PETG | Mottled glass |
| Stained glass window designs | 0.75mm PETG | Stained glass engraving |
| All designs layered | Various | Combined files |
| Front Nook piece rails and door surround | 1.7mm to 4mm works | Front Nook rails |
Material cutting notes
Current working file for windows with engraving (clear acrylic or PETG), tested with 1.5mm acrylic and .75mm PETG, both look fine but the PETG works best since it's thinner, but be mindful of warping, quick single cuts are best and remove any plastic covering before cutting.
Further templates
Hallway with second room design
Please note these are not all checked for use with the above correct template files.
Billie's original design files
Nook box - prototypecutfile.pdf
Window, door casings and frames - miniwindowsdoors_1-5mm.pdf
Original stained glass window file - miniwindowsengraving.pdf
Original file for 0.5mm card (extra detail work, furniture) -
Vectorised SLQ collection designs ready for resizing for use
Arch Vector Files
Casements
Stained Glass
References
- Interior fretwork designs https://www.auburnwoodturning.com.au/standard-heritage/interior-fretwork
- Window etching designs https://www.househistories.org/rolled-figured-glass
- Free stained glass window designs https://www.craftsmanspace.com/free-patterns/craft-patterns.html