Table of Contents
Designing for 3D printing using TinkerCad
Why
TinkerCAD is a great way to start making 3D models for 3D printing, or to plan out ideas that you wish to hand-cut or export for laser/CNC technologies. It's free for anyone to use, runs on any device with internet and it's arguably the most simple/easy 3D design software to start out with.
What
TinkerCAD is made by Autodesk and works essentially like children's building blocks; you stack shapes together or cut shapes from each other to build up your part.
How
Getting Started
- Go to tinkercad.com and click “start Tinkering” to get started.
- If you are participating in a workshop your facilitator may have you join a class.
- If you are working though it on your own, you will want to create a personal Autodesk account (if you don't have one already).
- The first time you sign in the software will prompt you to complete some mini tutorials which teach you the basics of using the software. You can revisit these tutorials at any time by going to tinkercad.com/learn (when you are logged in) and clicking [See all Starters].
Increasing size of working area
You may also wish to increase the size of your space, so you can make larger objects. You can do this by using the “Edit Grid” function at the bottom right. You can set it to a maximum of 1000x1000mm (1m cube)
Moving at smaller increments
You may also wish to change the grid snapping so you can move objects more accurately, you can do this by changing the grid snapping to 0.1mm.
Perspective vs Orthographic
In addition to moving around our object, we can also view it in two different modes:
- Perspective imitates looking through human eye or lense, so it’s the best one when we’re looking to get a feel for what our object will look like in real life, but it’s quite hard to place things accurately in this mode.
- Orthographic is used traditionally for making plans and diagrams, and is usually used for Top/Side/Back views. It shows our objects nice and flat so it’s easier to align objects to each other, and position them more accurately in space.
I recommend switching to Orthographic mode.
| Perspective | Orthographic |
|---|---|
| Better for understanding | Better for accuracy |
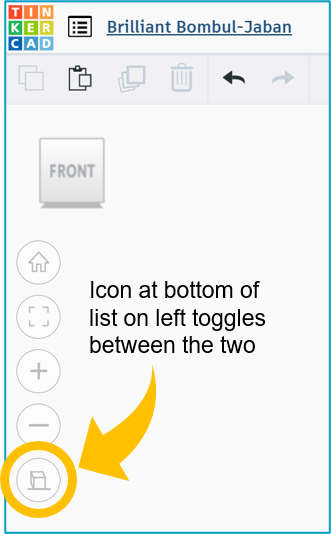
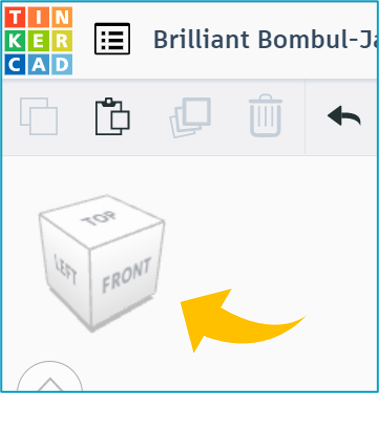
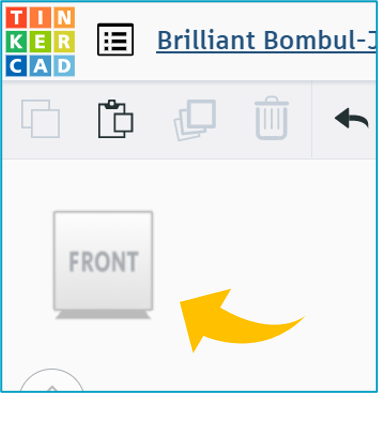
Snap to a Side View
Double click on faces of cube in top right of the screen to snap exactly to Top/ Bottom/ Front/ Back/ Right Side/ Left Side
What If/Next
Keyboard Shortcuts
 Reference from Donald Bell
Special Techniques
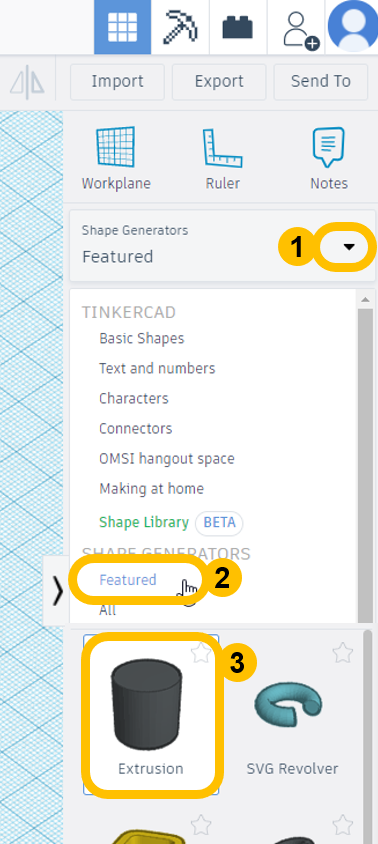
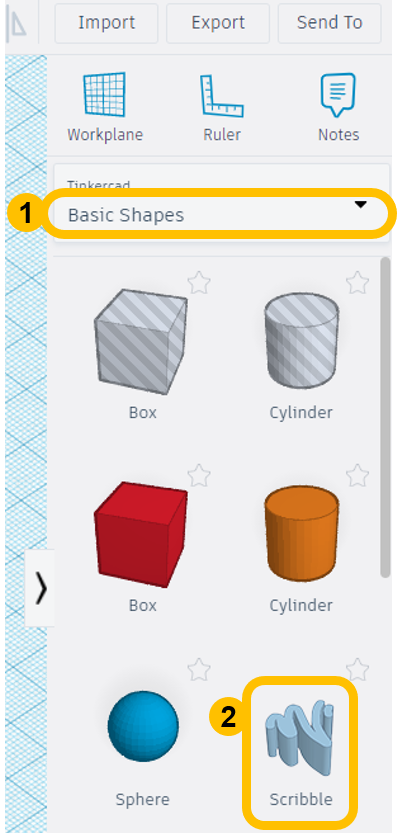
Custom Shapes
You can create simple blobby shapes using the extrusion tool:
You can also use scribble to draw pictures:
Exporting Vector/ Line Art
If you want to use your TinkerCAD files to cut on the CNC router, Laser cutter, or Vinyl Cutter you will need a vector file. Thankfully! TinkerCAD can make one.
TinkerCAD will export all the outlines of things touching the 'floor', to get it there:
- Rotate object so the ‘detailed/engraved’ face is down.
- Copy the object
- Click on the ‘floor’ (workplane)
- Paste the object. It should snap to the floor
If you're not sure how to do any of these steps, check out the #getting_started section above.
Now that it's on the floor, you're ready to export!
To export the whole document:
- Export (top right)
- Choose .SVG
For individual or groups of pieces:
- First selecting them in the 3D view (shift+click to add more or click and drag to select a bunch in the same area)
Then export >svg Check that it says “Include… Only the selected # shapes.”