Table of Contents
Workshop 02 - Operating System Install
Today we'll:
- Ensure your computer powers on
- Troubleshoot errors from Power On Self Test (POST)
- Boot to Basic Input Output System (BIOS), and
- Begin installing our Operating System (OS).
Power On
- Ensure your case is closed/fits tightly
- Connect your keyboard and mouse
- Set-up your monitor, connect the VGA cable
- Connect power cables into the monitor and case last
- Try the power button!
If correctly assembled you'll see:
- Green power and hard drive LEDs flash
- Then power LED stays on and
- Fans start up (quietly)
- BIOS screen flashes
Success!
Congratulations! Please assist others.
Failure?
- Is it fully plugged in?
- Does the power switch click? (Try removing the front panel and press it directly.)
- Check power switch connection to the motherboard. (Unplug the power lead, open case and check the front panel power header is connected.)
- Check power cables from the PSU to the motherboard. (plugs only fit in one direction, so don't force them.)
POST
If your computer turns on but doesn't pass POST, it tells you with lights and beeps.
Two Beeps

- Is the fan cable plugged in and air guide installed correctly? Are heatsink screws tight?
Three Beeps

- Is your processor is sitting in the socket firmly? Are heatsink screws firmly tightened?
Four Beeps

- Is the CPU power connector connected?
Five Beeps

- Is your RAM firmly clicked into place? Test RAM individually.
Six/Seven/Eight Beeps

- Please ask for assistance (advanced).
Nine Beeps

Check your PSU cable headers on the motherboard.
Ten Beeps

- Won't occur unless a PCI expansion card is installed. If installed, remove and reboot.
Customising BIOS
After POST your computer will continue to boot by activating the Basic Input Output System (BIOS).
- The BIOS is firmware, and works between your computer's hardware and software.
- It's permanently attached to the hardware.
- A battery retains settings for up to 10 years.
BIOS will attempt to boot your computer and run checks. As your computer was recently disassembled, it may request information.
It may ask to confirm hardware changes:

to set the date and time:

and launch operating system from the internal hard drive.
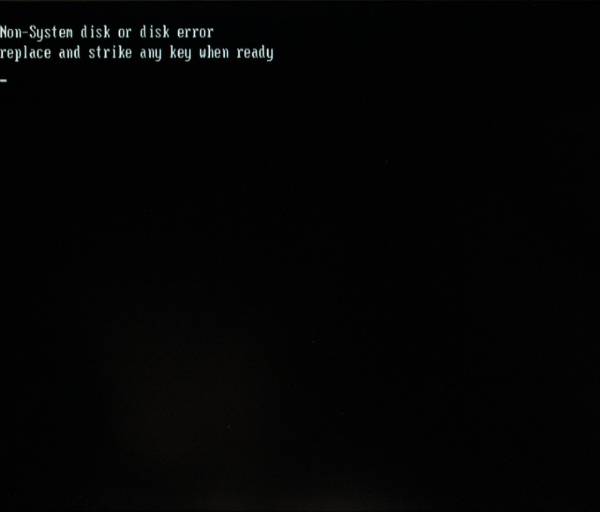
Your hard drive was wiped, so it cannot continue to boot.
System Configuration
Access 'System Configuration' so your computer can boot from USB to install our operating system. A well-timed keystroke is required. See keys on the 'splash' screen (bottom right):

- F9: Choose a device to boot from.
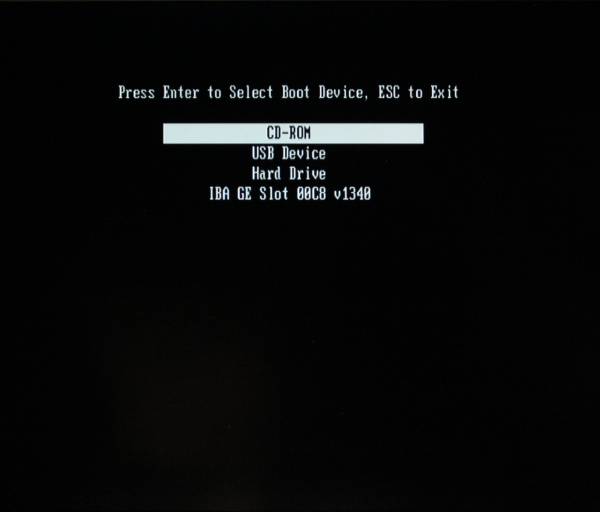
- F12: Force computer to boot from network card (advanced).

- F10: BIOS set-up. On your next reboot, press and hold F10.
BIOS Set up
Select language:

Select 'System Information' from 'File' menu.

This displays information about the computer's components.

See Processor information from Workshop 01? See hardware without opening the case. Exit with any key.
Set Time/Date

Select 'Storage', then 'Device Configuration'.

Exit and select 'Storage Options'. Enable 'Removable Media Boot' to allow booting from USB.

Exit and select 'Boot Order' to see available options.

We'll boot from USB, so move USB to the top.

Disable network booting if unneeded.

Confirm with F10 and exit Boot Order.
Return to 'File' menu. Select 'Save Changes and Exit'.

Confirm with F10. Your computer and boot process will restart, looking for the USB.
Boot From USB
You'll be given a USB containing a Xubuntu Live System and Installer. (A Live System lets you boot/use your computer from USB). We'll use this to install the Operating System (OS).
Insert USB and restart the computer (ctrl-alt-delete).

If successful, it should show a desktop environment with the Install Dialogue open.

If not, check your BIOS settings and ask for assistance.
Install Xubuntu
Choose English, then 'Install Xubuntu'.
Keyboard Layout
Choose the correct keyboard layout. (Use 'Detect Keyboard Layout' if unsure.)
Wireless
Choose whether to connect to wireless. We'll select 'I don't want to connect to a wifi network right now' for now.
Third Party Software
Select 'Install third-party software' (this lets us use propetary software types, such as MP3s.)

Installation Type
Select your hard disk, chose 'Erase and install', then 'Install now'.

Where are You?
Set your computer location (Brisbane), then continue.

Your Details
Provide your details and create a memorable password. Select 'log in automatically', then continue.
Your system will now install.

Complete Installation
When complete, remove your USB and restart. Enter BIOS again and change your first boot device to internal hard disk.
SDLW Network Setup
Let's quickly set up our local SDLW network. We'll use it to update/install software without internet.
The facilitator laptop acts as a server to store your needed files. Your facilitator will show you this.
Break Time
The Operating System
An Operating System (OS) looks after:
- Booting
- Controlling peripherals
- Providing a graphical user interface (GUI) and desktop environment
- Managing system resources - like the Central Process Unit (CPU) and the (GPU).
- Interacting with/storing files
- Communicating over networks
We just installed Xubuntu - a 'flavour' of Ubuntu based on Linux, a Free and Open Source OS.
Navigating Xubuntu
Launch Xubuntu.
In the top left you can access the whisker menu, (like Windows start menu).
The File Manager
The File Manager helps us navigate your system's files and folders. Select it from the whisker menu.

It will default to your home folder. Note your file location within the computer in the top bar.

Customising your Desktop
You can customise your desktop - eg, by right clicking image files (Connect your phone to drag one over) to 'set as desktop background'. You can also change theme. In the whisker menu, select 'settings' and select 'window manager'.

Select 'kokodi' - it has larger window handles for easier resizing.

Updates
Choose 'Settings' from the whisker menu and select 'Software Updater'.

It will check for updates from the SDLW laptop.

Don't worry if some updates are missing - click 'install now'.

Enter your password - your system will update.

Restart your computer before the next workshop.
